


什么是 Spring Boot Starter
starter 是 SpringBoot 的一个重要的组成部分,它相当于一个可以集成到SpringBoot项目中的模块,比如你想在SpringBoot项目中使用Redis,我们需要做的第一步就是去pom.xml中引入redis相关的start依赖,引入Redis的starter依赖后,我们就可以直接在idea中编写redis相关的代码
同时,在 maven 中引入 starter 依赖之后,SpringBoot 就能自动扫描到要加载的信息并启动相应的默认配置,它遵循“约定大于配置”的理念。
为什么需要 Starter?
理想情况: 开发者只需要关心调用哪些接口、传递哪些参数,就跟调用自己写的代码一样简单。
开发 starter 的好处: 开发者引入之后,可以直接在 application.yml 中写配置,自动创建相应的客户端。
如何开发Starter
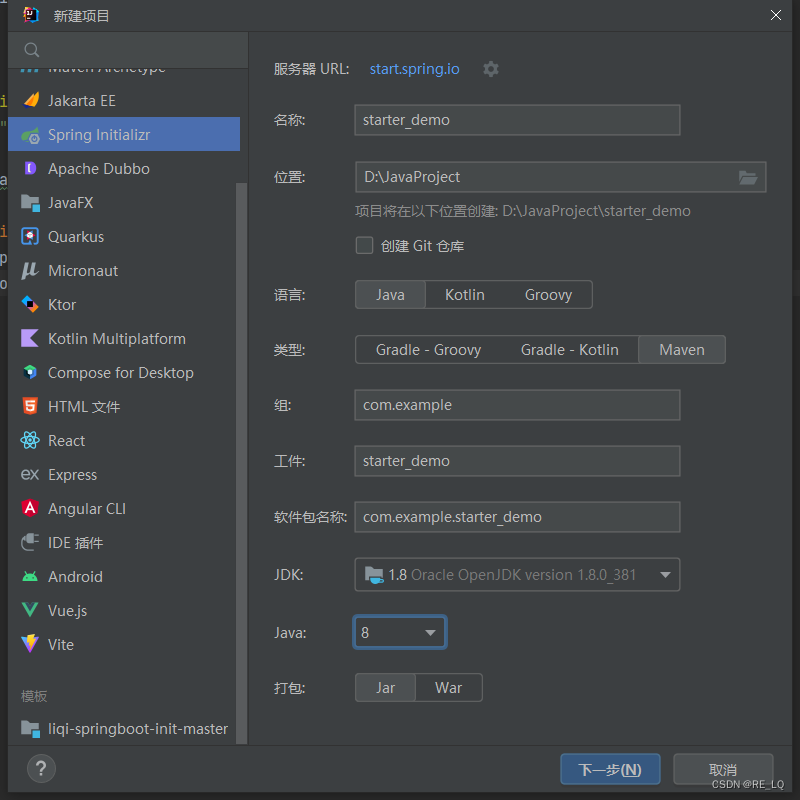
1.创建一个springboot项目
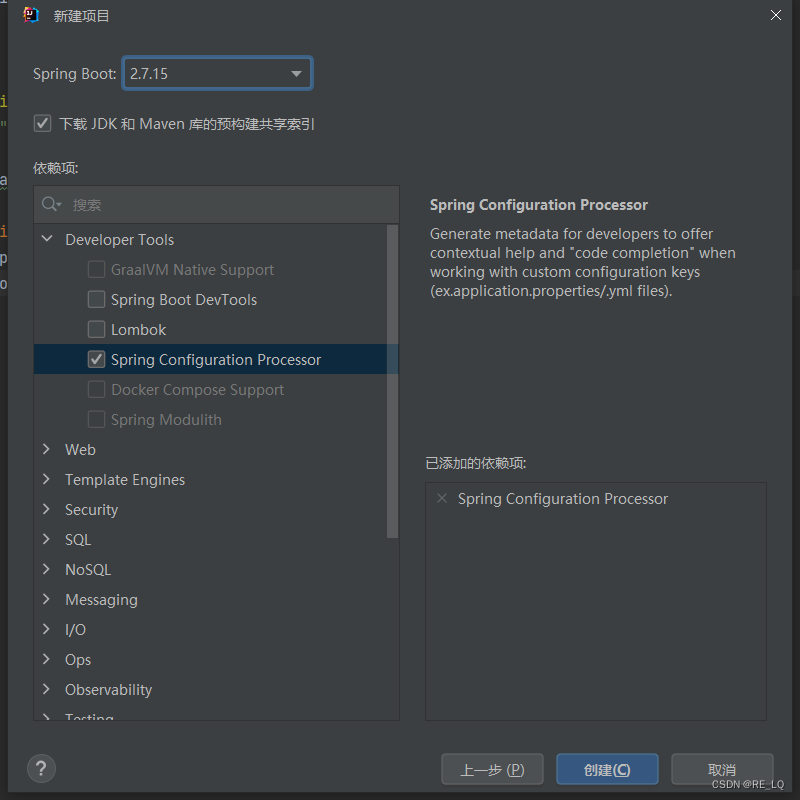
2.导入需要的依赖,这里我们只需要勾上Spring Configuration Processor即可,这个依赖能够帮我们自动生成引入starter后在yml配置文件中的代码提示(往下看就知道了)
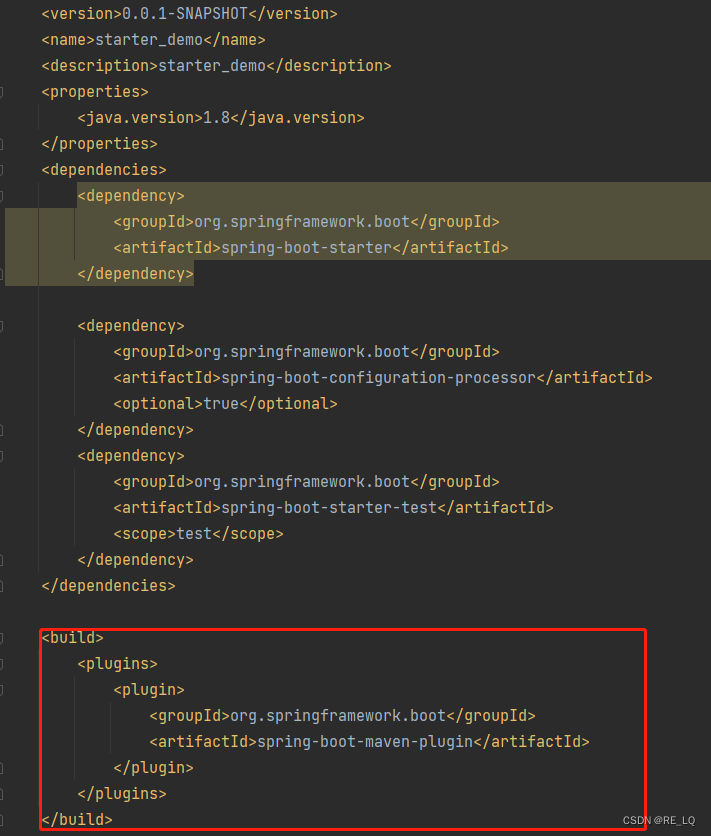
3.删除项目中的多余结构
将方框内maven的打jar包插件删除
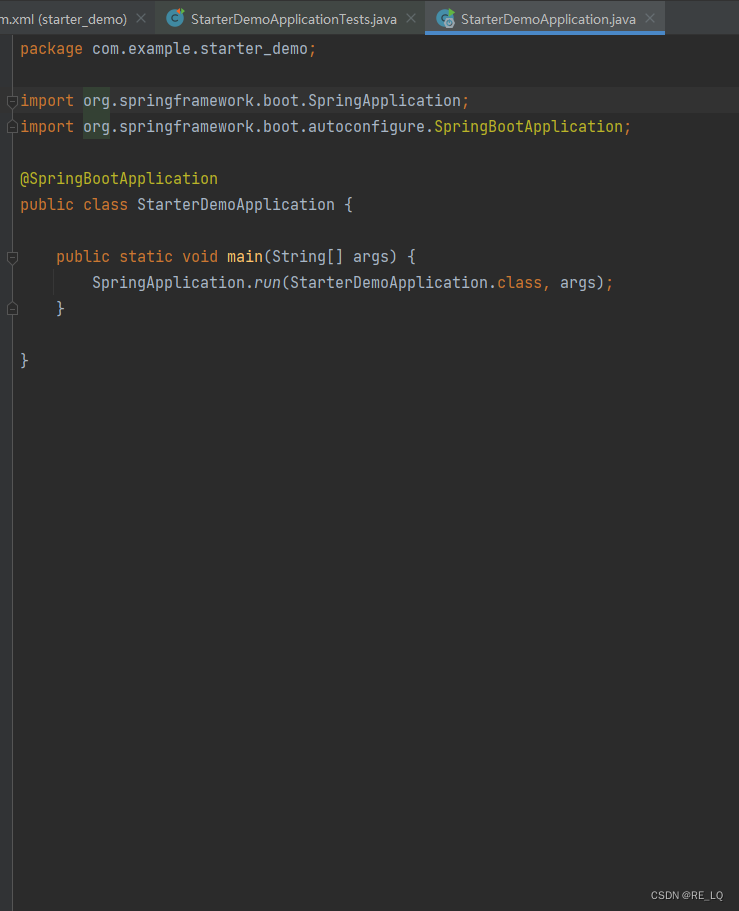
将SpringBoot 启动类删除
4.开始编写自己需要的功能,这里我们编写一个可以通过两个属性(ak,sk)进行用户鉴权功能的客户端用例来演示
编写实现业务的客户端类,该类有accessKey和secretKey两个属性
package com.lqapiclientsdk.client;

import cn.hutool.core.util.RandomUtil;
import cn.hutool.http.HttpRequest;
import cn.hutool.http.HttpResponse;
import cn.hutool.http.HttpUtil;
import cn.hutool.json.JSONUtil;
import com.lqapiclientsdk.model.User;
import com.lqapiclientsdk.utils.SignUtil;
import lombok.extern.slf4j.Slf4j;

import java.util.HashMap;
import java.util.Map;

//创建一个client.层:客户端层,负责与用户交互、处理用户请求,以及调用服务端提供的API接口等任务的部分。
@Slf4j
public class LqApiClient {
    private static final String GATEWAY_HOST="http://localhost:8090";
    String accessKey;
    String secretKey;

    public LqApiClient(String accessKey, String secretKey) {
        this.accessKey = accessKey;
        this.secretKey = secretKey;
    }

    public String ApiInvoke(Object requestParams, String apiUrl) {
        String jsonStr = JSONUtil.toJsonStr(requestParams);
        HttpResponse response = HttpRequest.post(apiUrl)
                .body(jsonStr)
                .addHeaders(getHeaderMap(jsonStr))
                .execute();
        log.info("调用该接口返回的结果状态码:" + response.getStatus());
        String result = response.body();  //hutool 的HttpResponse.body返回的响应体内容已经自动转换成String类型了
        return result;
    }


    public String getNameByPost(String name) {
        HashMap<String, Object> paramMap = new HashMap<>();
        paramMap.put("name", name);
        String result = HttpUtil.post("localhost:8123/api/name/", paramMap);
        System.out.println(result);
        return result;
    }

    public Map<String, String> getHeaderMap(String body) {
        HashMap<String, String> hashMap = new HashMap<String, String>();
        hashMap.put("accessKey", accessKey);
        hashMap.put("secretKey", secretKey);
        hashMap.put("body", body);
        //生成随机数,发送给服务器
        hashMap.put("nonce", RandomUtil.randomNumbers(4));
        //生成以秒为单位的时间戳发送给服务器
        hashMap.put("timeStamp", String.valueOf(System.currentTimeMillis() / 1000));
        hashMap.put("sign", SignUtil.getSign(body, secretKey));
        return hashMap;
    }
}
为了能够在别的项目导入我们的starer后能够通过在yml文件中做配置的方式拿到对应属性的client对象,我们还需要写一个配置类
package com.lqapiclientsdk;

import com.lqapiclientsdk.client.LqApiClient;
import lombok.Data;
import org.springframework.boot.context.properties.ConfigurationProperties;
import org.springframework.context.annotation.Bean;
import org.springframework.context.annotation.ComponentScan;
import org.springframework.context.annotation.Configuration;

@ComponentScan
@Configuration
@ConfigurationProperties("lqapi.client")
@Data//一定得要,不然到时在别的项目引用了这个sdk也无法再yml文件中做配置,因为配置的底层就是通过set方法
public class LqApiClientConfig {
    String accessKey;

    String secretKey;

    @Bean
    public LqApiClient lqApiClient(){
        return new LqApiClient(accessKey,secretKey);
    }

}
写好配置类后,我们在resources下新建一个叫META-INF(不能小写)的目录,并在该目录下新建一个叫spring.factories的文件进行springboot的自动装配配置(不懂这一步的意义的小伙伴可以去了解一下springboot自动配置原理)

打开spring.factories,做以下配置
org.springframework.boot.autoconfigure.EnableAutoConfiguration=com.xxx.xxxsdk.xxxConfig
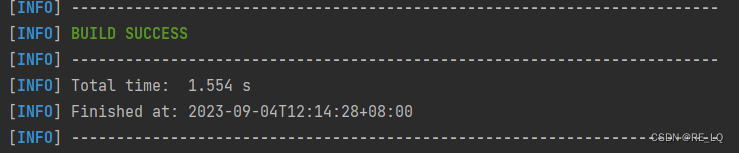
//等号后面填的是你刚刚创建的config配置类路径5.执行Maven生命周期中的clean后执行Install,即可将该starter打包成依赖包到你电脑本地的maven仓库中~
 \
\
执行install后我们可以看到控制台输出了BUILD SUCCESS的日志,说明install成功
6.测试使用效果
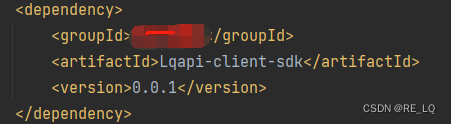
打开别的项目,在pom.xml文件中引入我们刚刚starter项目的工组件名
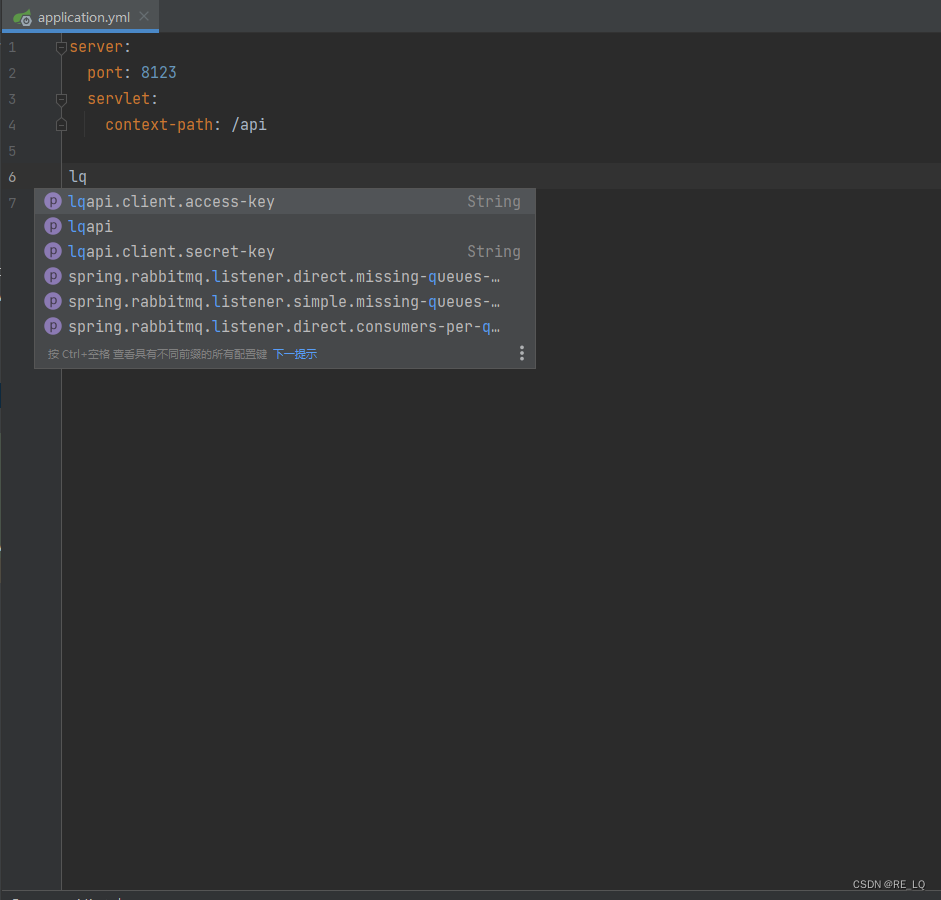
打开application.yml文件,我们输入刚刚在自定义config类中配置的prefix,可以看到神奇的事情发生了:我们的starter可以向springboot其他配置一样自动提示配置代码
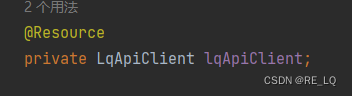
配置完成后我们就可以直接使用我们starter中的代码啦~ 至此开发自己的starter成功,感谢观看(・ω・)ノ


 1883
1883


 被折叠的 条评论
为什么被折叠?
被折叠的 条评论
为什么被折叠?
 到【灌水乐园】发言


