


学习目标:
本人超新手小白,跟着刘老师B站的视频,慢慢学习SpringBoot+Vue全栈开发,在尝试中记录遇到的问题和自己的学习笔记及心得体会。
学习内容:
SpringBoot+Vue全栈开发--p3.3SpringBoot Controller
1.控制器及前端传参
2.apipost软件使用
学习时间:
- 2023.4.19
学习产出:
1.Spring boot将传统的Web开发的mvc,json,tomcat等框架进行整合,提供了spring-boot-starter-web组件,简化了web应用配置。webmvc为web开发的基础框架,json为JSON数据库解析组件,tomcat为自带的容器依赖。
2.Spring Boot提供了@Controller和@RestController两种控制器的注解来标识此类负责接收和处理HTTP请求。(@RestController注解会将返回的对象数据转化为json格式)
3.get请求和post请求
package com.example.demo2.controller;

import org.springframework.http.HttpMethod;
import org.springframework.web.bind.annotation.*;

@RestController//一定不要忘记写!!!
public class ParamsController {
    @RequestMapping(value = "/getTest1",method = RequestMethod.GET)
    public String getTest1(){
        return "GET请求";
    }

    @RequestMapping(value = "/getTest2",method = RequestMethod.GET)
    //http://localhost:8080/getTest2?nickname=xuesidili&phone=123
    public String getTest2(String nickname,String phone){
        System.out.println("nickname:"+nickname);
        System.out.println("phone:"+phone);
        return "GET请求";
    }

    @RequestMapping(value = "/getTest3",method = RequestMethod.GET)
    //http://localhost:8080/getTest3?nickname=xuesidili
    public String getTest3(@RequestParam(value = "nickname",required = false)String name){
        //参数与方法不一致,用@RequestParam映射,让nickname和name绑定在一块
        System.out.println("nickname:"+name);
        return "GET请求";
    }

    @RequestMapping(value = "/postTest1",method = RequestMethod.POST)
    public String postTest1(){
        return "POST请求";
    }

    @RequestMapping(value = "/postTest2",method = RequestMethod.POST)
    public String postTest2(String username,String password){
        System.out.println("username:"+username);
        System.out.println("password:"+password);
        return "GET请求";
    }
}
4.通过apipost软件进行传参
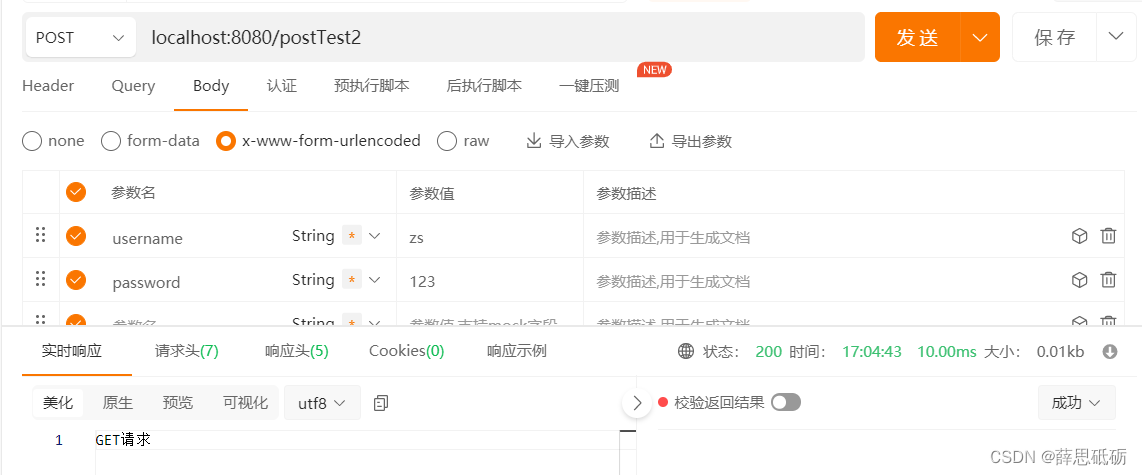 5.传参成功


 1057
1057


 被折叠的 条评论
为什么被折叠?
被折叠的 条评论
为什么被折叠?
 到【灌水乐园】发言


