


先自我介绍一下,小编浙江大学毕业,去过华为、字节跳动等大厂,目前阿里P7
深知大多数程序员,想要提升技能,往往是自己摸索成长,但自己不成体系的自学效果低效又漫长,而且极易碰到天花板技术停滞不前!
因此收集整理了一份《2024年最新网络安全全套学习资料》,初衷也很简单,就是希望能够帮助到想自学提升又不知道该从何学起的朋友。


既有适合小白学习的零基础资料,也有适合3年以上经验的小伙伴深入学习提升的进阶课程,涵盖了95%以上网络安全知识点,真正体系化!
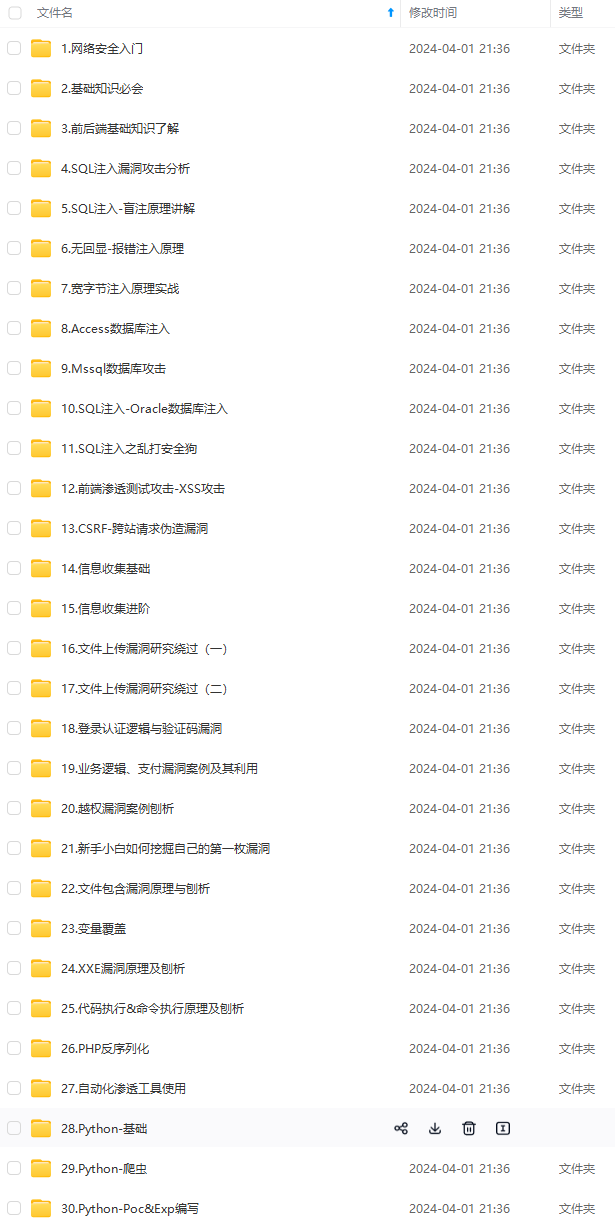
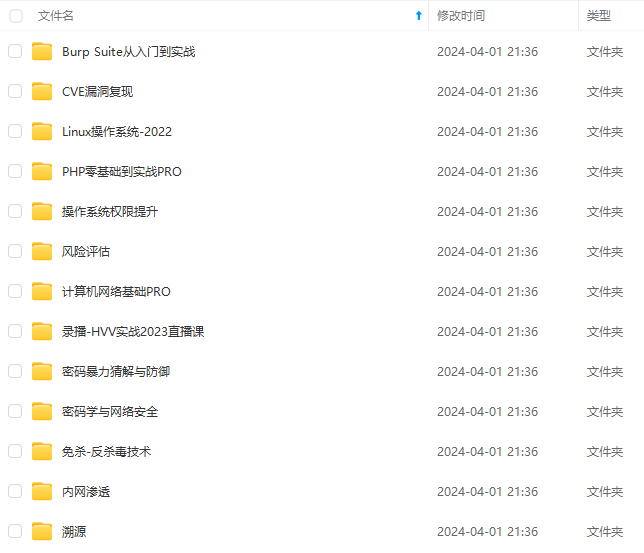
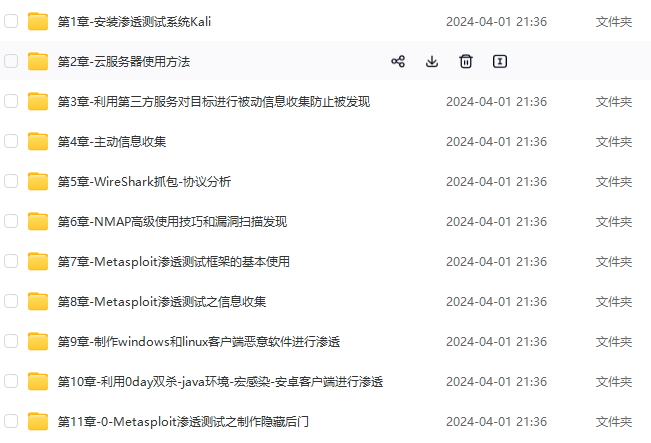
由于文件比较多,这里只是将部分目录截图出来,全套包含大厂面经、学习笔记、源码讲义、实战项目、大纲路线、讲解视频,并且后续会持续更新
如果你需要这些资料,可以添加V获取:vip204888 (备注网络安全)

正文
6、DaoAuthenticationProvider类
SpringSecurity默认了会使用DaoAuthenticationProvider实现AuthenticationProvider接口,专门进行用户认证的处理。DaoAuthenticationProvider在进行认证的时候需要一个UserDetailsService来获取用户的信息UserDetails,其中包括用户名,密码和所拥有的权限等。如果需要改变认证的方式,开发者可以实现自己的AuthenticationProvider。
7、PasswordEncoder类
在SpringSecurity中,对密码的加密都是由PasswordEncoder来完成的。在SpringSecurity中,已经对PasswordEncoder有了很多实现,包括md5加密,SHA-256加密等,开发者只需要直接拿来用就可以。在DaoAuthenticationProvider中,有一个就是PasswordEncoder熟悉,密码加密功能主义靠它来完成。
SpringSecurity的验证机制
1、SpringSecurity的验证机制
SpringSecurity大体上是由一堆Filter实现的,Filter会在SpringMVC前拦截请求。Filter包括登出Filter(LogoutFilter)、用户名密码验证Filter(UsernamePasswordAuthenticationFilter)之类。Filter在交由其他组件完成细分的功能,最常用的UsernamePasswordAuthenticationFilter会持有一个AuthenticationManager引用,AuthenticationManager是一个验证管理器,专门负责验证。但AuthenticationManager本身并不做具体的验证工作,AuthenticationManager持有一个AuthenticationProvider集合,AuthenticationProvider才是做验证工作的组件,验证成功或失败之后调用对应的Handler。
搭建项目
1、新建Springboot项目
创建一个SpringBoot项目,添加SpringSecurity和Thymeleaf依赖。

pom.xml完整代码。
<?xml version="1.0" encoding="UTF-8"?><project xmlns=“http://maven.apache.org/POM/4.0.0” xmlns:xsi=“http://www.w3.org/2001/XMLSchema-instance”
xsi:schemaLocation=“http://maven.apache.org/POM/4.0.0 https://maven.apache.org/xsd/maven-4.0.0.xsd”>
4.0.0
org.springframework.boot
spring-boot-starter-parent
2.2.2.RELEASE
com.mcy
security-demo
0.0.1-SNAPSHOT
security-demo
Demo project for Spring Boot
<java.version>1.8</java.version>
org.springframework.boot
spring-boot-starter-web
org.springframework.boot
spring-boot-starter-security
org.springframework.boot
spring-boot-starter-thymeleaf
org.thymeleaf.extras
thymeleaf-extras-springsecurity5
org.springframework.boot
spring-boot-starter-test
test
org.junit.vintage
junit-vintage-engine
org.springframework.security
spring-security-test
test
org.springframework.boot
spring-boot-maven-plugin
2、项目结构。

编写代码
1、登录页面
用于测试的HTML页面,用了bootstrap的样式文件。
login.html登录页面,主要有一个form表单和账号密码输入框,用于向login请求提交username和password,从而进行登录。Security默认登录地址login,退出地址为logout。代码如下。
用户名或密码错误!
注销成功!
//sec:authorize可以判断用户是否登录,用户权限,设置该菜单是否显示
未登录显示
登录显示
用于用户名或密码错误提示。
用户名或密码错误!
退出,注销提示。
注销成功!
注意这些提示都是SpringSecurity里边自带的。
sec:authorize用于判断用户是否登录,用户是否拥有哪些角色权限,一般在前台页面控制菜单是否显示。
2、登录成功页面
home.html是ROLE_USER用户登录之后显示的页面,同时提供了一个超链接到admin页面,代码如下。
Home页面
欢迎[用户名]访问Home页面!
您的权限是:权限
admin.html是ROLE_ADMIN用户登录之后显示的页面,同时提供了一个到dba页面的超链接,代码如下。
Admin页面
欢迎[用户名]访问Admin页面!
您的权限是:权限
dba.html页面只是显示简单的欢迎语句,代码如下。
dba页面
欢迎[用户名]访问dba页面!
您的权限是:权限
未登录显示
登录显示
权限包含ROLE_ADMIN显示
权限不包含ROLE_ADMIN登录显示
accessDenied.html是访问拒绝页面,如果登录的用户没有权限访问该页面,会进行提示,代码如下。
AccessDenied页面
欢迎[用户名],您没有权限访问页面!
您的权限是:权限
3、Security配置类
在项目中新建一个security包,在该包下新建一个WebSecurityConfig类,继承WebSecurityConfigurerAdapter类,用于处理SpringSecurity的用户认证和授权操作,设置页面访问权限。
configure(AuthenticationManagerBuilder auth)和configure(HttpSecurity http)两个方法中分别打印了一句话,用于启动项目时的跟踪调试。
successHandler(new LoginSuccessHandle())用于处理登出成功之后的操作,LoginSuccessHandle类用于处理不同用户跳转到不同页面。
具体代码如下。
import org.springframework.context.annotation.Configuration;
import org.springframework.security.config.annotation.authentication.builders.AuthenticationManagerBuilder;
import org.springframework.security.config.annotation.web.builders.HttpSecurity;
import org.springframework.security.config.annotation.web.configuration.WebSecurityConfigurerAdapter;
@Configuration
public class WebSecurityConfig extends WebSecurityConfigurerAdapter {
/**
-
用户认证操作
-
@param auth
-
@throws Exception
*/
@Override
protected void configure(AuthenticationManagerBuilder auth) throws Exception {
System.out.println(“WebSecurityConfig configure(AuthenticationManagerBuilder auth) 方法被调用。。。。。。”);
//添加用户,并给予权限
auth.inMemoryAuthentication().withUser(“aaa”).password(“{noop}1234”).roles(“USER”);
auth.inMemoryAuthentication().withUser(“admin”).password(“{noop}admin”).roles(“ADMIN”, “DBA”);
}
/**
-
用户授权操作
-
@param http
-
@throws Exception
*/
@Override
protected void configure(HttpSecurity http) throws Exception {
System.out.println(“WebSecurityConfig configure(HttpSecurity http) 方法被调用。。。。。。”);
http.csrf().disable(); //安全器令牌
http.authorizeRequests() //开始请求权限配置。
.antMatchers(“/login”, “/static/**”).permitAll()
.antMatchers(“/”, “/home”).hasRole(“USER”)
.antMatchers(“/admin/**”).hasAnyRole(“ADMIN”, “DBA”)
.anyRequest().authenticated() //其余所有的请求都需要认证(用户登录)之后才可以访问。
.and()
.formLogin() //开始设置登录操作
.loginPage(“/login”) //设置登录页面的访问地址
//.defaultSuccessUrl(“/main”) //指定登录成功后转向的页面。
.successHandler(new LoginSuccessHandle()) //登录成功跳转,LoginSuccessHandle处理不同权限跳转不同页面
.failureUrl(“/login?error”) //指定登录失败后转向的页面和传递的参数。
.and()
.logout().permitAll() //退出
.and()
.exceptionHandling().accessDeniedPage(“/accessDenied”); //指定异常处理页面
}
}
4、认证成功处理类LoginSuccessHandle
认证成功处理类LoginSuccessHandle,实现了AuthenticationSuccessHandler接口,是Spring用来处理用户认证授权并跳转到指定URL的。
重新onAuthenticationSuccess方法,获取当前用户的权限,根据权限跳转到指定的URL路径,代码如下。
import javax.servlet.Servlet;
import javax.servlet.http.HttpServletRequest;
import javax.servlet.http.HttpServletResponse;
import org.springframework.security.core.Authentication;
import org.springframework.security.core.authority.AuthorityUtils;
import org.springframework.security.web.authentication.AuthenticationSuccessHandler;
import java.io.IOException;
import java.util.Set;
public class LoginSuccessHandle implements AuthenticationSuccessHandler {
@Override
public void onAuthenticationSuccess(HttpServletRequest request, HttpServletResponse response, Authentication authentication)throws IOException {
//authentication.getAuthorities() 获取当前用户的权限
Set roles = AuthorityUtils.authorityListToSet(authentication.getAuthorities());
//获取到登陆者的权限,然后做跳转
if (roles.contains(“ROLE_ADMIN”)){
response.sendRedirect(“/admin”);
return;
}else if (roles.contains(“ROLE_USER”)){
response.sendRedirect(“/home”);
return;
}else {
response.sendRedirect(“/accessDenied”);
}
}
}
5、测试控制器
新建一个IndexController控制器,提供响应login,home,admin,dba,AccessDenied请求的方法。每个方法通过getUsername()方法获得当前认证用户的用户名,通过getAuthorith()方法获取当前认证用户的权限,并设置到ModelMap当中。
import org.springframework.security.core.Authentication;
import org.springframework.security.core.GrantedAuthority;
import org.springframework.security.core.context.SecurityContextHolder;
import org.springframework.stereotype.Controller;
import org.springframework.ui.ModelMap;
import org.springframework.web.bind.annotation.RequestMapping;
import org.springframework.web.bind.annotation.RequestMethod;
import java.util.ArrayList;
import java.util.List;
@Controller
public class IndexController {
@RequestMapping(value = {“/”, “/login”}, method = RequestMethod.GET)
public String index(){
return “login”;
}
@RequestMapping(“/home”)
public String homePage(ModelMap map){
map.put(“user”, getUsername());
map.put(“role”, getAuthority());
return “home”;
}
@RequestMapping(“/admin”)
public String admin(ModelMap map){
map.put(“user”, getUsername());
map.put(“role”, getAuthority());
return “admin”;
}
@RequestMapping(“/dba”)
public String dba(ModelMap map){
map.put(“user”, getUsername());
map.put(“role”, getAuthority());
return “dba”;
}
@RequestMapping(“/accessDenied”)
public String accessDenied(ModelMap map){
map.put(“user”, getUsername());
map.put(“role”, getAuthority());
return “accessDenied”;
}
/**
-
获取当前用户名称
-
@return
*/
private String getUsername(){
//获取当前用户名称
String username = SecurityContextHolder.getContext().getAuthentication().getName();
System.out.println(“username=”+username);
return username;
}
private String getAuthority(){
//获得Authentication对象,表示用户认证信息
Authentication authentication = SecurityContextHolder.getContext().getAuthentication();
List roles = new ArrayList<>();
//将角色名称添加到List集合
for(GrantedAuthority a: authentication.getAuthorities()){
roles.add(a.getAuthority());
}
System.out.println(“role=”+roles);
return roles.toString();
}
}
6、测试应用
运行项目可以看到WebSecurityConfig类中重写的两个方法已经执行,说明自定义的用户认证和用户授权工作已经生效。

在浏览器中输入URL测试应用:
http://localhost:8080 “/”、“/login”、“/home”、“admin”等任何一个当前项目的请求都会被重定向到http://localhost:8080/login页面,因为没有登录,,用户没有访问权限。login页面中,用sec:authorize写了两个标签一个是登录成功显示,一个是未登录显示,没有登录,就只显示了一个。sec:authorize一般用于控制菜单是否显示,效果如图。

输入错误的账号密码,会有提示用户名或密码错误。如图。

输入用户名:aaa,密码:1234,登录,该用户是“ROLE_USER”,跳转到home页面,如图。

单击超链接“访问admin页面”,由于当前用户的权限只是“ROLE_USER”,不能访问admin页面,所以会跳转到访问拒绝页面,如图。

单击超链接“安全退出”,会退出到登录页面,登录页面提示“注销成功!”,如图。

输入用户名:admin,密码admin,登录,该用户是“ROLE_USER”和“ROLE_DBA”权限,跳转到admin页面,如图。

单击超链接“访问dba页面”,由于当前用户的权限是“ROLE_ADMIN”和“ROLE_DBA”,可以访问dba页面,所以会跳转到dba页面,如图。在dba页面代码中,写了四行用sec:authorize判断是否显示的标签,两行判断是否登录,两行判断该用户是否有这个角色,条件成立才显示标签内容,效果如图。

通过测试可以看到,项目已经使用SpringSecurity实现了用户认证和用户授权。
上面的案例并没有把用户和权限存放到数据中,在实际开发中,用户和权限肯定是存放在数据库中,下面就来看看如何把数据存放到数据库中。
用户和权限保存在数据库中
1、修改后项目的目录结构。

2、添加依赖
在原有的项目中,修改pom.xml文件,添加MySQL和JPA依赖。
这里使用的是JPA操作数据库,对JPA不了解的可以访问Spring-Data-Jpa入门
org.springframework.boot
spring-boot-starter-data-jpa
mysql
mysql-connector-java
runtime
3、配置基本属性。
在src/main/resources下找到application.properties文件,在该配置文件中配置数据源和jpa相关的属性,需要在数据库中先新建一个security数据库。
#数据源信息配置
#数据库地址,jpa数据库名,需要在数据库中先建一个jpa数据库
spring.datasource.url=jdbc:mysql://localhost:3306/security?serverTimezone=GMT%2B8
#用户名
spring.datasource.username=root
#密码
spring.datasource.password=root
#链接数据库驱动
spring.datasource.driver-class-name=com.mysql.cj.jdbc.Driver
#指定数据库方言
spring.jpa.database-platform=org.hibernate.dialect.MySQL5InnoDBDialect
#配置在日志中显示SQL语句
spring.jpa.show-sql=true
#指定自动创建|更新|验证数据库表结构等配置,配置成updata
#表示如果数据库中存在持久化类对应的表就不创建,不存在就创建对应的表
spring.jpa.hibernate.ddl-auto=update
spring.jpa.hibernate.use-new-id-generator-mappings=false
4、创建用户类和角色权限实体类
SysUser权限类,代码如下。
import javax.persistence.*;
@Entity
@Table(name = “sys_role”)
public class SysRole {
@Id
@GeneratedValue(strategy = GenerationType.IDENTITY)
private Integer id; //主键
private String name; //权限名称
public Integer getId() {
return id;
}
public void setId(Integer id) {
this.id = id;
}
public String getName() {
return name;
}
public void setName(String name) {
this.name = name;
}
}
SysUser用户类
import javax.persistence.*;
import java.util.List;
@Entity
@Table(name = “sys_user”)
public class SysUser {
private Integer id;
private String name;
private String username;
private String password;
private List roles;
@Id
@GeneratedValue(strategy = GenerationType.IDENTITY)
public Integer getId() {
return id;
}
public void setId(Integer id) {
this.id = id;
}
public String getUsername() {
return username;
}
public void setUsername(String username) {
this.username = username;
}
public String getName() {
return name;
}
public void setName(String name) {
this.name = name;
}
public String getPassword() {
return password;
}
public void setPassword(String password) {
this.password = password;
}
@ManyToMany(cascade=CascadeType.REFRESH,fetch=FetchType.EAGER)
@JoinTable(name=“sys_user_role”,joinColumns=@JoinColumn(name=“user_id”),inverseJoinColumns=@JoinColumn(name=“role_id”))
public List getRoles() {
return roles;
}
public void setRoles(List roles) {
this.roles = roles;
}
}
SysUser类用来保存用户数据,其中username表示用户名,password表示密码,name表示用户姓名,roles表示用户权限的List集合,用户和权限的关系是多对多关系。
5、创建数据访问接口
在项目中新建一个repository包,在该包下新建一个UserRepository接口和RoleRepository接口,继承JpaRepository接口,UserRepository接口中写一个根据用户名去查询的方法findByUsername,遵循Spring-Data-Jpa命名规范,代码如下。
import com.mcy.securitydemo.entity.SysUser;
import org.springframework.data.jpa.repository.JpaRepository;
public interface UserRepository extends JpaRepository<SysUser, Integer> {
//根据登录用户名查询用户
SysUser findByUsername(String username);
}
import com.mcy.securitydemo.entity.SysRole;
import org.springframework.data.jpa.repository.JpaRepository;
public interface RoleRepository extends JpaRepository<SysRole, Integer> {
}
6、创建自定义服务类Service
在项目中新建一个service包,在该包下新建一个UserService类和RoleService类,UserService类实现了UserDetailsService接口,登录认证的时候SpringSecurity会通过UserDetailsService的loadUserByUsername()方法获取对应的UserDetails进行认证。
UserService类重写了UserDetailsService接口中的loadUserByUsername()方法,在方法中调用持久层接口的findByUsername方法通过JPA进行数据库验证,传递的参数是页面接收到的username。最后将获得的用户名,密码和权限保存到org.springframework.security.core.userdetails.User类中并返回,该User类是SpringSecurity内部的实现,专门用于保存用户名,密码,权限等与认证相关的信息。
UserService类代码
import com.mcy.securitydemo.entity.SysRole;
import com.mcy.securitydemo.entity.SysUser;
import com.mcy.securitydemo.repository.UserRepository;
import org.springframework.beans.factory.annotation.Autowired;
import org.springframework.security.core.GrantedAuthority;
import org.springframework.security.core.authority.SimpleGrantedAuthority;
import org.springframework.security.core.userdetails.User;
import org.springframework.security.core.userdetails.UserDetails;
import org.springframework.security.core.userdetails.UserDetailsService;
import org.springframework.security.core.userdetails.UsernameNotFoundException;
import org.springframework.stereotype.Service;
import java.util.ArrayList;
给大家的福利
零基础入门
对于从来没有接触过网络安全的同学,我们帮你准备了详细的学习成长路线图。可以说是最科学最系统的学习路线,大家跟着这个大的方向学习准没问题。
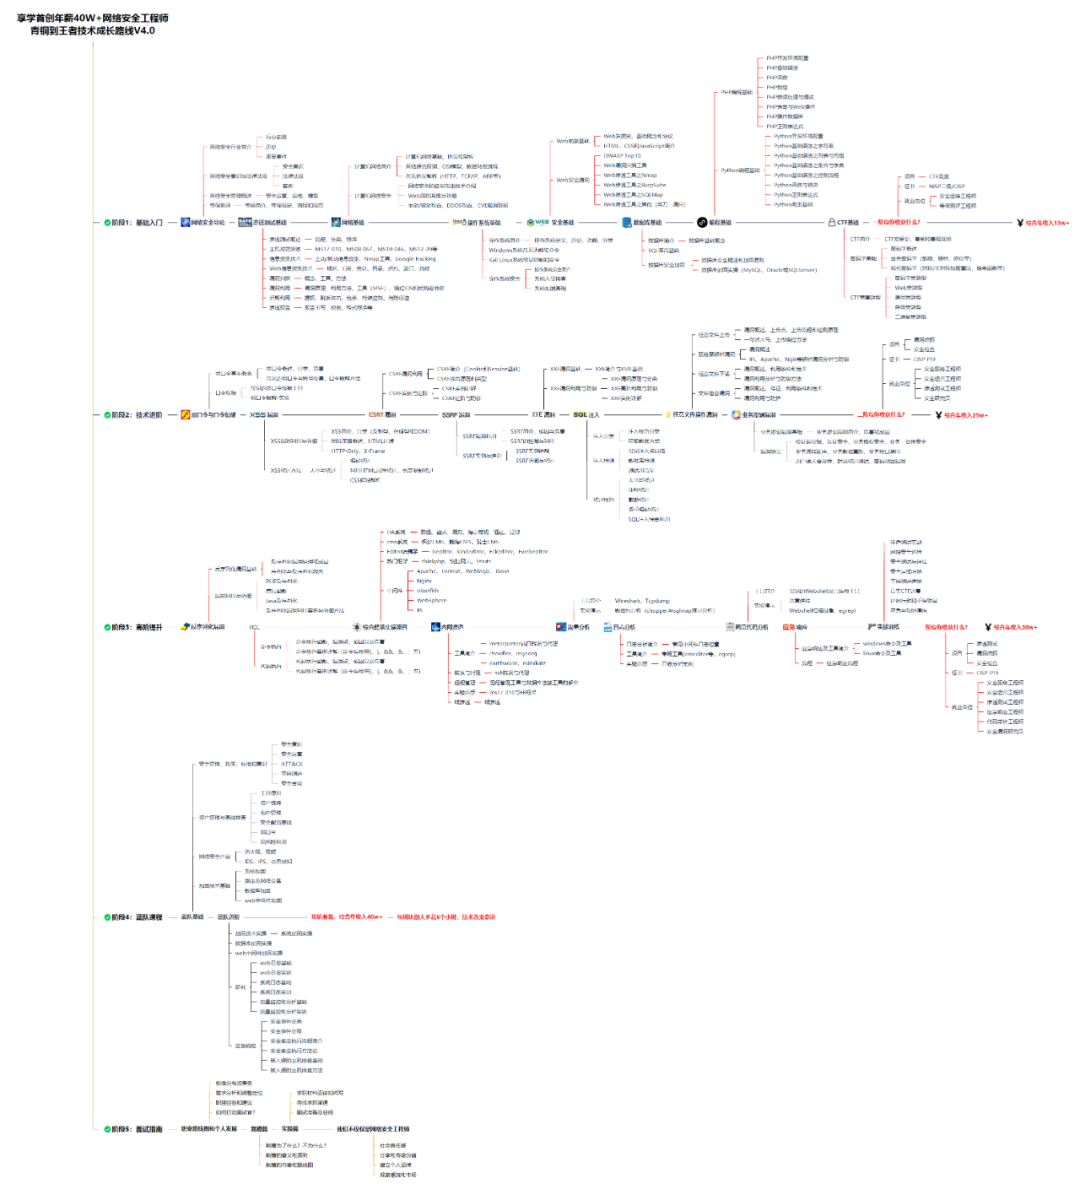
同时每个成长路线对应的板块都有配套的视频提供:

因篇幅有限,仅展示部分资料
网上学习资料一大堆,但如果学到的知识不成体系,遇到问题时只是浅尝辄止,不再深入研究,那么很难做到真正的技术提升。
需要这份系统化的资料的朋友,可以添加V获取:vip204888 (备注网络安全)

一个人可以走的很快,但一群人才能走的更远!不论你是正从事IT行业的老鸟或是对IT行业感兴趣的新人,都欢迎加入我们的的圈子(技术交流、学习资源、职场吐槽、大厂内推、面试辅导),让我们一起学习成长!
ls.User类中并返回,该User类是SpringSecurity内部的实现,专门用于保存用户名,密码,权限等与认证相关的信息。
UserService类代码
import com.mcy.securitydemo.entity.SysRole;
import com.mcy.securitydemo.entity.SysUser;
import com.mcy.securitydemo.repository.UserRepository;
import org.springframework.beans.factory.annotation.Autowired;
import org.springframework.security.core.GrantedAuthority;
import org.springframework.security.core.authority.SimpleGrantedAuthority;
import org.springframework.security.core.userdetails.User;
import org.springframework.security.core.userdetails.UserDetails;
import org.springframework.security.core.userdetails.UserDetailsService;
import org.springframework.security.core.userdetails.UsernameNotFoundException;
import org.springframework.stereotype.Service;
import java.util.ArrayList;
给大家的福利
零基础入门
对于从来没有接触过网络安全的同学,我们帮你准备了详细的学习成长路线图。可以说是最科学最系统的学习路线,大家跟着这个大的方向学习准没问题。
同时每个成长路线对应的板块都有配套的视频提供:
因篇幅有限,仅展示部分资料
网上学习资料一大堆,但如果学到的知识不成体系,遇到问题时只是浅尝辄止,不再深入研究,那么很难做到真正的技术提升。
需要这份系统化的资料的朋友,可以添加V获取:vip204888 (备注网络安全)
[外链图片转存中…(img-BNaOQe5j-1713176292159)]
一个人可以走的很快,但一群人才能走的更远!不论你是正从事IT行业的老鸟或是对IT行业感兴趣的新人,都欢迎加入我们的的圈子(技术交流、学习资源、职场吐槽、大厂内推、面试辅导),让我们一起学习成长!


 被折叠的 条评论
为什么被折叠?
被折叠的 条评论
为什么被折叠?
 到【灌水乐园】发言


