


目录
四、在bean包中新建UserMy.java,使之与数据库中的字段一一对应
六、在service包中新建实现类UserMySer.java
七、在controller包中新建访问类UserMyCon.java
一、IDEA创建springboot项目

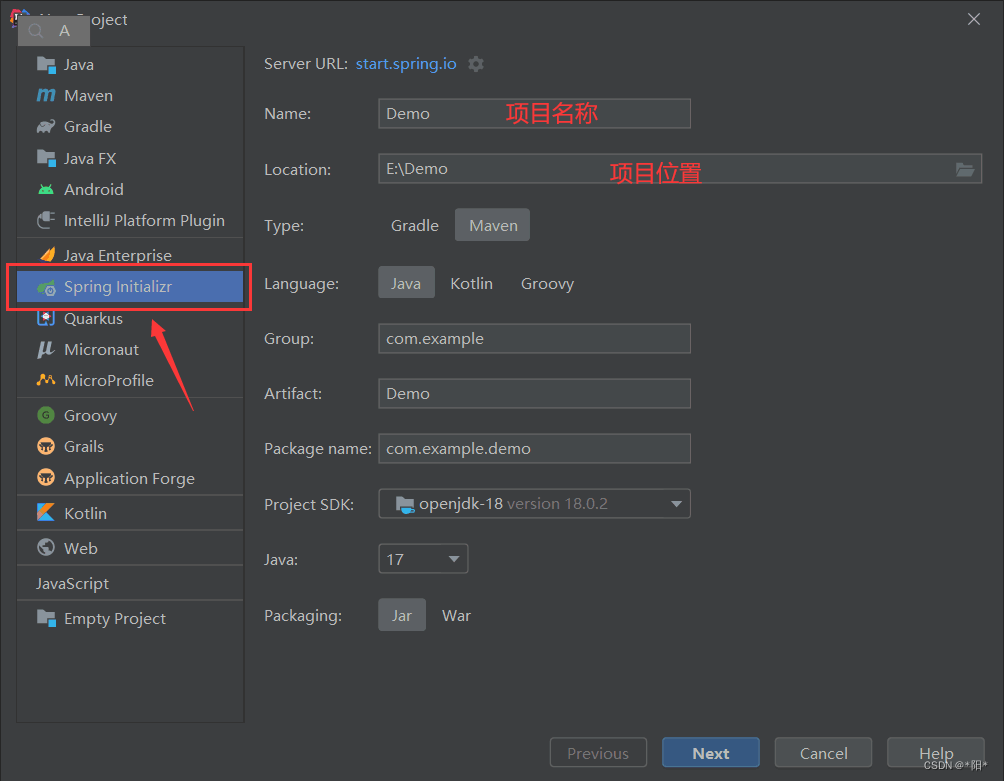
点击Next进入下一步
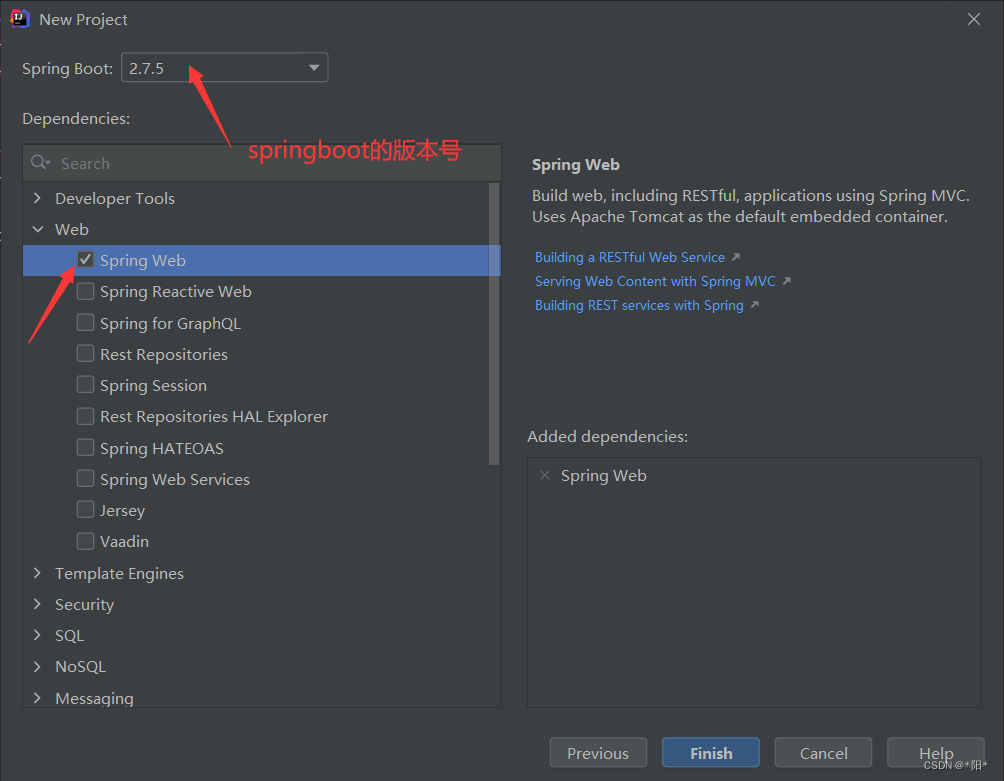
选择完成后,点击Finish创建项目
二、IDEA引入需要的依赖
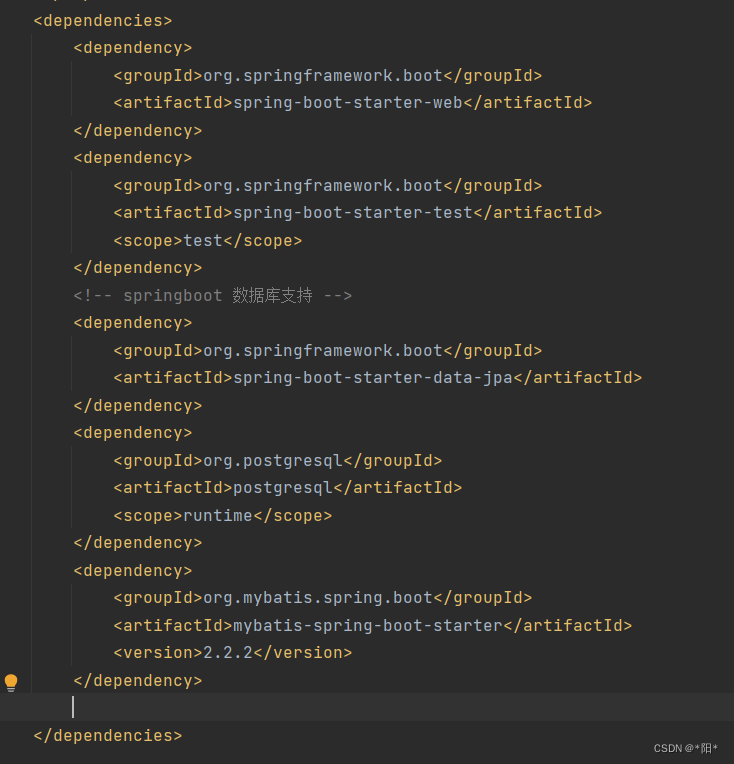
 <dependencies>
        <dependency>
            <groupId>org.springframework.boot</groupId>
            <artifactId>spring-boot-starter-web</artifactId>
        </dependency>
        <dependency>
            <groupId>org.springframework.boot</groupId>
            <artifactId>spring-boot-starter-test</artifactId>
            <scope>test</scope>
        </dependency>
        <!-- springboot 数据库支持 -->
        <dependency>
            <groupId>org.springframework.boot</groupId>
            <artifactId>spring-boot-starter-data-jpa</artifactId>
        </dependency>
        <dependency>
            <groupId>org.postgresql</groupId>
            <artifactId>postgresql</artifactId>
            <scope>runtime</scope>
        </dependency>
        <dependency>
            <groupId>org.mybatis.spring.boot</groupId>
            <artifactId>mybatis-spring-boot-starter</artifactId>
            <version>2.2.2</version>
        </dependency>

    </dependencies>
三、在PostgreSQL数据库创建表
这个可以在PostgreSQL下建表,也可以在IDEA下建表
PostgreSQL下建表:

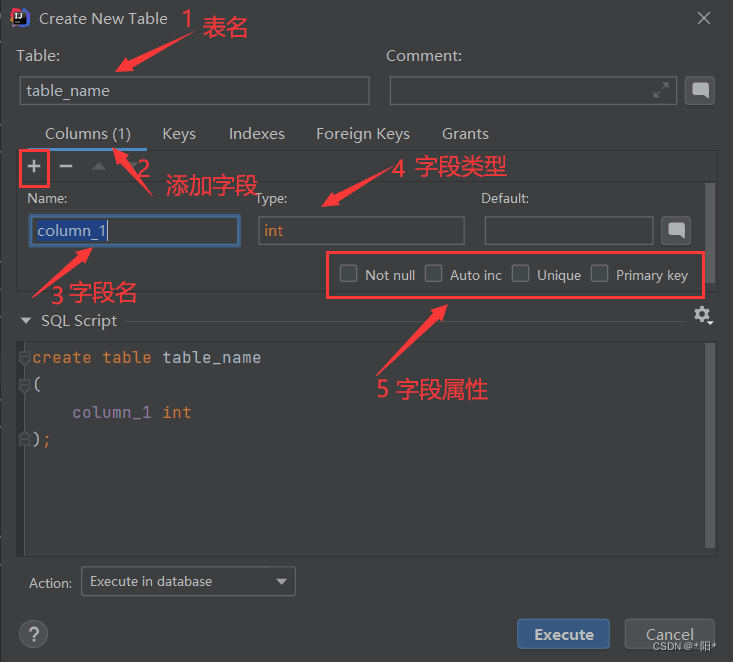
鼠标右击Tables,点击Create,点击Table

弹出以下对话框,完善表的内容,首先是表名
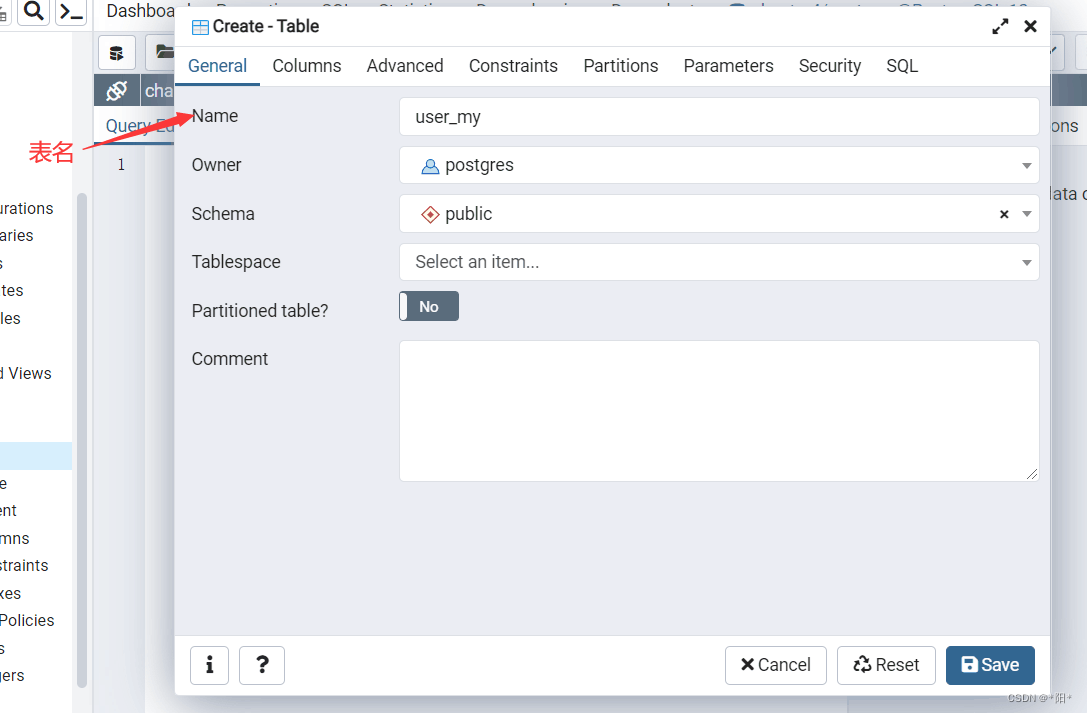
然后是表中各个字段的属性(根据需要添加字段)

除了以上方式可以在PostgreSQL建表之外,还有一种方式:
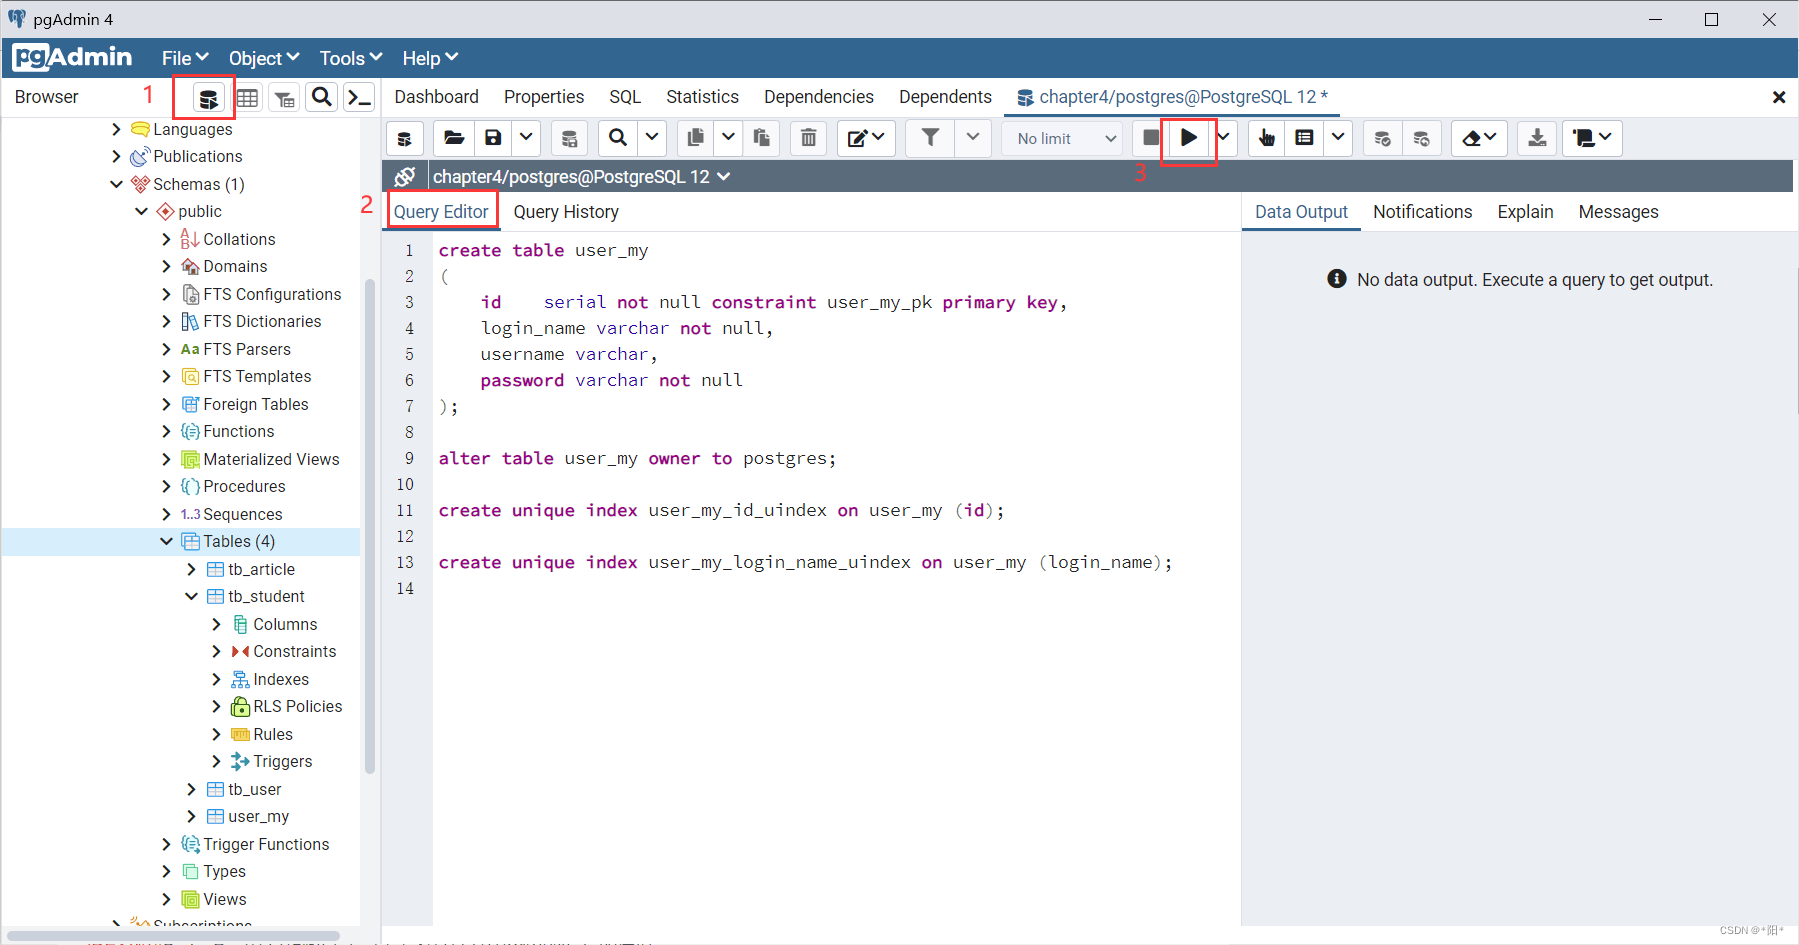
create table user_my
(
	id    serial not null constraint user_my_pk primary key,
	login_name varchar not null,
	username varchar,
	password varchar not null
);

alter table user_my owner to postgres;

create unique index user_my_id_uindex on user_my (id);

create unique index user_my_login_name_uindex on user_my (login_name);
IDEA下建表:
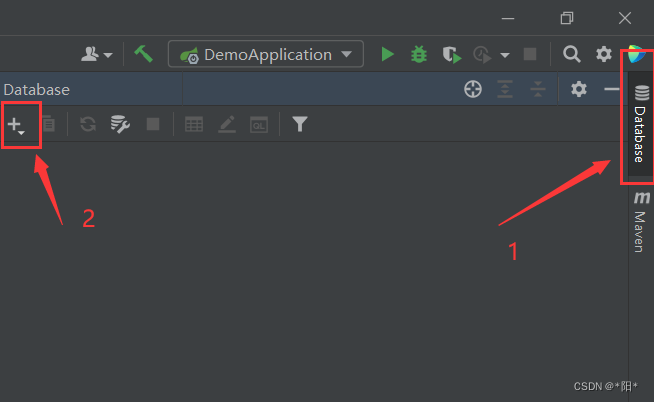
在IDEA下建表首先要连接数据库
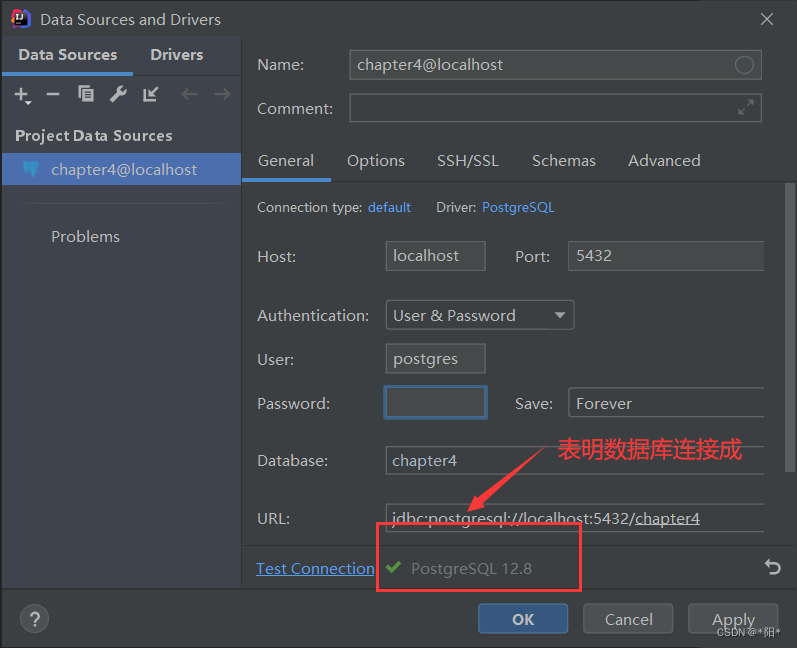
而在连接数据库之前要添加以下配置:
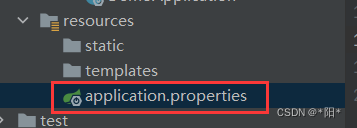
在application.properties文件下添加以下内容:

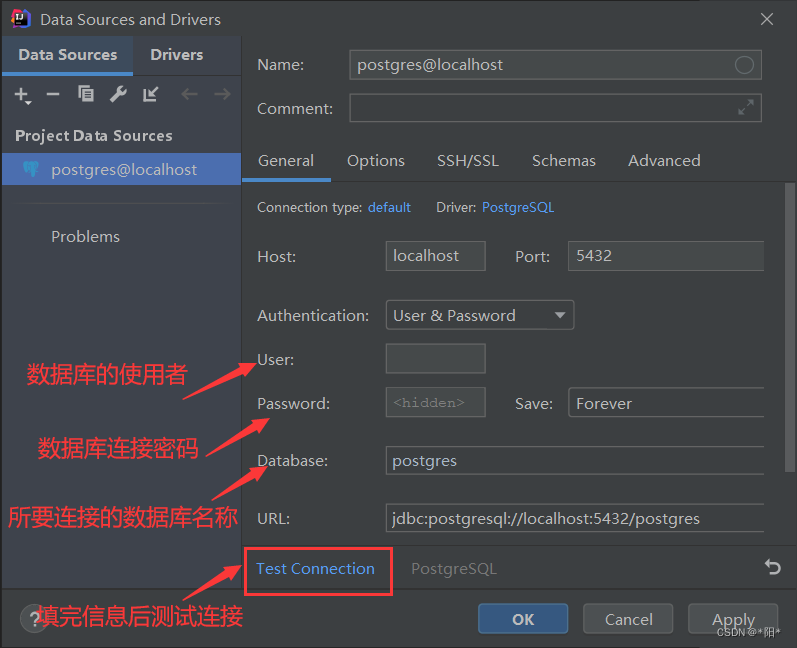
chapter4是我的数据库名称,这里可以改成自己的
spring.datasource.url=jdbc:postgresql://localhost:5432/chapter4

spring.datasource.username=postgres

spring.datasource.password=数据库连接密码

spring.datasource.driver-class-name=org.postgresql.Driver


spring.jpa.hibernate.ddl-auto=update

spring.jpa.show-sql=true

spring.jpa.properties.hibernate.format_sql=true

spring.jpa.properties.hibernate.dialect=org.hibernate.dialect.PostgreSQL81Dialect
完成以上配置,就可以在IDEA下连接数据库了

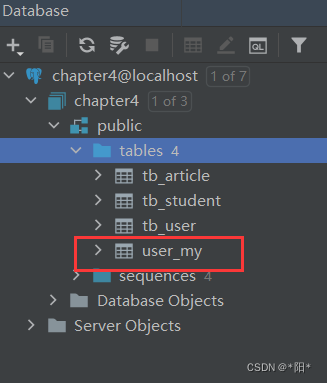
然后可以在IDEA下建表

在弹出的对话框填写以下内容,填完之后,点击Execute
完成之后,就出现了我们需要的表
四、在bean包中新建UserMy.java,使之与数据库中的字段一一对应
package com.example.demo.mybatis.bean;


import java.io.Serializable;

public class UserMy implements Serializable {
    private static final long serialVersionUID=1L;
    private int id;
    private String loginName;
    private String username;
    private String password;

    public int getId() {
        return id;
    }

    public void setId(int id) {
        this.id = id;
    }

    public String getLoginName() {
        return loginName;
    }

    public void setLoginName(String loginName) {
        this.loginName = loginName;
    }

    public String getUsername() {
        return username;
    }

    public void setUsername(String username) {
        this.username = username;
    }

    public String getPassword() {
        return password;
    }

    public void setPassword(String password) {
        this.password = password;
    }
}
五、在Repo包中新建UserMyRepo接口
package com.example.demo.mybatis.Repo;

import com.example.demo.mybatis.bean.UserMy;
import org.apache.ibatis.annotations.*;

import java.util.List;

public interface UserMyRepo {
    @Insert("insert into "+
            "user_my(login_name,username,password)"+
            "values(#{loginName},#{username},#{password})")
    public int insertUserMy(UserMy user);

    //插入数据获取主键
    @Insert("insert into user_my(login_name ,username ,password) "
            + "values (#{loginName},#{username},#{password})")
    @Options(useGeneratedKeys=true,keyProperty="id",keyColumn="id")
    public int insertGetKey(UserMy user);


    @Select("select * from user_my where username = #{username}")
    //引用id=”userResult“的@Results
    @ResultMap("userResult")
    public UserMy selectByUsername(@Param("username")String username);

    @Select("select * from user_my")
    //@Results用于映射对象属性和数据库列,常用于对象属性和数据库列不同名的情况
    @Results(id="userResult",value={
            @Result(id=true,column="id",property="id"),
            @Result(column="login_name",property="loginName"),
            @Result(column="password",property="password"),
            @Result(column="username",property="username")
    })
    public List<UserMy> findAll();


    @Delete("delete from user_my where id=#{id}")
    public void delete(final Integer id);

    @Select("select * from user_my where id=#{id}")
    //引用id=”userResult“的@Results
    @ResultMap("userResult")
    public UserMy findUserById(int id);

    @Update("update user_my set username=#{username}, login_name=#{loginName} where id=#{id}")
    public void update(final UserMy user);


}
六、在service包中新建实现类UserMySer.java
package com.example.demo.mybatis.service;

import com.example.demo.mybatis.Repo.UserMyRepo;
import com.example.demo.mybatis.bean.UserMy;
import org.springframework.stereotype.Service;

import javax.annotation.Resource;
import java.util.List;

@Service
public class UserMySer {
    @Resource
    private UserMyRepo userMyRepo;

    public int insertUser(UserMy user){
        return userMyRepo.insertUserMy(user);
    }
    public UserMy selectByUsername(String username){
        return userMyRepo.selectByUsername(username);
    }
    public List<UserMy> findAll(){
        return userMyRepo.findAll();
    }
    public int insertGetKey(UserMy user){
        return userMyRepo.insertGetKey(user);
    }
    public void update(UserMy user){
        userMyRepo.update(user);
    }
    public void delete(Integer id){
        userMyRepo.delete(id);
    }
}
七、在controller包中新建访问类UserMyCon.java
package com.example.demo.mybatis.controller;


import com.example.demo.mybatis.bean.UserMy;
import com.example.demo.mybatis.service.UserMySer;
import org.springframework.web.bind.annotation.RequestMapping;
import org.springframework.web.bind.annotation.RestController;

import javax.annotation.Resource;
import java.util.List;

@RestController
@RequestMapping("usermy")
public class UserMyCon {
    @Resource
    private UserMySer userMySer;
    private String username;

    @RequestMapping("/insert")
    public String insertUser(UserMy user){
        System.out.println("insertuser");
        return  "插入数据"+userMySer.insertUser(user)+
                "条";
    }

    @RequestMapping("/insertGetKey")
    public int insertGetKey(UserMy user){
        System.out.println("insertgetkey");
        return  userMySer.insertGetKey(user);
    }

    @RequestMapping("/selectByUsernmae")
    public UserMy selectByUsername(UserMy user){
        System.out.println("selectbyusernmae");
        return  userMySer.selectByUsername(username);
    }

    @RequestMapping("/findAll")
    public List<UserMy> findAll(){
        return userMySer.findAll();

    }

    @RequestMapping("/update")
    public void update(UserMy user){
        userMySer.update(user);
    }

    @RequestMapping("/delete")
    public void delete(Integer id){
        userMySer.delete(id);
    }
}
八、修改程序的启动入口类DemoApplication
package com.example.demo;

import org.mybatis.spring.annotation.MapperScan;
import org.springframework.boot.SpringApplication;
import org.springframework.boot.autoconfigure.SpringBootApplication;

@SpringBootApplication
@MapperScan("com.example.demo.mybatis.Repo")
public class DemoApplication {

    public static void main(String[] args) {
        SpringApplication.run(DemoApplication.class, args);
    }

}
九、验证
点击运行

运行完成,无报错

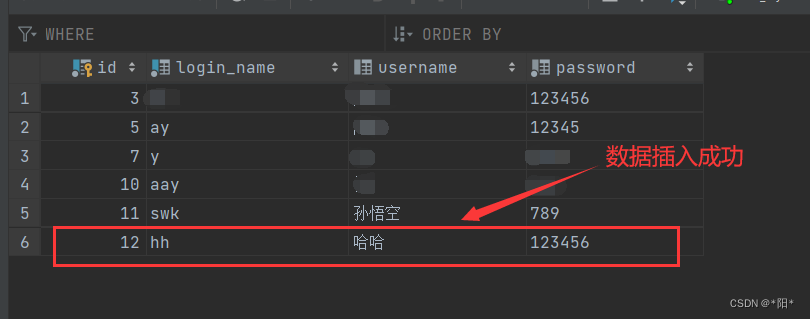
插入数据:
(这里需要注意一下,由于我设置的端口为80,所以直接使用127.0.0.1
如果使用8080端口,则需要一下地址改为:127.0.0.1:8080)

显示全部数据:

更新数据:


删除数据:


 216
216


 被折叠的 条评论
为什么被折叠?
被折叠的 条评论
为什么被折叠?
 到【灌水乐园】发言


