


目录
CSS是什么?
CSS 是“Cascading Style Sheet”的缩写,中文意思为“层叠样式表”。
CSS作用:
CSS 的主要作用是美化网页,对网页中元素的位置、字体、颜色、背景等属性进行精确控制。
CSS 不仅可以静态地修饰网页,还可以配合 JavaScript 动态地修改网页中元素的样式。
常用选择器
1. id选择器
作用: 根据元素的id属性值选中一个元素
语法: #id属性值
例子: #box{ }
<!DOCTYPE html>
<html lang="en">
<head>
    <meta charset="UTF-8">
    <meta http-equiv="X-UA-Compatible" content="IE=edge">
    <meta name="viewport" content="width=device-width, initial-scale=1.0">
    <title>Document</title>
    <style>
        /* 选中id带有box的元素 */
        #box{

        }
    </style>
</head>
<body>
    <!-- 为元素添加id -->
    <div id="box">

    </div>
</body>
</html>
2. 类选择器
作用: 根据元素的class属性值选中一组元素
语法: .class属性值
注意: 类选择器的定义需要用到一个英文的句号
.
<!DOCTYPE html>
<html lang="en">
<head>
    <meta charset="UTF-8">
    <meta http-equiv="X-UA-Compatible" content="IE=edge">
    <meta name="viewport" content="width=device-width, initial-scale=1.0">
    <title>Document</title>
    <style>
        /* 选中类(class)是box的元素 */
       .box{

       }
    </style>
</head>
<body>
    <!-- 定义个类 -->
    <div class="box">

    </div>
</body>
</html>
3. 通用选择器
作用: 选中页面中的所有元素
语法: *
用途:通用选择器用星号
*表示,它不匹配某个特定的 HTML 元素,而是匹配 HTML 文档中的每个元素。在开发中,我们通常使用通用选择器来清除 HTML 元素中默认的内外边距。
*{
    margin: 0;
    padding: 0;
  }
复合选择器
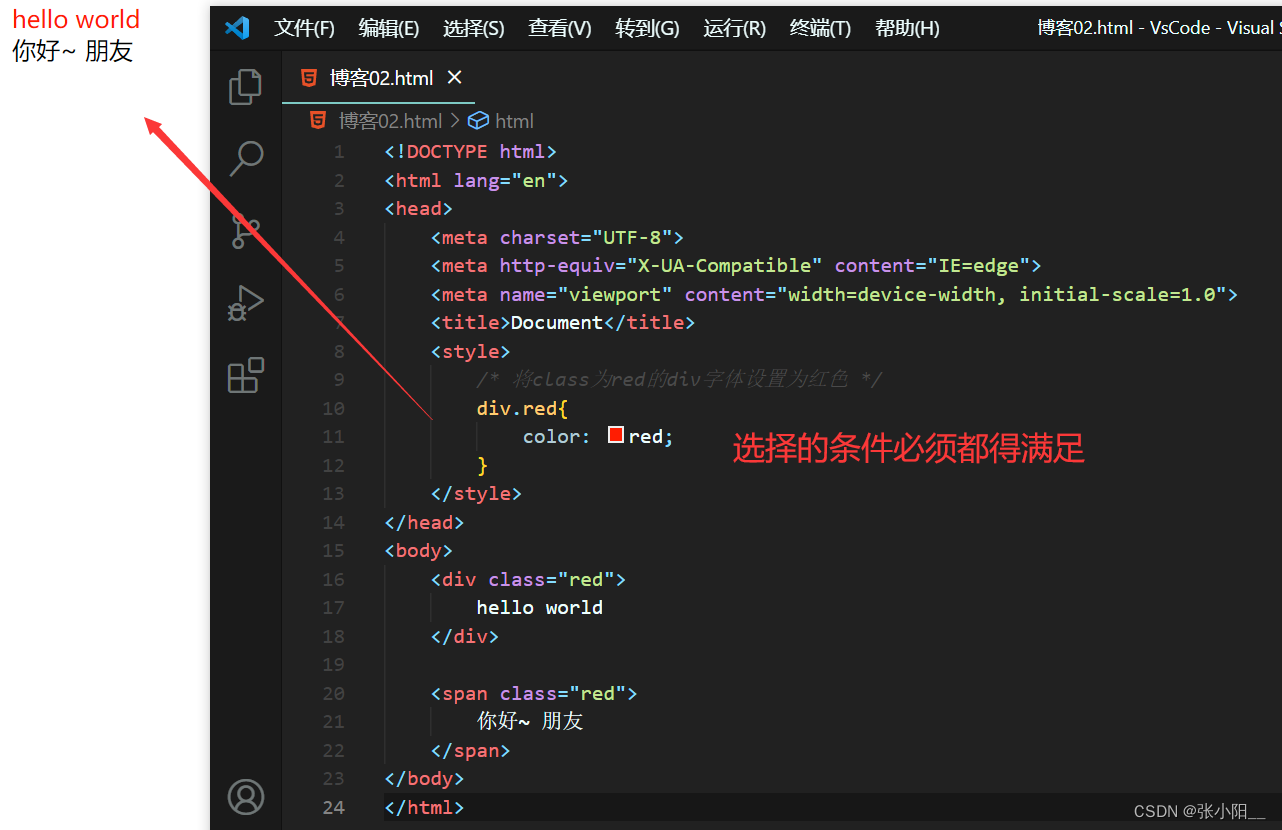
1. 交集选择器
作用: 选中同时复合多个条件的元素
语法: 选择器1选择器2选择器3选择器n { }
注意点: 交集选择器中如果有元素选择器,必须使用元素选择器开头
<!DOCTYPE html>
<html lang="en">
<head>
    <meta charset="UTF-8">
    <meta http-equiv="X-UA-Compatible" content="IE=edge">
    <meta name="viewport" content="width=device-width, initial-scale=1.0">
    <title>Document</title>
    <style>
        /* 将class为red的div字体设置为红色 */
        div.red{
            color: red;
        }
    </style>
</head>
<body>
    <div class="red">
        hello world
    </div>

    <span class="red">
        你好~ 朋友
    </span>
</body>
</html>
运行结果如下图所示:
2. 选择器分组(并集选择器)
作用:同时选择多个选择器对应的元素
语法:选择器1,选择器2,选择器3,选择器n{ }
比如:#b1,.p1,h1,span,div.red{ }
<!DOCTYPE html>
<html lang="en">
<head>
<meta charset="UTF-8">
<meta http-equiv="X-UA-Compatible" content="IE=edge">
<meta name="viewport" content="width=device-width, initial-scale=1.0">
<title>Document</title>
<style>
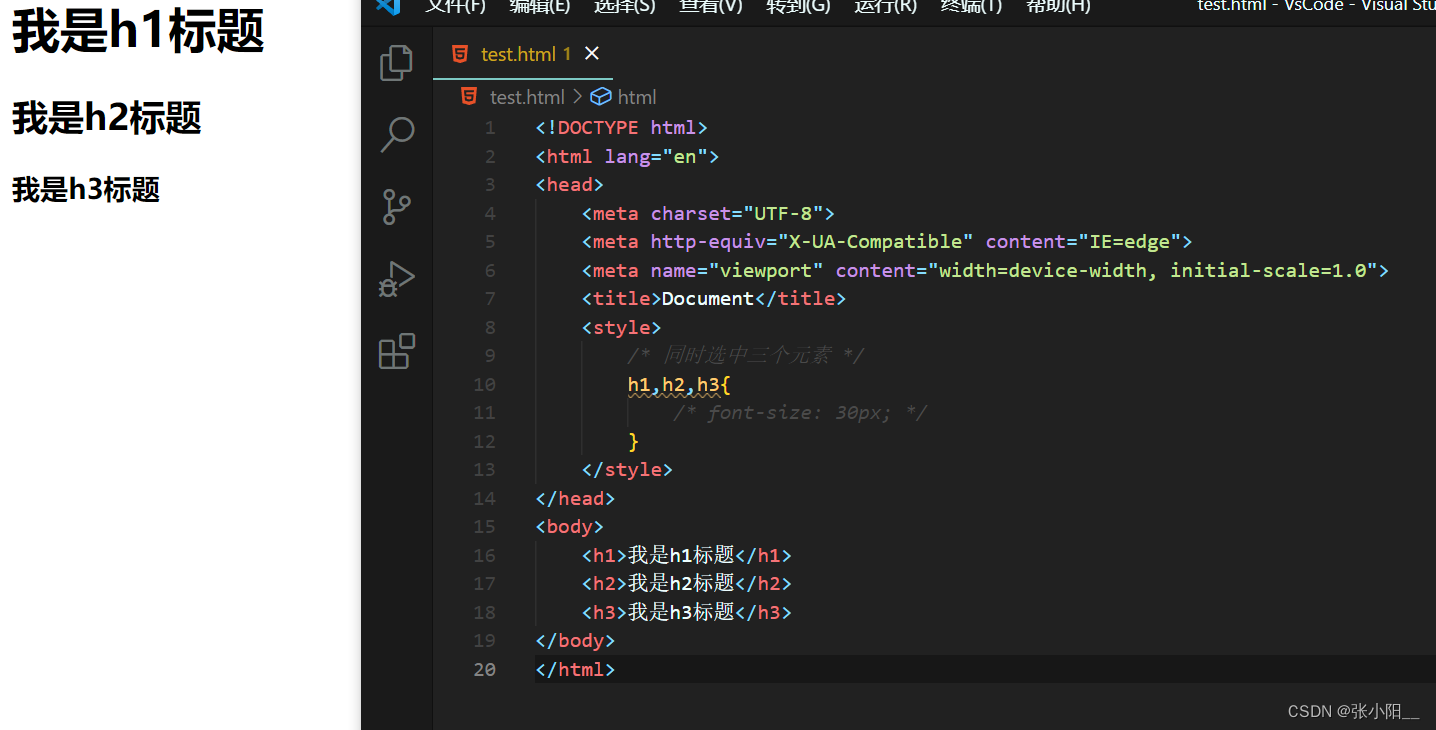
/* 同时选中三个元素 */
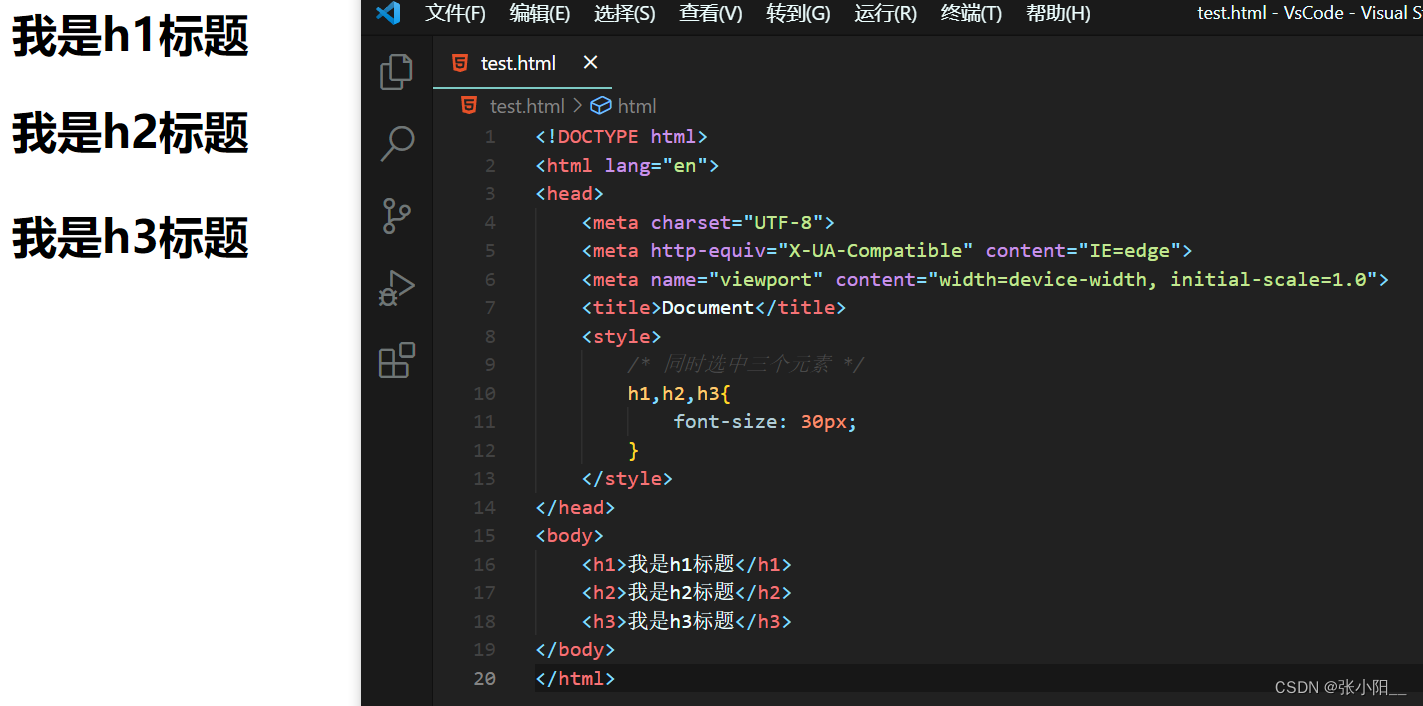
h1,h2,h3{
/* 为元素设置字体大小 */
font-size: 30px;
}
</style>
</head>
<body>
<h1>我是h1标题</h1>
<h2>我是h2标题</h2>
<h3>我是h3标题</h3>
</body>
</html>未设置字体大小前:
设置后:
关系选择器
- 父元素
直接包含子元素的元素叫做父元素 - 子元素
直接被父元素包含的元素是子元素 - 祖先元素
直接或间接包含后代元素的元素叫做祖先元素,一个元素的父元素也是它的祖先元素 - 后代元素
直接或间接被祖先元素包含的元素叫做后代元素,子元素也是后代元素 - 兄弟元素
拥有相同父元素的元素是兄弟元素
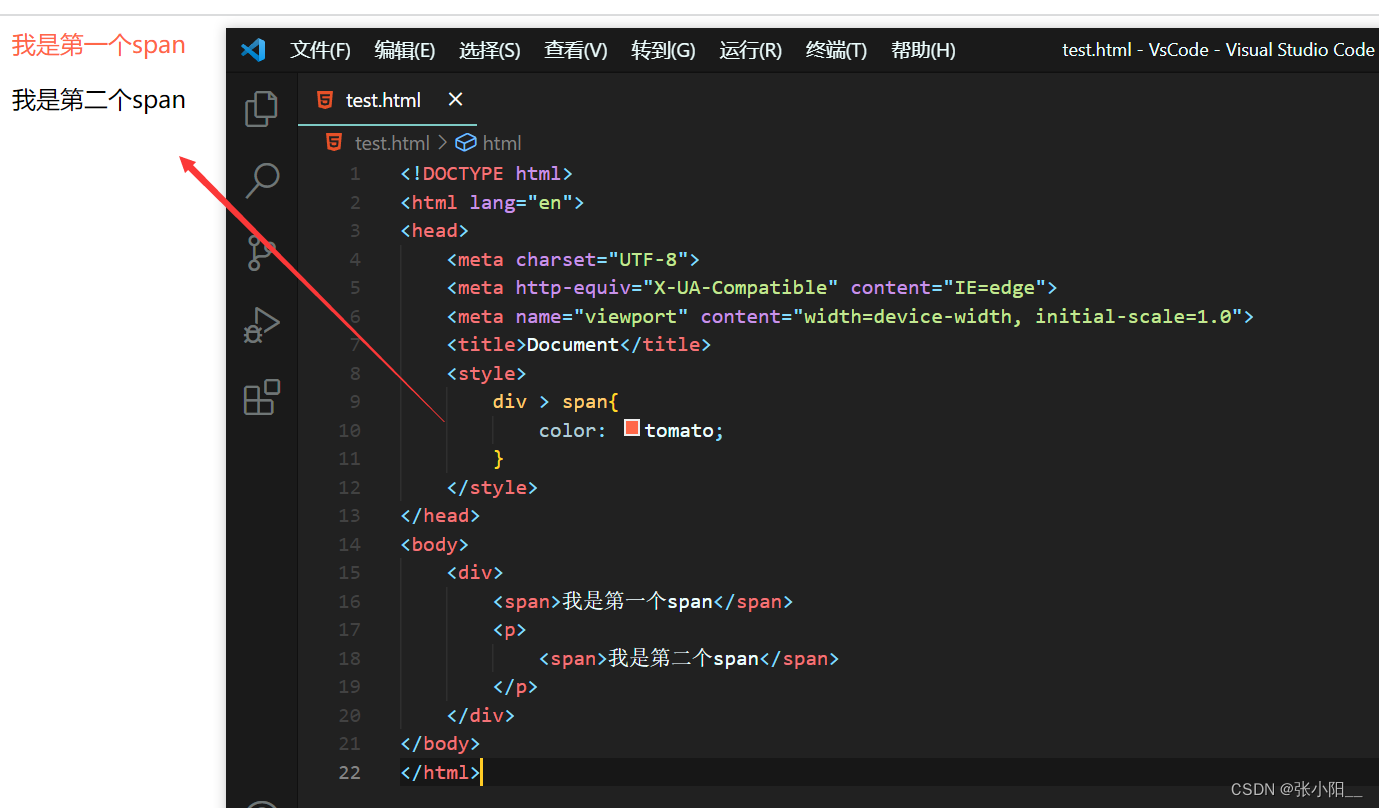
1. 子元素选择器
子选择器只会匹配某个元素的直接后代
选择器之间用大于号
>分隔开
<!DOCTYPE html>
<html lang="en">
<head>
    <meta charset="UTF-8">
    <meta http-equiv="X-UA-Compatible" content="IE=edge">
    <meta name="viewport" content="width=device-width, initial-scale=1.0">
    <title>Document</title>
    <style>
        div > span{
            color: tomato;
        }
    </style>
</head>
<body>
    <div>
        <span>我是第一个span</span>
        <p>
            <span>我是第二个span</span>
        </p>
    </div>
</body>
</html>
运行结果如下图所示:
2. 后代选择器
后代选择器的定义方式就是将标签名、class 属性或 id 属性等按照标签的嵌套关系由外到内的依次罗列,中间使用空格分开
<!DOCTYPE html>
<html lang="en">
<head>
    <meta charset="UTF-8">
    <meta http-equiv="X-UA-Compatible" content="IE=edge">
    <meta name="viewport" content="width=device-width, initial-scale=1.0">
    <title>Document</title>
    <style>
        /* 选中div后所有的span元素 */
        div span{
            color: tomato;
        }
    </style>
</head>
<body>
    <div>
        <span>我是第一个span</span>
        <p>
            <span>我是第二个span</span>
        </p>
    </div>
</body>
</html>
运行结果如下图所示:

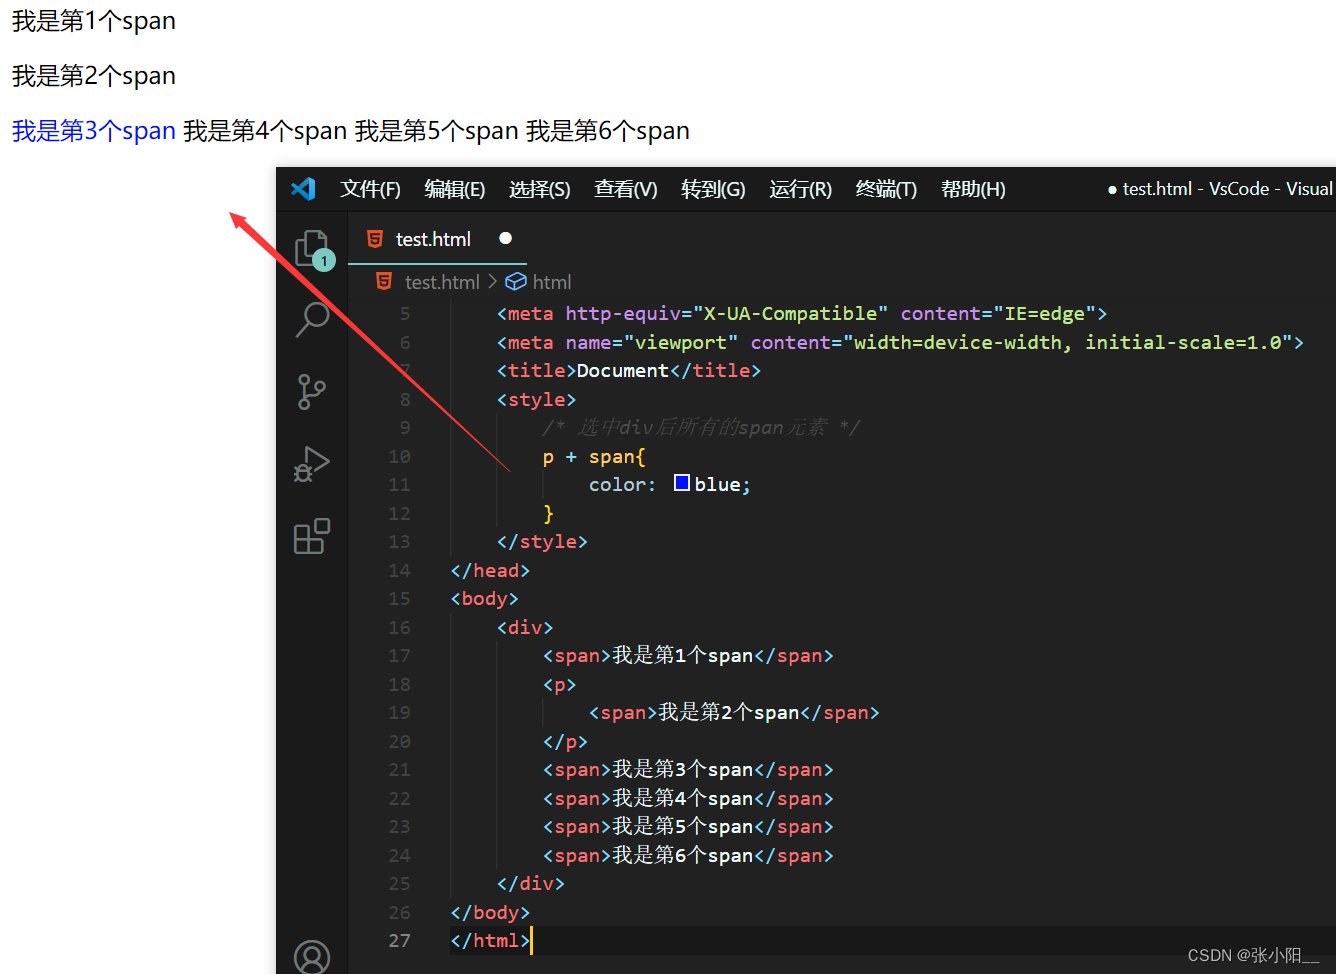
3. 兄弟选择器
一、相邻兄弟选择器用于匹配某个元素之后紧邻的另一个元素,这两个元素拥有同一个父级元素并且不存在嵌套关系。
二、相邻兄弟选择器的定义需要用到加号
+,加号两边为相邻的两个元素,选择器会匹配加号后面的元素。
<!DOCTYPE html>
<html lang="en">
<head>
    <meta charset="UTF-8">
    <meta http-equiv="X-UA-Compatible" content="IE=edge">
    <meta name="viewport" content="width=device-width, initial-scale=1.0">
    <title>Document</title>
    <style>
        /* 选中p相邻的span元素 */
        p + span{
            color: blue;
        }
    </style>
</head>
<body>
    <div>
        <span>我是第1个span</span>
        <p>
            <span>我是第2个span</span>
        </p>
        <span>我是第3个span</span>
        <span>我是第4个span</span>
        <span>我是第5个span</span>
        <span>我是第6个span</span>
    </div>
</body>
</html>
运行结果如下图所示:
4. 通用兄弟选择器
通用兄弟选择器需要用到波浪号 ~,波浪号两边为同一父级元素下的两个元素,选择器会匹配波浪号后面的元素
<!DOCTYPE html>
<html lang="en">
<head>
    <meta charset="UTF-8">
    <meta http-equiv="X-UA-Compatible" content="IE=edge">
    <meta name="viewport" content="width=device-width, initial-scale=1.0">
    <title>Document</title>
    <style>
        /* 选中与p是同级别的,p后面的所有span元素 */
        p ~ span{
            color: blue;
        }
    </style>
</head>
<body>
    <div>
        <span>我是第1个span</span>
        <p>
            <span>我是第2个span</span>
        </p>
        <span>我是第3个span</span>
        <span>我是第4个span</span>
        <span>我是第5个span</span>
        <span>我是第6个span</span>
    </div>
</body>
</html>
运行结果如下图所示:

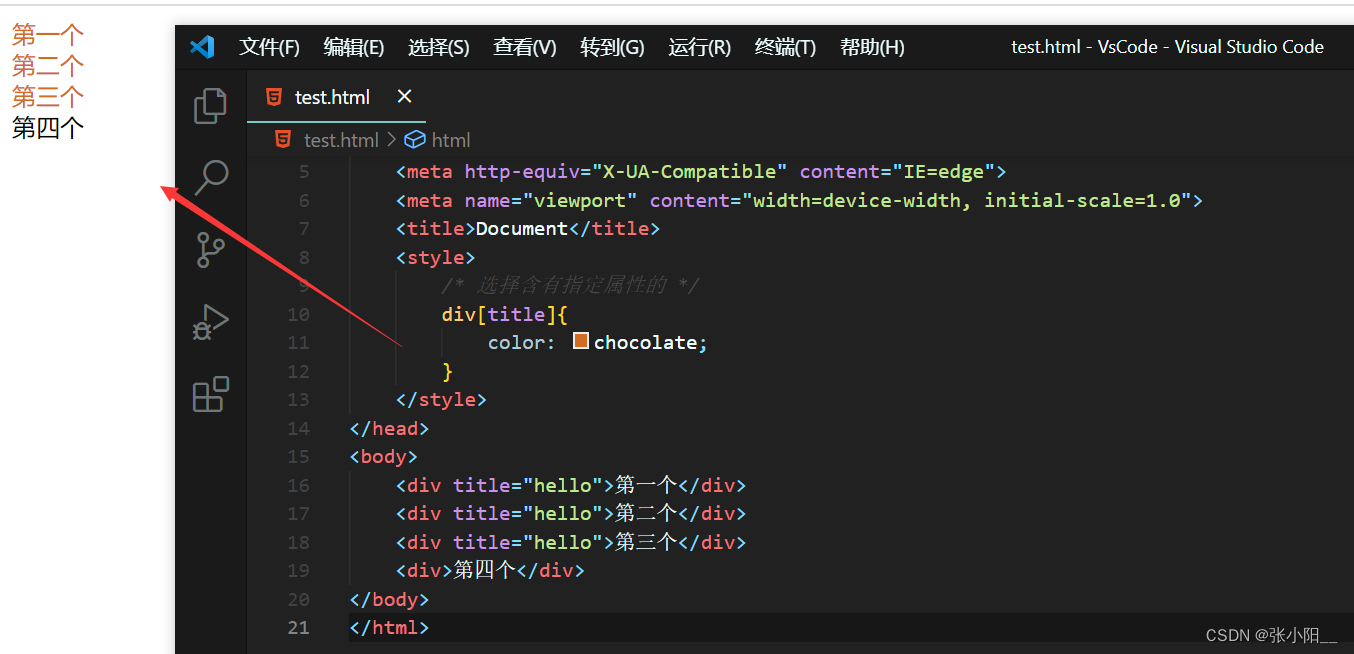
属性选择器
一、属性选择器用来匹配具有特定属性的元素。
二、属性选择器的定义方式与标签选择器相似,只不过需要在标签的后面使用方括号
[ ]来指定标签具有的属性信息。
<!DOCTYPE html>
<html lang="en">
<head>
    <meta charset="UTF-8">
    <meta http-equiv="X-UA-Compatible" content="IE=edge">
    <meta name="viewport" content="width=device-width, initial-scale=1.0">
    <title>Document</title>
    <style>
        /* 选择含有指定属性的 */
        div[title]{
            color: chocolate;
        }
    </style>
</head>
<body>
    <div title="hello">第一个</div>
    <div title="hello">第二个</div>
    <div title="hello">第三个</div>
    <div>第四个</div>
</body>
</html>
运行结果如下图所示:
<!DOCTYPE html>
<html lang="en">
<head>
<meta charset="UTF-8">
<meta http-equiv="X-UA-Compatible" content="IE=edge">
<meta name="viewport" content="width=device-width, initial-scale=1.0">
<title>Document</title>
<style>
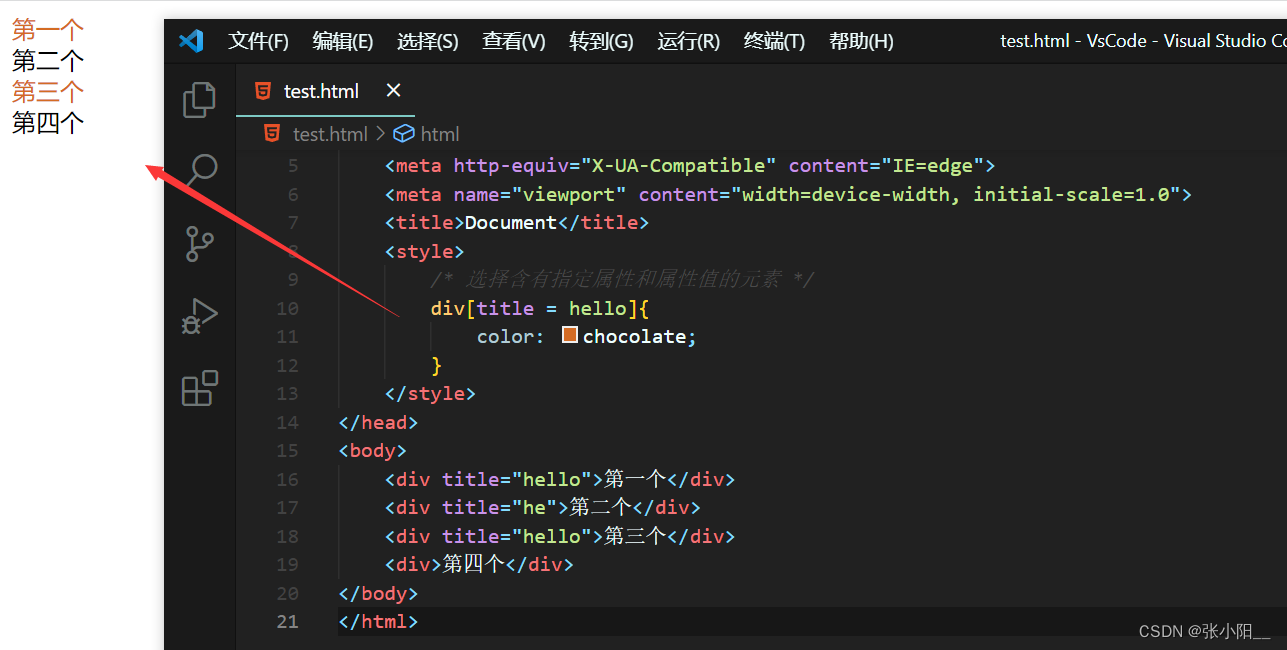
/* 选择含有指定属性和属性值的元素 */
div[title = hello]{
color: chocolate;
}
</style>
</head>
<body>
<div title="hello">第一个</div>
<div title="he">第二个</div>
<div title="hello">第三个</div>
<div>第四个</div>
</body>
</html>运行结果如下图所示:
<!DOCTYPE html>
<html lang="en">
<head>
    <meta charset="UTF-8">
    <meta http-equiv="X-UA-Compatible" content="IE=edge">
    <meta name="viewport" content="width=device-width, initial-scale=1.0">
    <title>Document</title>
    <style>
        /* 选择属性值以指定值开头的元素 */
        div[title ^= h]{
            color: chocolate;
        }
    </style>
</head>
<body>
    <div title="hello">第一个</div>
    <div title="he">第二个</div>
    <div title="hello">第三个</div>
    <div title="world">第四个</div>
</body>
</html>
运行结果如下图所示:

<!DOCTYPE html>
<html lang="en">
<head>
<meta charset="UTF-8">
<meta http-equiv="X-UA-Compatible" content="IE=edge">
<meta name="viewport" content="width=device-width, initial-scale=1.0">
<title>Document</title>
<style>
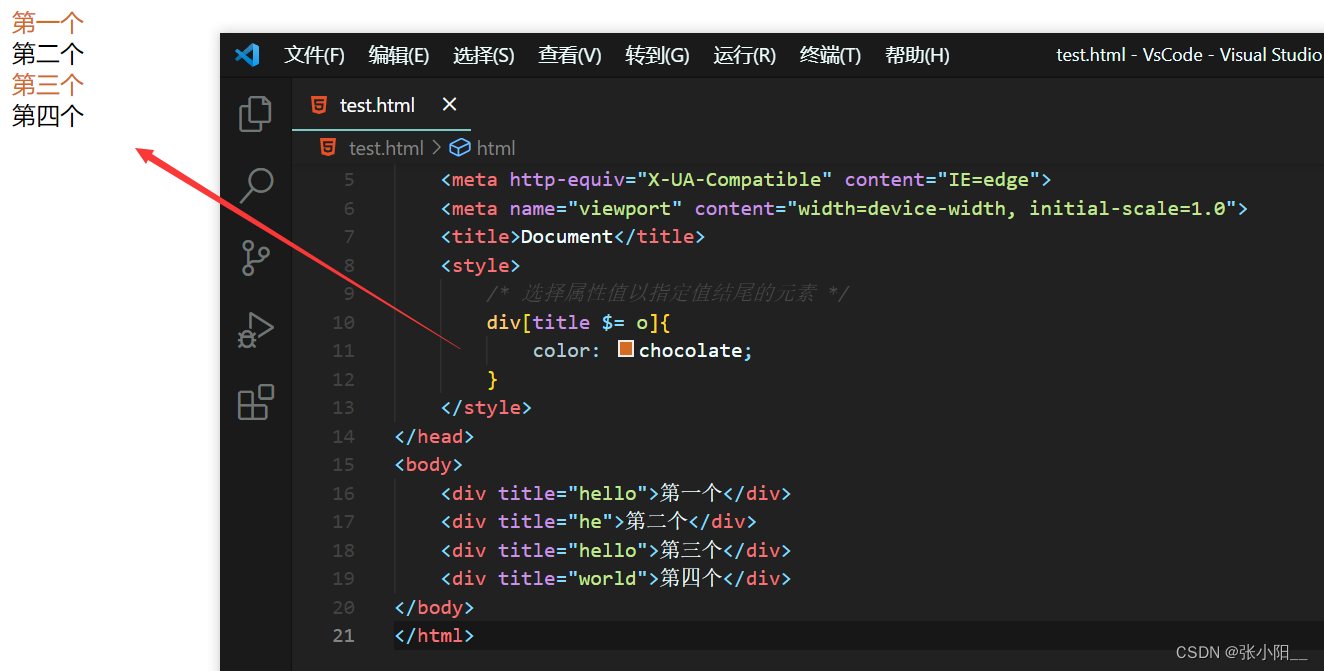
/* 选择属性值以指定值结尾的元素 */
div[title $= o]{
color: chocolate;
}
</style>
</head>
<body>
<div title="hello">第一个</div>
<div title="he">第二个</div>
<div title="hello">第三个</div>
<div title="world">第四个</div>
</body>
</html>运行结果如下图所示:
<!DOCTYPE html>
<html lang="en">
<head>
<meta charset="UTF-8">
<meta http-equiv="X-UA-Compatible" content="IE=edge">
<meta name="viewport" content="width=device-width, initial-scale=1.0">
<title>Document</title>
<style>
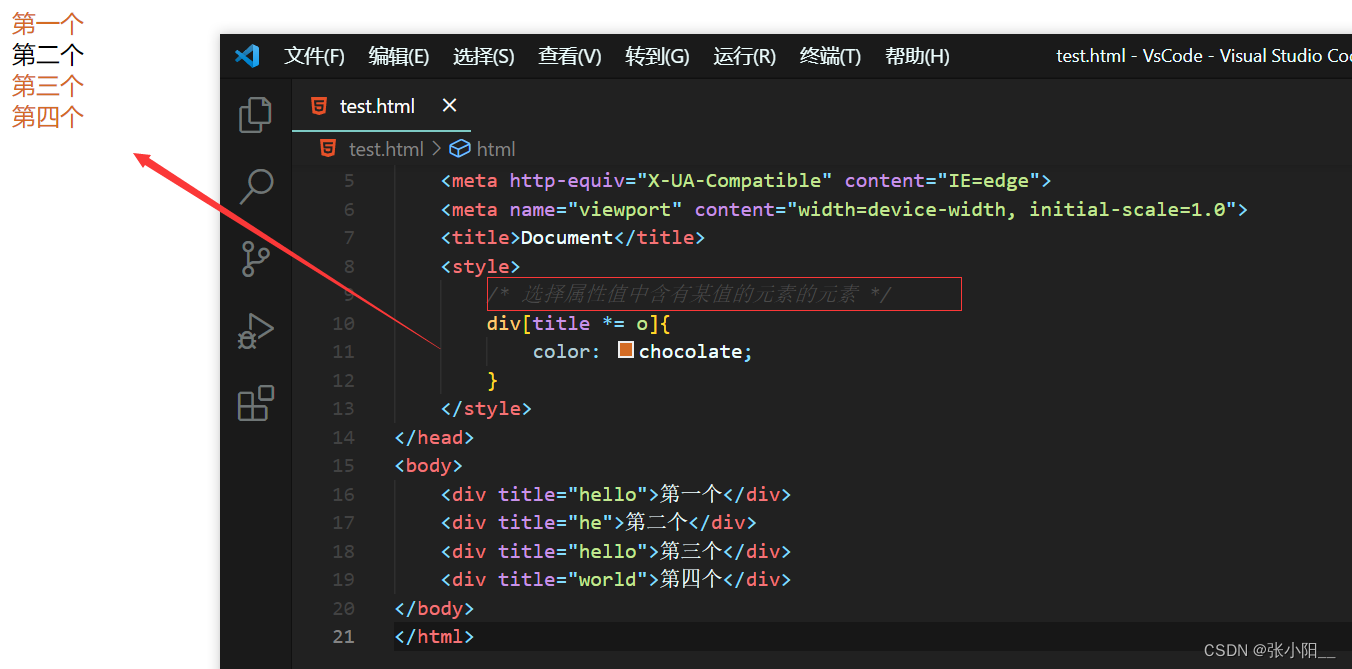
/* 选择属性值中含有某值的元素的元素 */
div[title *= o]{
color: chocolate;
}
</style>
</head>
<body>
<div title="hello">第一个</div>
<div title="he">第二个</div>
<div title="hello">第三个</div>
<div title="world">第四个</div>
</body>
</html>运行结果如下图所示:
伪类选择器
伪类(不存在的类,特殊的类) - 伪类用来描述一个元素的特殊状态
比如:第一个子元素、被点击的元素、鼠标移入的元素... 伪类一般情况下都是使用 : 开头
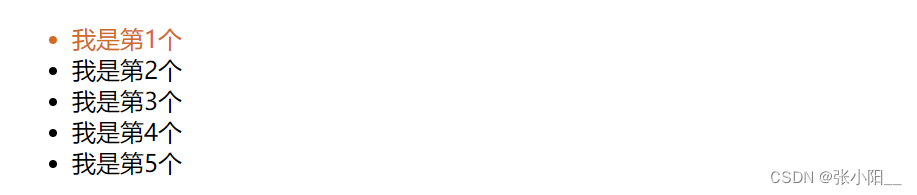
:first-child
<!DOCTYPE html>
<html lang="en">
<head>
    <meta charset="UTF-8">
    <meta http-equiv="X-UA-Compatible" content="IE=edge">
    <meta name="viewport" content="width=device-width, initial-scale=1.0">
    <title>Document</title>
    <style>
        ul li:first-child{
            color: chocolate;
        }
    </style>
</head>
<body>
    <ul>
        <li>我是第1个</li>
        <li>我是第2个</li>
        <li>我是第3个</li>
        <li>我是第4个</li>
        <li>我是第5个</li>
    </ul>
</body>
</html>
运行结果如下图所示:
:last-child
<!DOCTYPE html>
<html lang="en">
<head>
    <meta charset="UTF-8">
    <meta http-equiv="X-UA-Compatible" content="IE=edge">
    <meta name="viewport" content="width=device-width, initial-scale=1.0">
    <title>Document</title>
    <style>
        ul li:last-child{
            color: chocolate;
        }
    </style>
</head>
<body>
    <ul>
        <li>我是第1个</li>
        <li>我是第2个</li>
        <li>我是第3个</li>
        <li>我是第4个</li>
        <li>我是第5个</li>
    </ul>
</body>
</html>
运行结果如下图所示:

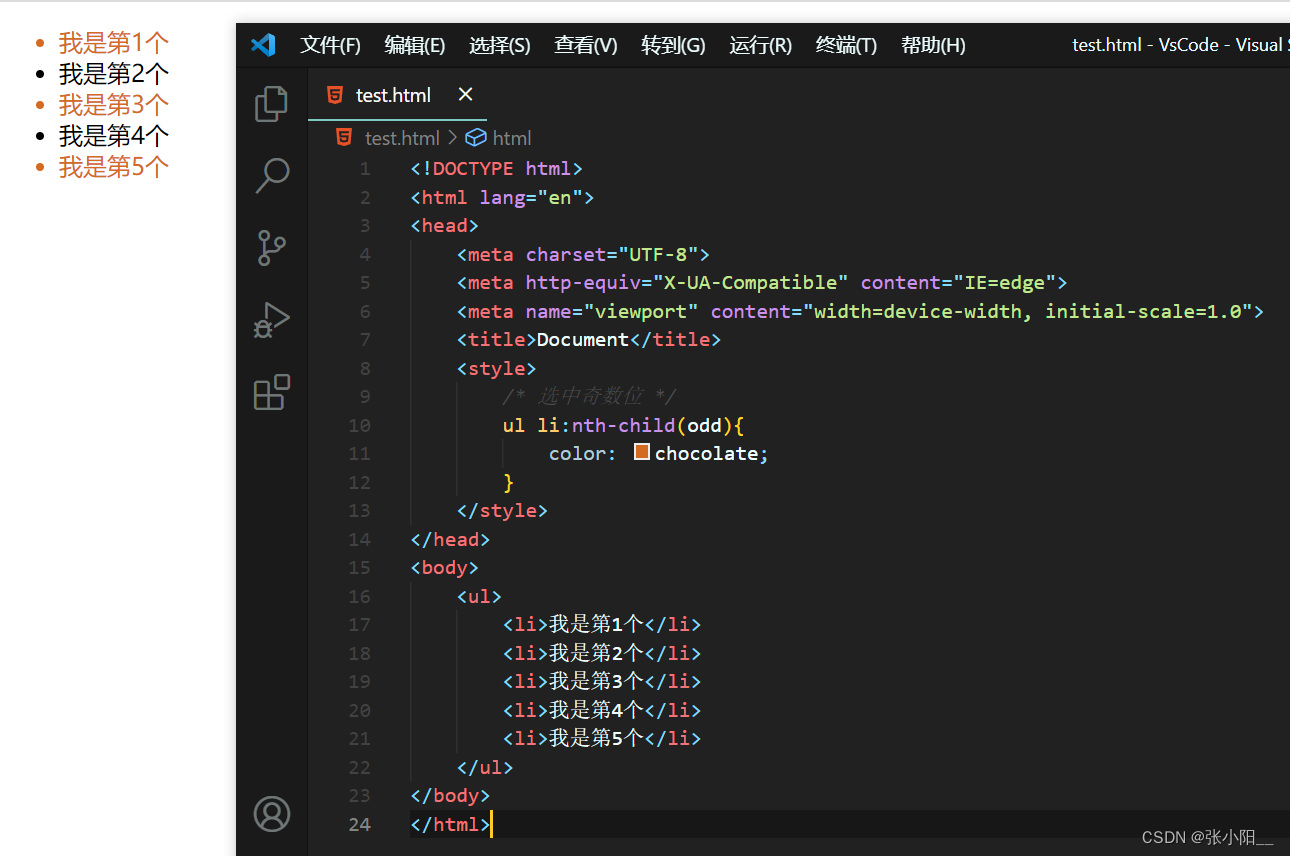
:nth - child( )
特殊值:
n表示第n个 ,n的范围0到正无穷
2n 或 even表示选中偶数位的元素2n+1 或 odd 表示选中奇数位的元素
<!DOCTYPE html>
<html lang="en">
<head>
    <meta charset="UTF-8">
    <meta http-equiv="X-UA-Compatible" content="IE=edge">
    <meta name="viewport" content="width=device-width, initial-scale=1.0">
    <title>Document</title>
    <style>
        /* 选中奇数位 */
        ul li:nth-child(odd){
            color: chocolate;
        }
    </style>
</head>
<body>
    <ul>
        <li>我是第1个</li>
        <li>我是第2个</li>
        <li>我是第3个</li>
        <li>我是第4个</li>
        <li>我是第5个</li>
    </ul>
</body>
</html>
运行结果如下图所示:
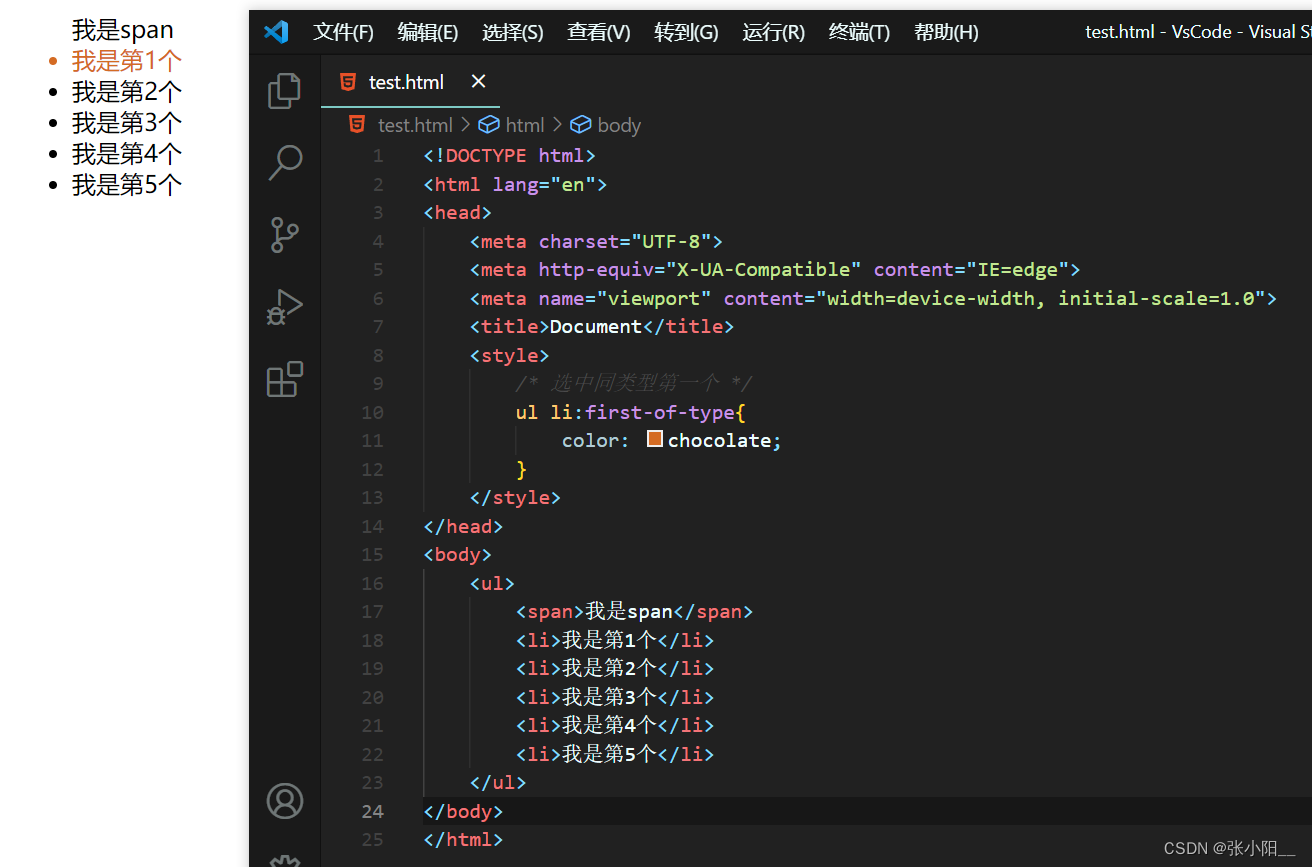
: first - of - type
这些个伪类的功能和上述的类似,不通点是他们是在同类型元素中进行排序
<!DOCTYPE html>
<html lang="en">
<head>
    <meta charset="UTF-8">
    <meta http-equiv="X-UA-Compatible" content="IE=edge">
    <meta name="viewport" content="width=device-width, initial-scale=1.0">
    <title>Document</title>
    <style>
        /* 选中同类型第一个 */
        ul li:first-of-type{
            color: chocolate;
        }
    </style>
</head>
<body>
    <ul>
        <span>我是span</span>
        <li>我是第1个</li>
        <li>我是第2个</li>
        <li>我是第3个</li>
        <li>我是第4个</li>
        <li>我是第5个</li>
    </ul>
</body>
</html>
运行结果如下图所示:
: last - of - type
<!DOCTYPE html>
<html lang="en">
<head>
    <meta charset="UTF-8">
    <meta http-equiv="X-UA-Compatible" content="IE=edge">
    <meta name="viewport" content="width=device-width, initial-scale=1.0">
    <title>Document</title>
    <style>
        /* 选中同类型最后一个 */
        ul li:last-of-type{
            color: chocolate;
        }
    </style>
</head>
<body>
    <ul>
        <span>我是span</span>
        <li>我是第1个</li>
        <li>我是第2个</li>
        <li>我是第3个</li>
        <li>我是第4个</li>
        <li>我是第5个</li>
    </ul>
</body>
</html>
运行结果如下图所示:

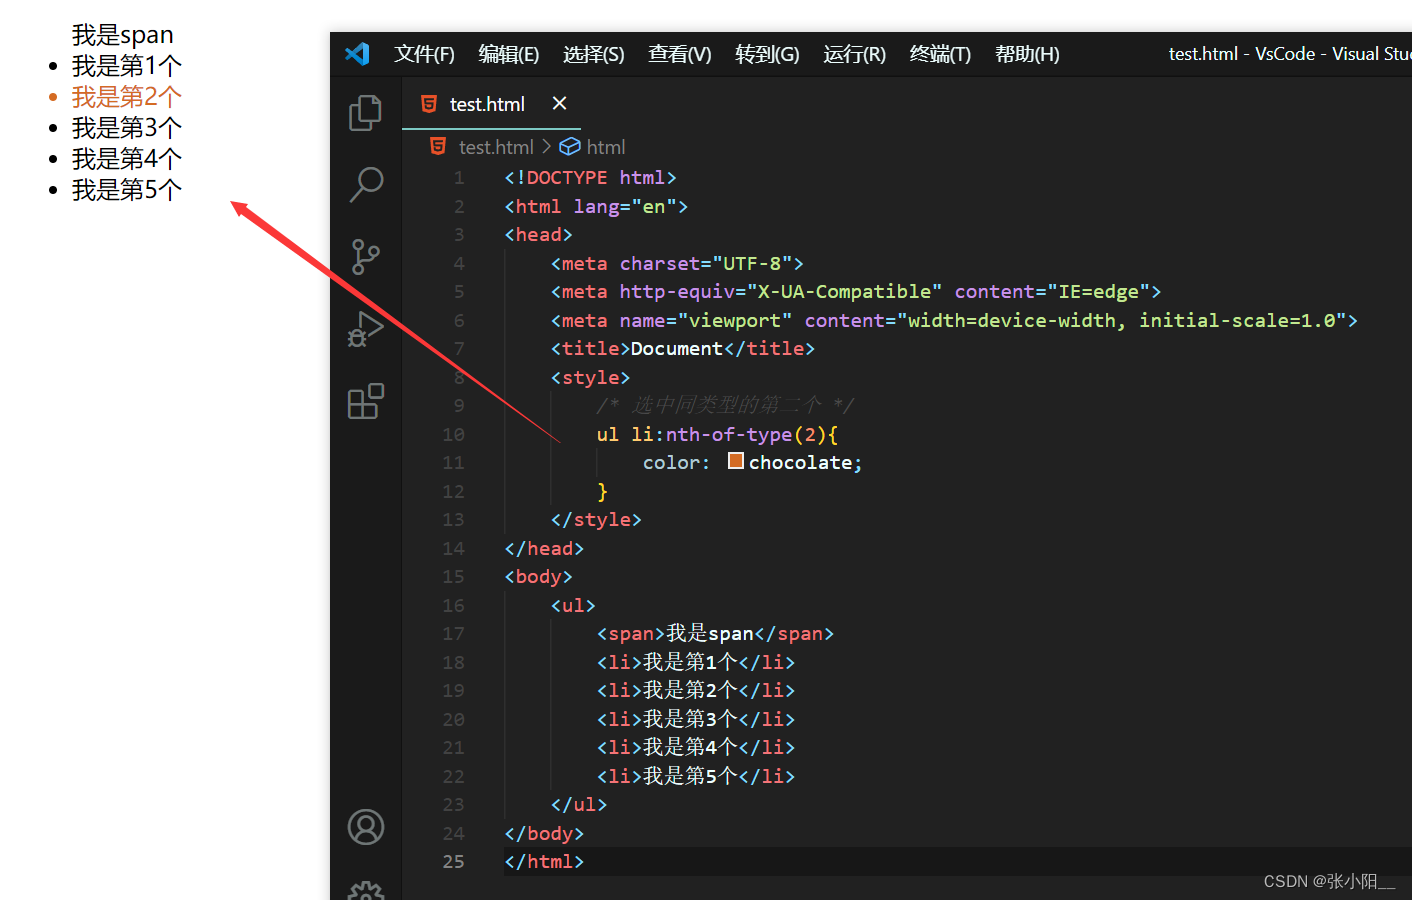
: nth - of - type
<!DOCTYPE html>
<html lang="en">
<head>
    <meta charset="UTF-8">
    <meta http-equiv="X-UA-Compatible" content="IE=edge">
    <meta name="viewport" content="width=device-width, initial-scale=1.0">
    <title>Document</title>
    <style>
        /* 选中同类型的第二个 */
        ul li:nth-of-type(2){
            color: chocolate;
        }
    </style>
</head>
<body>
    <ul>
        <span>我是span</span>
        <li>我是第1个</li>
        <li>我是第2个</li>
        <li>我是第3个</li>
        <li>我是第4个</li>
        <li>我是第5个</li>
    </ul>
</body>
</html>
运行结果如下图所示:
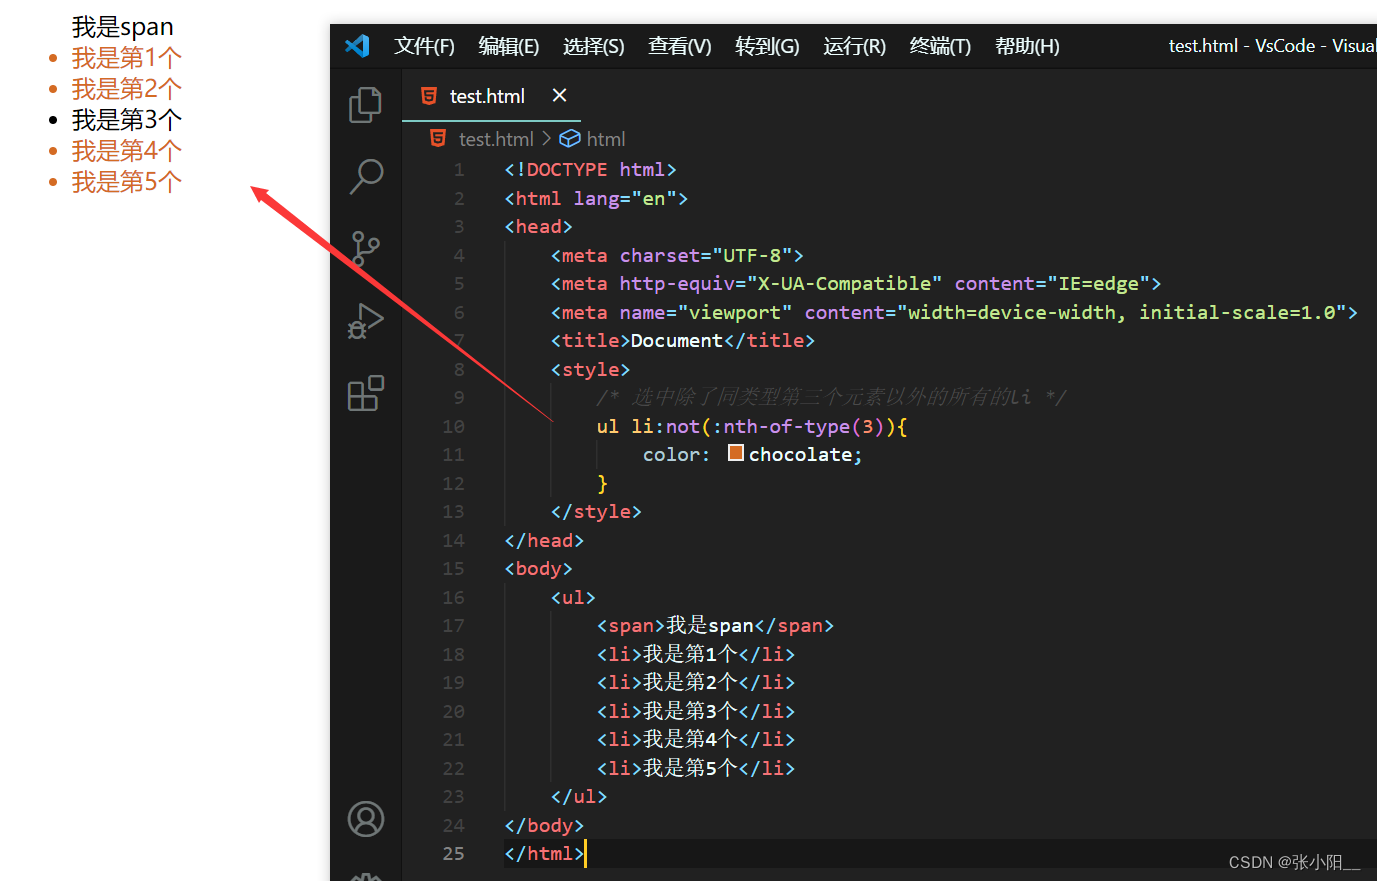
:not( )否定伪类
将符合条件的元素从选择器中去除
注意::nth-child()是整体一个大的排序,而:nth-of-type()是同类型的排序
<!DOCTYPE html>
<html lang="en">
<head>
    <meta charset="UTF-8">
    <meta http-equiv="X-UA-Compatible" content="IE=edge">
    <meta name="viewport" content="width=device-width, initial-scale=1.0">
    <title>Document</title>
    <style>
        /* 选中除了第二个元素以外的所有的li */
        ul li:not(:nth-child(2)){
            color: chocolate;
        }
    </style>
</head>
<body>
    <ul>
        <span>我是span</span>
        <li>我是第1个</li>
        <li>我是第2个</li>
        <li>我是第3个</li>
        <li>我是第4个</li>
        <li>我是第5个</li>
    </ul>
</body>
</html>
运行结果如下图所示:

<!DOCTYPE html>
<html lang="en">
<head>
    <meta charset="UTF-8">
    <meta http-equiv="X-UA-Compatible" content="IE=edge">
    <meta name="viewport" content="width=device-width, initial-scale=1.0">
    <title>Document</title>
    <style>
        /* 选中除了同类型第三个元素以外的所有的li */
        ul li:not(:nth-of-type(3)){
            color: chocolate;
        }
    </style>
</head>
<body>
    <ul>
        <span>我是span</span>
        <li>我是第1个</li>
        <li>我是第2个</li>
        <li>我是第3个</li>
        <li>我是第4个</li>
        <li>我是第5个</li>
    </ul>
</body>
</html>
运行结果如下图所示:
超链接的伪类
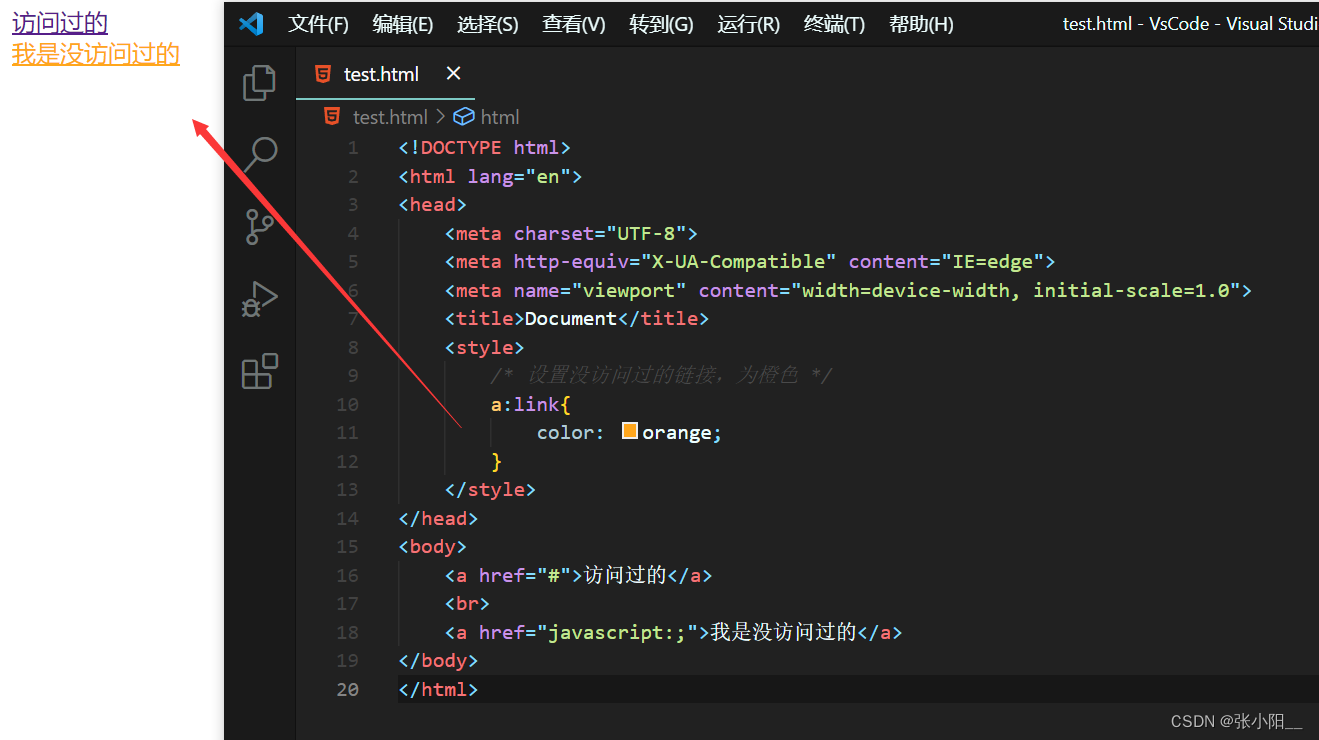
:link
:link 用来表示没访问过的链接(正常的链接)
当点击链接为#的超链接,链接就会变一个颜色,而没访问过的链接就是正常的蓝色
如下图:

注: javascript:; 与 # 都可用作超链接的占位符
我们可以用:link来设置没访问过的链接
<!DOCTYPE html>
<html lang="en">
<head>
    <meta charset="UTF-8">
    <meta http-equiv="X-UA-Compatible" content="IE=edge">
    <meta name="viewport" content="width=device-width, initial-scale=1.0">
    <title>Document</title>
    <style>
        /* 设置没访问过的链接,为橙色 */
        a:link{
            color: orange;
        }
    </style>
</head>
<body>
    <a href="#">访问过的</a>
    <br>
    <a href="javascript:;">我是没访问过的</a>
</body>
</html>
运行结果如下:
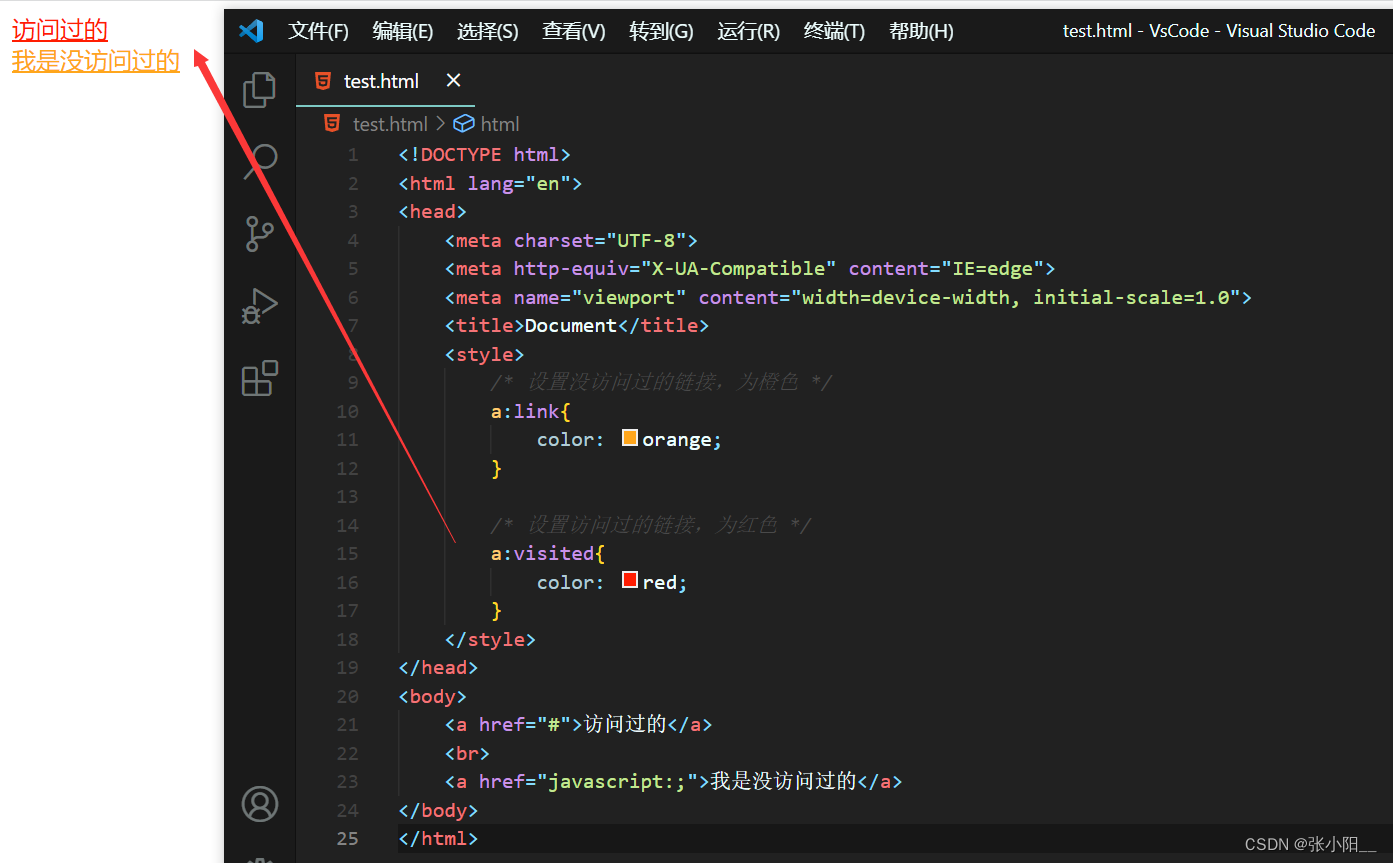
:visited
:visited用来表示访问过的链接
<!DOCTYPE html>
<html lang="en">
<head>
    <meta charset="UTF-8">
    <meta http-equiv="X-UA-Compatible" content="IE=edge">
    <meta name="viewport" content="width=device-width, initial-scale=1.0">
    <title>Document</title>
    <style>
        /* 设置没访问过的链接,为橙色 */
        a:link{
            color: orange;
        }

        /* 设置访问过的链接,为红色 */
        a:visited{
            color: red;
        }
    </style>
</head>
<body>
    <a href="#">访问过的</a>
    <br>
    <a href="javascript:;">我是没访问过的</a>
</body>
</html>
运行结果如下:
注意:link 和 visited 只能给a使用,是超链接独有的
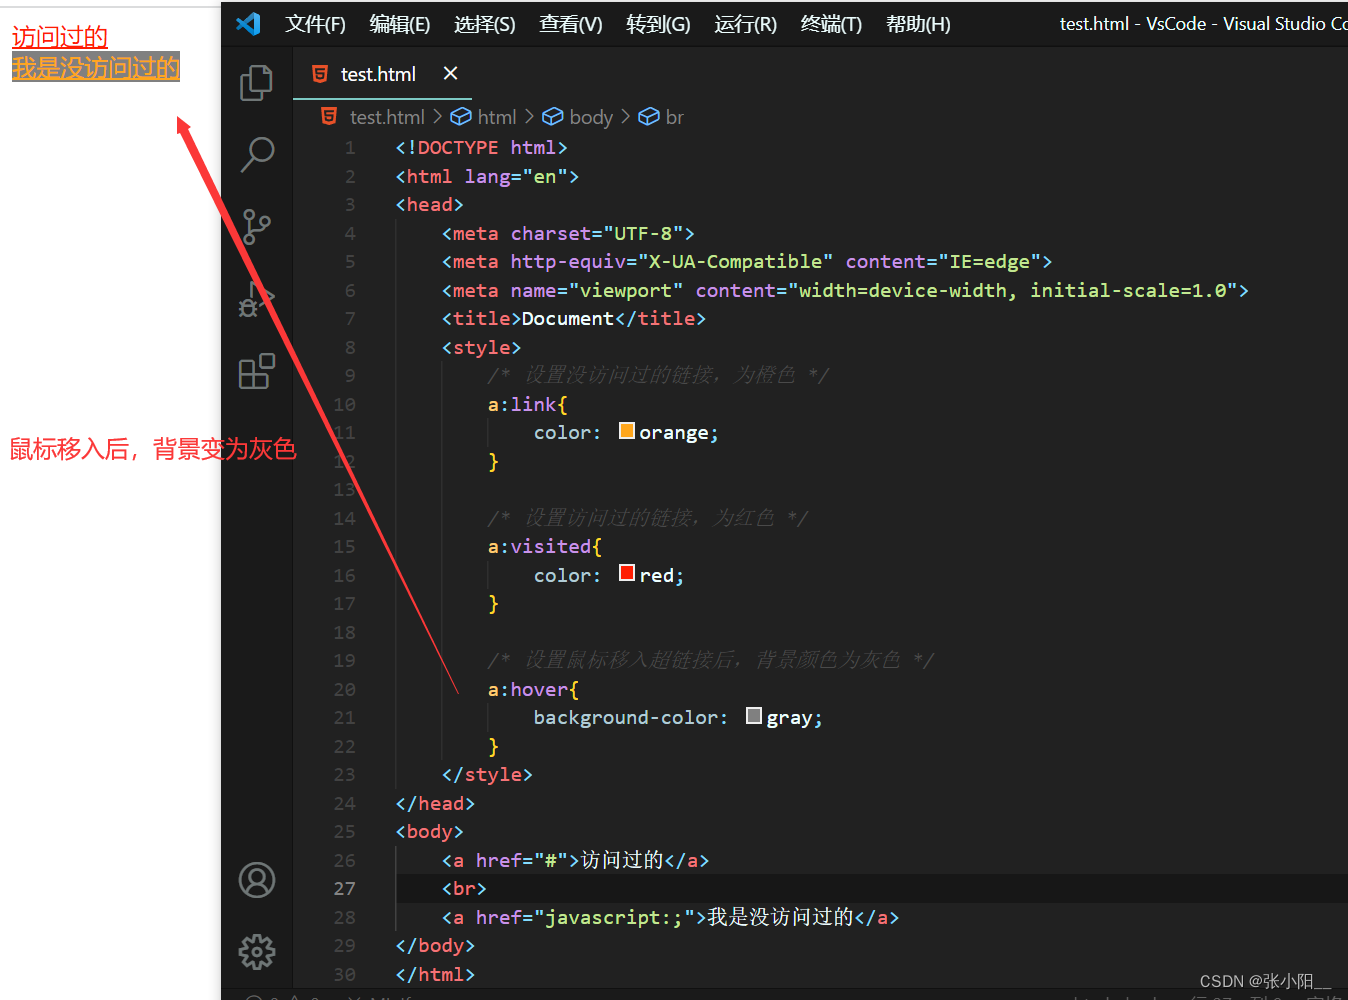
:hover
: hover用来表示鼠标移入的状态
<!DOCTYPE html>
<html lang="en">
<head>
    <meta charset="UTF-8">
    <meta http-equiv="X-UA-Compatible" content="IE=edge">
    <meta name="viewport" content="width=device-width, initial-scale=1.0">
    <title>Document</title>
    <style>
        /* 设置没访问过的链接,为橙色 */
        a:link{
            color: orange;
        }

        /* 设置访问过的链接,为红色 */
        a:visited{
            color: red;
        }

        /* 设置鼠标移入超链接后,背景颜色为灰色 */
        a:hover{
            background-color: gray;
        }
    </style>
</head>
<body>
    <a href="#">访问过的</a>
    <br>
    <a href="javascript:;">我是没访问过的</a>
</body>
</html>
运行结果如下:
:active
: active用来表示鼠标点击
<!DOCTYPE html>
<html lang="en">
<head>
    <meta charset="UTF-8">
    <meta http-equiv="X-UA-Compatible" content="IE=edge">
    <meta name="viewport" content="width=device-width, initial-scale=1.0">
    <title>Document</title>
    <style>
        /* 设置没访问过的链接,为橙色 */
        a:link{
            color: orange;
        }

        /* 设置访问过的链接,为红色 */
        a:visited{
            color: red;
        }

        /* 设置鼠标移入超链接后,背景颜色为灰色 */
        a:hover{
            background-color: gray;
        }

        /* 当鼠标点击,背景颜色变为#bfa */
        a:active{
            background-color: #bfa;
        }
    </style>
</head>
<body>
    <a href="#">访问过的</a>
    <br>
    <a href="javascript:;">我是没访问过的</a>
</body>
</html>
运行结果如下:

补充:
链接伪类先后顺序被称为 LVHA 顺序:
:link—:visited—:hover—:active。hover 和 active 可以绑定任意元素
伪元素
伪元素:表示页面中一些特殊的并不真实的存在的元素(特殊的位置)
伪元素使用::开头
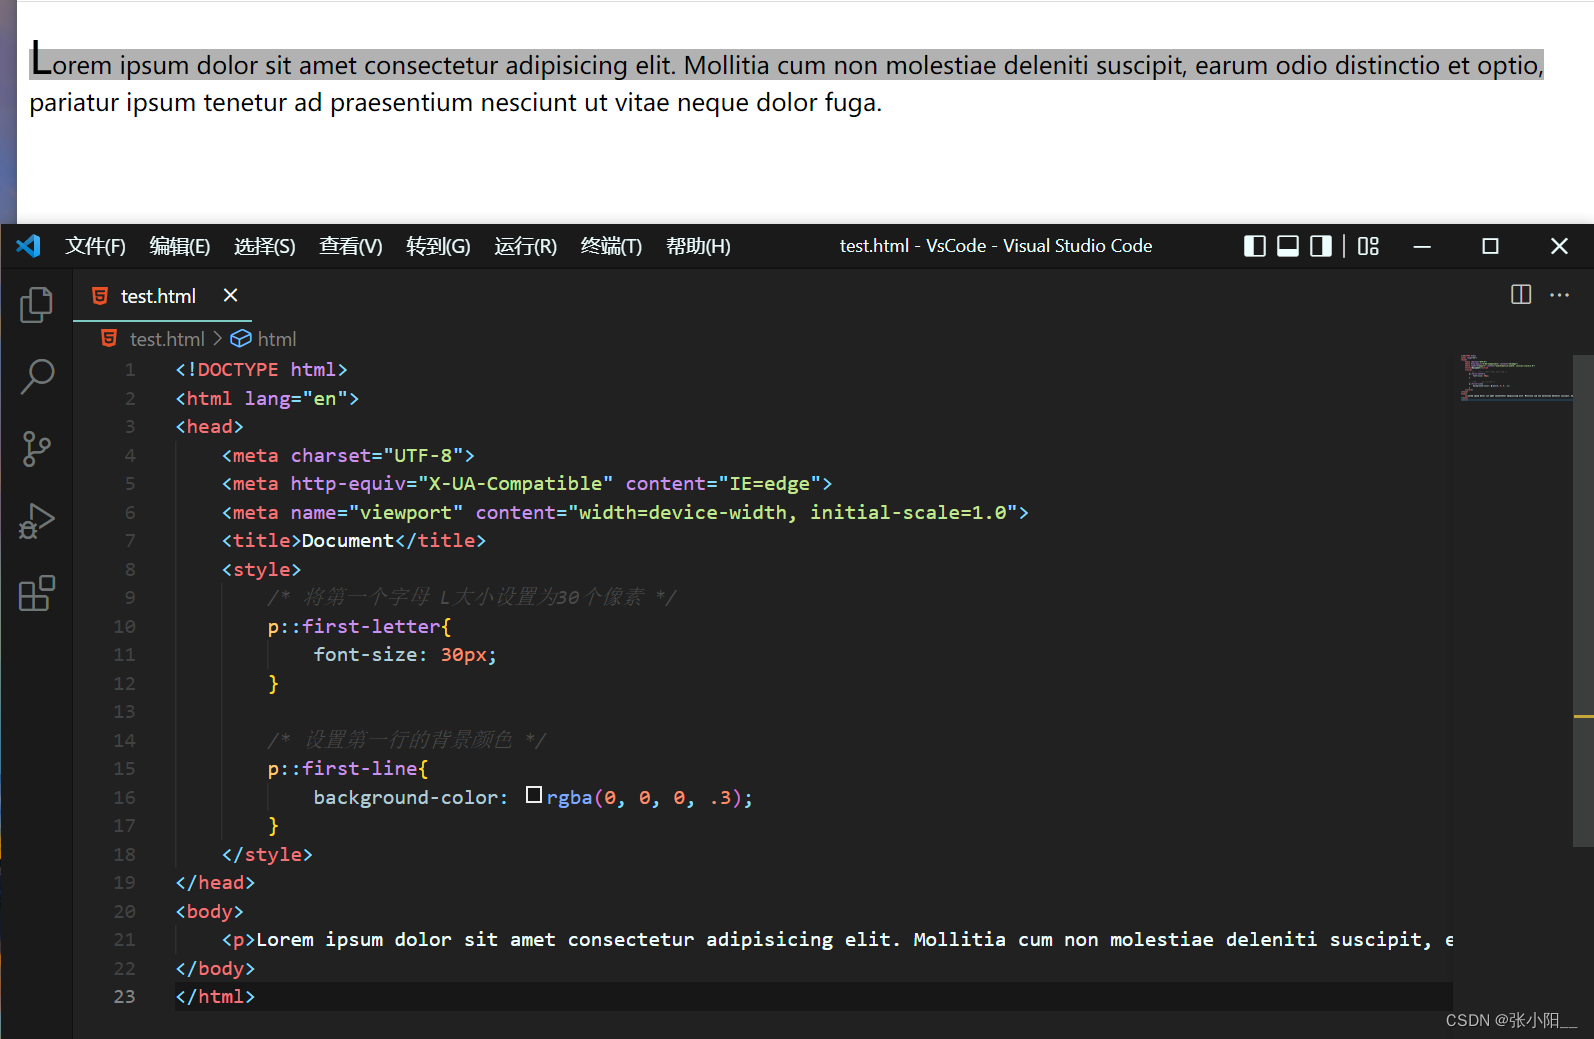
::first - letter
::first-line
::first - letter 表示第一个字母
::first - line 表示第一行
<!DOCTYPE html>
<html lang="en">
<head>
    <meta charset="UTF-8">
    <meta http-equiv="X-UA-Compatible" content="IE=edge">
    <meta name="viewport" content="width=device-width, initial-scale=1.0">
    <title>Document</title>
    <style>
        /* 将第一个字母 L大小设置为30个像素 */
        p::first-letter{
            font-size: 30px;
        }

        /* 设置第一行的背景颜色 */
        p::first-line{
            background-color: rgba(0, 0, 0, .3);
        }
    </style>
</head>
<body>
    <p>Lorem ipsum dolor sit amet consectetur adipisicing elit. Mollitia cum non molestiae deleniti suscipit, earum odio distinctio et optio, pariatur ipsum tenetur ad praesentium nesciunt ut vitae neque dolor fuga.</p>
</body>
</html>
运行结果如下:
::selection
表示选中的内容
<!DOCTYPE html>
<html lang="en">
<head>
    <meta charset="UTF-8">
    <meta http-equiv="X-UA-Compatible" content="IE=edge">
    <meta name="viewport" content="width=device-width, initial-scale=1.0">
    <title>Document</title>
    <style>
        /* 将第一个字母 L大小设置为30个像素 */
        p::first-letter{
            font-size: 30px;
        }

        /* 设置第一行的背景颜色 */
        p::first-line{
            background-color: rgba(0, 0, 0, .3);
        }

        /* 设置选中后,字体颜色变为red */
        p::selection{
            color: red;
        }
    </style>
</head>
<body>
    <p>Lorem ipsum dolor sit amet consectetur adipisicing elit. Mollitia cum non molestiae deleniti suscipit, earum odio distinctio et optio, pariatur ipsum tenetur ad praesentium nesciunt ut vitae neque dolor fuga.</p>
</body>
</html>
运行结果如下:
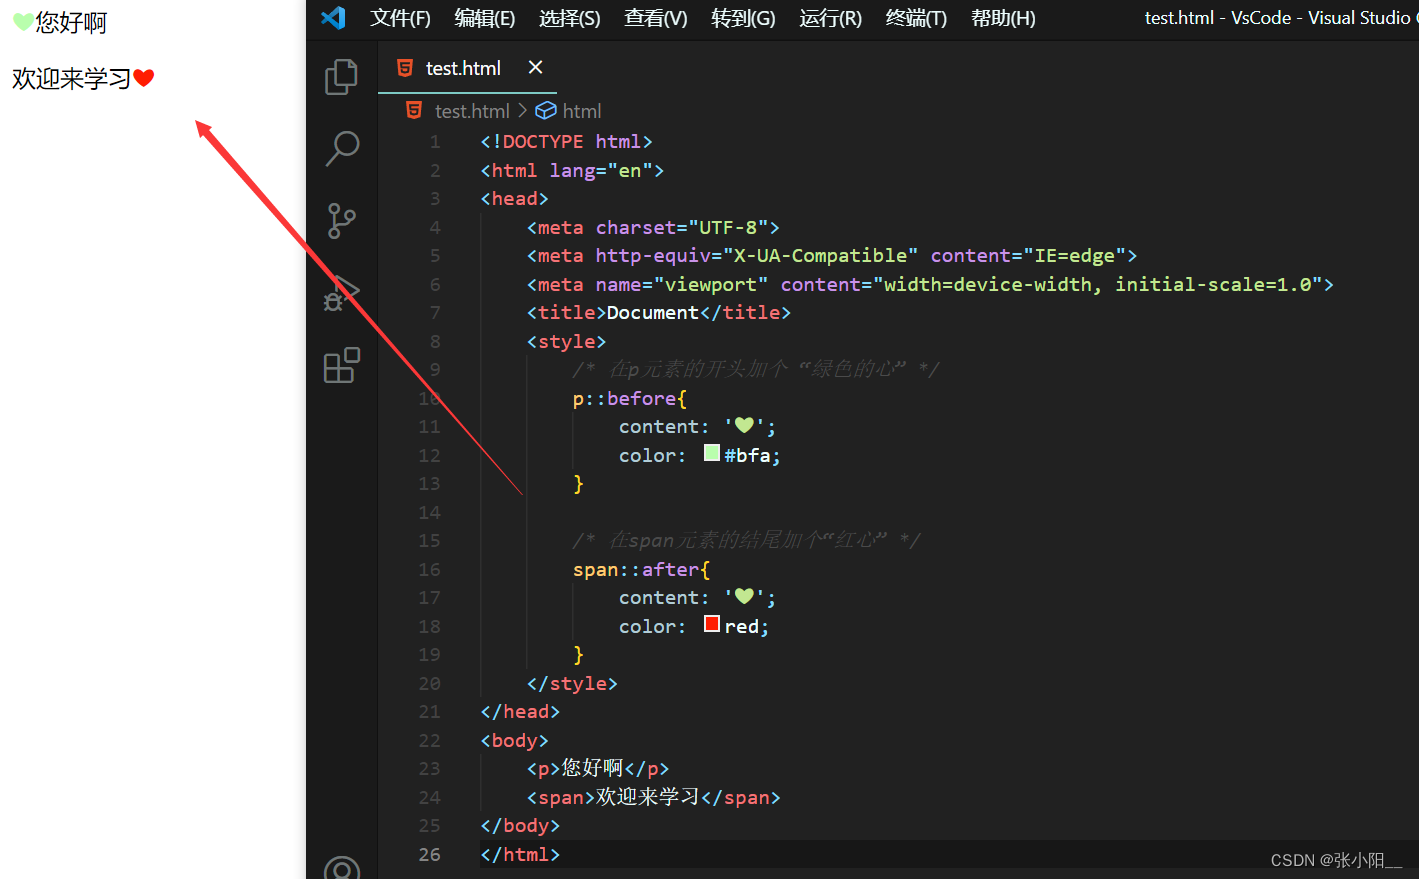
 ::before
::after
: : before元素的开始
: : after元素的最后
- before 和 after 必须结合content属性来使用通过 content 属性来为一个元素添加修饰性的内容,此元素默认为行内元素。
<!DOCTYPE html>
<html lang="en">
<head>
    <meta charset="UTF-8">
    <meta http-equiv="X-UA-Compatible" content="IE=edge">
    <meta name="viewport" content="width=device-width, initial-scale=1.0">
    <title>Document</title>
    <style>
        /* 在p元素的开头加个 “绿色的心” */
        p::before{
            content: '❤';
            color: #bfa;
        }

        /* 在span元素的结尾加个“红心” */
        span::after{
            content: '❤';
            color: red;
        }
    </style>
</head>
<body>
    <p>您好啊</p>
    <span>欢迎来学习</span>
</body>
</html>
运行结果如下:
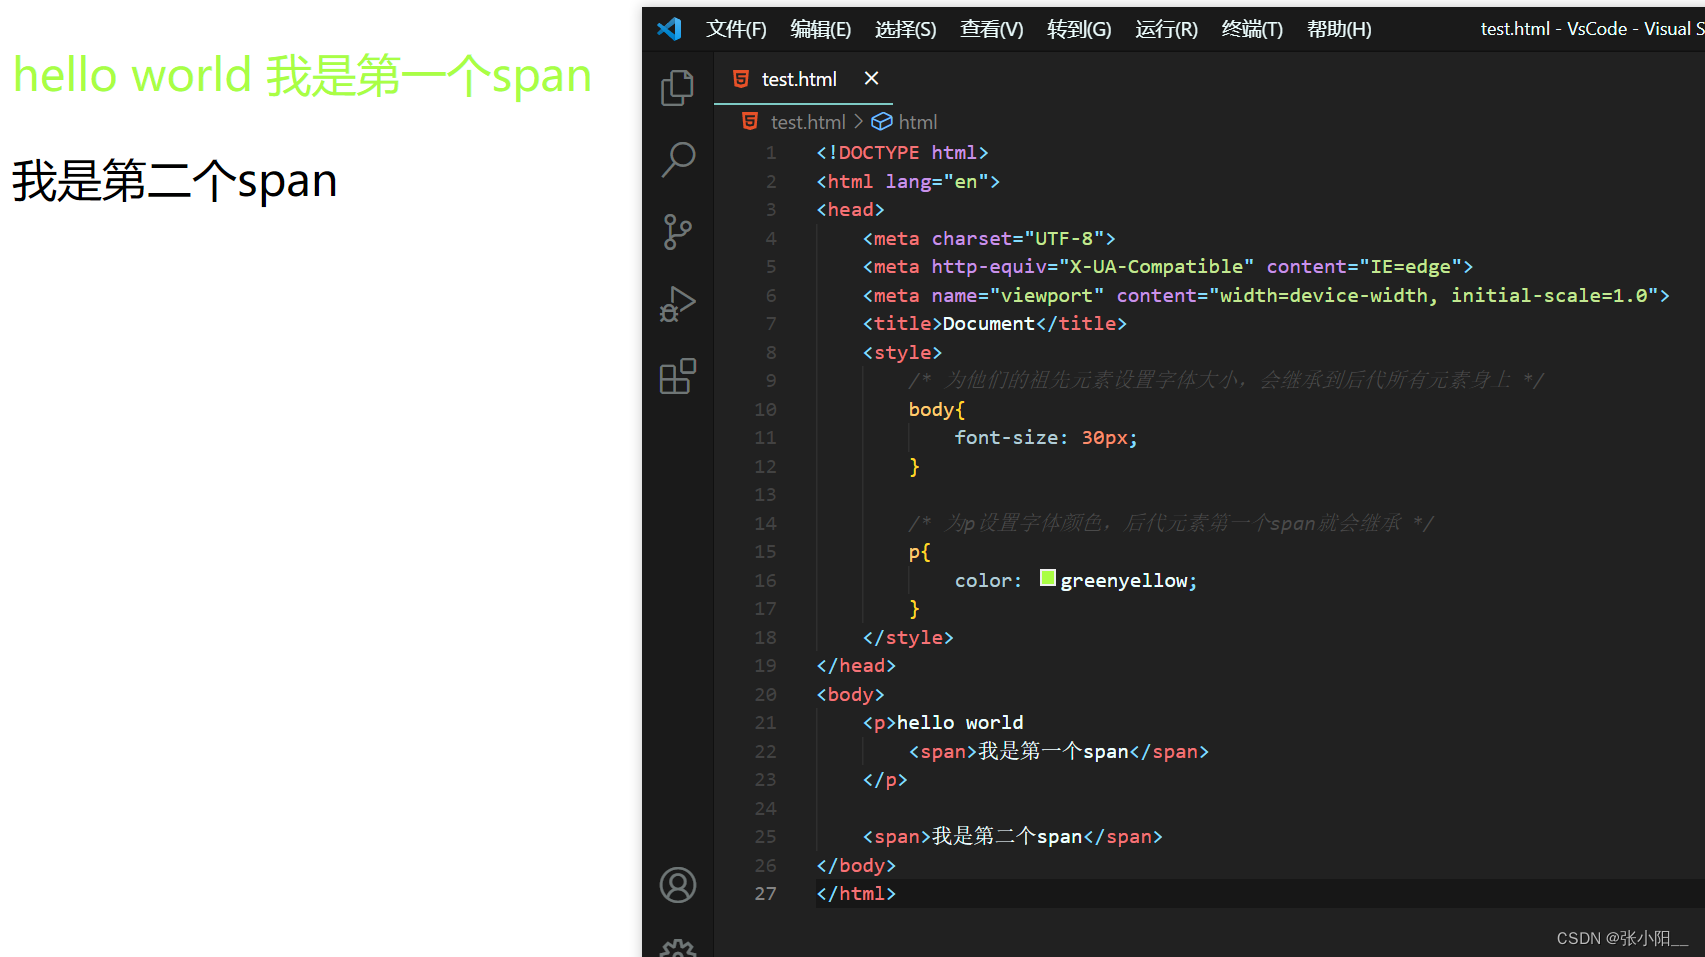
继承
样式的继承,我们为一个元素设置的样式同时也会应用到它的后代元素上继承是发生在祖先与后代之间的
继承的设计是为了方便我们的开发
利用继承我们可以将一些通用的样式统一设置到共同的祖先元素上
这样只需设置一次即可让所有的元素都具有该样式
<!DOCTYPE html>
<html lang="en">
<head>
    <meta charset="UTF-8">
    <meta http-equiv="X-UA-Compatible" content="IE=edge">
    <meta name="viewport" content="width=device-width, initial-scale=1.0">
    <title>Document</title>
    <style>
        /* 为他们的祖先元素设置字体大小,会继承到后代所有元素身上 */
        body{
            font-size: 30px;
        }

        /* 为p设置字体颜色,后代元素第一个span就会继承 */
        p{
            color: greenyellow;
        }
    </style>
</head>
<body>
    <p>hello world
        <span>我是第一个span</span>
    </p>

    <span>我是第二个span</span>
</body>
</html>
运行结果如下:
注意:
并不是所有的样式都会被继承
比如背景相关的,布局相关……这些样式都不会被继承。
<!DOCTYPE html>
<html lang="en">
<head>
<meta charset="UTF-8">
<meta http-equiv="X-UA-Compatible" content="IE=edge">
<meta name="viewport" content="width=device-width, initial-scale=1.0">
<title>Document</title>
<style>
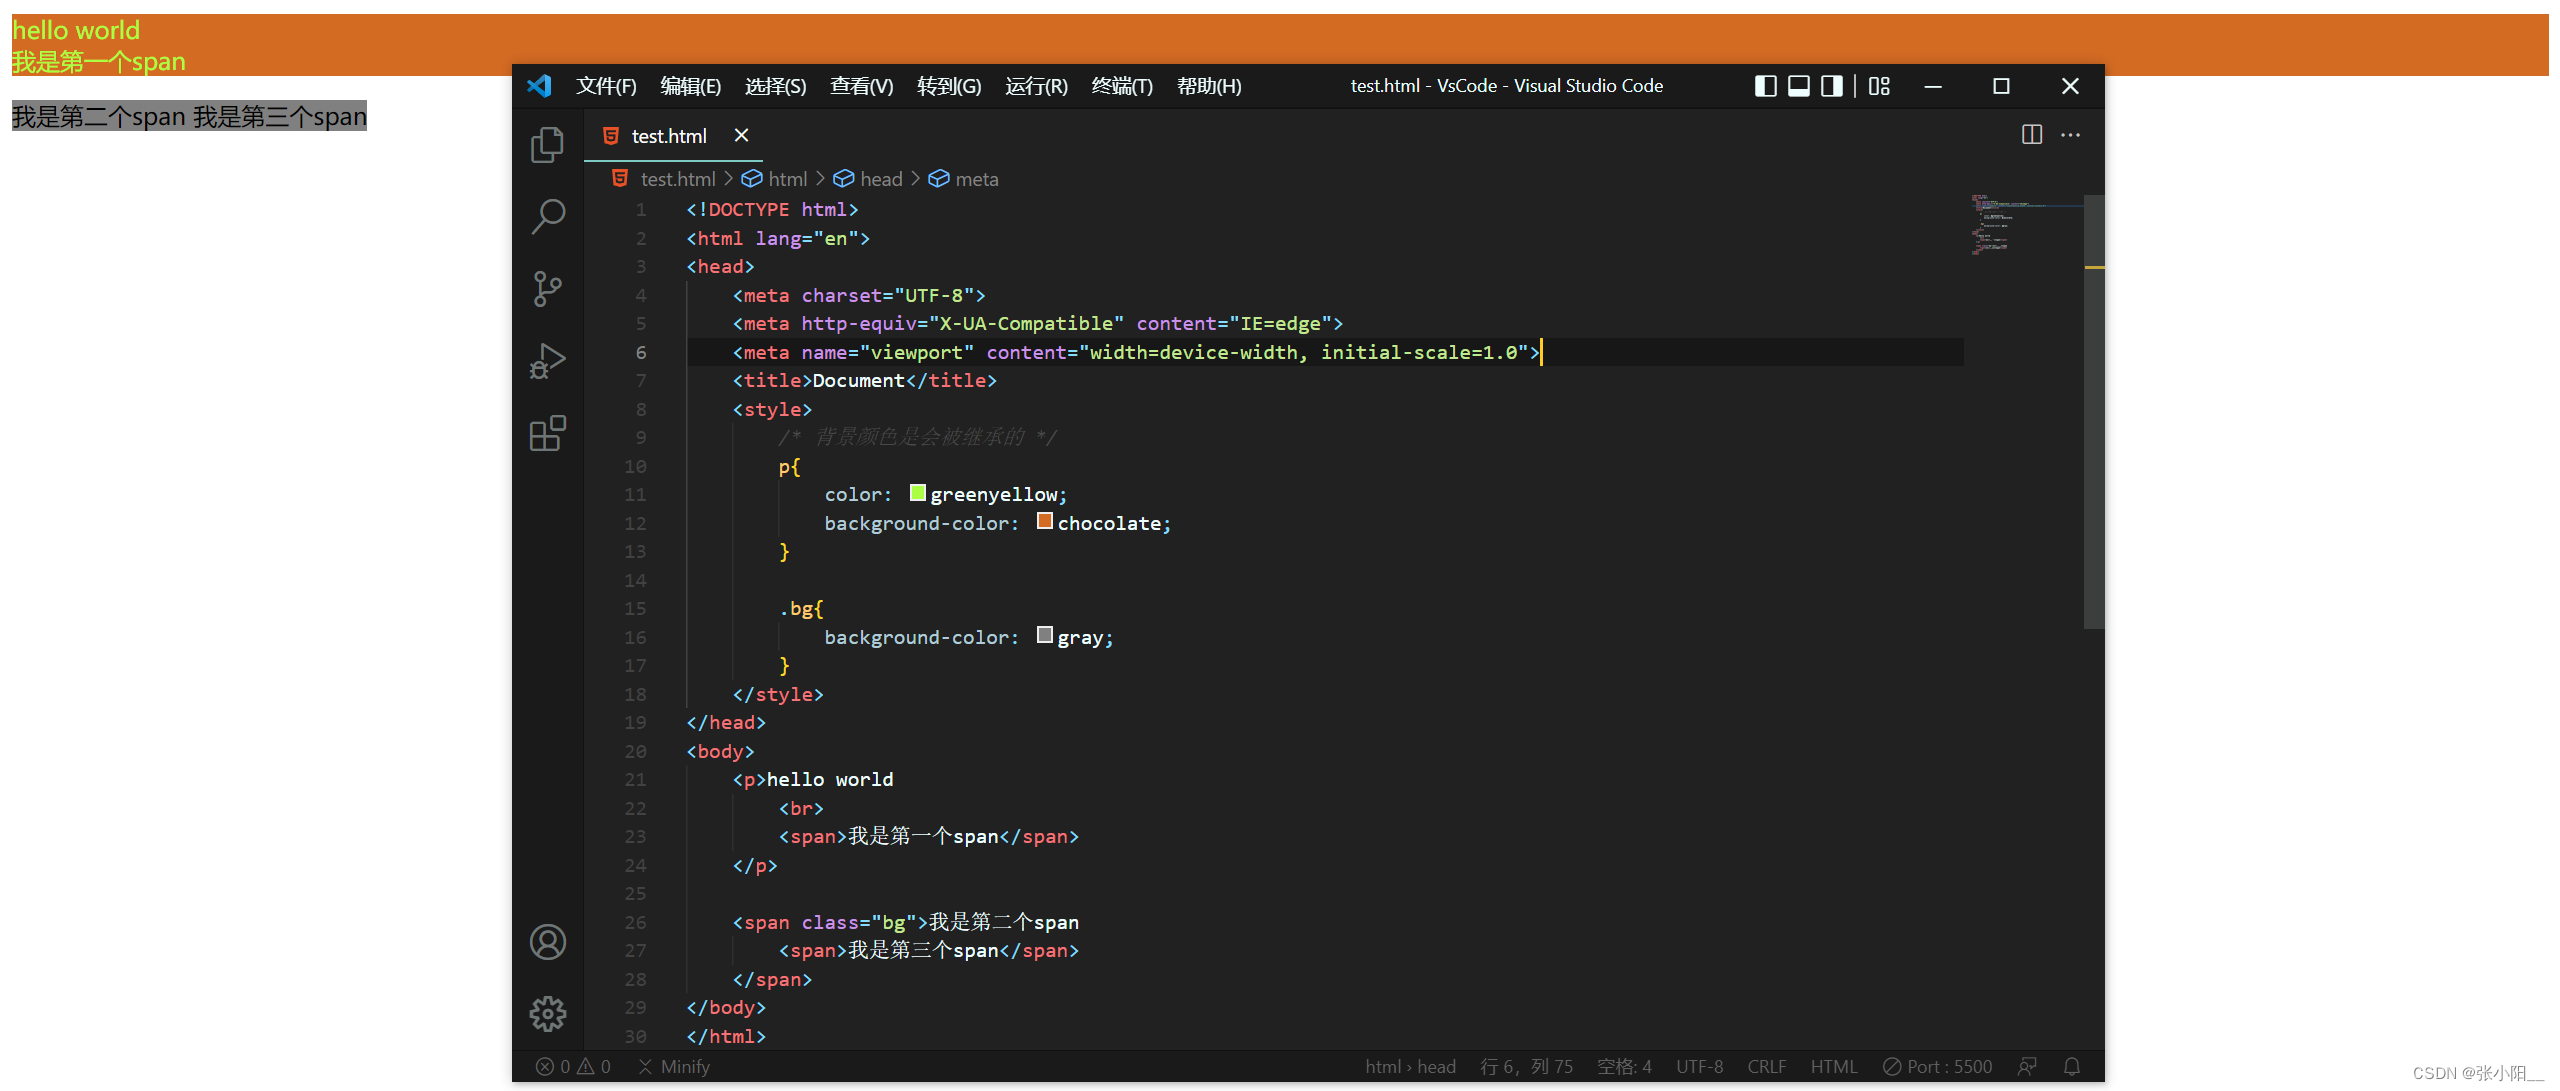
/* 背景颜色是会被继承的 */
p{
color: greenyellow;
background-color: chocolate;
}
.bg{
background-color: gray;
}
</style>
</head>
<body>
<p>hello world
<br>
<span>我是第一个span</span>
</p>
<span class="bg">我是第二个span
<span>我是第三个span</span>
</span>
</body>
</html>运行结果如下:
选择器的权重
样式的冲突
当我们通过不同的选择器,选中相同的元素,并且为相同的样式设置不同的值时,此时就发生了样式的冲突。
发生样式冲突时,应用哪个样式由选择器的权重(优先级)决定
选择器的权重:
- 内联样式
- id选择器
- 类和伪类选择器
- 元素选择器
- 通用选择器
- 继承的样式 (没有优先级)
- 比较优先级时,需要将所有的选择器的优先级进行相加计算,最后优先级越高,则越优先显示(分组选择器是单独计算的)
- 选择器的累加不会超过其最大的数量级,类选择器在高也不会超过id选择器
- 如果优先级计算后相同,此时则优先使用靠下的样式
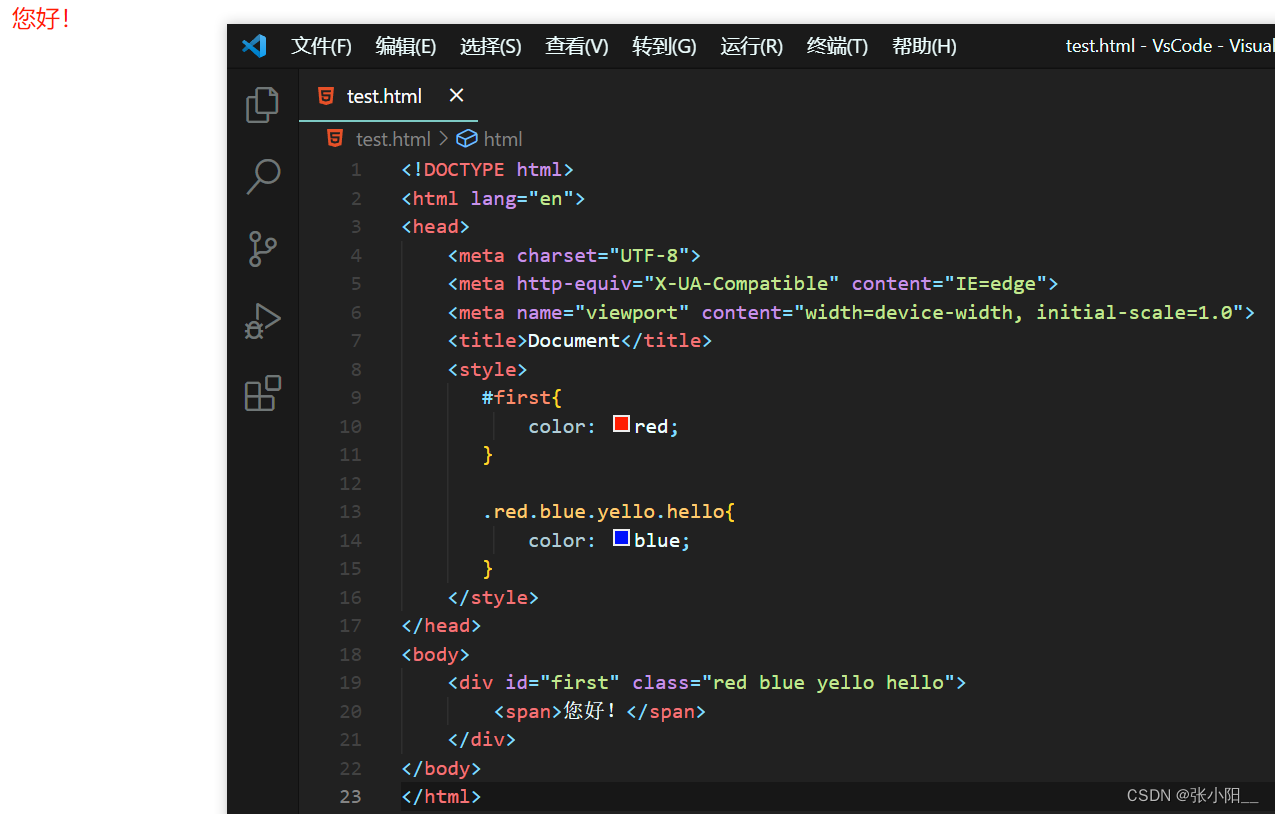
即使同一类相加起来再高,也不会超过其最大级
<!DOCTYPE html>
<html lang="en">
<head>
    <meta charset="UTF-8">
    <meta http-equiv="X-UA-Compatible" content="IE=edge">
    <meta name="viewport" content="width=device-width, initial-scale=1.0">
    <title>Document</title>
    <style>
       #first{
           color: red;
       }

       .red.blue.yello.hello{
           color: blue;
       }
    </style>
</head>
<body>
    <div id="first" class="red blue yello hello">
        <span>您好!</span>
    </div>
</body>
</html>
运行结果如下:
! important
可以在某一个样式的后边添加 ! important ,则此时该样式会获取到最高的优先级,甚至超过内联样式。
注意:在开发中这个一定要慎用!
<!DOCTYPE html>
<html lang="en">
<head>
    <meta charset="UTF-8">
    <meta http-equiv="X-UA-Compatible" content="IE=edge">
    <meta name="viewport" content="width=device-width, initial-scale=1.0">
    <title>Document</title>
    <style>
       #first{
           color: red;
       }

       .red.blue.yello.hello{
           color: blue !important;
       }
    </style>
</head>
<body>
    <div id="first" class="red blue yello hello">
        <span>您好!</span>
    </div>
</body>
</html>
运行结果如下:

像素和百分比
长度单位:
像素
屏幕(显示器)实际上是由一个一个的小点点构成的
不同屏幕的像素大小是不同的,像素越小的屏幕显示的效果越清晰,所以同样的200px在不同的设备下显示效果不一样
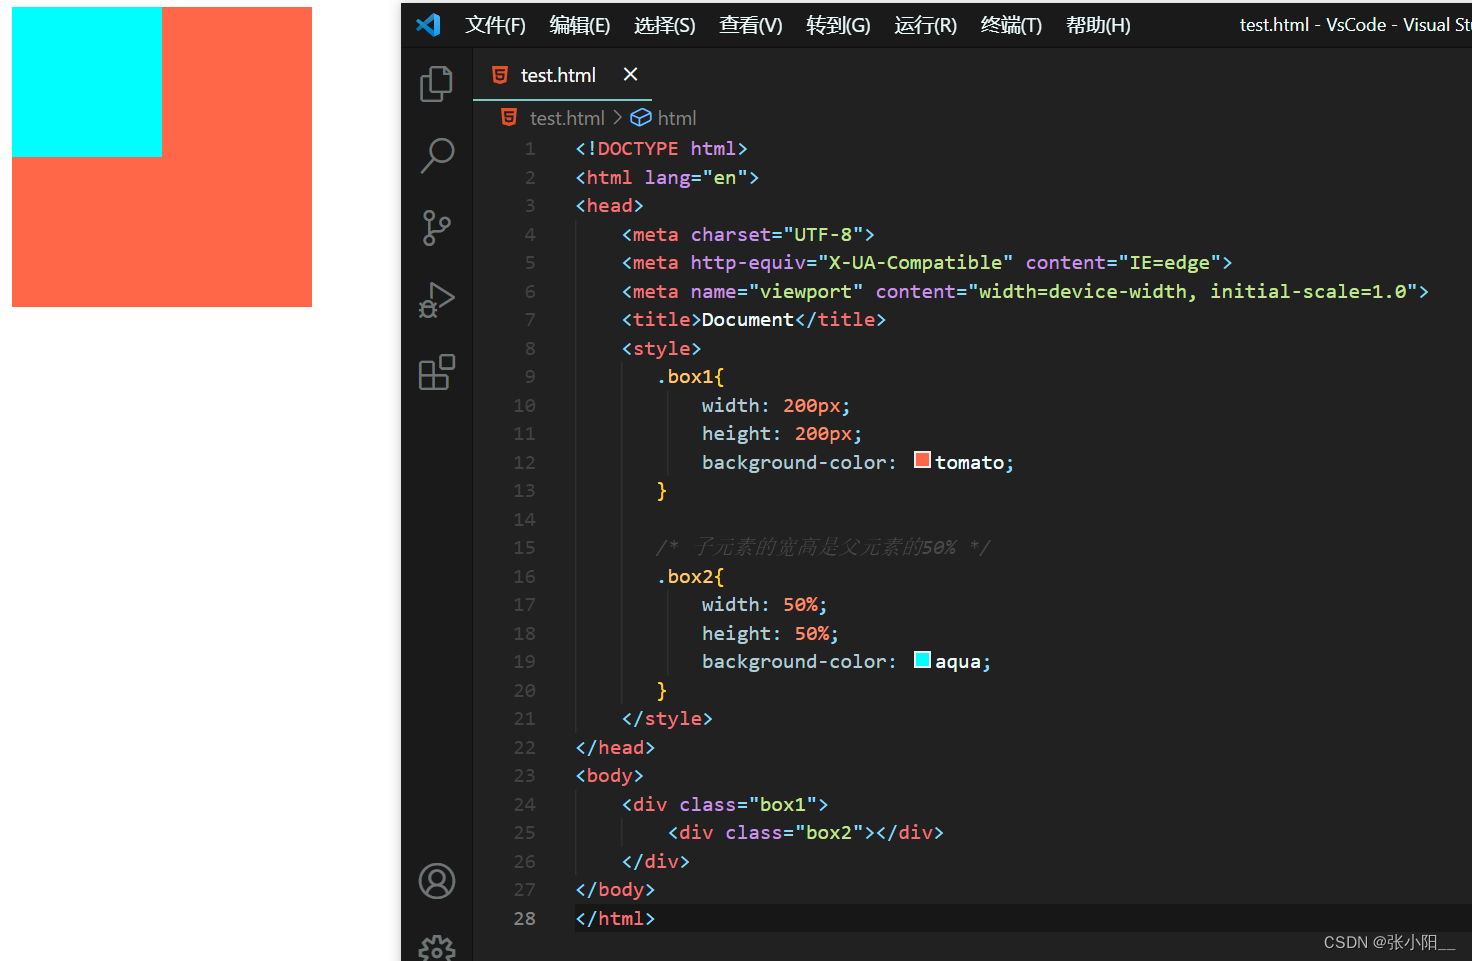
百分比:
也可以将属性值设置为相对于其父元素属性的百分比设置百分比可以使子元素跟随父元素的改变而改变
<!DOCTYPE html>
<html lang="en">
<head>
    <meta charset="UTF-8">
    <meta http-equiv="X-UA-Compatible" content="IE=edge">
    <meta name="viewport" content="width=device-width, initial-scale=1.0">
    <title>Document</title>
    <style>
       .box1{
           width: 200px;
           height: 200px;
           background-color: tomato;
       }

       /* 子元素的宽高是父元素的50% */
       .box2{
           width: 50%;
           height: 50%;
           background-color: aqua;
       }
    </style>
</head>
<body>
    <div class="box1">
        <div class="box2"></div>
    </div>
</body>
</html>
运行结果如下:
em 与 rem
em
-
em是相对于元素的字体大小来计算的
-
1em = 1 font-size
-
em会根据字体大小的改变而改变
rem
- rem是相对于根元素(html)的字体大小来计算
<!DOCTYPE html>
<html lang="en">
<head>
    <meta charset="UTF-8">
    <meta http-equiv="X-UA-Compatible" content="IE=edge">
    <meta name="viewport" content="width=device-width, initial-scale=1.0">
    <title>Document</title>
    <style>
       .box1{
           font-size: 20px;
           /* 相当于 20em*20px=400px */
           width: 20em;
           /* 15em*20px=300px */
           height: 15em;
           background-color: chocolate;
       }

    </style>
</head>
<body>
    <div class="box1">
    </div>
</body>
</html>
运行结果如下: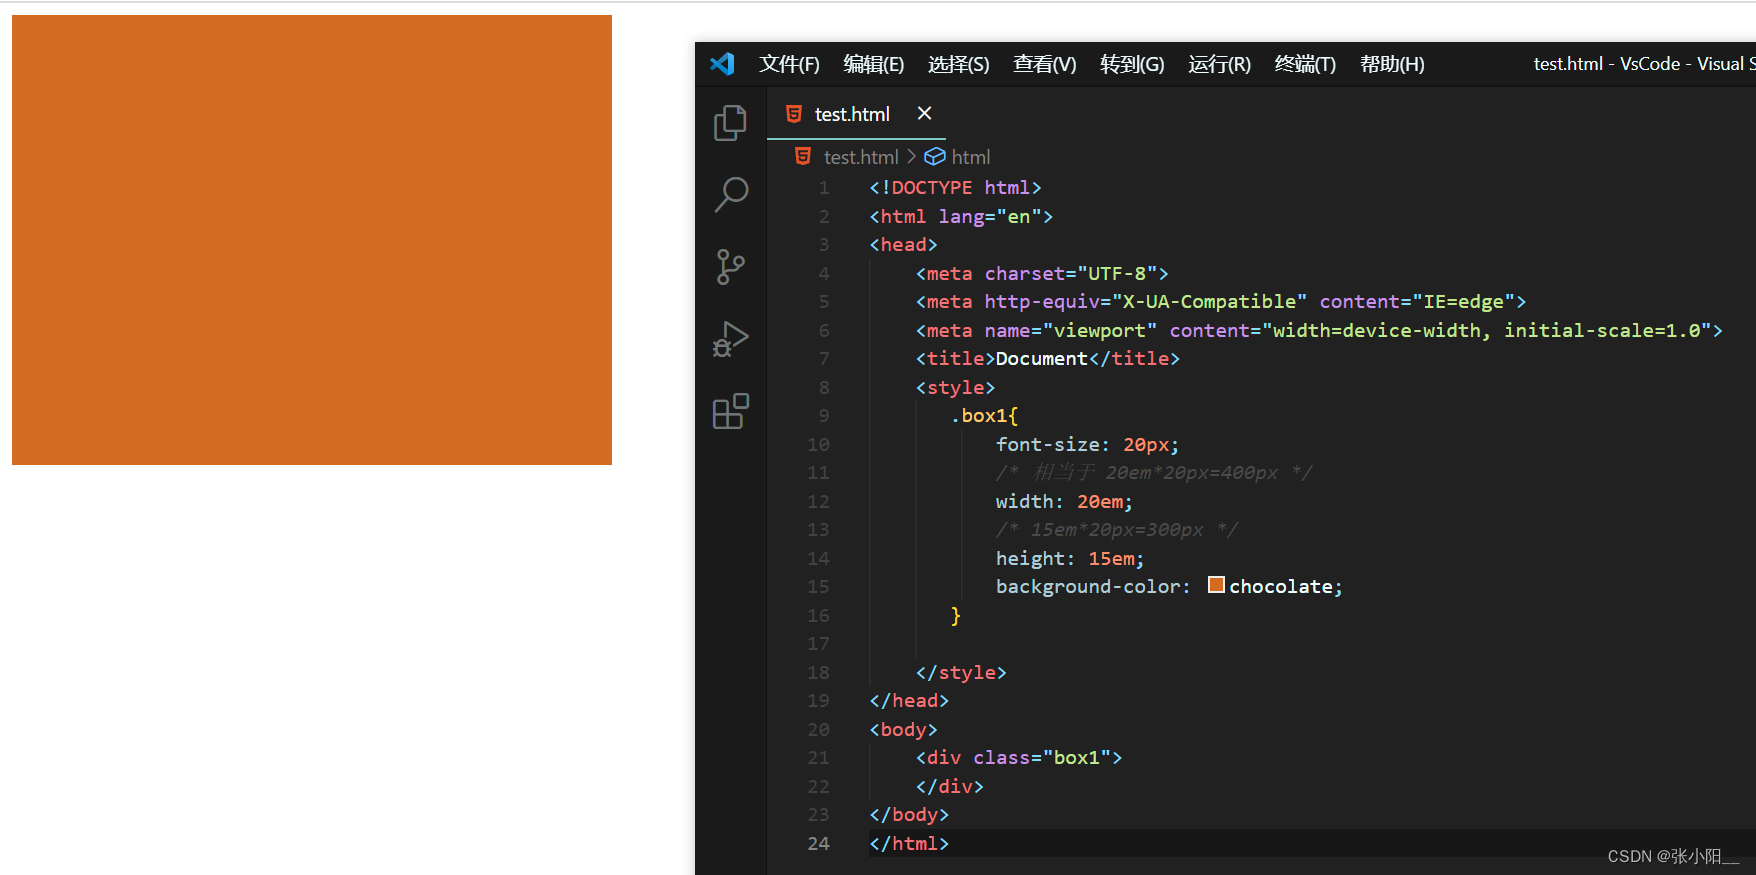
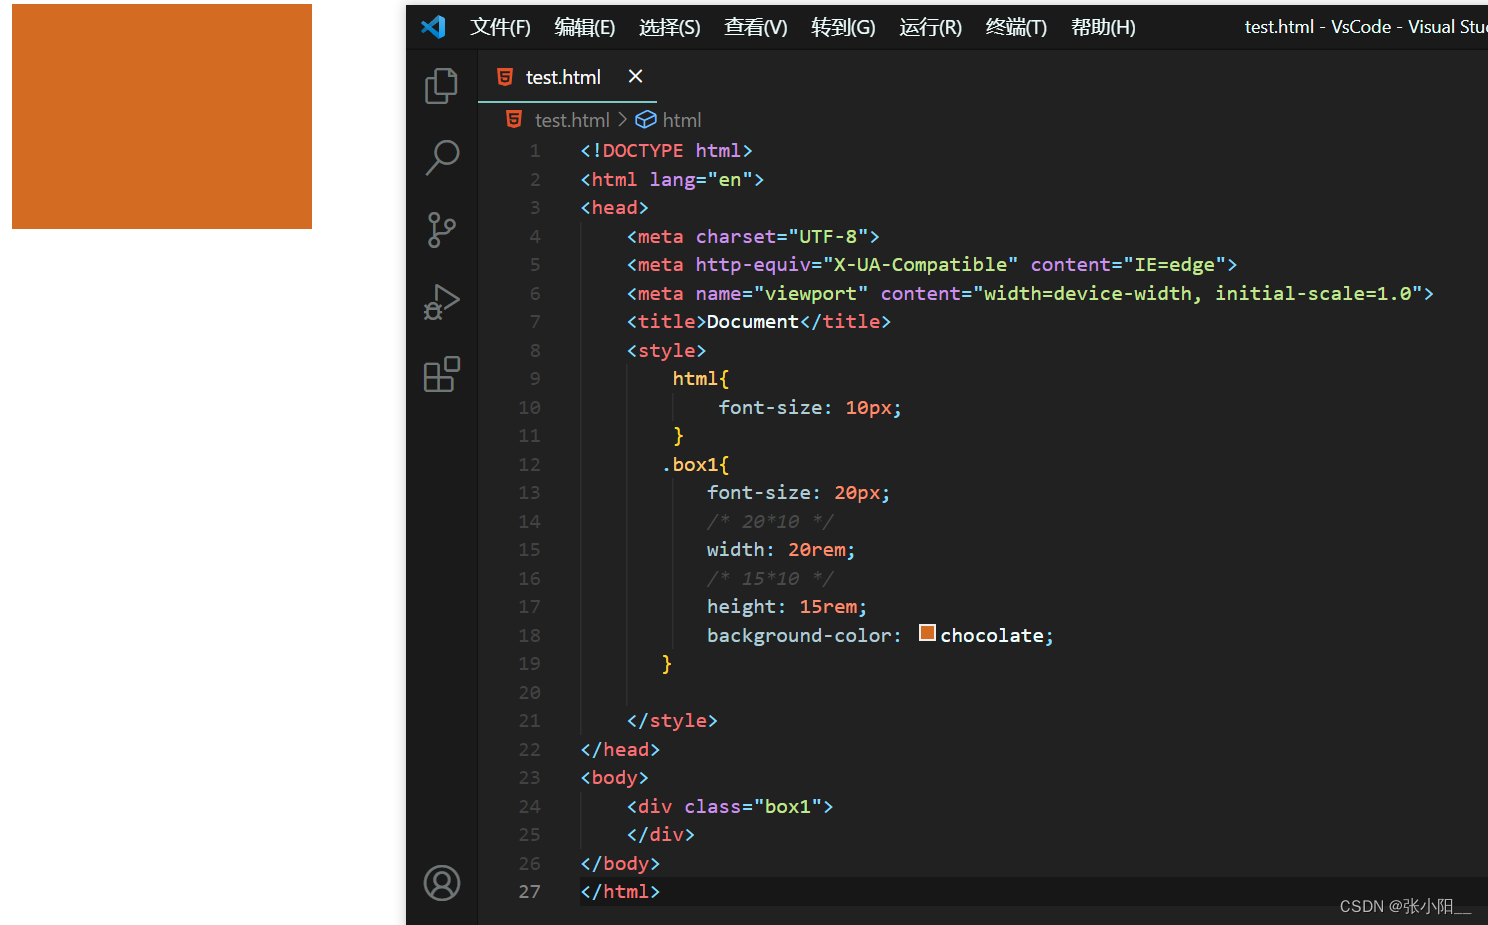
<!DOCTYPE html>
<html lang="en">
<head>
    <meta charset="UTF-8">
    <meta http-equiv="X-UA-Compatible" content="IE=edge">
    <meta name="viewport" content="width=device-width, initial-scale=1.0">
    <title>Document</title>
    <style>
        html{
            font-size: 10px;
        }
       .box1{
           font-size: 20px;
           /* 20*10 */
           width: 20rem;
           /* 15*10 */
           height: 15rem;
           background-color: chocolate;
       }

    </style>
</head>
<body>
    <div class="box1">
    </div>
</body>
</html>
运行结果如下:
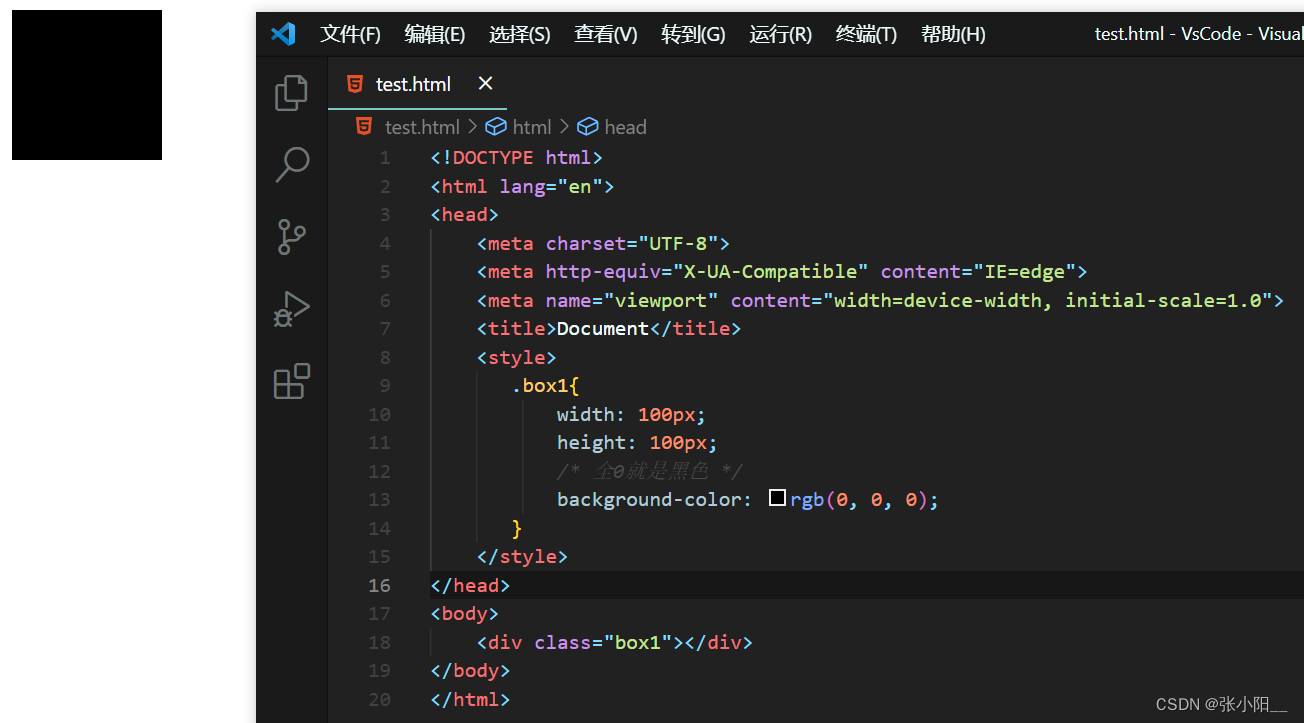
RGB值
RGB
- RGB通过三种颜色的不同浓度来调配出不同的颜色
- R red, G green, B blue
- 每一种颜色的范围在0 ~ 255 (0% - 100%)之间
- 语法: RGB(红色, 绿色, 蓝色)
<!DOCTYPE html>
<html lang="en">
<head>
    <meta charset="UTF-8">
    <meta http-equiv="X-UA-Compatible" content="IE=edge">
    <meta name="viewport" content="width=device-width, initial-scale=1.0">
    <title>Document</title>
    <style>
       .box1{
           width: 100px;
           height: 100px;
           /* 全0就是黑色 */
           background-color: rgb(0, 0, 0);
       }
    </style>
</head>
<body>
    <div class="box1"></div>
</body>
</html>
运行结果如下:
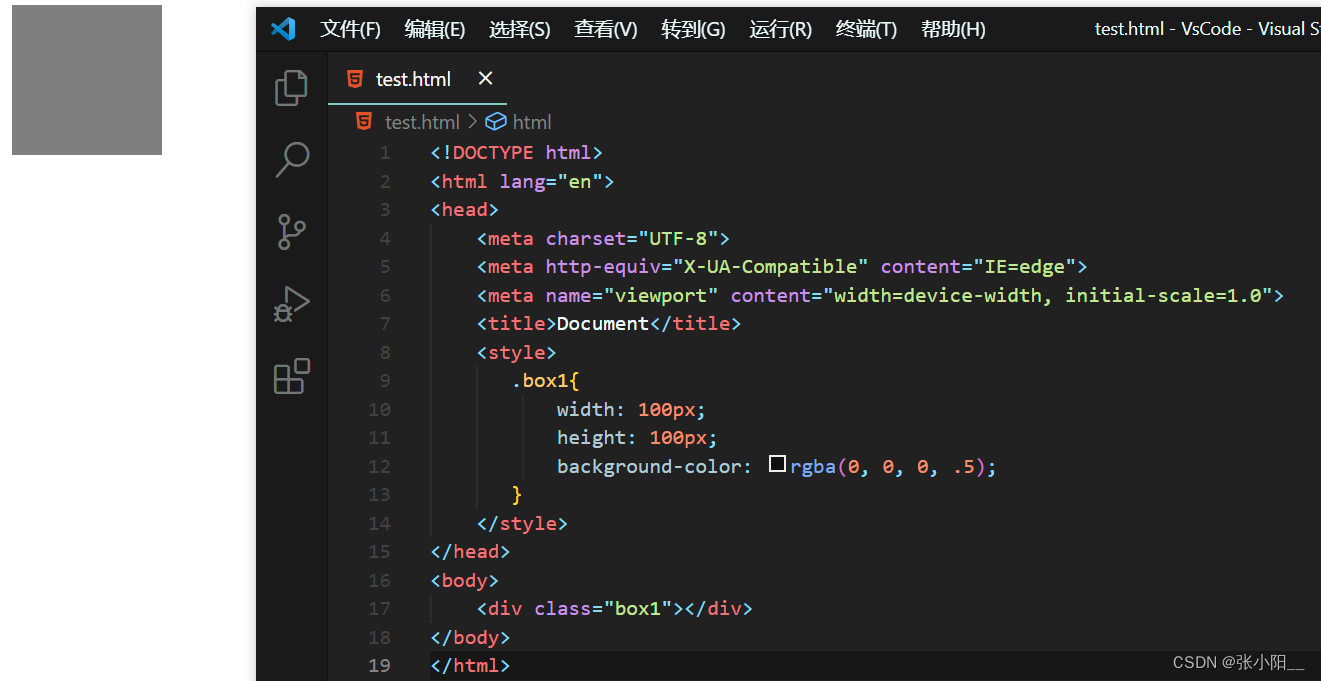
RGBA
- 就是在rgb的基础上增加了一个a,a表示不透明度
- 需要四个值,前三个和rgb一样,第四个表示不透明度
- 1表示完全不透明,0表示完全透明,.5半透明
<!DOCTYPE html>
<html lang="en">
<head>
    <meta charset="UTF-8">
    <meta http-equiv="X-UA-Compatible" content="IE=edge">
    <meta name="viewport" content="width=device-width, initial-scale=1.0">
    <title>Document</title>
    <style>
       .box1{
           width: 100px;
           height: 100px;
           background-color: rgba(0, 0, 0, .5);
       }
    </style>
</head>
<body>
    <div class="box1"></div>
</body>
</html>
运行结果如下:
十六进制的RGB值
- 语法:#红色绿色蓝色
- 颜色浓度用 00~ ff 调整
- 如果颜色两位两位重复可以进行简写
例如:
#aabbcc > #abc
#aabbce 不可简写
hsl
hsl值 与 hsla值
- h色相(0 - 360)
- s饱和度,颜色的浓度0% -100%
- l亮度,颜色的亮度0%-100%
- a不透明度
<!DOCTYPE html>
<html lang="en">
<head>
    <meta charset="UTF-8">
    <meta http-equiv="X-UA-Compatible" content="IE=edge">
    <meta name="viewport" content="width=device-width, initial-scale=1.0">
    <title>Document</title>
    <style>
       .box1{
           width: 100px;
           height: 100px;
           /* 色相、饱和度、亮度、不透明度 */
           background-color: hsla(50, 60%, 70%, .5);
       }
    </style>
</head>
<body>
    <div class="box1"></div>
</body>
</html>
望大牛指点,更新中…


 5254
5254


 被折叠的 条评论
为什么被折叠?
被折叠的 条评论
为什么被折叠?
 到【灌水乐园】发言


