


目录
一、Sentinel
中文文档:https://github.com/alibaba/Sentinel/wiki/%E4%BB%8B%E7%BB%8D
 理解为Hystrix的加强版即可
下载地址:https://github.com/alibaba/Sentinel/releases
Spring Cloud Alibaba Reference Documentation (spring-cloud-alibaba-group.github.io)
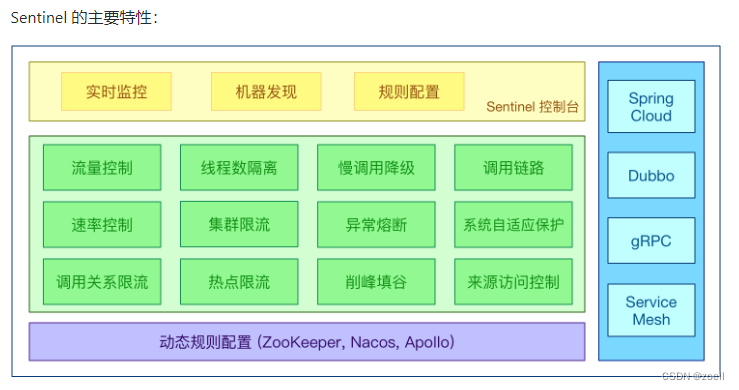
解决服务使用中的各种问题:
服务雪崩、服务降级、服务熔断、服务限流
二、安装Sentinel控制台
(一)sentinel组件由2部分构成
后台以及前台8080
(二)安装步骤
下载地址:https://github.com/alibaba/Sentinel/releases
下载到本地sentinel-dashboard-1.7.0.jar
前提:java8环境OK 8080端口不能被占用
以jar包方式运行
java -jar sentinel-dashboard-1.7.0.jar
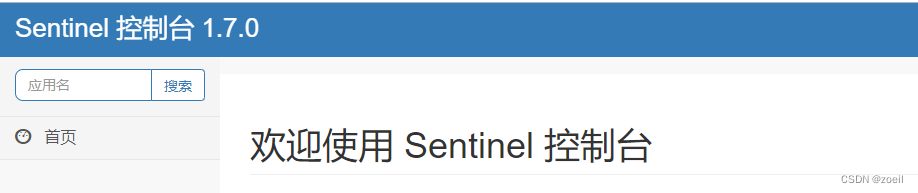
访问sentinel管理界面
登录账号密码均为sentinel
三、初始化演示工程
nacos要先启动成功
新建module cloudalibaba-sentinel-service8401
POM
<dependencies>
        <!--SpringCloud ailibaba nacos -->
        <dependency>
            <groupId>com.alibaba.cloud</groupId>
            <artifactId>spring-cloud-starter-alibaba-nacos-discovery</artifactId>
        </dependency>
        <!--SpringCloud ailibaba sentinel-datasource-nacos 后续做持久化用到-->
        <dependency>
            <groupId>com.alibaba.csp</groupId>
            <artifactId>sentinel-datasource-nacos</artifactId>
        </dependency>
        <!--SpringCloud ailibaba sentinel -->
        <dependency>
            <groupId>com.alibaba.cloud</groupId>
            <artifactId>spring-cloud-starter-alibaba-sentinel</artifactId>
        </dependency>
        <!--openfeign-->
        <dependency>
            <groupId>org.springframework.cloud</groupId>
            <artifactId>spring-cloud-starter-openfeign</artifactId>
        </dependency>
        <!-- SpringBoot整合Web组件+actuator -->
        <dependency>
            <groupId>org.springframework.boot</groupId>
            <artifactId>spring-boot-starter-web</artifactId>
        </dependency>
        <dependency>
            <groupId>org.springframework.boot</groupId>
            <artifactId>spring-boot-starter-actuator</artifactId>
        </dependency>
        <!--日常通用jar包配置-->
        <dependency>
            <groupId>org.springframework.boot</groupId>
            <artifactId>spring-boot-devtools</artifactId>
            <scope>runtime</scope>
            <optional>true</optional>
        </dependency>
        <dependency>
            <groupId>cn.hutool</groupId>
            <artifactId>hutool-all</artifactId>
            <version>4.6.3</version>
        </dependency>
        <dependency>
            <groupId>org.projectlombok</groupId>
            <artifactId>lombok</artifactId>
            <optional>true</optional>
        </dependency>
        <dependency>
            <groupId>org.springframework.boot</groupId>
            <artifactId>spring-boot-starter-test</artifactId>
            <scope>test</scope>
        </dependency>

    </dependencies>
YML
server:
  port: 8401

spring:
  application:
    name: cloudalibaba-sentinel-service
  cloud:
    nacos:
      discovery:
        #Nacos服务注册中心地址
        server-addr: localhost:8848
    sentinel:
      transport:
        #配置Sentinel dashboard地址
        dashboard: localhost:8080
        #默认8719端口,假如被占用会自动从8719开始依次+1扫描,直至找到未被占用的端口
        port: 8719

management:
  endpoints:
    web:
      exposure:
        include: '*'
主启动
@EnableDiscoveryClient
@SpringBootApplication
public class MainApp8401
{
    public static void main(String[] args) {
        SpringApplication.run(MainApp8401.class, args);
    }
}
业务类FlowLimitController
@RestController
public class FlowLimitController
{
@GetMapping("/testA")
public String testA()
{
return "------testA";
}
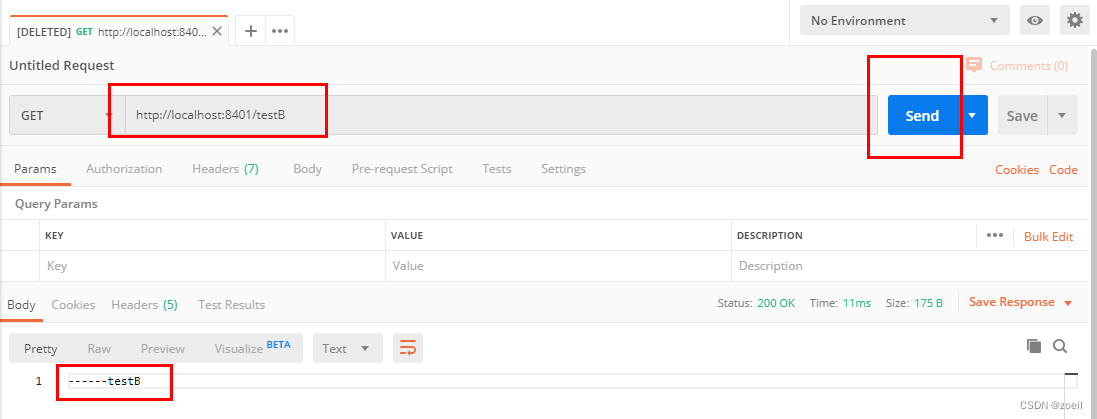
@GetMapping("/testB")
public String testB()
{
return "------testB";
}
}
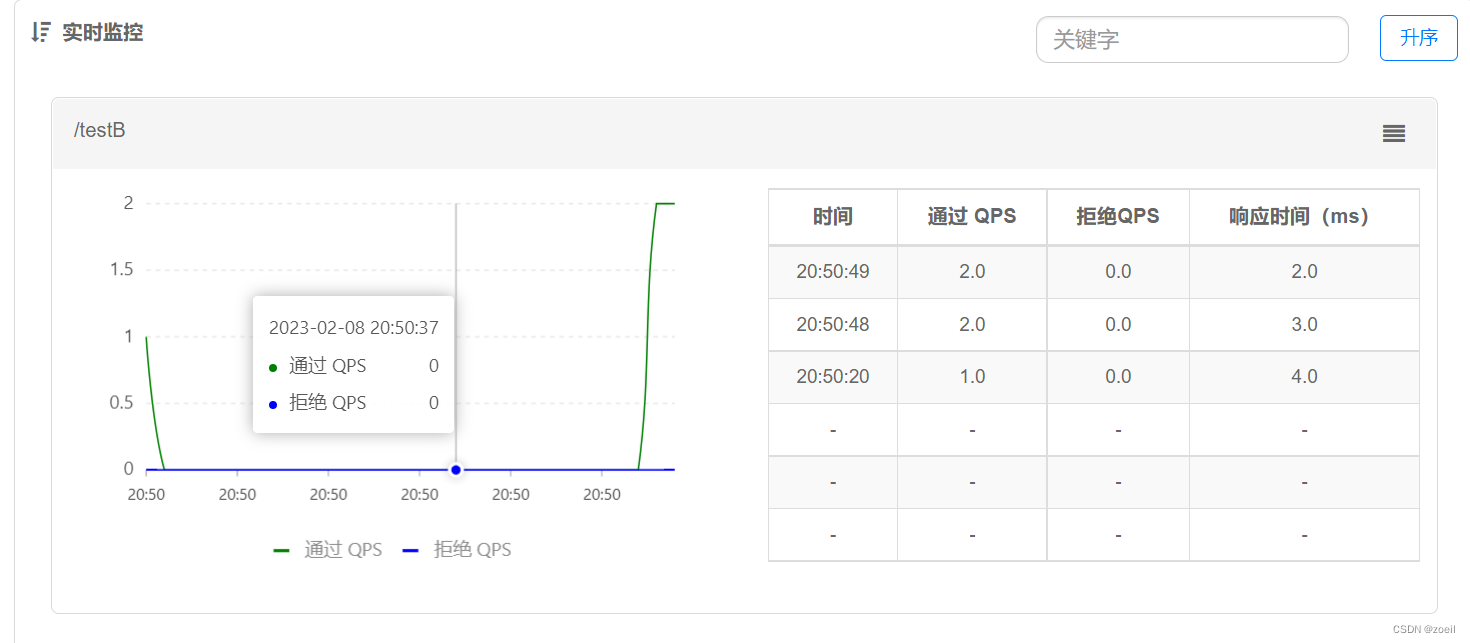
启动Sentinel8080后启动该微服务
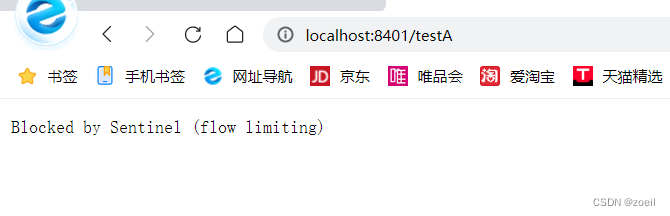
因为Sentinel采用的是懒加载方式,所以我们需要先访问微服务的方法,Sentinel控制台才会出现监控
四、流控模式
基本介绍
(一)快速失败
快速失败(QPS)
快速失败(线程)
这里使线程睡眠模仿业务
    @GetMapping("/testA")
    public String testA()
    {
        try {
            TimeUnit.MILLISECONDS.sleep(1000);
        } catch (Exception e) {
            System.out.println(e);
        }
        return "------testA";
    }
开两个页面访问,当一个页面业务未解决完毕,别的线程被限流
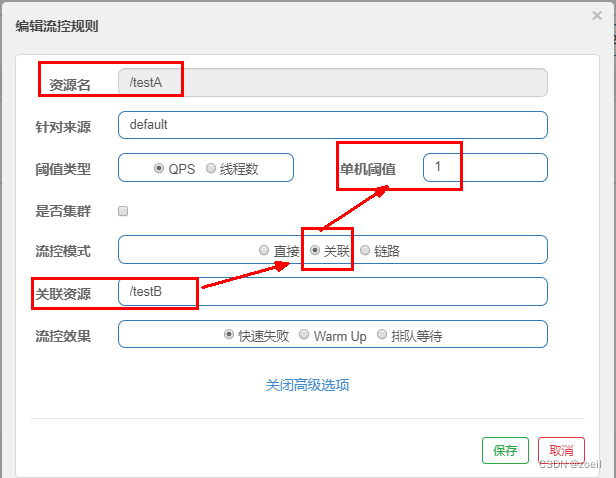
(二)关联资源
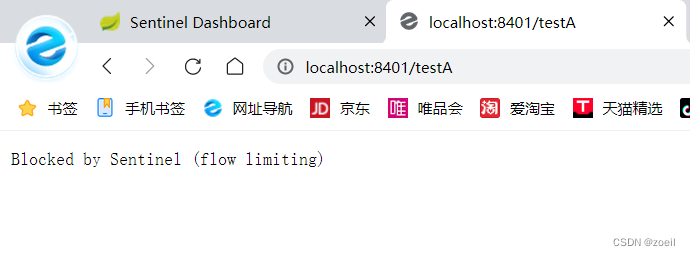
当关联的资源达到阈值时,就限流自己。比如,当与订单接口关联的资源支付接口达到阀值后,就限流订单接口自己
设置效果
当关联资源/testB的qps阀值超过1时,就限流/testA的Rest访问地址,当关联资源到阈值后限制配置好的资源名
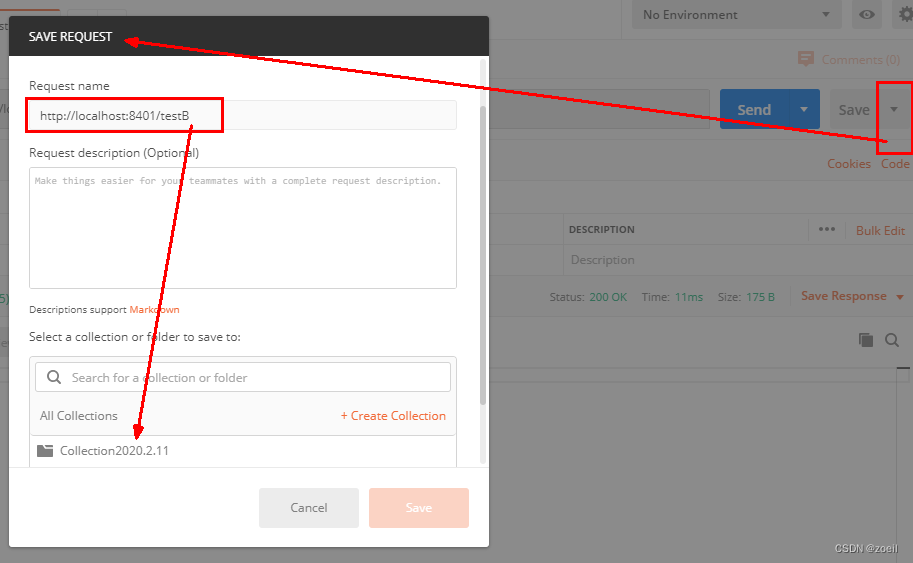
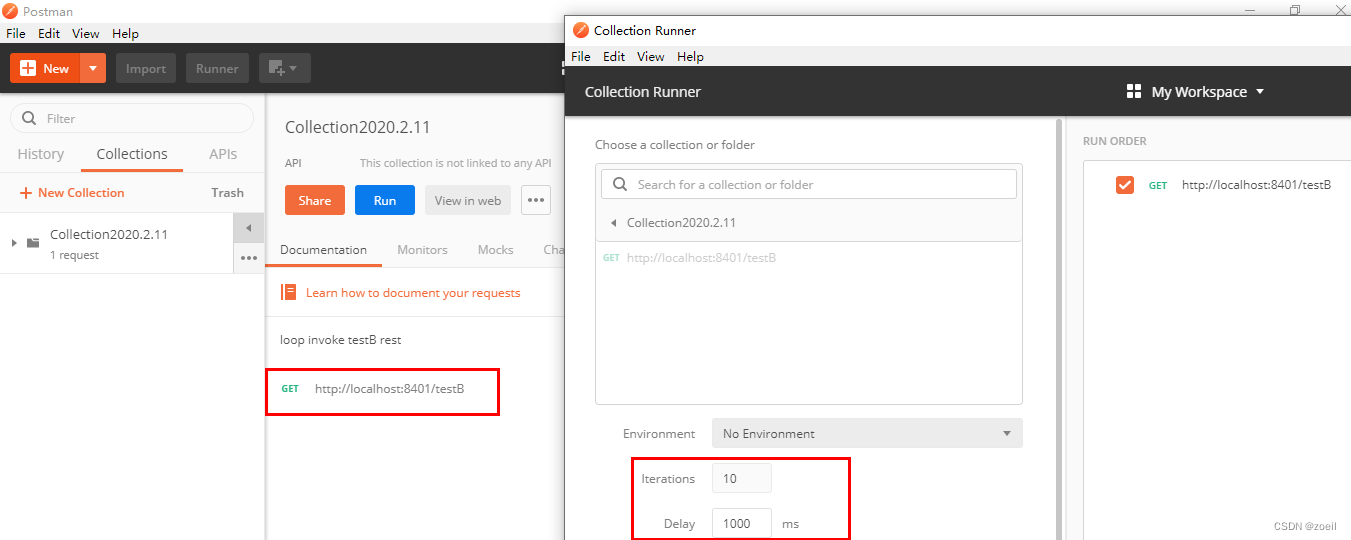
使用postman模拟并发密集访问testB
先测试访问testB成功,这里要点击一下save保存请求内容
postman里新建多线程集合组
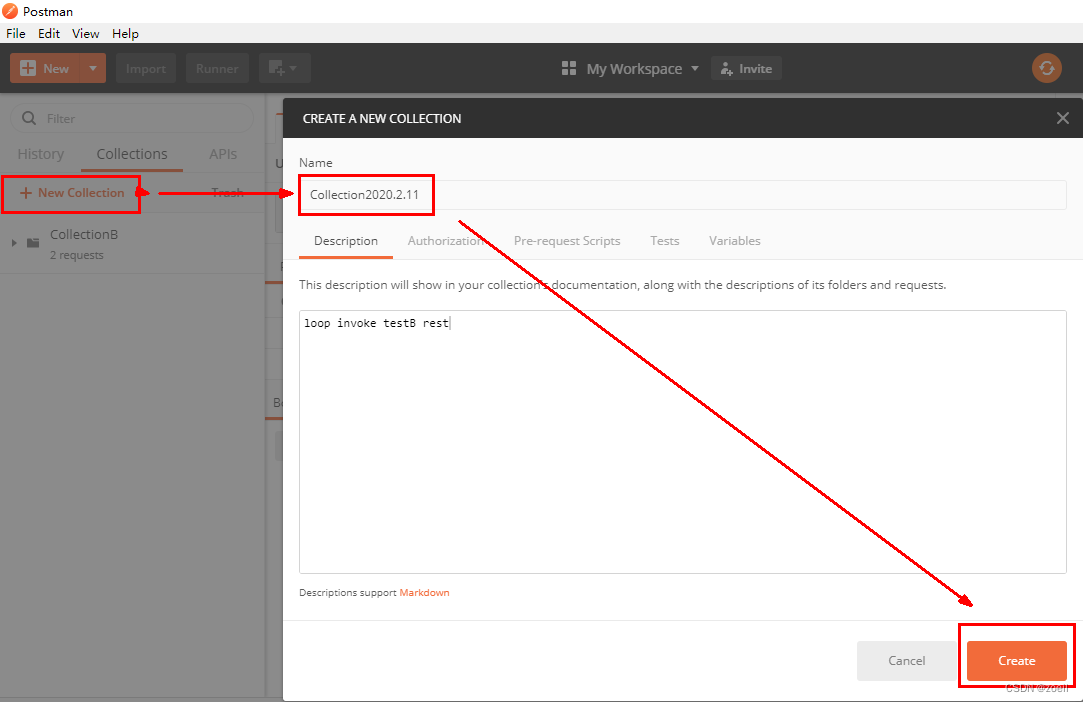
将访问地址添加进新新线程组
Run

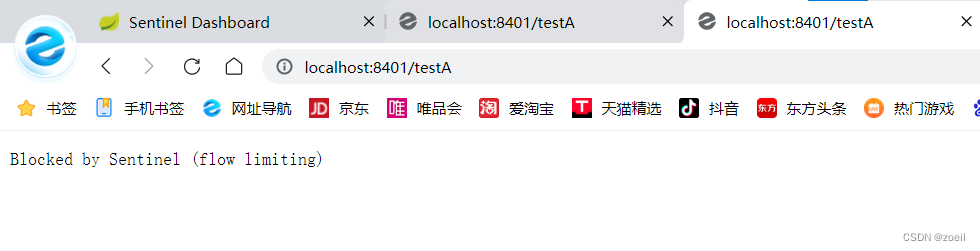
A被限流了
(三)链路
链路:阈值统计时,只统计从指定资源进入当前资源的请求,是对请求来源的限流
Sentinel 链路流控模式失效 · Issue #1213 · alibaba/Sentinel (github.com)
(四)预热(Warm Up)
官网:流量控制 · alibaba/Sentinel Wiki (github.com)
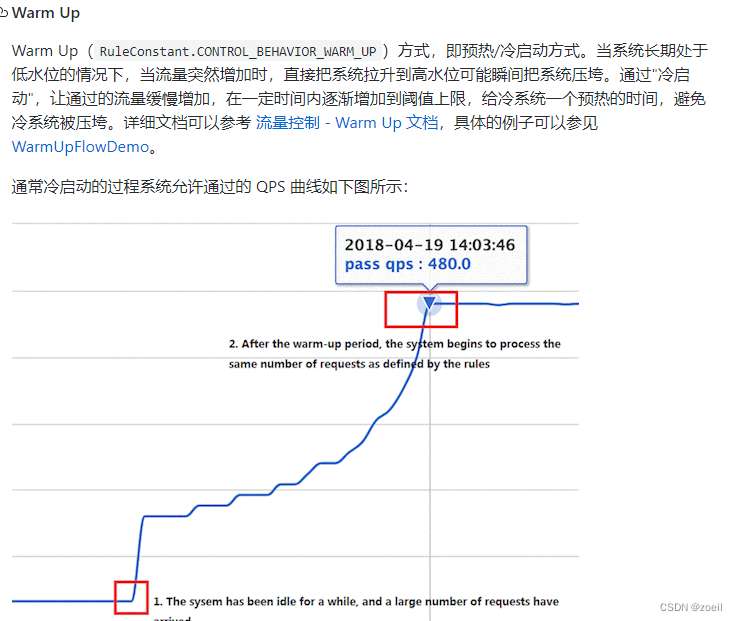
解释:默认coldFactor为3,即请求 QPS 从 threshold / 3 开始,经预热时长逐渐升至设定的 QPS 阈值。
案例,阀值为10+预热时长设置5秒。
系统初始化的阀值为10 / 3 约等于3,即阀值刚开始为3;然后过了5秒后阀值才慢慢升高恢复到10

应用场景
秒杀系统在开启的瞬间,会有很多流量上来,很有可能把系统打死,预热方式就是把为了保护系统,可慢慢的把流量放进来,慢慢的把阀值增长到设置的阀值。
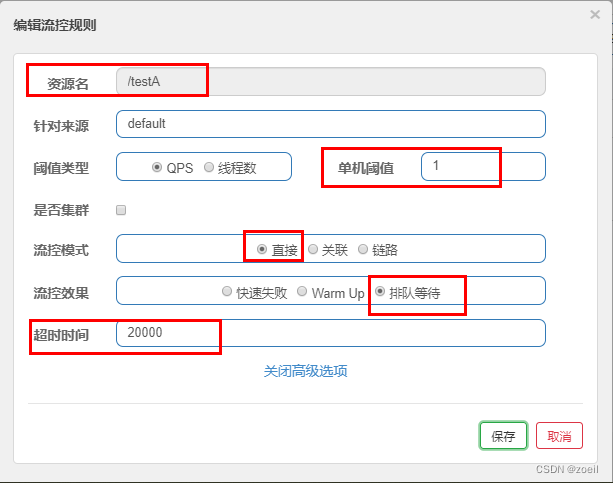
(五)排队等待
匀速排队,阈值必须设置为QPS
官网
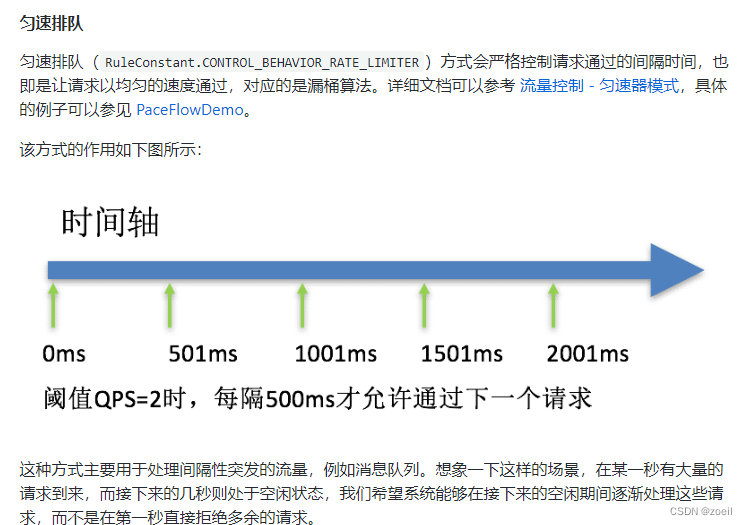
设置含义:/testA每秒1次请求,超过的话就排队等待,等待的超时时间为20000毫秒。
测试


 2490
2490


 被折叠的 条评论
为什么被折叠?
被折叠的 条评论
为什么被折叠?
 到【灌水乐园】发言


