


目录
7.5 BeanFactory和FactoryBean的区别 【工作面试题!!!】
这种情况下,我们就可以使用FactoryBean来完成这个骚操作。
编写DateFactoryBean实现FactoryBean接口:
bean的单例与多例 设置
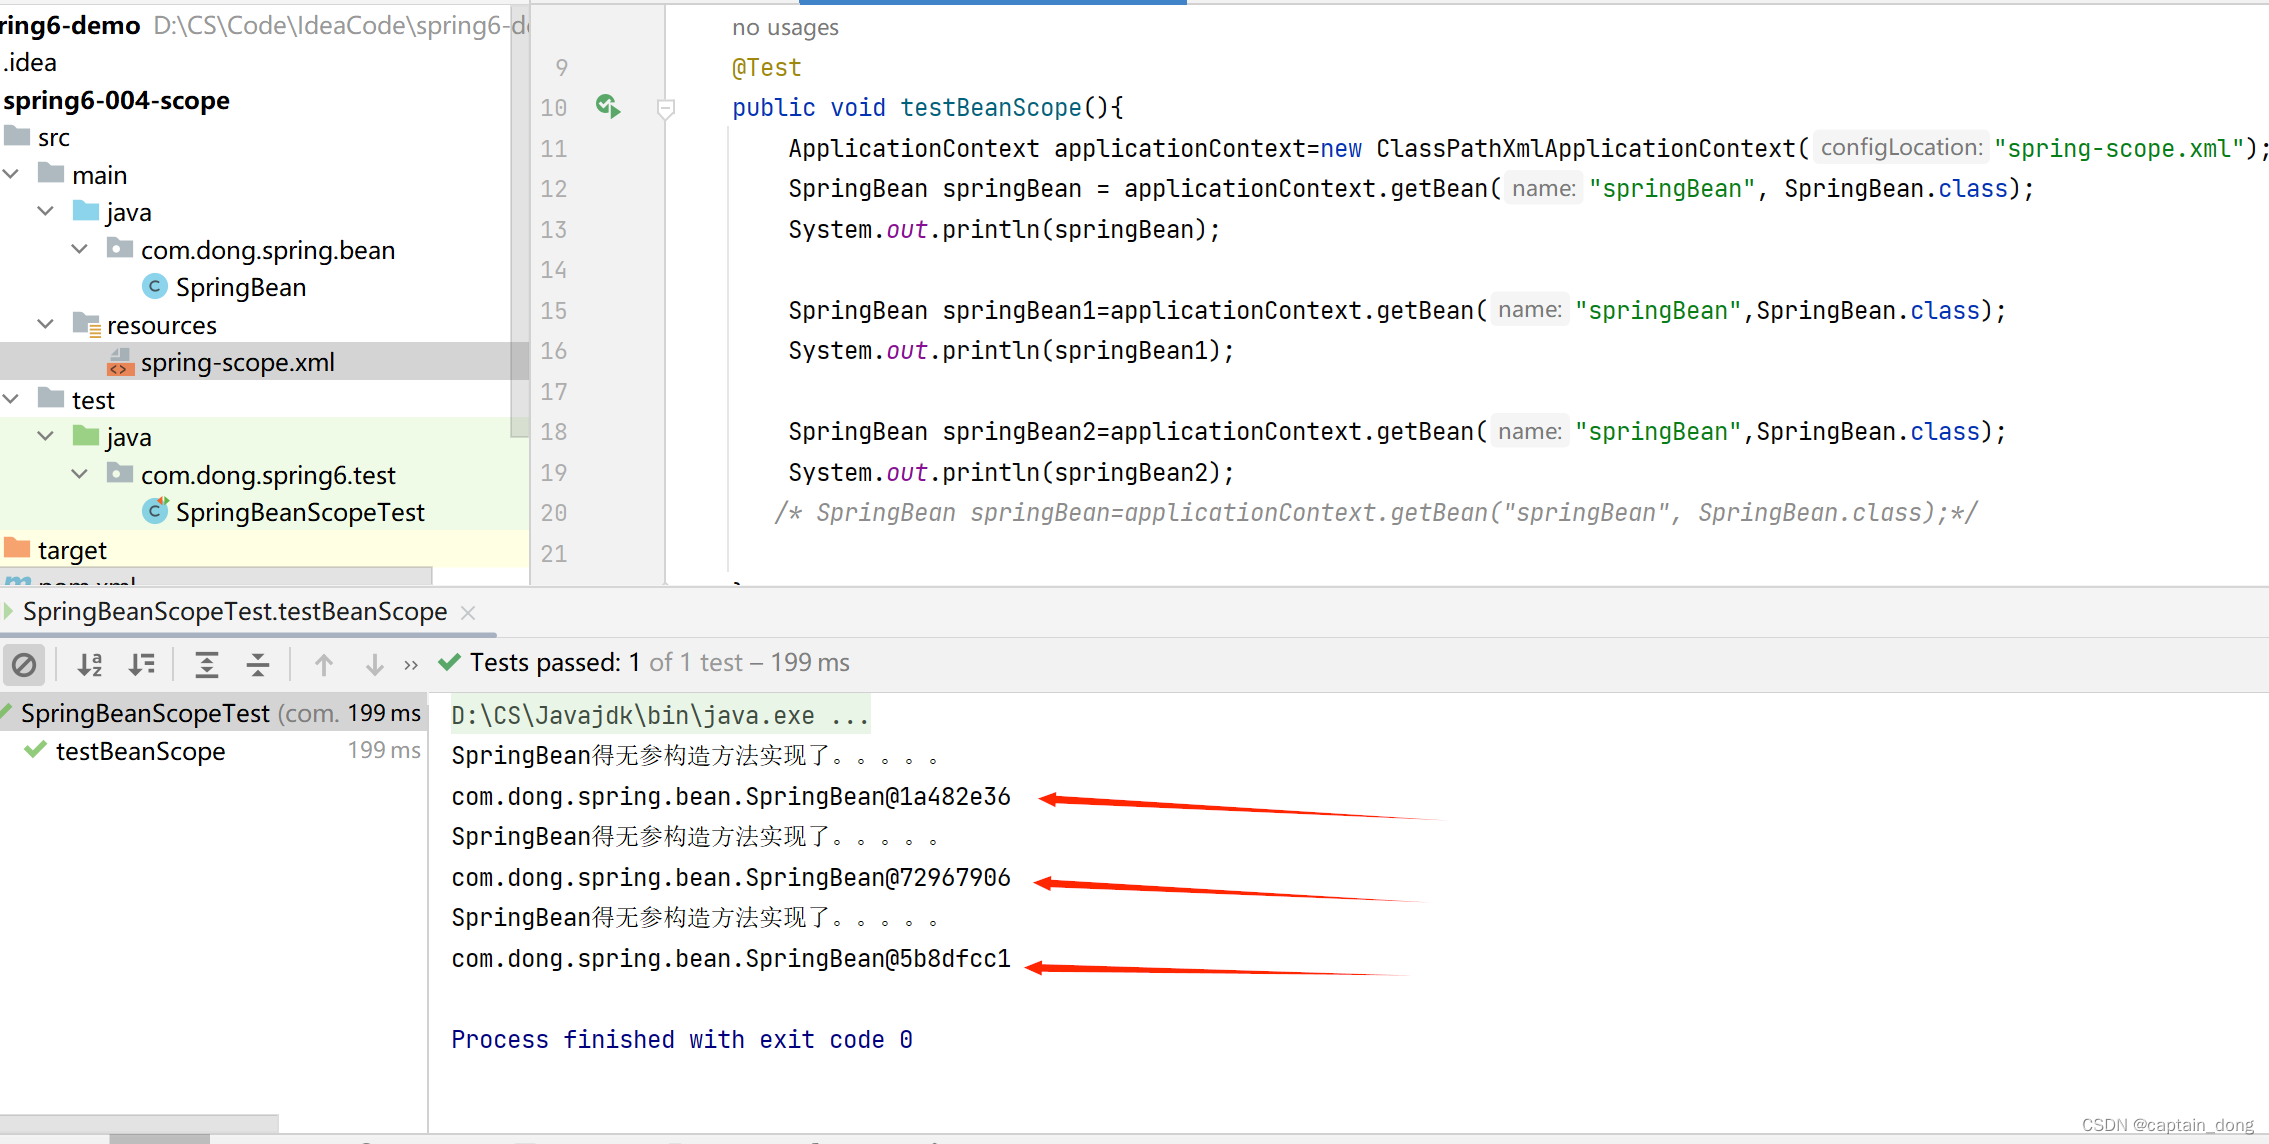
bean的单例与多例 设置 scope属性设置:默认singleton 多例:prototype


默认下:【启动容器的时候就创建对象了】

设置
scope为:prototype【启动容器的时候不会创建对象】【在调getBean才创建】

scope 还有多个值:


工厂模式的三种形态
工厂模式通常有三种形态:
- 第一种:简单工厂模式(Simple Factory):不属于23种设计模式之一。简单工厂模式又叫做:静态 工厂方法模式。简单工厂模式是工厂方法模式的一种特殊实现。
- 第二种:工厂方法模式(Factory Method):是23种设计模式之一。
- 第三种:抽象工厂模式(Abstract Factory):是23种设计模式之一。
简单工厂模式
简单工厂模式的角色包括三个:
- 抽象产品 角色
- 具体产品 角色
- 工厂类 角色
代码:
package com.dong.factory;

/**
 * 抽象产品角色
 */
public abstract class Weapon {
    public abstract void attack();
}
package com.dong.factory;

/**
 * 具体产品角色
 */
public class Tank extends Weapon{

    public void attack() {
        System.out.println("坦克开炮!!!!!");
    }
}
package com.dong.factory;

/**
 * 具体产品角色
 */
public class Warcraft extends Weapon{

    public void attack() {
        System.out.println("战斗机扔下小男孩!!!!!");
    }
}
package com.dong.factory;

/**
 * 工厂类角色
 */
public class WeaponFactory {
    public static Weapon get(String weaponType){
        if (weaponType==null||weaponType.trim().length()==0) {
            return null;
        }
        Weapon weapon=null;
        if ("TANK".equals(weaponType)){
            weapon=new Tank();
        } else if ("WARCRAFT".equals(weaponType)) {
            weapon=new Warcraft();
        }else {
            throw new RuntimeException("不⽀持该武器!");
        }
        return weapon;
    }
}
package com.dong.factory;

/**
 * 客户端程序
 */
public class Test {
    public static void main(String[] args) {
        Weapon weapon=WeaponFactory.get("TANK");
        weapon.attack();
        Weapon weapon1=WeaponFactory.get("WARCRAFT");
        weapon1.attack();
    }
}
运行结果:

总结:


工厂模式
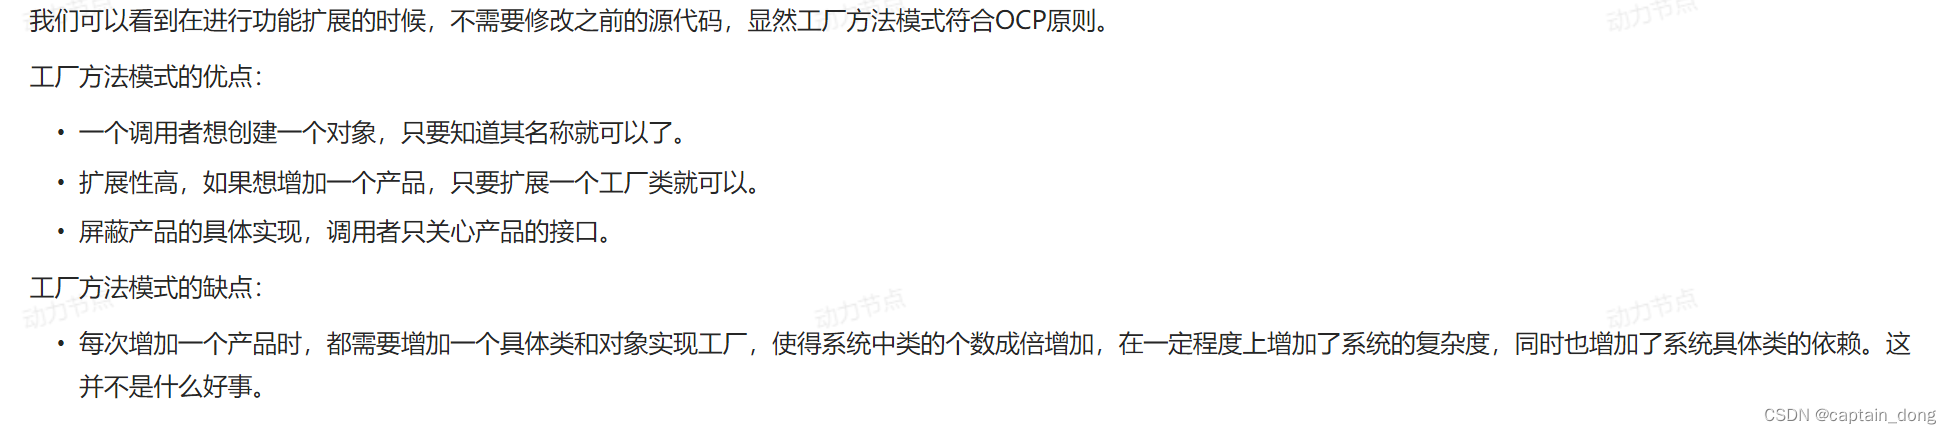
工厂方法模式既保留了简单工厂模式的优点,同时又解决了简单工厂模式的缺点。
工厂方法模式的角色包括:
- 抽象工厂角色
- 具体工厂角色
- 抽象产品角色
- 具体产品角色
代码:
package com.dong.factory.method;

/**
 * 抽象产品角色
 */
public abstract class Weapon {
    public abstract void attack();
}
package com.dong.factory.method;

/**
 * 具体产品角色
 */
public class Dagger extends Weapon{
    @Override
    public void attack() {
        System.out.println("炸军舰。。。。");
    }
}
package com.dong.factory.method;

/**
 * 具体产品角色
 */
public class Gun extends Weapon {
    @Override
    public void attack() {
        System.out.println("开枪射击。。。。");
    }
}
package com.dong.factory.method;

/**
 * 抽象⼯⼚⻆⾊
 */
public abstract class WeaponFactory {
    public abstract Weapon get();
}
package com.dong.factory.method;

/**
 * 具体⼯⼚⻆⾊
 */
public class GunFactory extends WeaponFactory{
    @Override
    public Weapon get() {
        return new Gun();
    }
}
package com.dong.factory.method;

/**
 * 具体⼯⼚⻆⾊--生产具体产品
 */
public class DaggerFactory extends WeaponFactory{
    @Override
    public Weapon get() {
        return new Dagger();
    }
}
package com.dong.factory.method;

/**
 * 客户端程序
 */
public class Test {
    public static void main(String[] args) {
        WeaponFactory weaponFactory=new DaggerFactory();
        Weapon dagger=weaponFactory.get();
        dagger.attack();

        WeaponFactory weaponFactory1=new GunFactory();
        Weapon gun=weaponFactory1.get();
        gun.attack();
    }
}
运行结果:

总结:

抽象工厂模式
- 抽象工厂模式相对于工厂方法模式来说,就是工厂方法模式是针对一个产品系列的,而抽象工厂模式是针对多个产品系列的,即工厂方法模式是一个产品系列一个工厂类,而抽象工厂模式是多个产品系列一个工厂类。
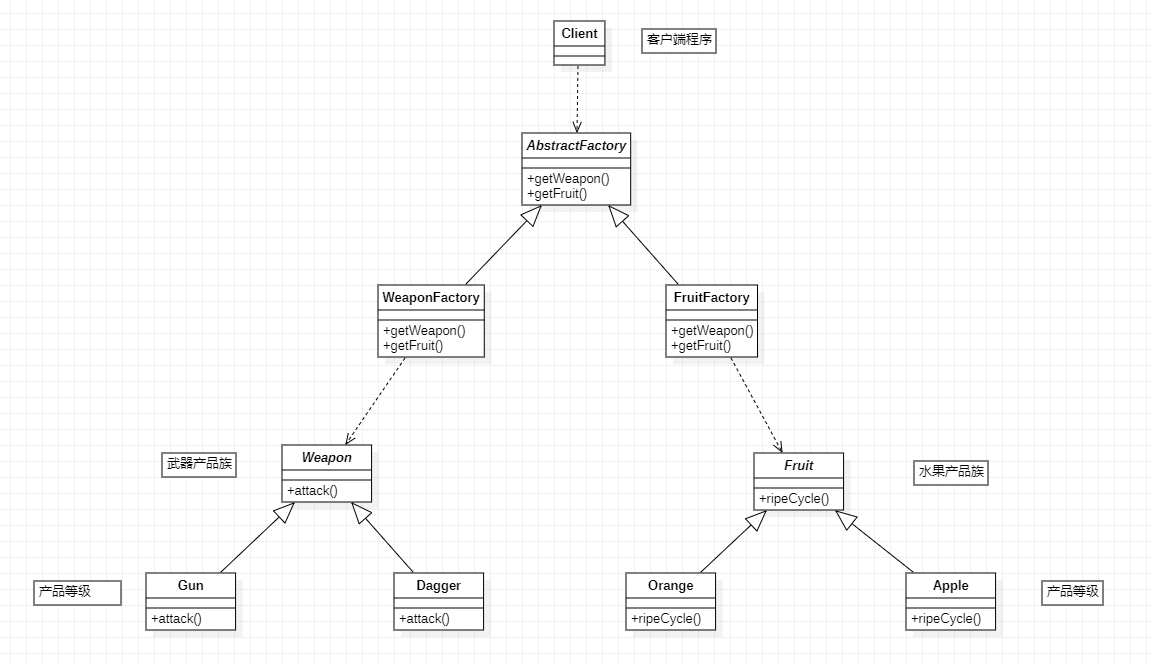
- 抽象工厂模式特点:抽象工厂模式是所有形态的工厂模式中最为抽象和最具一般性的一种形态。抽象工厂模式是指当有多个抽象角色时,使用的一种工厂模式。抽象工厂模式可以向客户端提供一个接口,使客户端在不必指定产品的具体的情况下,创建多个产品族中的产品对象。它有多个抽象产品类,每个抽象产品类可以派生出多个具体产品类,一个抽象工厂类,可以派生出多个具体工厂类,每个具体工厂类可以创建多个具体产品类的实例。每一个模式都是针对一定问题的解决方案,工厂方法模式针对的是一个产品等级结构;而抽象工厂模式针对的是多个产品等级结果。
抽象工厂中包含4个角色:
- 抽象工厂角色
- 具体工厂角色
- 抽象产品角色
- 具体产品角色
抽象工厂模式的类图如下:
抽象工厂模式代码如下:
代码:
package com.dong.product;

/**
 * 武器产品族
 * @author dong
 * @version 1.0
 * @className Weapon
 * @since 1.0
 **/
public abstract class Weapon {
    public abstract void attack();
}
package com.dong.product;

/**
 * 武器产品族中的产品等级1
 * @author dong
 * @version 1.0
 * @className Gun
 * @since 1.0
 **/
public class Gun extends Weapon{
    @Override
    public void attack() {
        System.out.println("开枪射击!");
    }
}
package com.dong.product;

/**
 * 武器产品族中的产品等级2
 * @author dong
 * @version 1.0
 * @className Dagger
 * @since 1.0
 **/
public class Dagger extends Weapon{
    @Override
    public void attack() {
        System.out.println("砍丫的!");
    }
}
package com.dong.product;

/**
 * 水果产品族
 * @author dong
 * @version 1.0
 * @className Fruit
 * @since 1.0
 **/
public abstract class Fruit {
    /**
     * 所有果实都有一个成熟周期。
     */
    public abstract void ripeCycle();
}
package com.dong.product;

/**
 * 水果产品族中的产品等级1
 * @author dong
 * @version 1.0
 * @className Orange
 * @since 1.0
 **/
public class Orange extends Fruit{
    @Override
    public void ripeCycle() {
        System.out.println("橘子的成熟周期是10个月");
    }
}
package com.dong.product;

/**
 * 水果产品族中的产品等级2
 * @author dong
 * @version 1.0
 * @className Apple
 * @since 1.0
 **/
public class Apple extends Fruit{
    @Override
    public void ripeCycle() {
        System.out.println("苹果的成熟周期是8个月");
    }
}
package com.dong.factory;

import com.dong.product.Fruit;
import com.dong.product.Weapon;

/**
 * 抽象工厂
 * @author dong
 * @version 1.0
 * @className AbstractFactory
 * @since 1.0
 **/
public abstract class AbstractFactory {
    public abstract Weapon getWeapon(String type);
    public abstract Fruit getFruit(String type);
}
package com.dong.factory;

import com.dong.product.Dagger;
import com.dong.product.Fruit;
import com.dong.product.Gun;
import com.dong.product.Weapon;

/**
 * 武器族工厂
 * @author dong
 * @version 1.0
 * @className WeaponFactory
 * @since 1.0
 **/
public class WeaponFactory extends AbstractFactory{

    public Weapon getWeapon(String type){
        if (type == null || type.trim().length() == 0) {
            return null;
        }
        if ("Gun".equals(type)) {
            return new Gun();
        } else if ("Dagger".equals(type)) {
            return new Dagger();
        } else {
            throw new RuntimeException("无法生产该武器");
        }
    }

    @Override
    public Fruit getFruit(String type) {
        return null;
    }
}
package com.dong.factory;

import com.dong.product.*;

/**
 * 水果族工厂
 * @author dong
 * @version 1.0
 * @className FruitFactory
 * @since 1.0
 **/
public class FruitFactory extends AbstractFactory{
    @Override
    public Weapon getWeapon(String type) {
        return null;
    }

    public Fruit getFruit(String type){
        if (type == null || type.trim().length() == 0) {
            return null;
        }
        if ("Orange".equals(type)) {
            return new Orange();
        } else if ("Apple".equals(type)) {
            return new Apple();
        } else {
            throw new RuntimeException("我家果园不产这种水果");
        }
    }
}
package com.dong.client;

import com.dong.factory.AbstractFactory;
import com.dong.factory.FruitFactory;
import com.dong.factory.WeaponFactory;
import com.dong.product.Fruit;
import com.dong.product.Weapon;

/**
 * @author dong
 * @version 1.0
 * @className Client
 * @since 1.0
 **/
public class Client {
    public static void main(String[] args) {
        // 客户端调用方法时只面向AbstractFactory调用方法。
        AbstractFactory factory = new WeaponFactory(); // 注意:这里的new WeaponFactory()可以采用 简单工厂模式 进行隐藏。
        Weapon gun = factory.getWeapon("Gun");
        Weapon dagger = factory.getWeapon("Dagger");

        gun.attack();
        dagger.attack();

        AbstractFactory factory1 = new FruitFactory(); // 注意:这里的new FruitFactory()可以采用 简单工厂模式 进行隐藏。
        Fruit orange = factory1.getFruit("Orange");
        Fruit apple = factory1.getFruit("Apple");

        orange.ripeCycle();
        apple.ripeCycle();
    }
}
运行结果:

总结:
抽象工厂模式的优缺点:
- 优点:当一个产品族中的多个对象被设计成一起工作时,它能保证客户端始终只使用同一个产品族中的对象。
- 缺点:产品族扩展非常困难,要增加一个系列的某一产品,既要在AbstractFactory里加代码,又要在具体的里面加代码。
7.Bean的实例化(获取)方式
Spring为Bean提供了多种实例化方式,通常包括4种方式。(也就是说在Spring中为Bean对象的创建准备了多种方案,目的是:更加灵活)
- 第一种:通过构造方法实例化
- 第二种:通过简单工厂模式实例化
- 第三种:通过factory-bean实例化
- 第四种:通过FactoryBean接口实例化
7.1 通过构造方法实例化
- 我们之前一直使用的就是这种方式。默认情况下,会调用Bean的无参数构造方法。
代码:
先配置好各种依赖:
spring.xml【spring6的配置文件】
<?xml version="1.0" encoding="UTF-8"?>
<beans xmlns="http://www.springframework.org/schema/beans"
       xmlns:xsi="http://www.w3.org/2001/XMLSchema-instance"
       xsi:schemaLocation="http://www.springframework.org/schema/beans http://www.springframework.org/schema/beans/spring-beans.xsd">

    <!--spring提供的实例化方式,第一种:在spring配置文件中总结配置类全路径,spring会自动调用该类的无参构造方法来实例化Bean-->
    <bean id="sb" class="com.dong.spring6.bean.SpringBean"/>

</beans>
maven:
<?xml version="1.0" encoding="UTF-8"?>
<project xmlns="http://maven.apache.org/POM/4.0.0"
xmlns:xsi="http://www.w3.org/2001/XMLSchema-instance"
xsi:schemaLocation="http://maven.apache.org/POM/4.0.0 http://maven.apache.org/xsd/maven-4.0.0.xsd">
<modelVersion>4.0.0</modelVersion>
<groupId>li.dong</groupId>
<artifactId>spring6-005-bean-instantiation</artifactId>
<version>1.0-SNAPSHOT</version>
<dependencies>
<dependency>
<groupId>org.springframework</groupId>
<artifactId>spring-context</artifactId>
<version>6.0.9</version>
</dependency>
<dependency>
<groupId>junit</groupId>
<artifactId>junit</artifactId>
<version>4.13.2</version>
<scope>test</scope>
</dependency>
</dependencies>
<properties>
<maven.compiler.source>19</maven.compiler.source>
<maven.compiler.target>19</maven.compiler.target>
<project.build.sourceEncoding>UTF-8</project.build.sourceEncoding>
</properties>
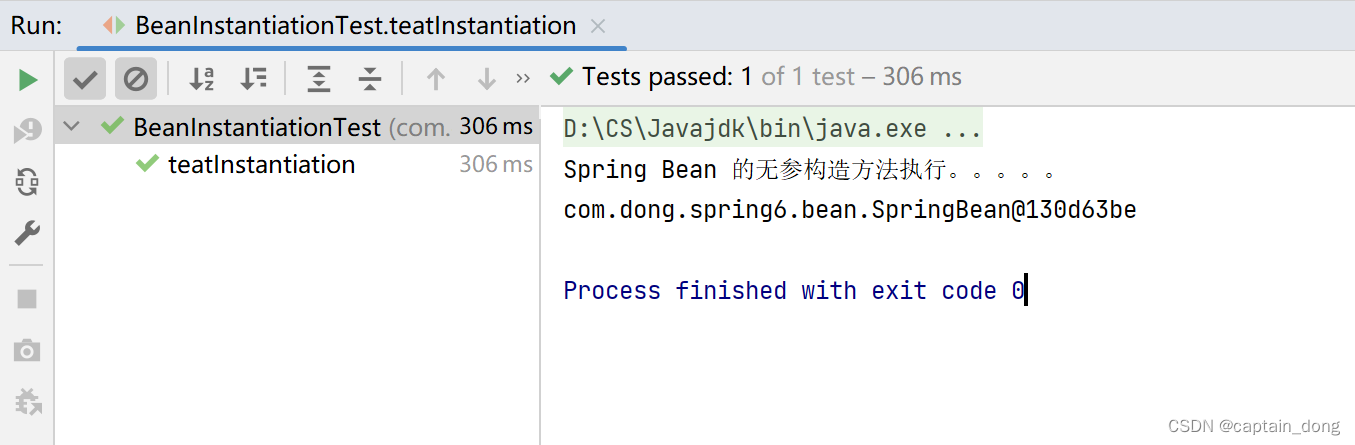
</project>package com.dong.spring6.bean;
public class SpringBean {
public SpringBean() {
System.out.println("Spring Bean 的无参构造方法执行。。。。。");
}
}
测试:
package com.dong.spring6.test;

import com.dong.spring6.bean.SpringBean;
import org.junit.Test;
import org.springframework.context.ApplicationContext;
import org.springframework.context.support.ClassPathXmlApplicationContext;

public class BeanInstantiationTest {
    @Test
    public void teatInstantiation(){
        ApplicationContext applicationContext=new ClassPathXmlApplicationContext("spring.xml");
        SpringBean springBean = applicationContext.getBean("sb", SpringBean.class);
        System.out.println(springBean);
    }
}
运行结果:
7.2 通过简单工厂模式实例化
代码:
第一步:定义一个Bean
package com.dong.spring6.bean;

public class Start {
    public Start() {
        System.out.println("Start 无参构造方法正在执行。。。。。");
    }
}
第二步:编写简单工厂模式当中的工厂类
package com.dong.spring6.bean;

/**
 * 简单工厂模式中的工厂类角色。 星工厂
 */
public class StartFactory {
    public static Start get(){
        return new Start();
    }
}
第三步:在Spring配置文件中指定创建该Bean的方法(使用factory-method属性指定)
<?xml version="1.0" encoding="UTF-8"?>
<beans xmlns="http://www.springframework.org/schema/beans"
       xmlns:xsi="http://www.w3.org/2001/XMLSchema-instance"
       xsi:schemaLocation="http://www.springframework.org/schema/beans http://www.springframework.org/schema/beans/spring-beans.xsd">

    <!--spring提供的实例化方式,第一种:在spring配置文件中总结配置类全路径,spring会自动调用该类的无参构造方法来实例化Bean-->
    <bean id="sb" class="com.dong.spring6.bean.SpringBean"/>

    <!--spring提供的实例化方式,第二种:通过简单工厂模式,你需要在spring配置文件中告诉spring框架,调用哪个类的哪个方法获取Bean -->
    <!--factory-method 属性指定的是工厂类当中的静态方法,也就是告诉spring框架,调用这个方法可以获取Bean -->
    <bean id="start" class="com.dong.spring6.bean.StartFactory" factory-method="get"/>

</beans>
第四步:编写测试程序
package com.dong.spring6.test;

import com.dong.spring6.bean.Start;
import com.dong.spring6.bean.StartFactory;
import org.junit.Test;
import org.springframework.context.ApplicationContext;
import org.springframework.context.support.ClassPathXmlApplicationContext;

public class BeanInstantiationTest {

    @Test
    public void teatInstantiation2(){
        ApplicationContext applicationContext=new ClassPathXmlApplicationContext("spring.xml");
        Start start = applicationContext.getBean("start", Start.class);
        System.out.println(start);
    }
}
teatInstantiation2方法中的Start start = applicationContext.getBean("start", Start.class);中,使用Start.class参数是因为 Spring 容器返回的对象类型应该与这里指定的类型保持一致。- 虽然在
spring.xml配置文件中 Bean 的定义指定的是StartFactory类并配置了其静态方法get(),但实际上 Spring 容器会调用该方法并返回一个Start类型的实例,这个实例的类型就是由 Spring 自动推断得出的。因此,在teatInstantiation2方法中,使用Start.class作为参数,表示我们期望获取的是一个Start类型的对象,而不是其他类型。
执行结果:
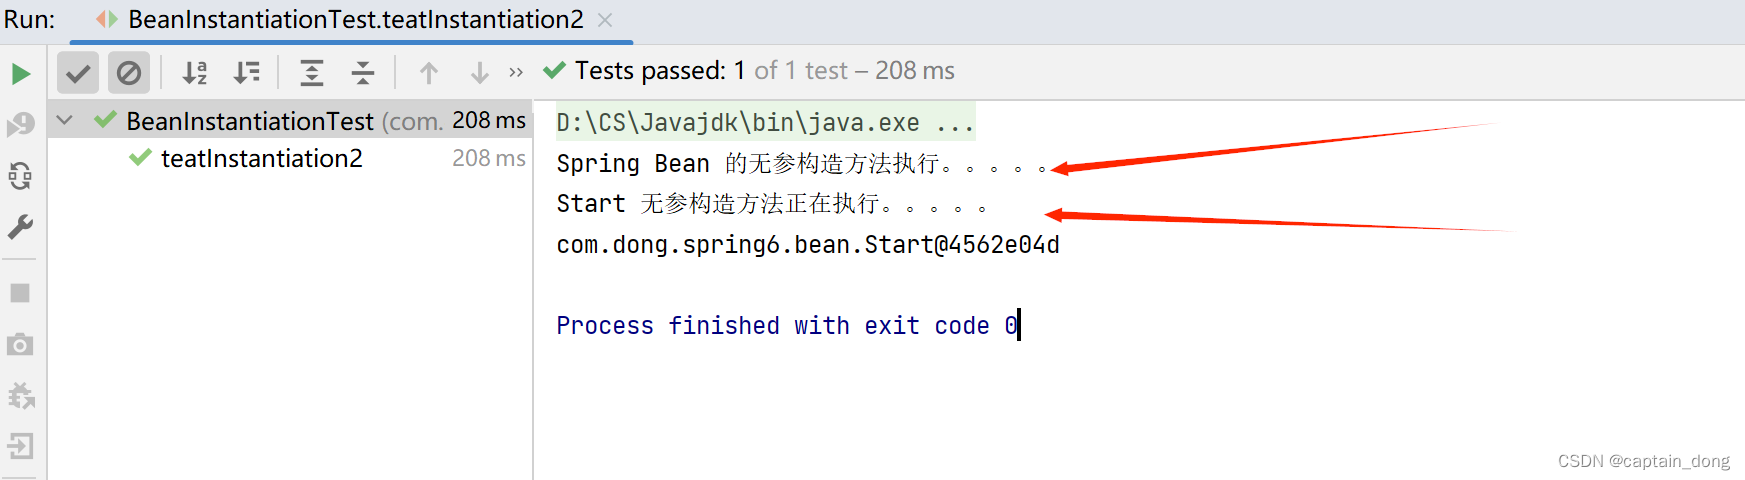
加载spring容器的时候会调用配置的bean的所有无参构造方法
7.3 通过factory-bean实例化
这种方式本质上是:通过工厂方法模式进行实例化。
代码:
第一步:定义一个Bean
package com.dong.spring6.bean;

/**
 * 工厂方法模式中的具体产品角色
 */
public class Gun {
    public Gun() {
        System.out.println("Gun的无参构造方法执行。。。。。。");
    }
}
第二步:定义具体工厂类,工厂类中定义实例方法
package com.dong.spring6.bean;

/**
 * 工厂方法模式中的具体工厂角色
 */
public class GunFactory {

    //工厂方法模式中的具体工厂角色中的方法是 实例化方法
    public Gun get(){
        return new Gun();
    }
}
第三步:在Spring配置文件中指定factory-bean以及factory-method
<?xml version="1.0" encoding="UTF-8"?>
<beans xmlns="http://www.springframework.org/schema/beans"
       xmlns:xsi="http://www.w3.org/2001/XMLSchema-instance"
       xsi:schemaLocation="http://www.springframework.org/schema/beans http://www.springframework.org/schema/beans/spring-beans.xsd">

    <!--spring提供的实例化方式,第一种:在spring配置文件中总结配置类全路径,spring会自动调用该类的无参构造方法来实例化Bean-->
    <bean id="sb" class="com.dong.spring6.bean.SpringBean"/>

    <!--spring提供的实例化方式,第二种:通过简单工厂模式,你需要在spring配置文件中告诉spring框架,调用哪个类的哪个方法获取Bean -->
    <!--factory-method 属性指定的是工厂类当中的静态方法,也就是告诉spring框架,调用这个方法可以获取Bean -->
    <bean id="start" class="com.dong.spring6.bean.StartFactory" factory-method="get"/>

    <!--spring提供的实例化方式,第三种:通过工厂方法模式,通过factory-bean属性+factory-method属性共同来完成。-->
    <!--告诉spring框架,调用哪个对象的哪个方法来获取Bean-->
    <bean id="gunFactory" class="com.dong.spring6.bean.GunFactory"/>
    <!--以下配置很关键,factory-bean属性告诉spring调用哪个对象  factory-method属性告诉spring调用该对象的哪个方法。  -->
    <bean id="gun" factory-bean="gunFactory" factory-method="get"/>
</beans>
第四步:编写测试程序
package com.dong.spring6.test;

import com.dong.spring6.bean.Gun;
import com.dong.spring6.bean.SpringBean;
import com.dong.spring6.bean.Start;
import com.dong.spring6.bean.StartFactory;
import org.junit.Test;
import org.springframework.context.ApplicationContext;
import org.springframework.context.support.ClassPathXmlApplicationContext;

public class BeanInstantiationTest {
    @Test
    public void teatInstantiation(){
        ApplicationContext applicationContext=new ClassPathXmlApplicationContext("spring.xml");
        SpringBean springBean = applicationContext.getBean("sb", SpringBean.class);
        System.out.println(springBean);
    }

    @Test
    public void teatInstantiation2(){
        ApplicationContext applicationContext=new ClassPathXmlApplicationContext("spring.xml");
        Start start = applicationContext.getBean("start", Start.class);
        System.out.println(start);
    }

    @Test
    public void teatInstantiation3(){
        ApplicationContext applicationContext=new ClassPathXmlApplicationContext("spring.xml");
        Gun gun = applicationContext.getBean("gun", Gun.class);
        System.out.println(gun);
    }
}
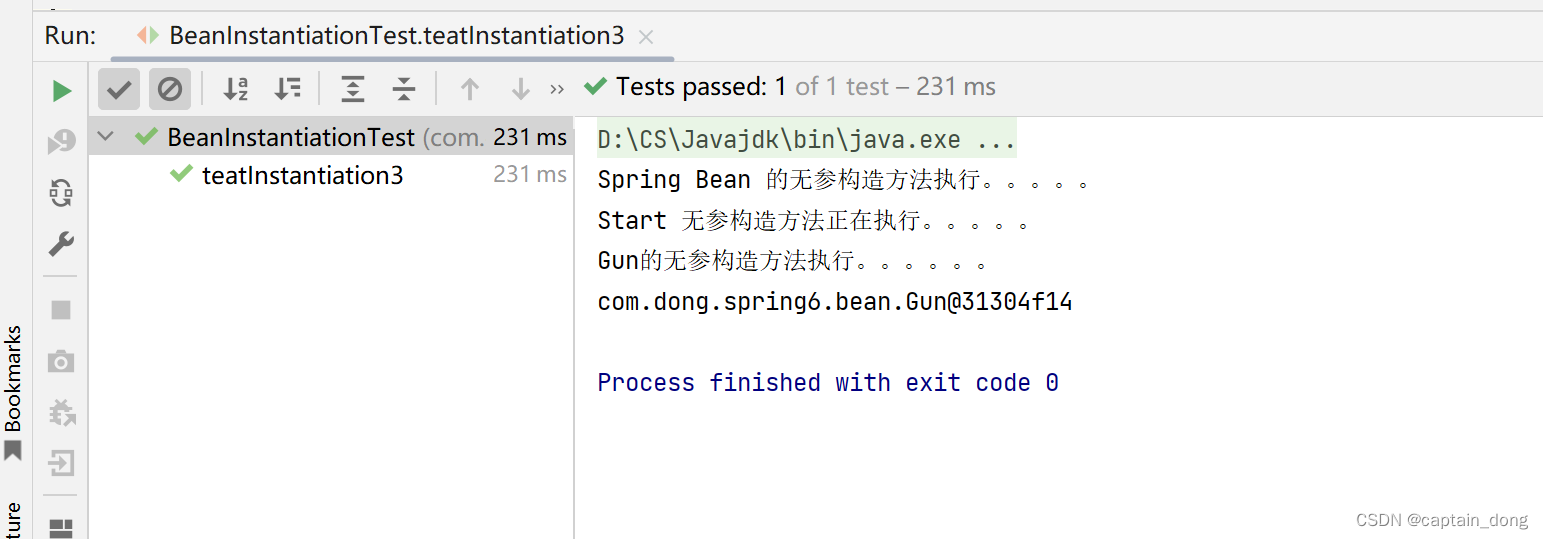
运行结果:
7.4 通过FactoryBean接口实例化
- 以上的第三种方式中,factory-bean是我们自定义的,factory-method也是我们自己定义的。
- 在Spring中,当你编写的类直接实现FactoryBean接口之后,factory-bean不需要指定了,factory-method也不需要指定了。
- factory-bean会自动指向实现FactoryBean接口的类,factory-method会自动指向getObject()方法。
代码:
第一步:定义一个Bean
package com.dong.spring6.bean;

/**
 * Bean
 */
public class Person {
    public Person() {
        System.out.println("Person无参构造执行。。。。。");
    }
}
第二步:编写一个类实现FactoryBean接口
package com.dong.spring6.bean;

import org.springframework.beans.factory.FactoryBean;

public class PersonFactoryBean implements FactoryBean<Person> {
    @Override
    public Person getObject() throws Exception {
        return new Person();
    }

    @Override
    public Class<?> getObjectType() {
        return null;
    }


    /**
     * 这个方法在接口中有默认实现。
     * 默认返回true,表示单例的
     * 如果想多例,总结总结将这个方法的返回 修改为 return false;即可
     * @return
     */
    @Override
    public boolean isSingleton() {
        return FactoryBean.super.isSingleton();
    }
}
第三步:在Spring配置文件中配置FactoryBean
<?xml version="1.0" encoding="UTF-8"?>
<beans xmlns="http://www.springframework.org/schema/beans"
       xmlns:xsi="http://www.w3.org/2001/XMLSchema-instance"
       xsi:schemaLocation="http://www.springframework.org/schema/beans http://www.springframework.org/schema/beans/spring-beans.xsd">

    <!--spring提供的实例化方式,第一种:在spring配置文件中总结配置类全路径,spring会自动调用该类的无参构造方法来实例化Bean-->
    <bean id="sb" class="com.dong.spring6.bean.SpringBean"/>

    <!--spring提供的实例化方式,第二种:通过简单工厂模式,你需要在spring配置文件中告诉spring框架,调用哪个类的哪个方法获取Bean -->
    <!--factory-method 属性指定的是工厂类当中的静态方法,也就是告诉spring框架,调用这个方法可以获取Bean -->
    <bean id="start" class="com.dong.spring6.bean.StartFactory" factory-method="get"/>

    <!--spring提供的实例化方式,第三种:通过工厂方法模式,通过factory-bean属性+factory-method属性共同来完成。-->
    <!--告诉spring框架,调用哪个对象的哪个方法来获取Bean-->
    <bean id="gunFactory" class="com.dong.spring6.bean.GunFactory"/>
    <!--以下配置很关键,factory-bean属性告诉spring调用哪个对象  factory-method属性告诉spring调用该对象的哪个方法。  -->
    <bean id="gun" factory-bean="gunFactory" factory-method="get"/>

    <!--spring提供的实例化方式,第四种 :通过FactoryBean接口来实现。 -->
    <!--这种方式实际上是第三种方式的简化。-->
    <!--由于你编写的类实现了FactoryBean接口,所以这个类是一个特殊的类,不需要你再手动指定:factory-bean、factory-method-->
    <!--通过一个特殊的Bean:工厂Bean,来返回一个普通的Bean Person对象-->
    <!--通过FactoryBean这个工厂Bean主要是想对普通Bean进行加工处理。-->
    <bean id="person" class="com.dong.spring6.bean.PersonFactoryBean"/>

</beans>
测试程序:
package com.dong.spring6.test;

import com.dong.spring6.bean.*;
import org.junit.Test;
import org.springframework.context.ApplicationContext;
import org.springframework.context.support.ClassPathXmlApplicationContext;

public class BeanInstantiationTest {
    @Test
    public void teatInstantiation(){
        ApplicationContext applicationContext=new ClassPathXmlApplicationContext("spring.xml");
        SpringBean springBean = applicationContext.getBean("sb", SpringBean.class);
        System.out.println(springBean);
    }

    @Test
    public void teatInstantiation2(){
        ApplicationContext applicationContext=new ClassPathXmlApplicationContext("spring.xml");
        Start start = applicationContext.getBean("start", Start.class);
        System.out.println(start);
    }

    @Test
    public void teatInstantiation3(){
        ApplicationContext applicationContext=new ClassPathXmlApplicationContext("spring.xml");
        Gun gun = applicationContext.getBean("gun", Gun.class);
        System.out.println(gun);
    }

    @Test
    public void teatInstantiation4(){
        ApplicationContext applicationContext=new ClassPathXmlApplicationContext("spring.xml");
        Person person = applicationContext.getBean("person", Person.class);
        System.out.println(person);
    }
}
执行结果:
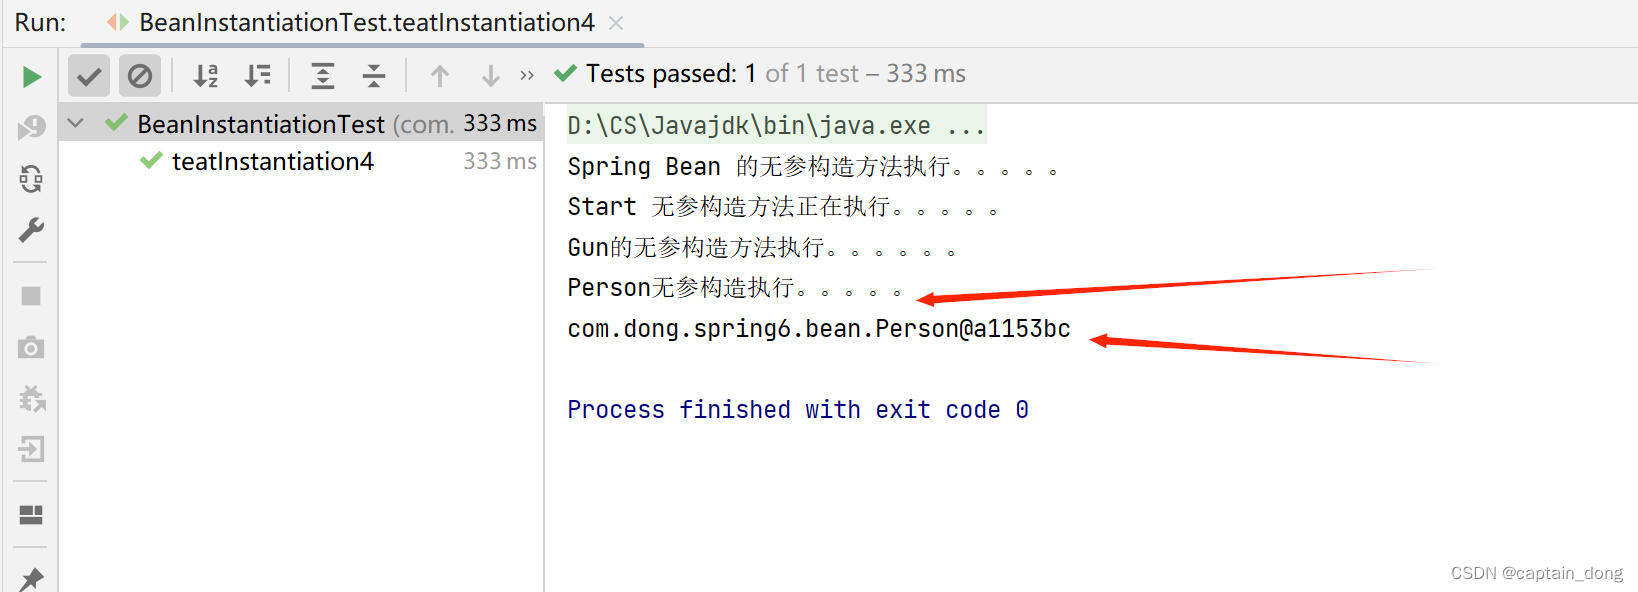
FactoryBean在Spring中是一个接口。被称为“工厂Bean”。“工厂Bean”是一种特殊的Bean。所有的“工厂Bean”都是用来协助Spring框架来创建其他Bean对象的。
7.5 BeanFactory和FactoryBean的区别 【工作面试题!!!】
7.5.1 BeanFactory
- Spring IoC容器的顶级对象,BeanFactory被翻译为“Bean工厂”,在Spring的IoC容器中,“Bean工厂”负责创建Bean对象。
- BeanFactory是工厂。
7.5.2 FactoryBean
FactoryBean:它是一个Bean,是一个能够辅助Spring实例化其它Bean对象的一个Bean。
在Spring中,Bean可以分为两类:
- 第一类:普通Bean
- 第二类:工厂Bean(记住:工厂Bean也是一种Bean,只不过这种Bean比较特殊,它可以辅助Spring实例化其它Bean对象。)
7.6 注入自定义Date
我们前面说过,java.util.Date在Spring中被当做简单类型,简单类型在注入的时候可以直接使用value属性或value标签来完成。但我们之前已经测试过了,对于Date类型来说,采用value属性或value标签赋值的时候,对日期字符串的格式要求非常严格,必须是这种格式的:Mon Oct 10 14:30:26 CST 2022。其他格式是不会被识别的。
如以下代码:
Student
package com.dong.spring6.bean;

import java.util.Date;

/**
 * @author dong
 * @version 1.0
 * @className Student
 * @since 1.0
 **/
public class Student {
    private Date birth;

    public void setBirth(Date birth) {
        this.birth = birth;
    }

    @Override
    public String toString() {
        return "Student{" +
                "birth=" + birth +
                '}';
    }
}
spring.xml
<bean id="studentBean" class="com.dong.spring6.bean.Student">
  <property name="birth" value="Mon Oct 10 14:30:26 CST 2002"/>
</bean>
测试程序
@Test
public void testDate(){
    ApplicationContext applicationContext = new ClassPathXmlApplicationContext("spring.xml");
    Student studentBean = applicationContext.getBean("studentBean", Student.class);
    System.out.println(studentBean);
}
运行结果:

如果把日期格式修改一下:
<bean id="studentBean" class="com.dong.spring6.bean.Student">
  <property name="birth" value="2002-10-10"/>
</bean>
执行结果:

这种情况下,我们就可以使用FactoryBean来完成这个骚操作。
代码:
package com.dong.spring6.bean;

import java.util.Date;

public class Student {
    private Date birth;

    public void setBirth(Date birth) {
        this.birth = birth;
    }

    @Override
    public String toString() {
        return "Student{" +
                "birth=" + birth +
                '}';
    }
}
编写DateFactoryBean实现FactoryBean接口:
package com.dong.spring6.bean;

import org.springframework.beans.factory.FactoryBean;

import java.text.SimpleDateFormat;
import java.util.Date;

public class DateFactoryBean implements FactoryBean<Date> {
    private String strDate;

    public DateFactoryBean(String strDate) {
        this.strDate = strDate;
    }

    @Override
    public Date getObject() throws Exception {
        SimpleDateFormat simpleDateFormat=new SimpleDateFormat("yyyy-MM-dd");
        Date date = simpleDateFormat.parse(strDate);

        return date;
    }

    @Override
    public Class<?> getObjectType() {
        return null;
    }
}
编写spring配置文件:
<?xml version="1.0" encoding="UTF-8"?>
<beans xmlns="http://www.springframework.org/schema/beans"
       xmlns:xsi="http://www.w3.org/2001/XMLSchema-instance"
       xsi:schemaLocation="http://www.springframework.org/schema/beans http://www.springframework.org/schema/beans/spring-beans.xsd">


    <!--通过工厂Bean:DateFactoryBean 来返回普通Bean :java.util.Date-->
    <bean id="dateFactoryBean" class="com.dong.spring6.bean.DateFactoryBean">
        <constructor-arg index="0" value="2002-07-01"/>
    </bean>

    <bean id="studentBean" class="com.dong.spring6.bean.Student">
        <property name="birth" ref="dateFactoryBean"/>
    </bean>


    <!--spring提供的实例化方式,第一种:在spring配置文件中总结配置类全路径,spring会自动调用该类的无参构造方法来实例化Bean-->
    <bean id="sb" class="com.dong.spring6.bean.SpringBean"/>

    <!--spring提供的实例化方式,第二种:通过简单工厂模式,你需要在spring配置文件中告诉spring框架,调用哪个类的哪个方法获取Bean -->
    <!--factory-method 属性指定的是工厂类当中的静态方法,也就是告诉spring框架,调用这个方法可以获取Bean -->
    <bean id="start" class="com.dong.spring6.bean.StartFactory" factory-method="get"/>

    <!--spring提供的实例化方式,第三种:通过工厂方法模式,通过factory-bean属性+factory-method属性共同来完成。-->
    <!--告诉spring框架,调用哪个对象的哪个方法来获取Bean-->
    <bean id="gunFactory" class="com.dong.spring6.bean.GunFactory"/>
    <!--以下配置很关键,factory-bean属性告诉spring调用哪个对象  factory-method属性告诉spring调用该对象的哪个方法。  -->
    <bean id="gun" factory-bean="gunFactory" factory-method="get"/>

    <!--spring提供的实例化方式,第四种 :通过FactoryBean接口来实现。 -->
    <!--这种方式实际上是第三种方式的简化。-->
    <!--由于你编写的类实现了FactoryBean接口,所以这个类是一个特殊的类,不需要你再手动指定:factory-bean、factory-method-->
    <!--通过一个特殊的Bean:工厂Bean,来返回一个普通的Bean Person对象-->
    <!--通过FactoryBean这个工厂Bean主要是想对普通Bean进行加工处理。-->
    <bean id="person" class="com.dong.spring6.bean.PersonFactoryBean"/>

</beans>
测试类
package com.dong.spring6.test;

import com.dong.spring6.bean.*;
import org.junit.Test;
import org.springframework.context.ApplicationContext;
import org.springframework.context.support.ClassPathXmlApplicationContext;

public class BeanInstantiationTest {

    @Test
    public void testDate(){
        ApplicationContext applicationContext=new ClassPathXmlApplicationContext("spring.xml");
        Student student= applicationContext.getBean("studentBean", Student.class);
        System.out.println(student);
    }
}
运行结果:

想要输出日期格式为Student{birth=2002-07-01}
改进如下:
在
DateFactoryBean类的getObject()方法中,你可以将SimpleDateFormat的格式字符串中表示月份的MM修改为小写的mm。此外,为了让喜欢阅读时间戳的人不用再看毫秒和时区信息,可以使用另一个SimpleDateFormat对象对日期进行格式化,并返回格式化后的字符串。修改后的
DateFactoryBean类如下所示:
public class DateFactoryBean implements FactoryBean<Date> {
    private String strDate;

    public DateFactoryBean(String strDate) {
        this.strDate = strDate;
    }

    @Override
    public Date getObject() throws Exception {
        SimpleDateFormat sdf = new SimpleDateFormat("yyyy-MM-dd");
        return sdf.parse(strDate);
    }

    @Override
    public Class<?> getObjectType() {
        return Date.class;
    }

    @Override
    public String toString() {
        SimpleDateFormat sdf = new SimpleDateFormat("yyyy-MM-dd");
        return sdf.format(getObject());
    }
}
然后在
Student类的toString()方法中,调用DateFactoryBean对象的toString()方法,以获得格式化后的日期字符串。修改后的Student类如下所示:
public class Student {
    private Date birth;

    public void setBirth(Date birth) {
        this.birth = birth;
    }

    @Override
    public String toString() {
        return "Student{" +
                "birth=" + new DateFactoryBean(birth.toString()) +
                '}';
    }
}
这样,在 BeanInstantiationTest 测试类运行后,输出的就是 Student{birth=2002-07-01} 了。
或:
可以使用
SimpleDateFormat,将birth格式化成指定格式的字符串,然后输出这个字符串。修改后的Student类如下所示:
public class Student {
    private Date birth;

    public void setBirth(Date birth) {
        this.birth = birth;
    }

    @Override
    public String toString() {
        SimpleDateFormat sdf = new SimpleDateFormat("yyyy-MM-dd");
        String birthStr = sdf.format(birth);
        return "Student{" +
                "birth=" + birthStr +
                '}';
    }
}
【注意:
SimpleDateFormat simpleDateFormat=new SimpleDateFormat("yyyy-MM-dd");
】 这里的格式:yyyy-MM-dd 月份要大写!!
Student.java 类
package com.dong.spring6.bean;

import java.text.SimpleDateFormat;
import java.util.Date;

public class Student {
    private Date birth;

    public void setBirth(Date birth) {
        this.birth = birth;
    }

    @Override
    public String toString() {
        SimpleDateFormat simpleDateFormat=new SimpleDateFormat("yyyy-MM-dd");
        String birthStr=simpleDateFormat.format(birth);
        return "Student{" +
                "birth=" + birthStr +
                '}';
    }
}
改进后运行结果:


 403
403


 被折叠的 条评论
为什么被折叠?
被折叠的 条评论
为什么被折叠?
 到【灌水乐园】发言


