


 本文介绍了pytest的安装方法,测试文件命名和规则,参数化、前置后置处理器、fixture的使用,conftest.py的配置,以及失败重试、多断言、重复执行和allure测试报告的生成与组织。
1、pytest安装
# windows
pip install pytest
-i
https://pypi.douban.com/simple
# mac
python3
-m
pip install pytest
-i
https://pypi.douban.com/simple
2、命名测试文件规则
文件名以
test_*.py
文件和
*_test.py
测试用例规则
在
pytest
中编写测试用例可以以两种方式编写
1. 纯函数式
以
test_
开头的函数
def test_login_success():
    resp = login(userName="admin", password="1234")
    status_code = resp.status_code
    assert status_code == 200
    code = resp.json()["code"]
    assert code == "0"
2. 以类的方式
以
Test
开头的类,不能包含
init
方法
在类里以
test_
开头的方法代表一条用例
class TestBuyerLogin:
    def test_buyer_login(self):
        resp = buyer_login(username="Chronos",password="e10adc3949ba59abbe56e057f20f883e")
        assert resp.json()["uid"]==61253
        assert resp.json()["username"] == "Chronos"
3.pytest参数化(数据驱动)
当我们的多个用例除了测试数据和期望结果不同,其他的代码都高度相似时,我们可以使用参数化的方式优化用例编写
首先整理数据 下文中的 test_data
使用装饰器引入数据
@pytest.mark.parametrize("userName,password,expect_code,expect_message,expect_json", test_data)
编写测试用例,传入测试数据
test_data = [["Chronos", "123456asdf", "0", "success", {'code': '0', 'message': 'success', 'data': None}],
             ["", "123456asdf", "1", "参数为空", {'code': '1', 'message': '参数为空', 'data': None}],
             ["Chronos", "", "1", "参数为空", {'code': '1', 'message': '参数为空', 'data': None}]]

# 使用装饰器引入数据据
@pytest.mark.parametrize("userName,password,expect_code,expect_message,expect_json", test_data)
def test_login(userName, password, expect_code, expect_message, expect_json):
    resp = login(userName=userName, password=password)
    status_code = resp.status_code
    code = resp.json()["code"]
    message = resp.json()["message"]
    assert message == expect_message
    assert status_code == 200
    assert expect_json == resp.json()
assert code ==expect_code4.pytest笛卡尔积参数化(数据驱动)
cliebt_data = ['PC', 'WAP', 'NATIVE', 'REACT', 'MINI']
way_data = ['BUY_NOW', 'CART']


@pytest.mark.parametrize("client", cliebt_data)
@pytest.mark.parametrize("way", way_data)

class TestCreateTrade:

    def test_create_trade(self, client, way):
        buyer_login(username="Chronos", password="e10adc3949ba59abbe56e057f20f883e")
        if way == 'BUY_NOW':
            buy_now()
        elif way == 'CART':
            add_cart()
        resp = create_trade(client=client, way=way)
assert resp.status_code == 2005、pytest前置后置处理器
1. 模块级别:
setup_module
、
teardown_module
setup_module
:在每个模块执行前执行
teardown_module
:在每个模块执行后执行
2. 函数级别
setup_function
、
teardown_function
,不在类中的方法
setup_function
:在每个函数执行前执行
teardown_function
:在每个函数执行后执行
有几个函数就会执行几次
3. 类级别:
setup_class
、
teardown_class
setup_class
:在每个类执行前执行
teardown_class
:在每个类执行后执行
有几个类就有几对
4. 方法级别:
setup_method
、
teardown_method
setup_method
:在类里面的每个方法执行前执行
teardown_method
:在类里面每个方法执行后执行
6、pytest fixture函数
# 自定义fixture的@pytest.fixture重点参数
"""
scope: 该fixture函数的作用域,不指定时默认就是function
scope参数的值有以下几种:
1.session: 指的pytest的session,一次pytest执行就是一个session,在当前session该fixture函数只会被执行一次
2.package: 在一个包下,该fixture函数只会被执行一次
3.module: 在一个模块中,该fixture不管被调用多少次,只会被执行一次
4.class: 在一个类中,该fixture不管被调用多少次,只会被执行一次
5.function: 在一个函数或者方法中,该fixture不管被调用多少次,只会被执行一次
"""
"""
autouse: 表示该fixture是否被自动调用执行,默认是False
autouse=False时,我们需要主动调用fixture他才会被执行
主动调用有两种:
1.使用装饰器,@pytest.mark.usefixtures('buyer_login_fixture')
2.可以在测试用例函数中作为参数传递
"""

@pytest.fixture(scope='package',autouse=True)
def buyer_login_fixture():
    buyer_login('shamo', 'e622fdb8f36d56d96d8cf815d72112cb')
print('执行fixture函数')7、conftest.py和fixture
我们将自定义的
fixture
放在测试文件中,这样的话会比较混乱。为了统一管理自定义的
fixture
,我们可
以把他们放在
conftest.py
文件中。
conftest.py
是
pytest
测试框架的一个特殊文件,名称是固定的,他可以被用来管理自定义
fixture
,也可
以用来重写
pytest
的一些钩子函数。这个文件在一个项目可以有多个在不同的包下,在自己的包下生
效。但是我们建议一个项目用一个就行。在
pytest
执行时,会自动扫描
contest
里的代码,根据各个函数
定义的规则进行执行。
1、在conftest.py中定义前后置
@pytest.fixture(scope='session',autouse=False)
def buyer_login_fixture():
    buyer_login()
    print('执行fixture函数')
    yield # yield的下一行表示后置处理
    print('用例执行完成了,退出登录')
# fixture还可以实现数据返回
@pytest.fixture(scope='session',autouse=False)
def get_token():
    resp = buyer_login()
    buyer_token = resp.json()['access_token']
    print('执行fixture函数')
    yield buyer_token# yield的下一行表示后置处理
    # return buyer_token 这种返回也行,但是他不支持后置处理
    print('用例执行完成了,退出登录')
2、解决标题中文乱码
# 使用自定义fixtrue实现数据处理并返回
def pytest_collection_modifyitems(
        session: "Session", config: "Config", items: List["Item"]
) -> None:
    # item表示每个测试用例,解决用例名称中文显示问题
    for item in items:
        item.name = item.name.encode("utf-8").decode("unicode-escape")
        item._nodeid = item._nodeid.encode("utf-8").decode("unicode-escape")
8、失败重试
安装插件
# windows
pip3 install pytest-rerunfailures -i http://pypi.douban.com/simple/ --trusted-host pypi.douban.com
# mac
python3
-
m pip install pytest
-
rerunfailures
-
i
https
:
//
pypi
.
douban
.
com
/
simple
如何使用
1. 使用命令行参数
是一种全局性的指定,意味执行所有的用例都遵循这个失败重试的规则
--reruns 3
指的是最大重试次数,本身失败,如果第
1次重试成功了,后面两次不会执行
--reruns-delay 5
如果想在重试间隔中有延迟,可以加这个参数,单位是秒
pytest -sv --reruns 3 pytest_study\test_buy_now_api.py2. 装饰器指定
可以用于指定特定的用例失败重试的次数,
reruns_delay=10
表示每次重试的时间延迟,单位是秒
@pytest.mark.flaky(reruns=2,reruns_delay=10)9.多断言插件
在之前的接口用例里,有的接口存在着多个断言,我们一律使用了
assert
assert
断言一旦失败,用例即可结束,后续的断言不会被执行到。那这可能不是我们所希望的,我们希
望把所有断言都执行到,暴露出更多的问题。
有一个
pytest-assume
的插件,可以提供这种多断言的方式,他的断言在失败后不会结束用例执行,而
是把所有断言执行完成后才结束,只要有一个失败那么这条用例就失败
安装插件
# windows
pip install pytest-assume
-i
https://pypi.douban.com/simple
# mac
python3
-m
pip install pytest-assume
-i
https://pypi.douban.com/simple
使用方法
pytest.assume(期待结果,描述)
def test_login_password_null():
    resp = login(userName="Chronos", password="")
    status_code = resp.status_code
    code = resp.json()["code"]
    pytest.assume(code == "1", f'期望值是0,实际值是{code}')
pytest.assume(status_code == 200, f'期望值是200,实际值是{status_code}')10.重复执行
安装插件
# windows
pip install pytest-repeat
-i
https://pypi.douban.com/simple
# mac
python3
-m
pip install pytest-repeat
-i
https://pypi.douban.com/simple
1. 命令行参数
--count 5
表示重复
5
次
pytest -sv --count 5 pytest_study\test_buy_now_api.py2. 装饰器指定
里边的数字代表重复的次数。
@pytest.mark.repeat(2)11.allure测试报告
安装插件
# windows
pip install allure-pytest
-i
https://pypi.douban.com/simple
# mac
python3
-m
pip install allure-pytest
-i
https://pypi.douban.com/simple
如何使用:
1. 命令行参数用来收集测试结果数据
在命令行先进入到
pytest_study
目录下,执行下述命令
--alluredir ./report/data
表示收集到的测试结果数据会存入
report/data
目录下
--clean-alluredir
表示每次执行都清除之前的数据
pytest -sv --alluredir ./report/data --clean-alluredir2. 使用allure报告生成的工具生成html报告
下载
allure-2.11.0.zip
文件,然后解压,配环境变量,将
D:\allure-2.11.0\bin
配到
path
,
根据自己的解压路径来
重开命令行验证
allure
--version
如果提示不是内部命令,要么你命令敲错了,要么你环境变量配的不对
如果提示
java_home
不对,说明你电脑没装
jdk
,或者
java_home
配的不对,那就要按照
jdk
或者检
查
java
环境变量
重启
pycharm
在
pycharm
终端执行下述命令
在命令行先进入到
pytest_study
目录下,执行下述命令
report/data
指的是你的测试结果数据目录,就是第
1
步生成的
allure serve report/data12.整体执行入口及pytest.ini文件
[pytest]

addopts = -sv --alluredir ./report/data --clean-alluredir
testpaths = ./
python_files = test_*.py
python_classes = Test*
python_functions = test_*
addopts:
指定
pytest
执行时的命令行参数
testpaths
:指的是要执行的目录,
./
表示当前目录
python_files
:指的是要执行的测试文件,或者测试文件命名规则
python_classes
:指定的要执行的测试类,或者测试类命名规则
python_functions
:指定的要执行的测试方法或者测试函数,或者他们的命名规则
在
pytest_study
目录下创建
run.py
,该文件作为整体执行入口出现
import os

import pytest

if __name__ == '__main__':
    # pytest.main() 会自动扫描pytest.ini的配置
    pytest.main()

    # 执行完成后自动打开报告  仅用于本地调试
os.system('allure serve report/data')13.allure测试报告层级划分
为了能够更好的在测试报告上展示我们的用例,我们可以针对用例按照一定的维度进行分类管理
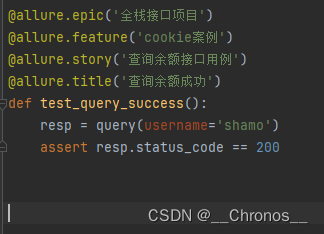
@allure.epic('买家服务')
@allure.feature('交易模块')
@allure.story('创建交易接口用例')
@pytest.mark.usefixtures('buyer_login_fixture')
class TestCreateTrade:
    client_data = ['PC', 'WAP', 'NATIVE', 'REACT', 'MINI']  # 5个数据
    way_data = ['BUY_NOW', 'CART']  # 2个数据

    @pytest.mark.parametrize('client', client_data)
    @pytest.mark.parametrize('way', way_data)
    def test_create_trade(self, client, way, buyer_login_fixture):  # 生成的数据总数是5*2=10
        allure.dynamic.title(f'{client}-{way}')
        # buyer_login('shamo','e622fdb8f36d56d96d8cf815d72112cb')
        # buyer_token = resp.json()['access_token']
        # 如果way是BUY_NOW就调用立即购买接口
        # 如果way是CART就调用添加购物车接口
        if way == 'BUY_NOW':
            buy_now(sku_id=541, num=1)
        elif way == 'CART':
            add_cart(sku_id=541, num=1)
        resp = create_trade(client=client, way=way)
        assert resp.status_code == 200


 被折叠的 条评论
为什么被折叠?
被折叠的 条评论
为什么被折叠?
 到【灌水乐园】发言


