


本文使用pycharm,主要介绍了python与mysql数据库交互的一些操作
一、介绍
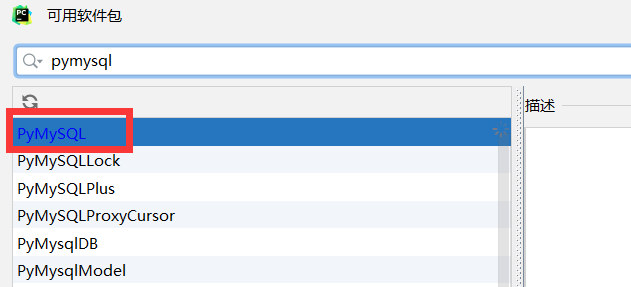
1、引入模块
首先需要安装python中的PyMySQL软件包
2、Connection对象
用于建立与数据库的连接,调用connect()方法创建对象
参数host:连接的mysql主机,如果本机是'localhost'
参数port:连接的mysql主机的端口,默认是3306
参数db:数据库的名称
参数user:连接的用户名
参数password:连接的密码
参数charset:通信采用的编码方式,默认是'gb2312',要求与数据库创建时指定的编码一致,否则中文会乱码
对象方法
close()关闭连接
commit()事务,所以需要提交才会生效
rollback()事务,放弃之前的操作
cursor()返回Cursor对象,用于执行sql语句并获得结果
3、Cursor对象
执行sql语句,调用Connection对象的cursor()方法创建对象
close()关闭
execute(operation [, parameters ])执行语句,返回受影响的行数
fetchone()执行查询语句时,获取查询结果集的第一个行数据,返回一个元组
next()执行查询语句时,获取当前行的下一行
fetchall()执行查询时,获取结果集的所有行,一行构成一个元组,再将这些元组装入一个元组返回
二、相关操作
from pymysql import *1、增加
try:
    #创建连接对象,参数(ip地址,端口号,用户名,密码,数据库名,编码)
    conn=connect(host='localhost',port=3306,user='root',password='123456',db='python',charset='utf8')
    #获得cursor对象,用于执行sql语句
    cursor1=conn.cursor()

    #构造sql语句
    sql='insert into persons(name) values("孙悟空")'
    cursor1.execute(sql)

    #默认开启事务,提交后生效
    conn.commit()
    #关闭连接
    cursor1.close()
    conn.close()
    print('ok')
except Exception as e:
    print(e.message)
2、修改
修改和删除与增加操作类似,只需要修改sql语句
sql='update persons set name="猪八戒" where id=1'
3、删除
sql='delete from persons where id=1'
4、sql语句参数化
有时候为了防止非法数据(例如单引号问题),提高安全性,需要对sql语句参数化
try:
    name=input("请输入用户名:")
    conn=connect(host='localhost',port=3306,user='root',password='123456',db='python',charset='utf8')
    cursor1=conn.cursor()

    #构造sql语句
    sql='insert into persons(name) values(%s)'
    cursor1.execute(sql,[name])

    conn.commit()
    cursor1.close()
    conn.close()
    print('ok')
except Exception as e:
    print(e.message)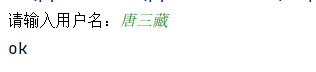

5、查询
- 查询一行数据
cursor1.execute('select * from persons where id=2')
result = cursor1.fetchone()
print(result)
- 查询多行数据
cursor1.execute('select * from persons')
result = cursor1.fetchall()
print(result)
三、封装
对于重复使用的代码,需要做封装处理
创建MysqlHelper.py文件,定义类
from pymysql import *

class MysqlHelper:
    def __init__(self,host,port,db,user,password,charset='utf8'):
        self.host=host
        self.port=port
        self.db=db
        self.user=user
        self.password=password
        self.charset=charset
    def open(self):
        self.conn=connect(host=self.host,port=self.port,db=self.db,user=self.user,password=self.password,charset=self.charset)
        self.cursor=self.conn.cursor()
    def close(self):
        self.cursor.close()
        self.conn.close()
    def cud(self,sql,params):
        try:
            self.open()
            self.cursor.execute(sql,params)
            self.conn.commit()
            self.close()
            print("ok")
        except Exception as e:
            print(e.message)
    def all(self,sql,params=[]):
        try:
            self.open()
            self.cursor.execute(sql,params)
            result=self.cursor.fetchall()
            self.close()
            return result
        except Exception as e:
            print(e.message)
创建py文件,使用封装好的帮助类完成修改操作
from MysqlHelper import MysqlHelper

#修改
name=input("请输入姓名:")
id1=input("请输入编号:")
sql='update persons set name=%s where id=%s'
params=[name,id1]
sqlhelper=MysqlHelper('localhost',3306,'python','root','123456')
sqlhelper.cud(sql,params)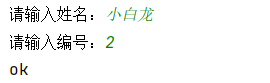
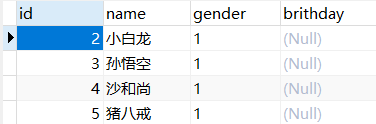
创建py文件,使用封装好的帮助类完成查询数据操作
from MysqlHelper import MysqlHelper

#查询
sql='select id,name from persons where id<5'
sqlhelper=MysqlHelper('localhost',3306,'python','root','123456')
result=sqlhelper.all(sql)
print(result)
四、用户登录实例
创建用户表users
表结构如下
id
name
pwd
注意:需要对密码进行加密
如果使用md5加密,则密码包含32个字符
如果使用sha1加密,则密码包含40个字符
create table users(
id int primary key auto_increment not null,
name varchar(20),
pwd char(40),
);
添加数据
insert into users values(0,'abc','40bd001563085fc35165329ea1ff5c5ecbdbbeef');
检验
引入hashlib模块、MysqlHelper模块
from MysqlHelper import MysqlHelper
from hashlib import sha1
#接收用户输入
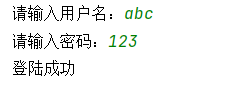
name=input("请输入用户名:")
pwd=input("请输入密码:")
#对密码加密
s1=sha1()
s1.update(pwd.encode())
pwd2=s1.hexdigest()
#根据用户名查询密码
sql='select password from users where name=%s'
helper=MysqlHelper('localhost',3306,'python','root','123456')
result=helper.all(sql,[name])
#验证
if len(result)==0:
print("用户名错误")
elif result[0][0]==pwd2:
print("登陆成功")
else:
print("密码错误")


 498
498


 被折叠的 条评论
为什么被折叠?
被折叠的 条评论
为什么被折叠?
 到【灌水乐园】发言


