


 本文详细介绍了如何在Android项目中创建三个页面,实现自动跳转、点击事件触发的页面跳转,并通过用户注册页面传递数据至第三个页面。展示了如何在接收页面显示传递的内容,包括设置背景、布局和事件处理。
一、创建项目和三个页面
1.创建项目
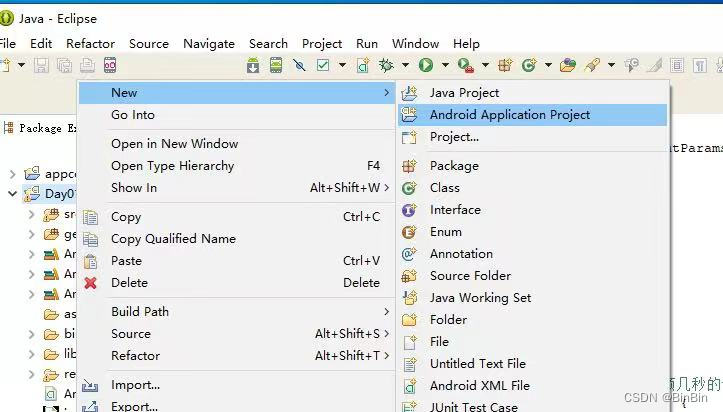
打开ADT左上角点击File-New-Android Application Project(创建项目)
注意项目名大小写要规范
2.创建页面
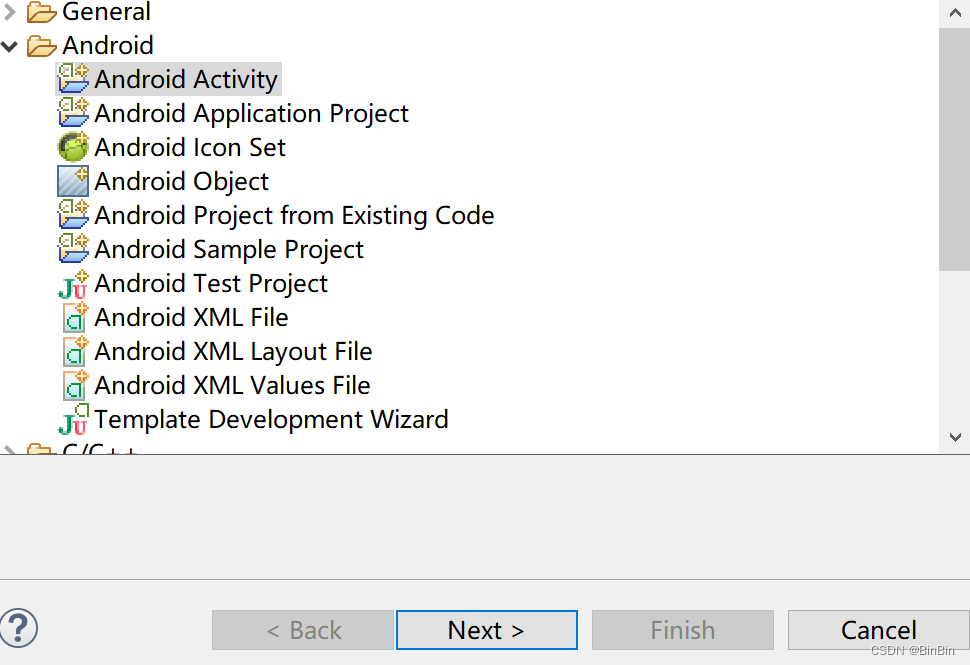
在我们所建的项目下在src右键new-other-Android-AndroidActivity(创建页面)
注意命名规范
二、实现自动跳转界面
1.放入页面背景图片
我们先打开res下的layout找到我们的.xml文件切换为代码视图插入图片
代码如下:
<LinearLayout xmlns:android="http://schemas.android.com/apk/res/android"
xmlns:tools="http://schemas.android.com/tools"
android:layout_width="match_parent"
android:layout_height="match_parent"
android:background="@drawable/ic_launcher"
tools:context=".MainActivity" >
</LinearLayout>
android:background="@drawable/ic_launcher"
这是我们要插入图片的代码我这里用的是项目自带的图片
2.代码实现自动跳转效果
编写代码实现在第一个页面等待3s自动跳转第二个页面
代码如下:
package com.example.dy3;

import android.os.Bundle;
import android.app.Activity;
import android.content.Intent;
import android.view.Menu;
import android.view.WindowManager;

public class MainActivity extends Activity {

    @Override
    protected void onCreate(Bundle savedInstanceState) {
        super.onCreate(savedInstanceState);
//        隐藏状态栏
        getWindow().addFlags(WindowManager.LayoutParams.FLAG_FULLSCREEN);
//        隐藏标题栏
        getActionBar().hide();
        setContentView(R.layout.activity_main);
//        1.定义一个子线程
        Thread thread=new Thread(new Runnable() {

			@Override
			public void run() {
				// TODO Auto-generated method stub
				try {
//					休眠三秒
					Thread.sleep(3000);
				} catch (InterruptedException e) {
					// TODO Auto-generated catch block
					e.printStackTrace();
				}
//				2.跳转到第二个页面
				Intent it=new Intent(getApplicationContext(),LiuActivity.class);
				startActivity(it);
			}
		});
//        启动子线程
        thread.start();
    }


}
三、实现点击跳转和传递内容到第三个页面
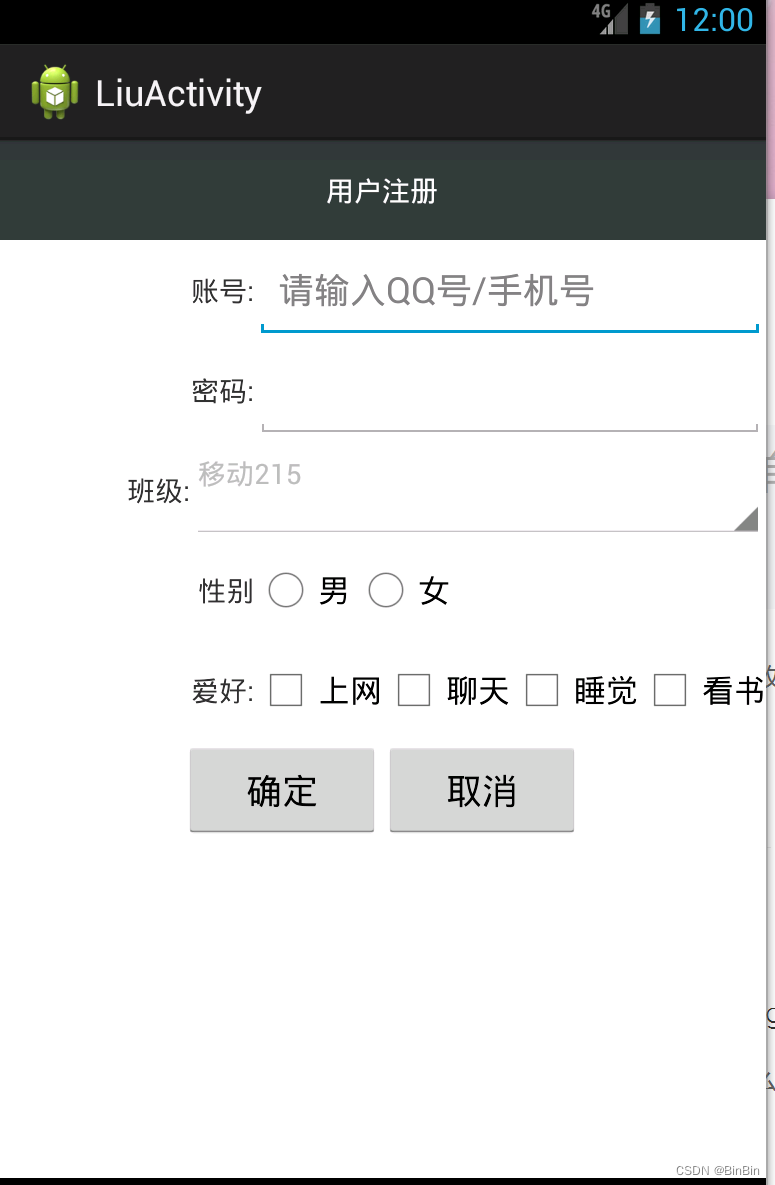
1.编写用户注册页面
代码如下:
<LinearLayout xmlns:android="http://schemas.android.com/apk/res/android"
    xmlns:tools="http://schemas.android.com/tools"
    android:layout_width="match_parent"
    android:layout_height="match_parent"
  android:orientation="vertical"
    tools:context=".LiuActivity" >

     <LinearLayout
       android:layout_width="match_parent"
       android:layout_height="50dp"
       >
       <TextView
           android:layout_width="match_parent"
           android:layout_height="match_parent"
           android:text="用户注册"
           android:gravity="center"
           android:textColor="#fff"
           android:background="#373c3f"/>
   </LinearLayout>
   <LinearLayout
       android:layout_width="match_parent"
       android:layout_height="50dp">
      <TextView
          android:layout_width="0dp"
          android:layout_height="match_parent"
          android:layout_weight="1"
          android:text="账号:"
          android:gravity="center_vertical|right"/>
      <EditText
          android:id="@+id/ed_import;"
          android:layout_width="0dp"
          android:layout_height="match_parent"
          android:layout_weight="2"
          android:hint="请输入QQ号/手机号"
          />
   </LinearLayout>
     <LinearLayout
       android:layout_width="match_parent"
       android:layout_height="50dp">
      <TextView

          android:layout_width="0dp"
          android:layout_height="match_parent"
          android:layout_weight="1"
          android:text="密码:"
          android:gravity="center_vertical|right"/>
      <EditText
           android:id="@+id/ed_password"
          android:layout_width="0dp"
          android:layout_height="match_parent"
          android:layout_weight="2"
          />
   </LinearLayout>
     <LinearLayout
       android:layout_width="match_parent"
       android:layout_height="50dp">
      <TextView
          android:layout_width="0dp"
          android:layout_height="match_parent"
          android:layout_weight="1"
          android:text="班级:"
          android:gravity="center_vertical|right"/>
      <Spinner
          android:id="@+id/sp_pulldown"
          android:layout_width="0dp"
          android:layout_height="match_parent"
          android:layout_weight="3"/>
   </LinearLayout>
   <LinearLayout
       android:layout_width="match_parent"
       android:layout_height="50dp">
       <TextView
           android:layout_width="0dp"
           android:layout_height="match_parent"
           android:text="性别"
           android:layout_weight="1"
           android:gravity="center_vertical|right"/>
       <RadioGroup
           android:layout_width="0dp"
           android:layout_height="match_parent"
           android:layout_weight="2"
           android:orientation="horizontal">
           <RadioButton
               android:id="@+id/rd_w
               "
               android:layout_width="50dp"
               android:layout_height="match_parent"
               android:text="男"/>
           <RadioButton
               android:id="@+id/rd_m"
               android:layout_width="50dp"
               android:layout_height="match_parent"
               android:text="女"/>
       </RadioGroup>
   </LinearLayout>
   <LinearLayout
       android:layout_width="match_parent"
       android:layout_height="50dp">
       <TextView
           android:layout_width="0dp"
           android:layout_height="match_parent"
           android:layout_weight="1"
           android:text="爱好:"
           android:gravity="center_vertical|right"/>
       <LinearLayout
           android:layout_width="0dp"
           android:layout_height="match_parent"
           android:layout_weight="2">
           <CheckBox
               android:id="@+id/cb_Internet"
               android:layout_width="wrap_content"
               android:layout_height="match_parent"
               android:text="上网"/>
            <CheckBox
                android:id="@+id/cb_chat"
               android:layout_width="wrap_content"
               android:layout_height="match_parent"
               android:text="聊天"/>
             <CheckBox
                 android:id="@+id/cb_sleep"
               android:layout_width="wrap_content"
               android:layout_height="match_parent"
               android:text="睡觉"/>
              <CheckBox
                  android:id="@+id/cb_book"
               android:layout_width="wrap_content"
               android:layout_height="match_parent"
               android:text="看书"/>
       </LinearLayout>
   </LinearLayout>
   <LinearLayout
       android:layout_width="match_parent"
       android:layout_height="50dp"
       android:gravity="center">
       <Button
           android:id="@+id/btn_confirm"
           android:layout_width="100dp"
           android:layout_height="match_parent"
           android:text="确定"
          />
        <Button
            android:id="@+id/btn_cancel"
           android:layout_width="100dp"
           android:layout_height="match_parent"
           android:text="取消"
           />
   </LinearLayout>
</LinearLayout>
页面视图效果: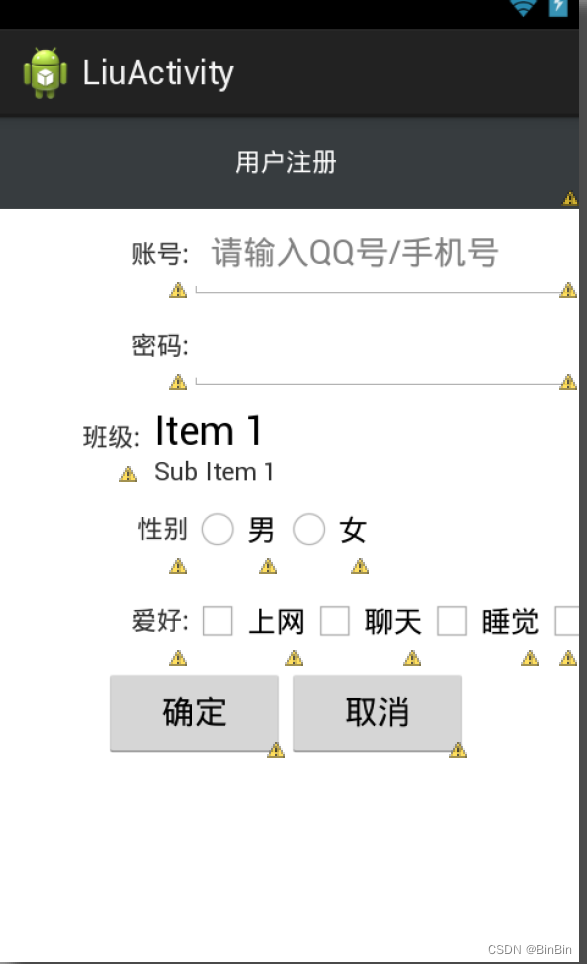
2.编辑下拉列表内容和获取页面内容并实现点击跳转
代码如下;
package com.example.dy3;


import android.os.Bundle;
import android.app.Activity;
import android.content.Intent;

import android.view.View;
import android.view.View.OnClickListener;
import android.widget.ArrayAdapter;
import android.widget.Button;
import android.widget.CheckBox;
import android.widget.EditText;
import android.widget.RadioButton;
import android.widget.Spinner;

public class LiuActivity extends Activity implements OnClickListener{

	 // 1:定义所有控件
	EditText Edimpot,Edpass;
	RadioButton rbw,rbm;
	CheckBox CbInternet,Cbchat,Cbsleep,Cbbook;
	Button Btnconfirm,Btncancel;
	private Spinner Sppull;
	String []arr=null;
	@Override
	protected void onCreate(Bundle savedInstanceState) {
		super.onCreate(savedInstanceState);
		setContentView(R.layout.activity_liu);
		  //2:找到所有有id的控件
		   into();
		// 准备控件所要显示的数据
	       arr= new String []{"移动215","移动214","移动213","移动212","移动211"};
	    // 使用适配器来进行页面和数据的绑定
	        ArrayAdapter<String> stt=new ArrayAdapter<String>(getApplicationContext(),R.layout.eeee,arr);
	        Sppull.setAdapter(stt);
	        // 3:设置点击按钮的点击事件
	        Btnconfirm .setOnClickListener(this);

	}
	 public void into(){
		 Edimpot=(EditText) findViewById(R.id.ed_import);
		 Edpass=(EditText) findViewById(R.id.ed_password);
		  rbw=(RadioButton) findViewById(R.id.rd_w);
		  rbm=(RadioButton) findViewById(R.id.rd_m);
		  CbInternet=(CheckBox) findViewById(R.id.cb_Internet);
		  Cbchat=(CheckBox) findViewById(R.id.cb_chat);
		  Cbsleep=(CheckBox) findViewById(R.id.cb_sleep);
		  Cbbook=(CheckBox) findViewById(R.id.cb_book);
		  Btnconfirm=(Button) findViewById(R.id.btn_confirm);
		  Btncancel=(Button) findViewById(R.id.btn_cancel);
		  Sppull=(Spinner) findViewById(R.id.sp_pulldown);
	  }


public void onClick(View arg0) {
	// 4: 获取用户名输入框
	String name=Edimpot.getText().toString();
	  // 5:获取密码输入框内容
	String pass=Edpass.getText().toString();
	 // 6:获取性别单选框内容
	String sex="";
	if(rbw.isChecked()){
		sex=rbw.getText().toString();
	}
	if(rbm.isChecked()){
		sex=rbm.getText().toString();
	}
	String hobby="";
	// 7:获取爱好多选框内容
	if(CbInternet.isChecked()){
		hobby+=CbInternet.getText().toString();
	}
	if(Cbchat.isChecked()){
		hobby+=Cbchat.getText().toString();
	}
	if(Cbsleep.isChecked()){
		hobby+=Cbsleep.getText().toString();
	}
	if(Cbbook.isChecked()){
		hobby+=Cbbook.getText().toString();
	}
	int i=Sppull.getSelectedItemPosition();

	//7.2获取下拉列表框所选内容
	String spt=arr[i];
	// 8:传值跳转
	Intent is=new Intent(getApplicationContext(),LioActivity.class);
	// 9:传递数据!!!
	is.putExtra("name", name);
	is.putExtra("mm", pass);
	is.putExtra("xing", sex);
	is.putExtra("ai", hobby);
	is.putExtra("spt", spt);
	startActivity(is);
}

}
四、接受数据并显示
1.在第三个页面创建文本框来接受内容
代码如下
<LinearLayout xmlns:android="http://schemas.android.com/apk/res/android"
    xmlns:tools="http://schemas.android.com/tools"
    android:layout_width="match_parent"
    android:layout_height="match_parent"
    tools:context=".OkActivity" >

    <TextView
        android:id="@+id/tv_a"
         android:layout_width="wrap_content"
        android:layout_height="wrap_content"
        />

</LinearLayout>
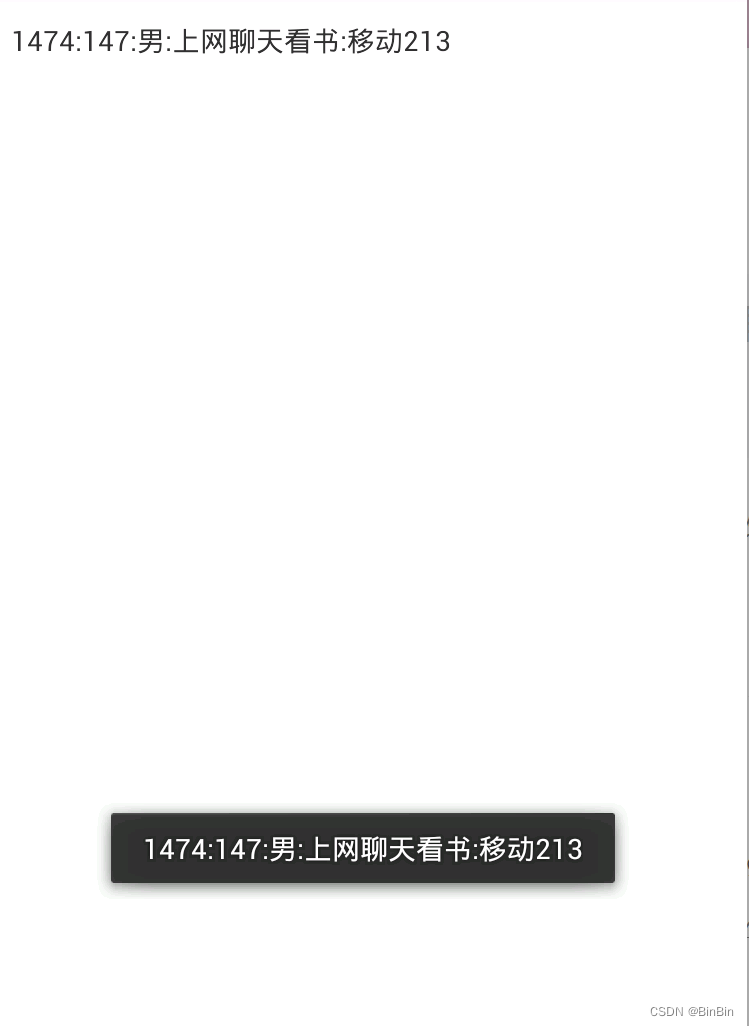
2.吐司和文字显示接受内容
代码如下:
package com.example.dy3;
import android.os.Bundle;
import android.app.Activity;
import android.content.Intent;
import android.view.Menu;
import android.widget.TextView;
import android.widget.Toast;
public class LioActivity extends Activity {
@Override
protected void onCreate(Bundle savedInstanceState) {
super.onCreate(savedInstanceState);
setContentView(R.layout.activity_lio);
Intent it=getIntent();
String name=it.getStringExtra("name");
String pass=it.getStringExtra("mm");
String sex=it.getStringExtra("xing");
String hobby=it.getStringExtra("ai");
String spt=it.getStringExtra("spt");
String str=name+":"+pass+":"+sex+":"+hobby+":"+spt;
Toast.makeText(getApplicationContext(), str, 1).show();
TextView tvShow=(TextView) findViewById(R.id.tv_a);
tvShow.setText(str);
}
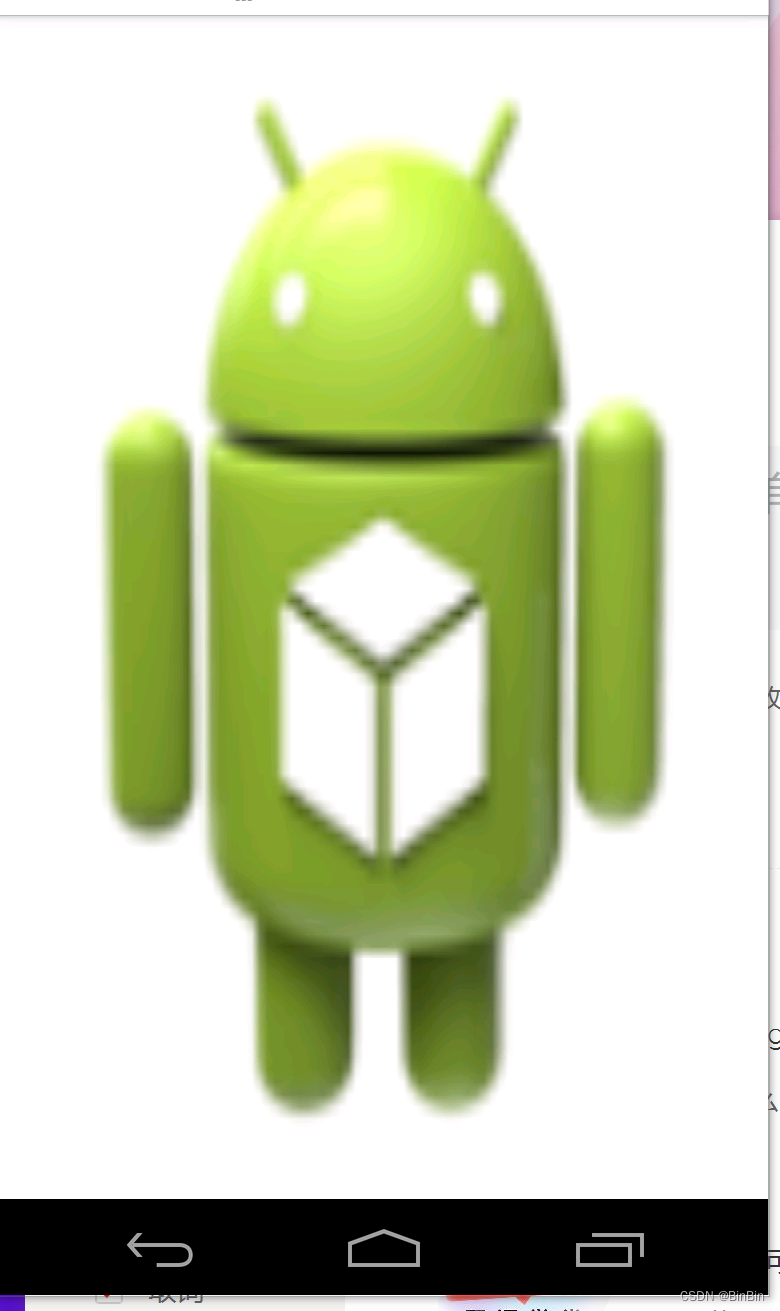
}五、效果展示

总结
以上就是我写内容 ,这也是我第一次写博客,可能有很多不足之处,希望大家能指出,不吝赐教。我也希望以博客为记录,坚持学习,共同进步,谢谢大家。


 1871
1871

 被折叠的 条评论
为什么被折叠?
被折叠的 条评论
为什么被折叠?
 到【灌水乐园】发言


