


安装
1、更新系统
> sudo apt update
> sudo apt upgrade
2、使用apt安装MySQL8.0.33
使用该方式安装MySQL时,会自动安装最新版本,并且自动配置环境
> sudo apt install mysql-server
--运行命令后,会询问是否解压安装[y / n]  选择 y
安装完成后,MySQL会自启动,运行命令检测是否安装成功
xxx@xxx-virtual-machine:~$ systemctl status mysql
 mysql.service - MySQL Community Server
     Loaded: loaded (/lib/systemd/system/mysql.service; enabled; vendor preset: enabled)
     Active: active (running) since Fri 2023-05-12 08:29:41 CST; 50s ago
    Process: 931 ExecStartPre=/usr/share/mysql/mysql-systemd-start pre (code=exited, statu>
   Main PID: 1032 (mysqld)
     Status: "Server is operational"
      Tasks: 38 (limit: 4573)
     Memory: 424.6M
        CPU: 3.681s
     CGroup: /system.slice/mysql.service
             └─1032 /usr/sbin/mysqld

5月 12 08:29:37 jxx-virtual-machine systemd[1]: Starting MySQL Community Server...
5月 12 08:29:41 jxx-virtual-machine systemd[1]: Started MySQL Community Server...
出现以上表述,说明安装成功,并且已经启动
3、配置MySQL
对于 MySQL 的全新安装,您需要运行数据库管理系统包含的安全脚本。 此脚本更改了一些不太安全的默认选项,例如禁止远程 root 登录和删除示例用户。
使用 sudo 运行安全脚本:
> sudo mysql_secure_installation
这将引导您完成一系列提示,您可以在其中对 MySQL 安装的安全选项进行一些更改。 第一个提示将询问您是否要设置验证密码插件,该插件可用于在认为新用户有效之前测试新 MySQL 用户的密码强度。
如果您选择设置验证密码插件,则您创建的任何使用密码进行身份验证的 MySQL 用户都需要具有满足您选择的策略的密码:
OutputSecuring the MySQL server deployment.

Connecting to MySQL using a blank password.

VALIDATE PASSWORD COMPONENT can be used to test passwords
and improve security. It checks the strength of password
and allows the users to set only those passwords which are
secure enough. Would you like to setup VALIDATE PASSWORD component?

Press y|Y for Yes, any other key for No: Y

There are three levels of password validation policy:

LOW    Length >= 8
MEDIUM Length >= 8, numeric, mixed case, and special characters
STRONG Length >= 8, numeric, mixed case, special characters and dictionary                  file

Please enter 0 = LOW, 1 = MEDIUM and 2 = STRONG:  2
Please set the password for root here.

# 输入密码
New password:
Re-enter new password:

Estimated strength of the password: 100
Do you wish to continue with the password provided?(Press y|Y for Yes, any other key for No) : y
# 是否删除匿名用户 y

By default, a MySQL installation has an anonymous user,
allowing anyone to log into MySQL without having to have
a user account created for them. This is intended only for
testing, and to make the installation go a bit smoother.
You should remove them before moving into a production
environment.

Remove anonymous users? (Press y|Y for Yes, any other key for No) : y
Success.

# 是否允许root用户远程登录 y
Normally, root should only be allowed to connect from
'localhost'. This ensures that someone cannot guess at
the root password from the network.

Disallow root login remotely? (Press y|Y for Yes, any other key for No) :

 ... skipping.
By default, MySQL comes with a database named 'test' that
anyone can access. This is also intended only for testing,
and should be removed before moving into a production
environment.

# 是否删除test数据库 n
Remove test database and access to it? (Press y|Y for Yes, any other key for No) :

 ... skipping.
Reloading the privilege tables will ensure that all changes
made so far will take effect immediately.

# 开始刷新授权表,使设置生效 y
Reload privilege tables now? (Press y|Y for Yes, any other key for No) : y
Success.

All done!
使用mysql -u root -p指令 密码登陆MySQL
4、配置过程中可能出现的问题
设置密码出错 " … Failed! Error: SET PASSWORD has no significance for user ‘root’@‘localhost’ as the authenticati "
重新打开一个终端
> sudo mysql
使用sql语句修改root密码
> ALTER USER 'root'@'localhost' IDENTIFIED WITH mysql_native_password by '新密码';
注意:密码默认长度要**>=8**,最好包含大小写英文字母、特殊字符和数字,不想设置复杂的密码,可以修改密码长度和安全等级,在该指令之前可使用以下两条指令
> set global validate_password.policy = 0;
--设置密码安全等级最低
> set global validate_password.length = 6;
--设置你想要的密码长度
重新执行 sudo mysql_secure_installation,密码设置为刚修该的密码。
远程连接,以DataGrip为例
登陆MySQL,修改或添加root用户远程访问host
> use mysql;
> ALTER USER 'root'@'localhost' IDENTIFIED WITH mysql_native_password BY '新密码';
> update mysql.user set host='%' where user='root';
> flush privileges;
修改ip限制
> sudo vim /etc/mysql/mysql.conf.d/mysqld.cnf
找到 bind-address = *,修改或直接注释
如 :#bind-address = 111.0.0.1
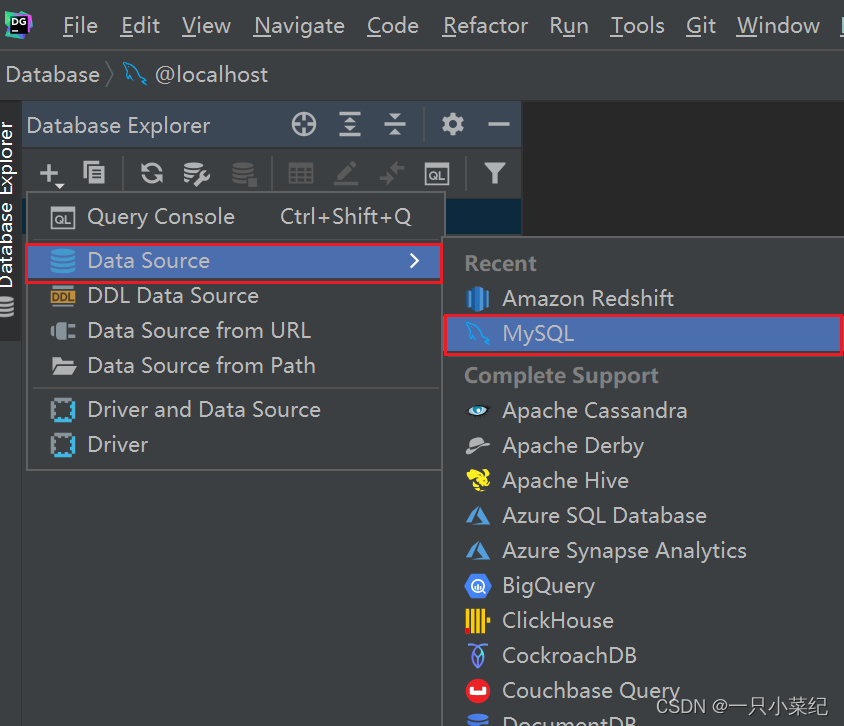
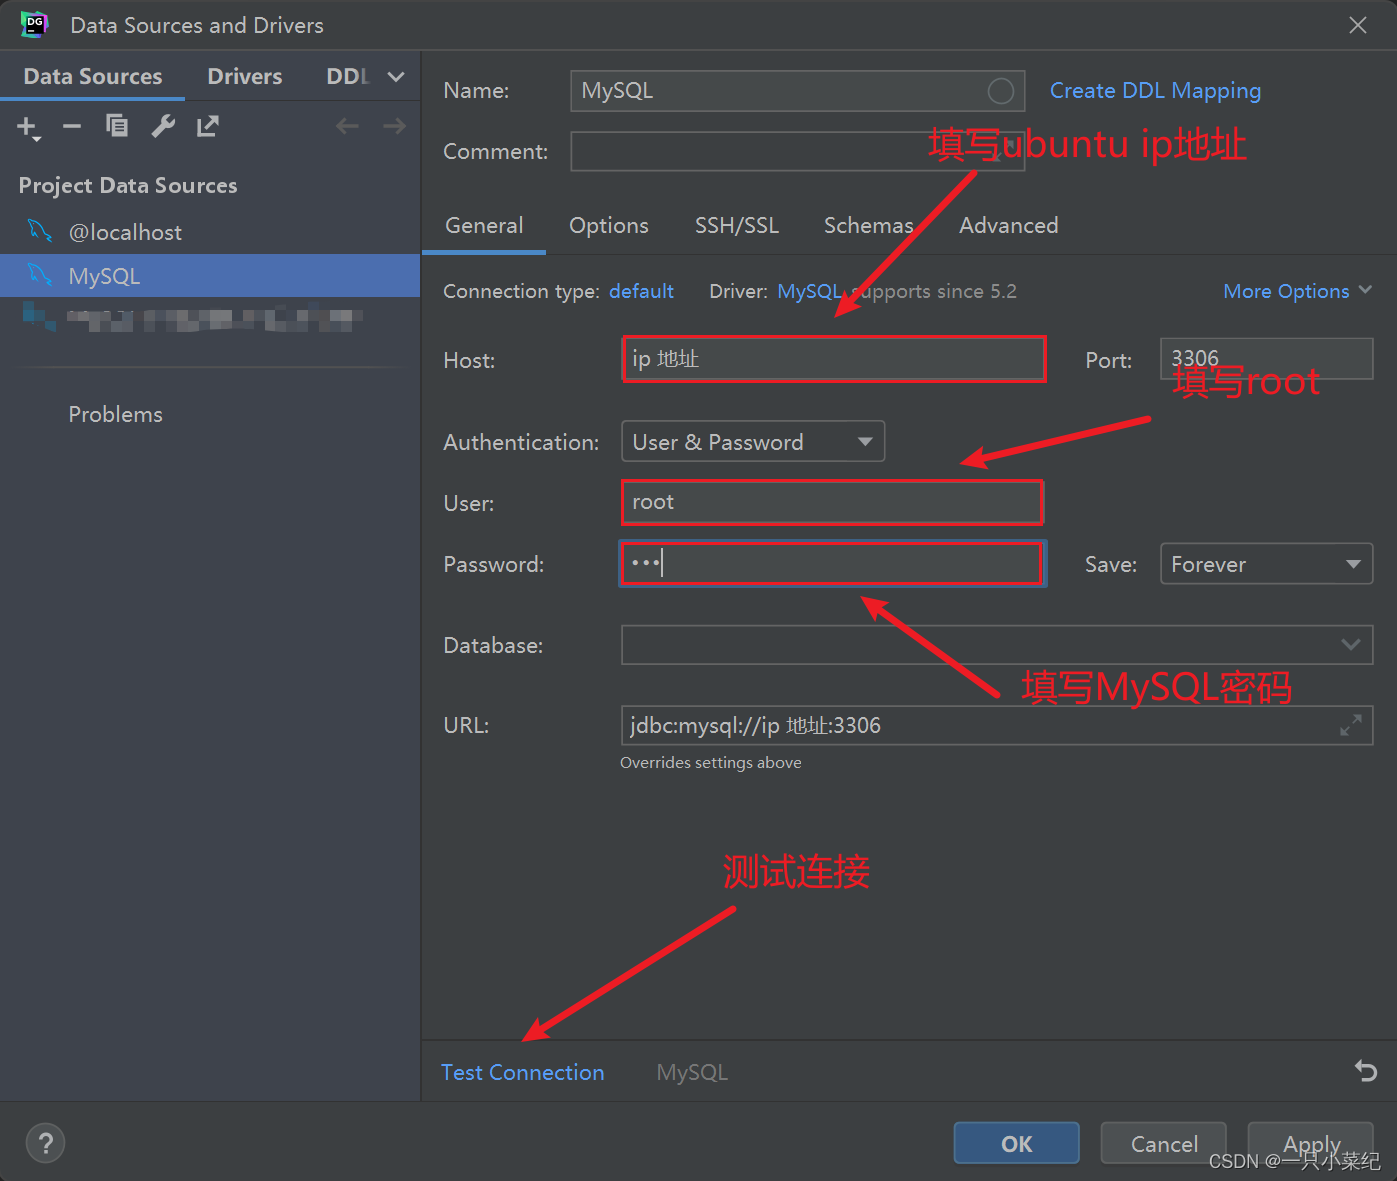
打开DataGrip
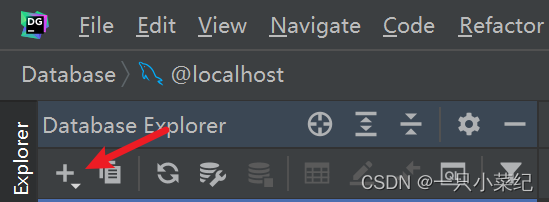
创建MySQL数据库连接
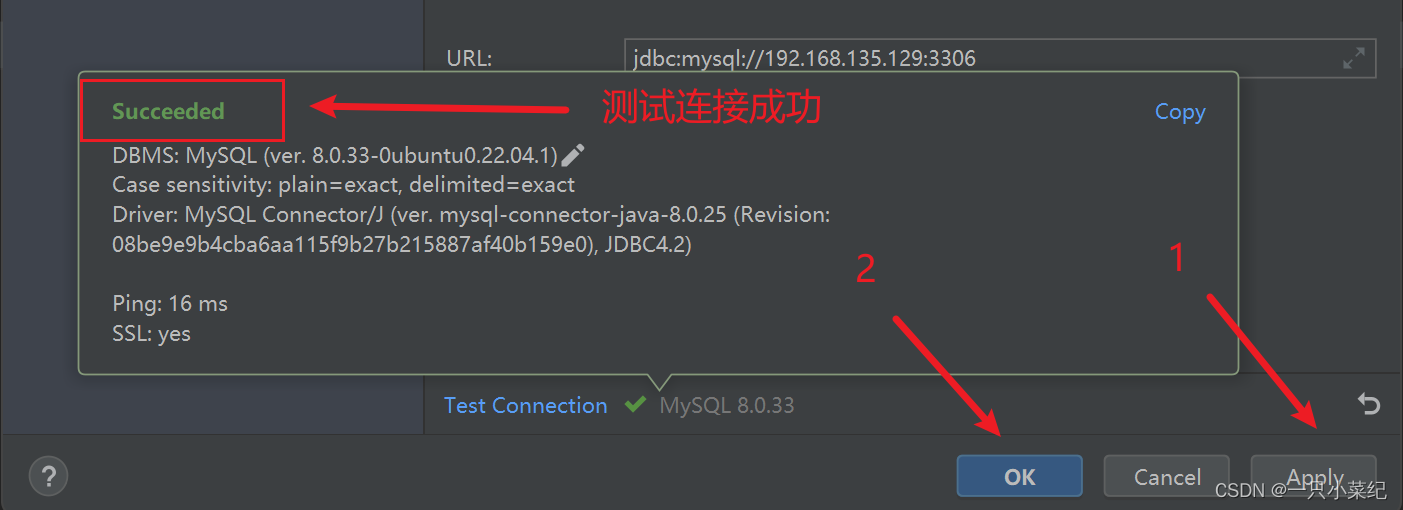
远程连接成功
卸载ubunu中的MySQL
关闭MySQL
> systemctl stop mysql
卸载相关依赖
> sudo apt remove --purge mysql-*
> sudo apt autoremove
卸载过程中提示释放空间,一路 y
清除依赖组建
> dpkg --list | grep mysql


 2845
2845


 被折叠的 条评论
为什么被折叠?
被折叠的 条评论
为什么被折叠?
 到【灌水乐园】发言


