


目录
实现qq、微信聊天输入框,可输入表情包,存储最近使用过的emoji,对输入框复制来的内容进行格式处理。
要在输入框内将表情包图片进行输入,使用原生的input的标签是很难实现的,如果要想实现上面的功能,只有使用自定义输入框,也就是给div添加 contenteditable="true" 属性,把div变成可输入的。下面来看代码示例:
第一步:先完成布局
输入框组件:
<template>
    <div class="container">
      <div class="top-icon">
        <!-- emoji图标 -->
        <el-popover placement="top-end" trigger="click" width="450">
          <template #reference>
            <div class="icon-box">
              <svg t="1690621072710" class="icon" viewBox="0 0 1024 1024" version="1.1" xmlns="http://www.w3.org/2000/svg"
                p-id="30103" width="25" height="25">
                <path
                  d="M515.328 965.2224c-249.9072 0-453.2224-203.3152-453.2224-453.2224s203.3152-453.2224 453.2224-453.2224 453.2224 203.3152 453.2224 453.2224-203.3152 453.2224-453.2224 453.2224z m0-845.0048c-216.0128 0-391.7824 175.7696-391.7824 391.7824s175.7696 391.7824 391.7824 391.7824 391.7824-175.7696 391.7824-391.7824-175.7696-391.7824-391.7824-391.7824z"
                  fill="#4f4f4f" p-id="30105"></path>
                <path d="M385.8944 409.4976m-53.6064 0a53.6064 53.6064 0 1 0 107.2128 0 53.6064 53.6064 0 1 0-107.2128 0Z"
                  fill="#4f4f4f" p-id="30106"></path>
                <path d="M636.8768 409.4976m-53.6064 0a53.6064 53.6064 0 1 0 107.2128 0 53.6064 53.6064 0 1 0-107.2128 0Z"
                  fill="#4f4f4f" p-id="30107"></path>
                <path
                  d="M510.208 708.1984c-122.88 0-183.7568-103.1168-186.3168-107.52a30.72 30.72 0 0 1 53.1456-30.8224c1.9968 3.3792 46.4896 76.9024 133.1712 76.9024 86.784 0 131.328-73.7792 133.1712-76.9024a30.78144 30.78144 0 0 1 41.984-11.008 30.6688 30.6688 0 0 1 11.1616 41.8304c-2.56 4.352-63.488 107.52-186.3168 107.52z"
                  fill="#4f4f4f" p-id="30108"></path>
              </svg>
            </div>
          </template>
          <Emoji />
        </el-popover>
      </div>
      <!-- 自定义输入框 -->
      <div id="message-input" contenteditable="true" spellcheck="false" autofocus></div>
    </div>
</template>

<script setup lang="ts">
import Emoji from './components/Emoji.vue'
</script>

<style scoped lang="scss">
.container {
  width: 100%;
  flex: 1;
  display: flex;
  flex-direction: column;
  position: relative;
  padding: 10px;
  box-sizing: border-box;
}

.send-message-btn {
  position: absolute;
  right: 5px;
  bottom: 5px;
  color: #fff;
}

.top-icon {
  width: 100%;
  display: flex;

  .icon-box {
    margin-right: 10px;
    cursor: pointer;
  }
}

#message-input {
  width: 100%;
  flex: 1;
  margin-top: 5px;
  box-sizing: border-box;
  resize: none;
  overflow: auto;

  &::placeholder {
    font-size: 15px;
  }
}
</style>
emoji组件
<template>
<div class="emoji-container">
<!-- 最近使用 -->
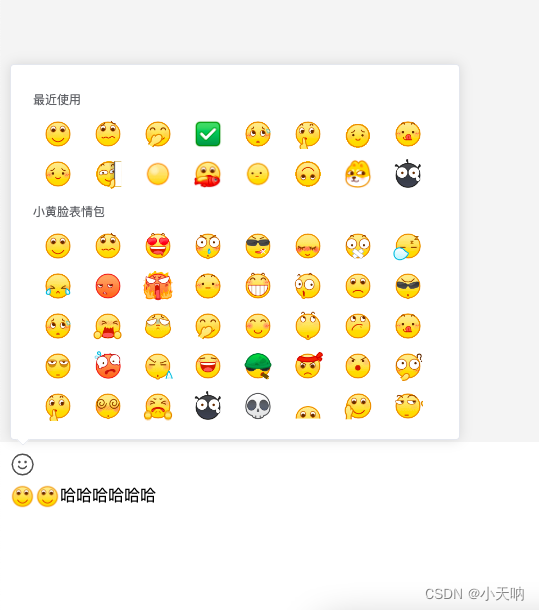
<div class="use-wrap" v-if="historyEmojiList.length">
<div class="emoji-title">最近使用</div>
<div class="recently-use-emoji">
<div class="emoji-item" v-for="(item, index) in historyEmojiList" :key="index">
<img :src="`./gif/${item}.gif`" alt="">
</div>
</div>
</div>
<!-- 所有表情列表 -->
<div class="emoji-title">小黄脸表情包</div>
<div class="all-emoji">
<div class="emoji-item" v-for="(item, index) in 203" :key="index">
<img :src="`./gif/${item}.gif`" alt="">
</div>
</div>
</div>
</template>
<script setup lang="ts">
import { ref } from 'vue'
const historyEmojiList = ref<number[]>([])
</script>
<style lang="scss" scoped>
.emoji-container {
width: 100%;
height: 350px;
padding: 5px 10px 15px;
box-sizing: border-box;
overflow: auto;
&::-webkit-scrollbar {
display: none;
}
}
.emoji-title {
font-size: 12px;
margin: 10px 0 5px;
}
.recently-use-emoji,
.all-emoji {
width: 100%;
display: flex;
flex-wrap: wrap;
.emoji-item {
width: 30px;
height: 30px;
margin: 5px 10px;
cursor: pointer;
img {
width: 100%;
height: 100%;
}
}
}</style>第二步:自定义输入框
<!--
    contenteditable 将div变为input
    spellcheck 取消字母错误提示
    autofocus 自动聚焦
-->
<div id="message-input" contenteditable="true" spellcheck="false" autofocus>
做到这一步,你的div已经可以像正常的input那样输入文本了,不过这里比起原生的input标签有点不足之处在于,如果你是复制的文本到输入框内,会自带css样式:

像上图那样肯定不是我们想要的,就需要对复制的文本进行处理。
我们需要对div添加 paste 事件(复制事件)
<div id="message-input" @paste="handlePaste" contenteditable="true" spellcheck="false" autofocus></div>

<script setup lang="ts">
import Emoji from './components/Emoji.vue'
// 清除复制的文本样式
import { handlePaste } from './utils/textFormat'
</script>
将 handlePaste 方法写到了utils中
// 输入框复制文本事件回调(将复制带样式的文本样式清空, 只保留纯文本)
export const handlePaste = (e) => {
    e.preventDefault()
    let text
    let clp = (e.originalEvent || e).clipboardData
    if (clp === undefined || clp === null) {
        text = window.clipboardData.getData("text") || ""
        if (text !== "") {
            if (window.getSelection) {
                var newNode = document.createElement("span")
                newNode.innerHTML = text;
                window.getSelection().getRangeAt(0).insertNode(newNode)
            } else {
                document.selection.createRange().pasteHTML(text)
            }
        }
    } else {
        text = clp.getData('text/plain') || ""
        if (text !== "") {
            document.execCommand('insertText', false, text)
        }
    }
}
这样就把复制的带样式的文本变为纯文本了

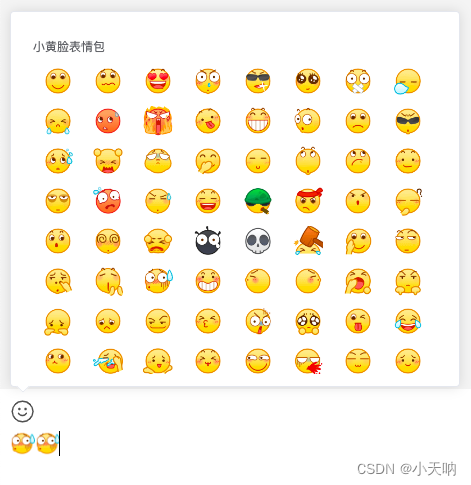
第三步:点击emoji,展示在自定义输入框中
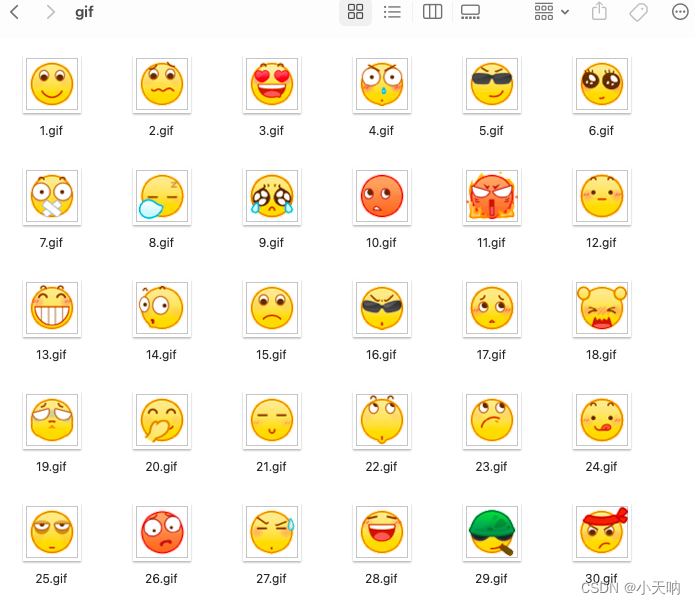
我的emoji是一个一个的gif图,放在public目录下的
需要对每个图片添加点击事件,并把具体点击的哪个emoji传回父组件中
仅展示关键代码
<div class="all-emoji">
    <div class="emoji-item" @click="appendEmoji(item)" v-for="(item, index) in 203" :key="index">
        <img :src="`./gif/${item}.gif`" alt="">
    </div>
</div>
<script setup>
const emit = defineEmits(['selectEmoji'])
// 点击emoji, 输入框插入emoji回调
const appendEmoji = (i) => {
emit('selectEmoji', i)
}
</script>在父组件中给emoji组件绑定自定义事件
<Emoji @selectEmoji="selectEmoji"/>// 自定义输入框dom 绑定ref
const messageInputDom = ref()
// 选择的emoji
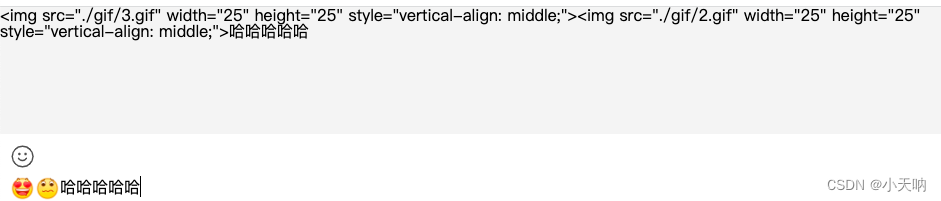
const selectEmoji = (index) => {
// 没有焦点就获取输入框焦点
if (document.activeElement != messageInputDom.value) {
messageInputDom.value.focus()
}
let emojiImg = `<img src="./gif/${index}.gif" width="25" height="25" style="vertical-align: middle;">`
document.execCommand('insertHTML', false, emojiImg)
// 保存最近使用的emoji
recentlyUseEmoji(index)
}
这样就实现了输入框能发送emoji图片了
在代码的后面也有个记录最近使用的emoji图片的功能 recentlyUseEmoji 方法
第四步:记录最近使用的emoji
就只是把最主要是 recentlyUseEmoji 方法,其余的就是在 mounted 从本地存储中拿到数据,传递给子组件就好
// 最近使用的emoji列表
const historyEmojiList = ref<number[]>([])

onMounted(() => {
  historyEmojiList.value = localStorage.getItem('emojiHistory') ? JSON.parse(localStorage.getItem('emojiHistory') as string) : []
})

// 保存最近使用的emoji
const recentlyUseEmoji = (index: number) => {
  let idx = historyEmojiList.value.indexOf(index)
  if (idx < 0) {
    historyEmojiList.value.unshift(index)
  } else {
    historyEmojiList.value.unshift(historyEmojiList.value.splice(idx, 1)[0])
  }
  // 只要两行emoji(16个)
  historyEmojiList.value = historyEmojiList.value.splice(0, 16)
  // 保存记录
  localStorage.setItem('emojiHistory', JSON.stringify(historyEmojiList.value))
}
<Emoji @selectEmoji="selectEmoji" :historyEmojiList="historyEmojiList"/>子组件:
const props = defineProps(['historyEmojiList'])

const historyEmojiList = ref([])

watch(() => props.historyEmojiList, (val) => {
    historyEmojiList.value = val
}, { deep: true })
第五步:获取到输入框的内容
自定义输入框通过v-model获取到内容是行不通的,需要使用 input 事件,给自定义输入框添加input事件 @input="messageInput" ,通过事件对象e获取内容
let message = ref('')
const messageInput = (e) => {
  message.value = e.target.innerHTML
  // (e.target as HTMLInputElement).innerHTML  ts类型
}
message渲染出来的内容:
这里就需要使用 v-html 来渲染
<div v-html="message"></div>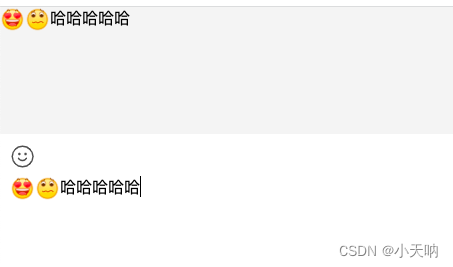
这样就实现了输入框能输入emoji图片的功能了


 578
578

 被折叠的 条评论
为什么被折叠?
被折叠的 条评论
为什么被折叠?
 到【灌水乐园】发言


