


首先在软件中创建一个新项目

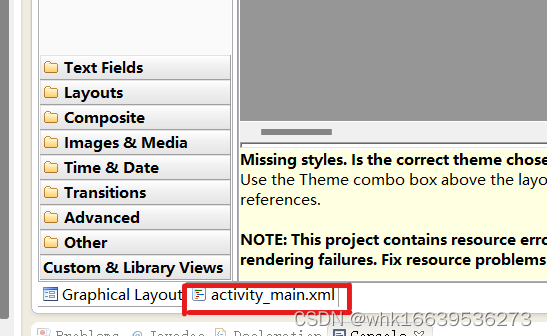
项目名首字母不能为数字,后面几步不需要进行选择点击Next即可,创建完后找到Activity_main.xml文件
在文件中写第一个页面
把右图的初始代码RelativeLayout布局改为左侧的LinearLayout布局,并将框选的四行内容和下方TextView控件删除,将要用到的图片放入res下的drawable文件中,

在LinearLayout中应用背景图片
<LinearLayout xmlns:android="http://schemas.android.com/apk/res/android"
    xmlns:tools="http://schemas.android.com/tools"
    android:layout_width="match_parent"
    android:layout_height="match_parent"
    android:orientation="vertical"
//背景图片                           图片名称
    android:background="@drawable/wx_background"
    tools:context="com.example.jknjk.SecendeActivity" >

</LinearLayout>
在src下的包中新建一个页面,作为第一个页面跳转后的页面
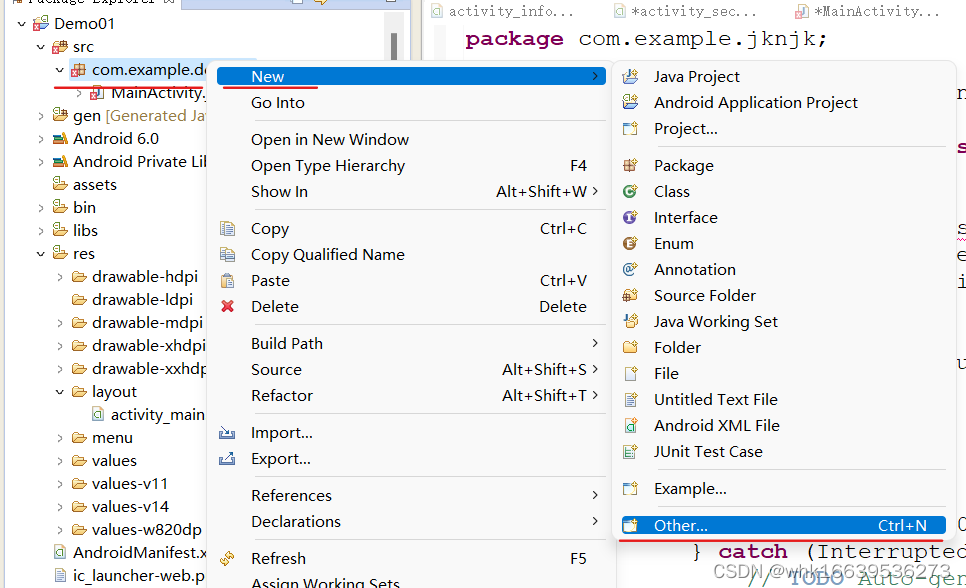
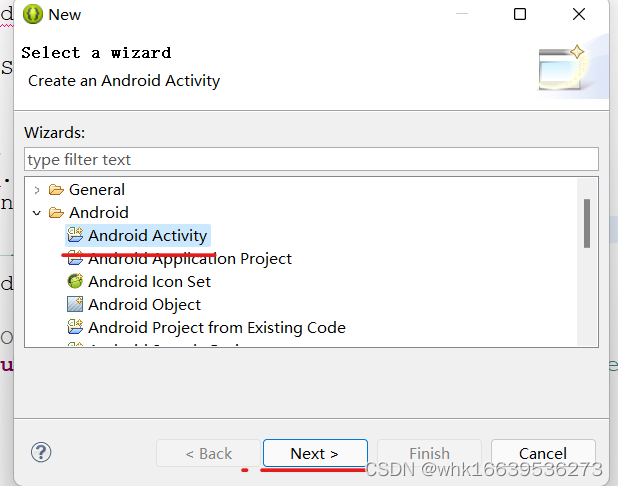
将名字改为其他的名字作为第二个页面

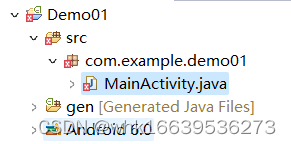
找到对应的第一个页面的.java文件
在里面设置三秒自动跳转
package com.example.jknjk;

import android.support.v7.app.ActionBarActivity;
import android.content.Intent;
import android.os.Bundle;
import android.view.Menu;
import android.view.MenuItem;

public class SecendeActivity extends ActionBarActivity {

	@Override
	protected void onCreate(Bundle savedInstanceState) {
		super.onCreate(savedInstanceState);
		setContentView(R.layout.activity_main);

		//开启一个子线程
		Thread t = new Thread(new Runnable() {

			@Override
			public void run() {
				try {
					//等待3秒
					Thread.sleep(3000);
				} catch (InterruptedException e) {
					// TODO Auto-generated catch block
					e.printStackTrace();
				}
//				开启第二个页面                                   第二个页面
				Intent t = new Intent(getApplicationContext(), SecendeActivity.class);

				startActivity(t);

			}
		});
	}


}
在第二个页面(res下的layout下的Activity_Secende.xml文件)进行布局,同样做法将RelativeLayout布局改为LinearLayout布局,在里面加入不同的控件将页面做出用户注册的页面,图图所示
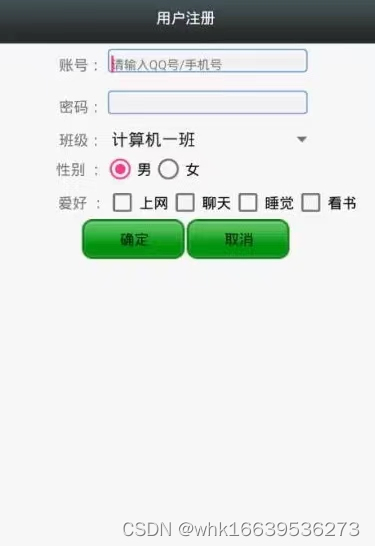
代码如下
<LinearLayout xmlns:android="http://schemas.android.com/apk/res/android"
    xmlns:tools="http://schemas.android.com/tools"
    android:layout_width="match_parent"
    android:layout_height="match_parent"
    android:orientation="vertical"
    tools:context="${relativePackage}.${activityClass}" >

    <TextView
        android:layout_width="match_parent"
        android:layout_height="80dp"
        android:background="#3A4445"
        android:gravity="center"
        android:text="用户注册表"
        android:textColor="#ffffff"
        android:textSize="20dp" />

    <LinearLayout
        android:layout_width="match_parent"
        android:layout_height="50dp" >

        <TextView
            android:layout_width="0dp"
            android:layout_height="match_parent"
            android:layout_weight="1"
            android:gravity="center_vertical|right"
            android:text="账号:" />

        <EditText
            android:id="@+id/ed_user"
            android:layout_width="0dp"
            android:layout_height="40dp"
            android:layout_weight="3"
            android:background="@drawable/ed" />
    </LinearLayout>

    <LinearLayout
        android:layout_width="match_parent"
        android:layout_height="50dp" >

        <TextView
            android:layout_width="0dp"
            android:layout_height="match_parent"
            android:layout_weight="1"
            android:gravity="center_vertical|right"
            android:text="密码:" />

        <EditText
            android:id="@+id/ed_password"
            android:layout_width="0dp"
            android:layout_height="40dp"
            android:layout_weight="3"
            android:background="@drawable/ed" />
    </LinearLayout>

    <LinearLayout
        android:layout_width="match_parent"
        android:layout_height="50dp" >

        <TextView
            android:layout_width="0dp"
            android:layout_height="match_parent"
            android:layout_weight="1"
            android:gravity="center_vertical|right"
            android:text="班级:" />

        <Spinner
            android:id="@+id/sp_class"
            android:layout_width="0dp"
            android:layout_height="match_parent"
            android:layout_weight="3" />
    </LinearLayout>

    <LinearLayout
        android:layout_width="match_parent"
        android:layout_height="50dp" >

        <TextView
            android:layout_width="0dp"
            android:layout_height="match_parent"
            android:layout_weight="1"
            android:gravity="center_vertical|right"
            android:text="性别:" />

        <RadioGroup
            android:layout_width="0dp"
            android:layout_height="match_parent"
            android:layout_weight="3"
            android:gravity="center_vertical"
            android:orientation="horizontal" >

            <RadioButton
                android:id="@+id/rb_sex_m"
                android:layout_width="wrap_content"
                android:layout_height="wrap_content"
                android:text="男" />

            <RadioButton
                android:id="@+id/rb_sex_w"
                android:layout_width="wrap_content"
                android:layout_height="wrap_content"
                android:text="女" />
        </RadioGroup>
    </LinearLayout>

    <LinearLayout
        android:layout_width="match_parent"
        android:layout_height="50dp"
        android:orientation="horizontal" >

        <TextView
            android:layout_width="0dp"
            android:layout_height="match_parent"
            android:layout_weight="1"
            android:gravity="center_vertical|right"
            android:text="爱好:" />

        <CheckBox
            android:id="@+id/cb_book"
            android:layout_width="0dp"
            android:layout_height="wrap_content"
            android:layout_weight="1"
            android:text="看书" />

        <CheckBox
            android:id="@+id/cb_sleep"
            android:layout_width="0dp"
            android:layout_height="wrap_content"
            android:layout_weight="1"
            android:text="睡觉" />

        <CheckBox
            android:id="@+id/cb_gaem"
            android:layout_width="0dp"
            android:layout_height="wrap_content"
            android:layout_weight="1"
            android:text="打游戏" />
    </LinearLayout>

    <LinearLayout
        android:layout_width="match_parent"
        android:layout_height="50dp"
        android:gravity="center"
        android:orientation="horizontal" >

        <Button
            android:id="@+id/bt_qd"
            android:layout_width="100dp"
            android:layout_height="35dp"
            android:background="@drawable/button"
            android:text="确认"
            android:layout_marginRight="10dp" />

        <Button
            android:id="@+id/bt_qx"
            android:layout_width="100dp"
            android:layout_height="35dp"
            android:background="@drawable/button"
            android:text="取消" />
    </LinearLayout>

</LinearLayout>
其中在输入框和按钮需要设置圆角、边框颜色和填充颜色,用的是背景
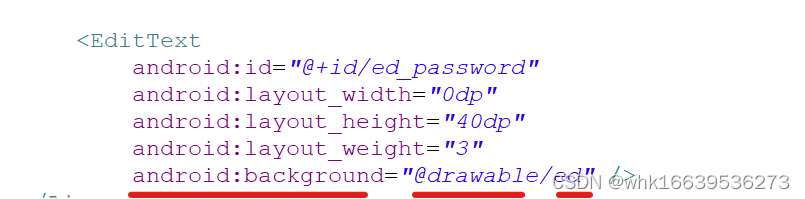
三处画横线的第一个是给输入框设置背景,第二、三个是背景内容,第二个是背景内容设置的文件所在位置,第三个是文件名称;下面是背景内容的创建和书写:
1.创建文件
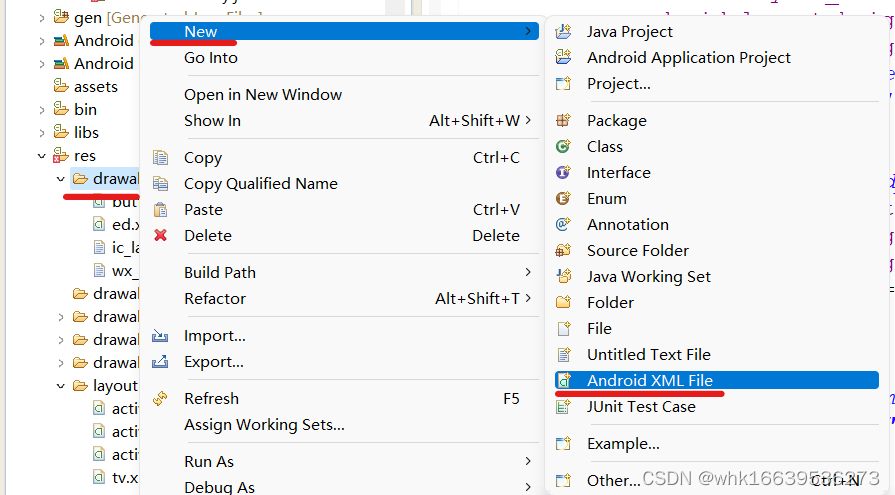
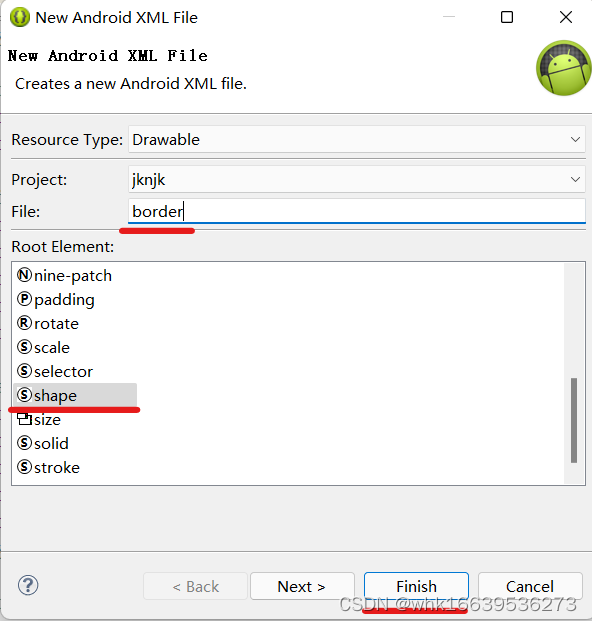
"border"为给文件起的名字
2.书写内容
<?xml version="1.0" encoding="utf-8"?>
<shape xmlns:android="http://schemas.android.com/apk/res/android" >
    //圆角设置
    <corners android:radius="15dp"/>
    //背景填充颜色
    <solid android:color="#ffffff"/>
    //边框颜色                                                                                    边框宽度
    <stroke  android:color="#E2E8F4" android:width="2dp"/>

</shape>
在整个页面布局中需要在输入框、单选按钮、多选按钮、下拉列表和提交按钮中设置id属性以便在第三个页面对数据进行获取

id属性设置的格式为android:id=“@+id/id名称”
下一步在对应的.java文件中进行对数据的获取、给下拉列表添加数据和对点击按钮跳转页面传值的设置,(下拉列表与其他控件不同不用再布局页面中添加数据,需要在.java文件中添加数据)下面是对数据的获取、下拉列表添加数据和对点击按钮跳转页面传值的设置:
1.定义变量:
package com.example.jknjk;

import android.app.Activity;
import android.content.Intent;
import android.os.Bundle;
import android.view.Menu;
import android.view.MenuItem;
import android.view.View;
import android.view.View.OnClickListener;
import android.widget.ArrayAdapter;
import android.widget.Button;
import android.widget.CheckBox;
import android.widget.EditText;
import android.widget.RadioButton;
import android.widget.Spinner;

public class MainActivity extends Activity implements OnClickListener {
//定义变量
	EditText uers,password;
	RadioButton rdm,rdw;
	CheckBox book,sleep,gaem;
	Spinner sp;
	Button btqd,btqx;
	String []str = null;

    @Override
    protected void onCreate(Bundle savedInstanceState) {
        super.onCreate(savedInstanceState);
    }
}
2.找到按钮
package com.example.jknjk;
import android.app.Activity;
import android.content.Intent;
import android.os.Bundle;
import android.view.Menu;
import android.view.MenuItem;
import android.view.View;
import android.view.View.OnClickListener;
import android.widget.ArrayAdapter;
import android.widget.Button;
import android.widget.CheckBox;
import android.widget.EditText;
import android.widget.RadioButton;
import android.widget.Spinner;
public class MainActivity extends Activity implements OnClickListener {
//定义
EditText uers,password;
RadioButton rdm,rdw;
CheckBox book,sleep,gaem;
Spinner sp;
Button btqd,btqx;
String []str = null;
@Override
protected void onCreate(Bundle savedInstanceState) {
super.onCreate(savedInstanceState);
setContentView(R.layout.activity_main);
inti();
}
//找到这个按钮
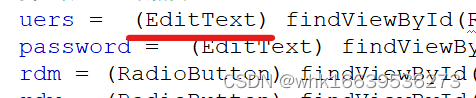
public void inti(){
// 变量名 数据类型 id名称
uers = (EditText) findViewById(R.id.ed_user);
password = (EditText) findViewById(R.id.ed_password);
rdm = (RadioButton) findViewById(R.id.rb_sex_m);
rdw = (RadioButton) findViewById(R.id.rb_sex_w);
book = (CheckBox) findViewById(R.id.cb_book);
sleep = (CheckBox) findViewById(R.id.cb_sleep);
gaem = (CheckBox) findViewById(R.id.cb_gaem);
sp = (Spinner) findViewById(R.id.sp_class);
btqd = (Button) findViewById(R.id.bt_qd);
btqx = (Button) findViewById(R.id.bt_qx);
}在用findViewById时数据类型需要强转
3.给下拉列表添加数据
在给下拉列表添加数据的时候需要对下拉列表进行样式的修改,下面图片为系统默认样式,
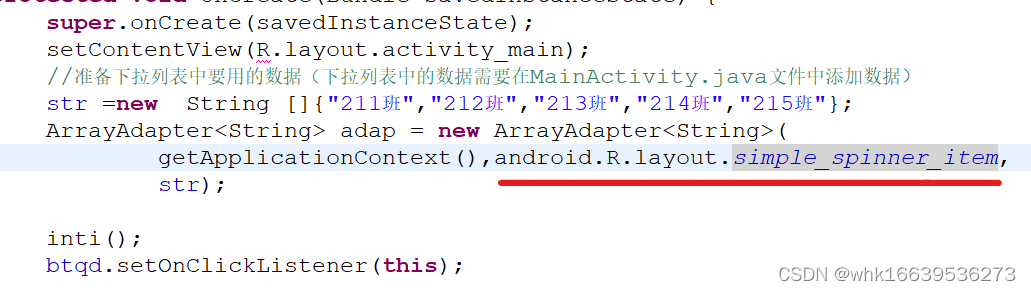
按住ctrl键,鼠标放上面选择第二个点击会出现体统默认的样式代码(系统默认不可修改)
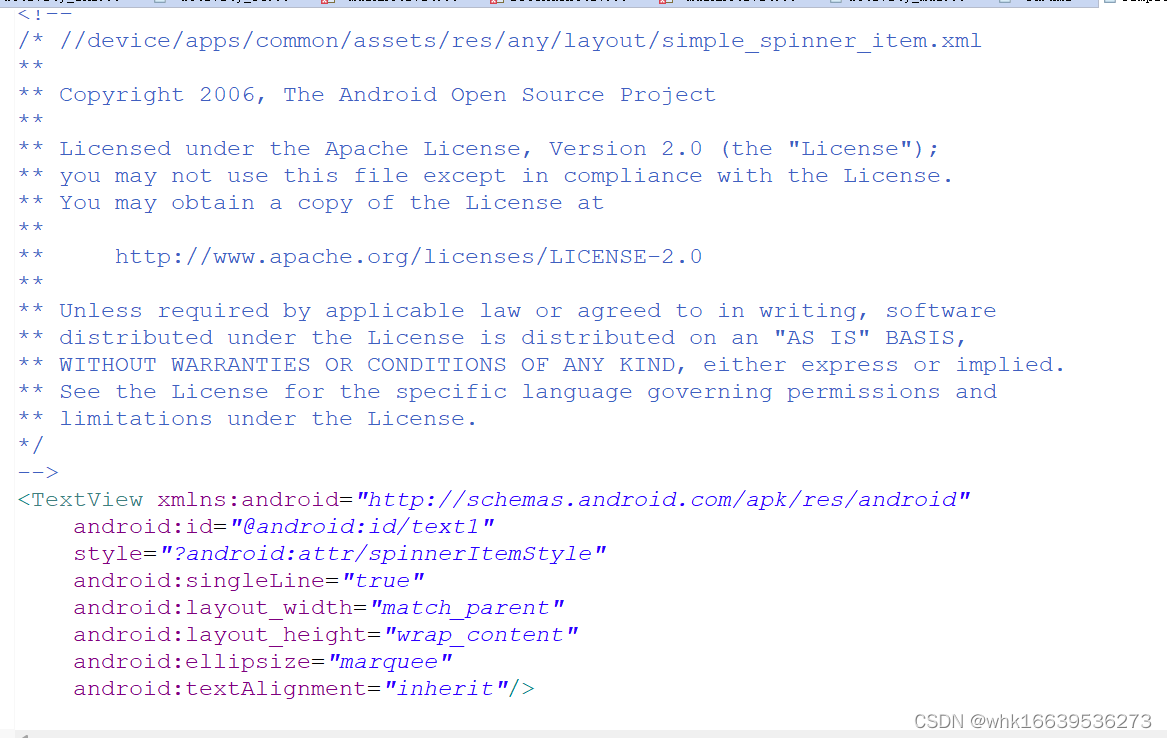
在layout文件中新建一个TextView文件:


将系统对样式的设定全部复制粘贴到新建的文件中在里面加入背景颜色和字体颜色
<?xml version="1.0" encoding="utf-8"?>
<!--
/* //device/apps/common/assets/res/any/layout/simple_spinner_item.xml
**
** Copyright 2006, The Android Open Source Project
**
** Licensed under the Apache License, Version 2.0 (the "License");
** you may not use this file except in compliance with the License.
** You may obtain a copy of the License at
**
**     http://www.apache.org/licenses/LICENSE-2.0
**
** Unless required by applicable law or agreed to in writing, software
** distributed under the License is distributed on an "AS IS" BASIS,
** WITHOUT WARRANTIES OR CONDITIONS OF ANY KIND, either express or implied.
** See the License for the specific language governing permissions and
** limitations under the License.
*/
-->
<TextView xmlns:android="http://schemas.android.com/apk/res/android"
    android:id="@android:id/text1"
    style="?android:attr/spinnerItemStyle"
    android:singleLine="true"
    android:layout_width="match_parent"
    android:layout_height="wrap_content"
    android:ellipsize="marquee"
    //背景颜色
    android:background="#FFAEC9"
    //字体颜色
    android:textColor="#ffffff"
    android:textAlignment="inherit"/>
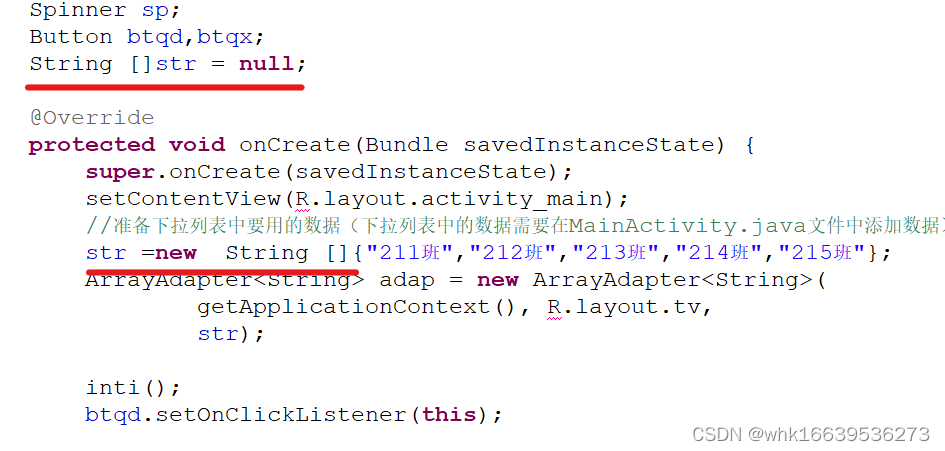
下面是下拉列表的数据添加
  @Override
    protected void onCreate(Bundle savedInstanceState) {
        super.onCreate(savedInstanceState);
        setContentView(R.layout.activity_main);
        //准备下拉列表中要用的数据(下拉列表中的数据需要在MainActivity.java文件中添加数据)
        str =new  String []{"211班","212班","213班","214班","215班"};
        ArrayAdapter<String> adap = new ArrayAdapter<String>(
        		getApplicationContext(), R.layout.tv,
        		str);

        inti();
        btqd.setOnClickListener(this);


    }
在准备数据的时候要在刚开始定义变量的位置定义,并且字符串需要动态初始化,图片如下
4.获取数据
@Override
public void onClick(View v) {
//获取账号输入框中的内容 获取数据 将数据转为字符串类型
String users = uers.getText().toString();
//获取密码输入框中的内容
String passwords = password.getText().toString();
//获取单选框中的数据
String sex = "";
//当单选按钮“男”被点击
if(rdm.isChecked()){
//数据存入sex中
sex = rdm.getText().toString();
}
//当单选按钮“女”被点击
if(rdw.isChecked()){
//数据存入sex中
sex = rdw.getText().toString();
}
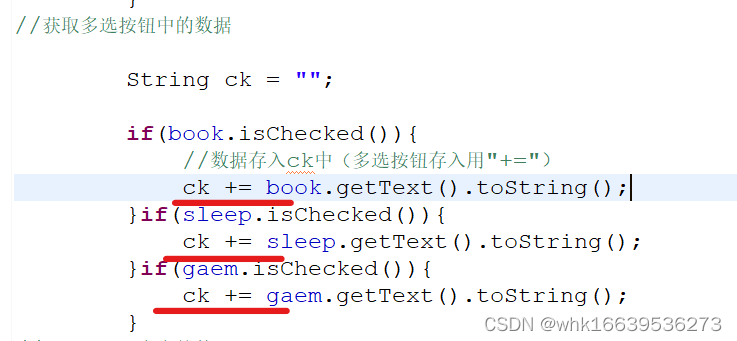
//获取多选按钮中的数据
String ck = "";
if(book.isChecked()){
//数据存入ck中(多选按钮存入用"+=")
ck += book.getText().toString();
}if(sleep.isChecked()){
ck += sleep.getText().toString();
}if(gaem.isChecked()){
ck += gaem.getText().toString();
}
//获取下拉列表中的数据
int i = sp.getSelectedItemPosition();
String spr = str[i];
//跳转页面
Intent it = new Intent(getApplicationContext(),InforActivity.class);
//传递内容
it.putExtra("uers", users);
it.putExtra("password", passwords);
it.putExtra("sex", sex);
it.putExtra("ck", ck);
it.putExtra("sp", spr);
startActivity(it);
}
注意多远按钮获取数据时是+=不是=;
获取下拉列表内容时获取的是所对应的下标,

最后用建立第二个页面的方法建立第三个页面,在第三个页面所对应的.java文件中完成对第二个页面获取的内容的展示:
package com.example.jknjk;

import android.support.v7.app.ActionBarActivity;
import android.content.Intent;
import android.os.Bundle;
import android.view.Menu;
import android.view.MenuItem;
import android.widget.TextView;
import android.widget.Toast;

public class InforActivity extends ActionBarActivity {

	@Override
	protected void onCreate(Bundle savedInstanceState) {
		super.onCreate(savedInstanceState);
		setContentView(R.layout.activity_infor);

	Intent it = getIntent();
		//获取数据
		String uers = it.getStringExtra("user");
		String password = it.getStringExtra("password");
		String sex = it.getStringExtra("sex");
		String ck = it.getStringExtra("ck");
		String spr = it.getStringExtra("spr");

		String str = uers+":"+password+":"+sex+":"+ck+":"+spr;
		//显示这些数据
		//土司显示
		Toast.makeText(getApplicationContext(), str, 1).show();;
		//文本显示
		TextView tvxhow = findViewById(R.id.tv_show);
	}


}


 3044
3044


 被折叠的 条评论
为什么被折叠?
被折叠的 条评论
为什么被折叠?
 到【灌水乐园】发言


