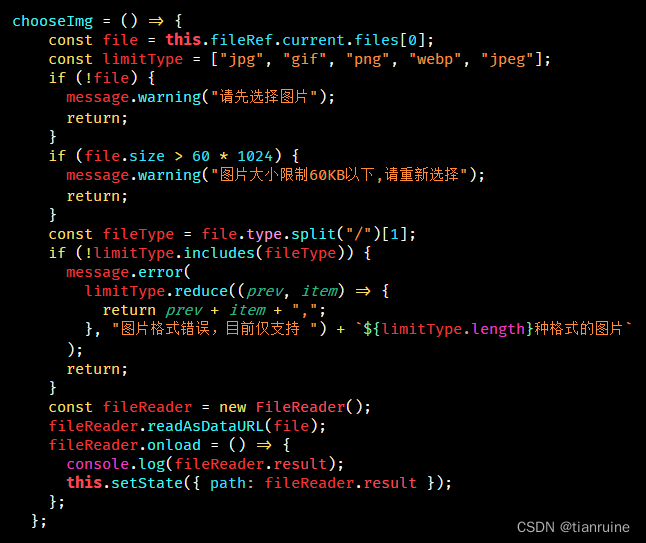
图片上传
1.通过fileReader 对象将图片变成base64 和一个字符串一样使用 可以直接入库
把上传的图片的数据直接存到数据库就行
import React, { PureComponent, createRef } from "react";
class AddGoods extends PureComponent {
  fileRef = createRef();
  state = {
    img: ""
  }
  getBase64 = () => {
    const file= this.fileRef.current.files[0]
    const reader= new FileReader();
    console.log(reader)
    reader.onload= () => {
      console.log('base64转换完成')
      console.log(reader.result)
      this.setState({ img: reader.result})
    }
    reader.readAsDataURL(file)
  }

  render() {
    return (
    <div>
      <input ref={this.fileRef } type="file" />
      <button onClick={this.getBase64}>获取图片</button>
      <img src={this.state.img} alt="" />
    </div>);
  }

  componentDidMount() {}
}

export default AddGoods;
2. 通过formdata 服务端将文件保存到服务器 之后将图片的服务器路径入库
* 通过input file 获取图片信息
* 将文件加入到formdata对象中
* 后端会从formdata对象解析图片的数据流
* 将图片保存到服务器下(可以是自己的服务器也可以是图床) -> 产生一个找到图片的路径
* 将路径保存到数据库 返回给前端
import React, { PureComponent, createRef } from "react";
import { uploadFile } from "@/api"
class AddGoods extends PureComponent {
  fileRef = createRef();
  state = {
    img: ""
  }
  getFormData = async () => {
    const file= this.fileRef.current.files[0]
    const  form = new FormData();
    form.append("hehe",file)
    const result = await uploadFile(form) //把图片存到服务器
    //console.log(result)
    this.setState({img:`http://localhost:3000${result.path}`})
  }

  render() {
    return (
    <div>
      <input ref={this.fileRef } type="file" />
      <button onClick={this.getFormData}>获取图片</button>
      <img src={this.state.img} alt="" />
    </div>);
  }

  componentDidMount() {}
}

export default AddGoods;
Excel的导出
1. 纯前端的导入导出
2. 后端提供一个下载链接
3. 通过ajax接口返回二进制数据流实现导出
方式1:纯前端方式导出
用到的不多
需要用到插件xlsx
import React, { Component } from 'react';
import  XLSX from "xlsx"
console.log(XLSX)
class ExportElsx extends Component {
  createElsx(){
    // 获取表格的dom元素
    var elt = document.getElementsByTagName('table')[0];
    console.log(elt)
    // 将表格的dom 元素转化为 excel工作薄
    var wb = XLSX.utils.table_to_book(elt, {sheet:"Sheet JS"});
    // 将工作薄导出为excel文件
    XLSX.writeFile(wb,'呵呵哒.xlsx');
  }
  state = {  }
  render() {
    return (
      <div>
        <table>
          <tr>
            <td>序号</td>
            <td>名字</td>
            <td>描述</td>
            <td>呵呵</td>
          </tr>
          <tr>
            <td>1</td>
            <td>韩梅梅</td>
            <td>好看</td>
            <td>呵呵</td>
          </tr>
          <tr>
            <td>2</td>
            <td>李蕾蕾</td>
            <td>呵呵</td>
            <td>呵呵</td>
          </tr>
        </table>
        <button onClick={this.createElsx}>导出excel</button>
      </div>
     );
  }
}

export default ExportElsx;
方式2:后端给个链接的方式导出
直接通过后端返回来的接口通过window.open()进行打开这个链接,就会下载excel到本地,但是用户体验不好,页面会抖动一下,通过用iframe体验会更好,页面不会抖动,但是在react组件里面用不了
以下是两种方式在原生js的用法
<body>
<!-- iframe 下载测试 1-->
<button onclick='download()'>iframe</button>
<iframe name='myFrame' style="display:none;"></iframe>
<script>
  function download(){
    window.open('http://localhost:3001/admin/export','myFrame')
  }
</script>
<!-- <!-- <!-- 下载测试2 -->
 <button onclick='download()'>open下载</button>
<script>
  function download(){
    window.open('http://localhost:3001/admin/export')
  }
</script>
在react组件里面用的时候
import React, { Component } from 'react';
import XLSX from "xlsx"
class ExportElsx extends Component {

  state = { }
  download = () => {
    window.open('http://localhost:3001/admin/export')
    // window.open('http://localhost:3001/kind/exportExcel','myFrame') //这是通过iframe的方法,但是在react组件里面不行
  }

  render() {
    return (
      <div>
        <button onClick={this.download}>导出excel</button>
        <hr />
        通过iframe实现下载
        // <iframe name='myFrame' style="display:none;"></iframe>  会报错,在react里面不支持这样写
        <button onClick={this.download}>iframe下载</button>
      </div>
     );
  }
}

export default ExportElsx;
方式3: 通过ajax接口返回二进制数据流实现导出
export const uploadExcel = (data = {}) => {
  let url = "/api/admin/export";
  return  new Promise((resolve,reject) => {
    axios({
      url,
      method: "POST",
      responseType: 'arraybuffer',
    }).then((res) => {
      console.log(res)
      // 将接口请求回来的数据流转化连接
      const loadstream = window.URL.createObjectURL(new Blob([res.data]))
      // 从header里获取文件名
      const contentDisposition = res.headers['content-disposition'] || '';
      const encodedFilename = contentDisposition.split('=')[1];
      //给导出的excel取后端写的文件名字
      const filename = decodeURIComponent(encodedFilename);
      // 创建一个a标签来下载文件
      const link = document.createElement('a')
      link.style.display = 'none'
      link.href = loadstream
      link.download=filename
      document.body.appendChild(link)
      // 模拟点击按标签
      if (navigator.userAgent.indexOf('Firefox') > -1) {
        // 火狐浏览器不支持click()
        const evt = document.createEvent('MouseEvents');
        evt.initEvent('click', true, true);
        link.dispatchEvent(evt);
      } else {
        link.click();
      }
      // 释放a标签和bobel对象
      document.body.removeChild(link)
      window.URL.revokeObjectURL(loadstream) // 释放掉blob对象
      resolve({ code:0, msg: "导出成功"})
    })

  })


};
上面是一个处理二进制流转化成Excel的接口进行处理
在用的时候直接通过这个接口来处理数据就行
用的时候
//通过按钮来触发这个方法
 <Button key="button" type="primary" onClick={this.uploadExcel}>
              导出数据
            </Button>
// 导出数据,在组件里面定义了一个方法
  uploadExcel = async() => {
    const result = await uploadExcel({})
    const { code, msg} = result;
    if(!code) {
      message.success(msg)
    }
  }


 3万+
3万+


 被折叠的 条评论
为什么被折叠?


