


目录
什么是Starter?Starter其实就是我们经常在maven中的导入的各种模块,自定义Starter可以快速的满足开发的需求,并且可以重复使用无需粘贴代码,直接从maven仓库中导入即可。那么我们如何自定义一个Starter呢?这里我们以IP自动记录为例(自定义Starter的知识点只需看主要部分即可):
一、创建Starter
1、自定义Starter的命名规则(主要)
如果为SpringBoot官方提供的Starter,那么都会将spring-boot-starter放在前面,如spring-boot-starter-web;如果为自定义Starter,则会将spring-boot-starter放在后面,如mybatis-spring-boot-starter。所以这里我命名为ipautocount-spring-boot-starter:
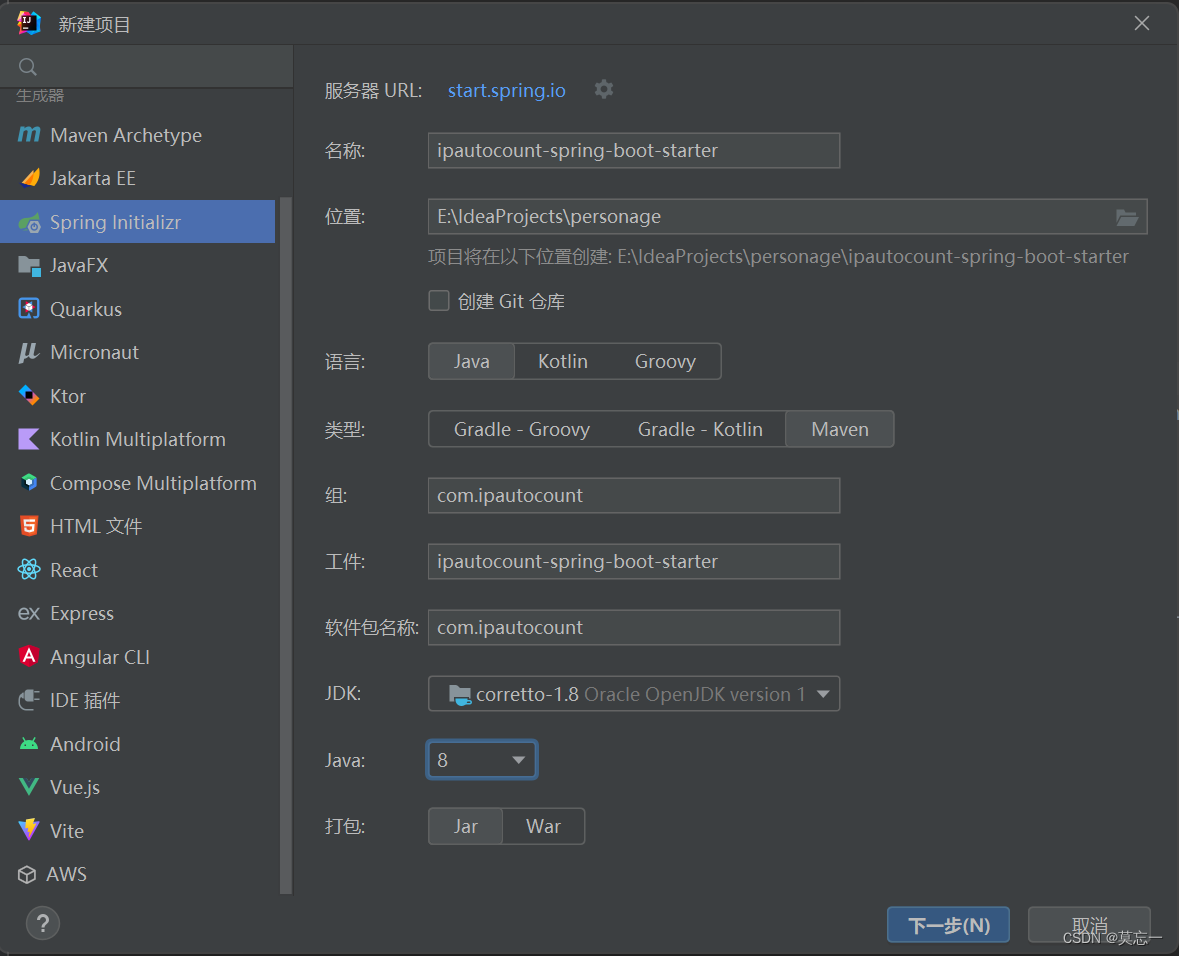
2、创建项目
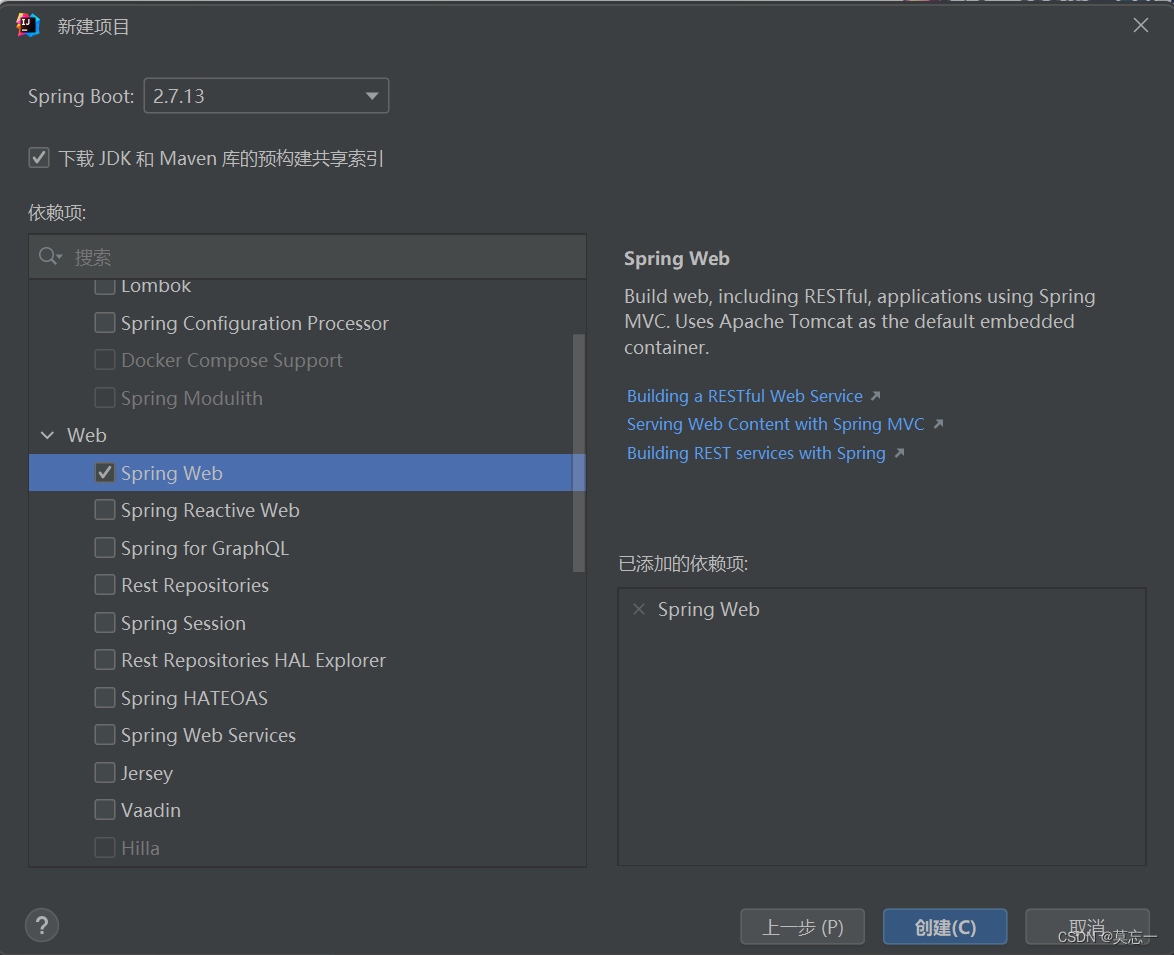
因为需要监控Web接口,所以我们自然也需要导入Web依赖:
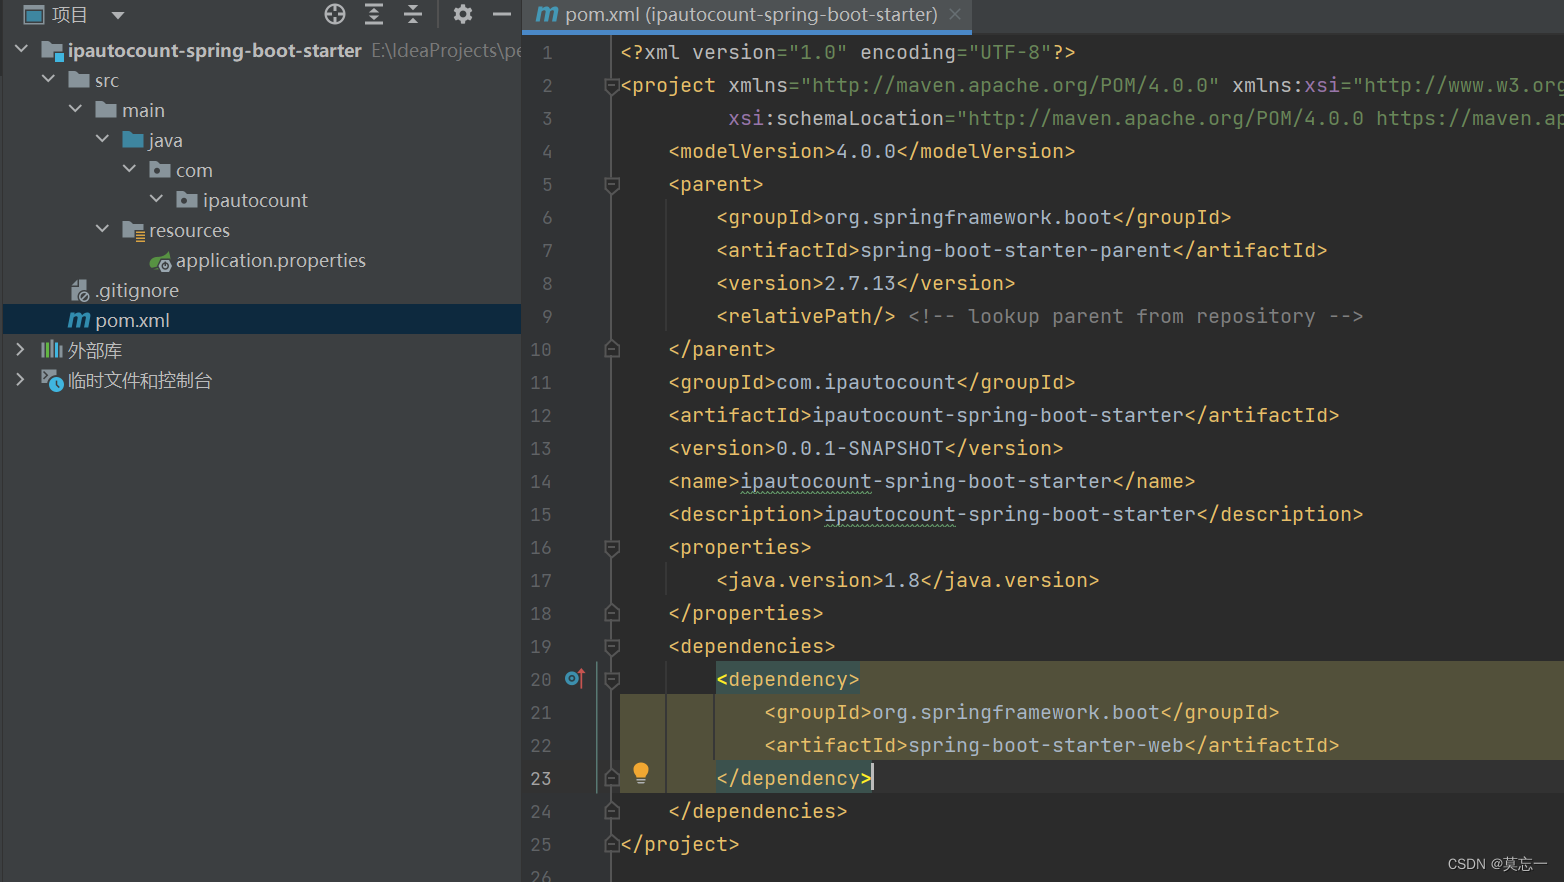
并且我们不需要在这里打包和测试并不是刚需,所以可以删除spring-boot-starter-test和spring-boot-maven-plugin的坐标,以及test目录及启动入口:
接下来就是实现代码,因为篇幅和时间限制,具体实现代码不多讲述了,主要看自定义Starter方面需要的代码,其他具体代码请在文章头或者文章尾部的资源进行查看。
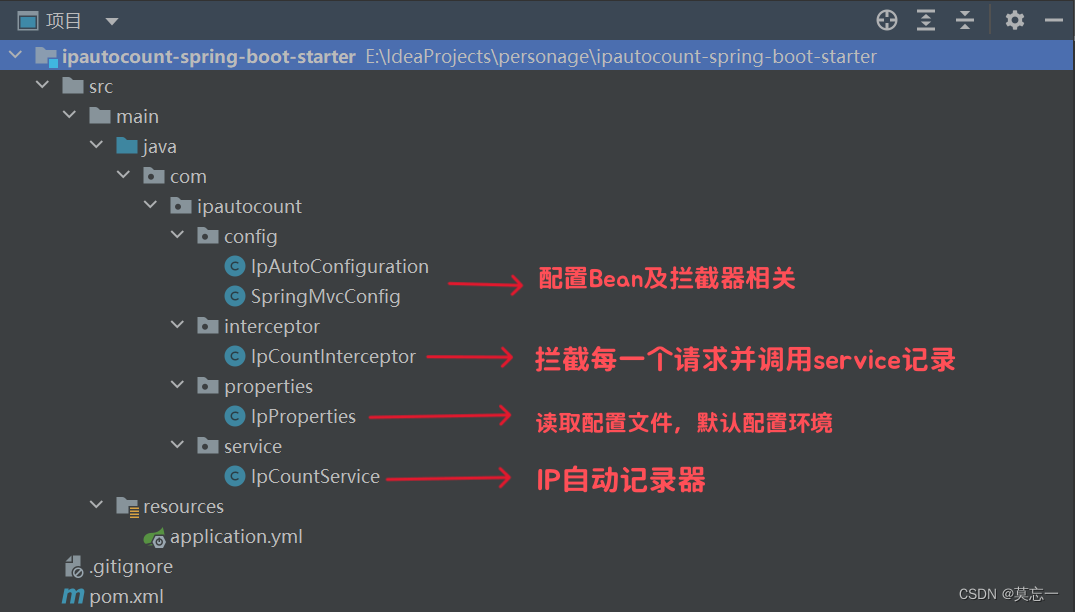
先来看IpProperties:
其中cycle是管理控制台多久显示一次日志信息;cycleReset是每次周期结束是否清空原本信息;model为日志显示的模式。其中@ConfigurationProperties(prefix = "ipautocount")非常重要,加上它之后,使用者就可以通过配置文件的方式来管理模块。同时类中的注释也不可少,后期可以在yml中出现注释。
@Component("ipProperties")
@ConfigurationProperties(prefix = "ipautocount")//绑定配置文件属性
public class IpProperties {
    /**
     * 日志显示周期
     */
    private Long cycle = 2L;

    /**
     * 是否周期重置数据
     */
    private boolean cycleReset = false;

    /**
     * 日志输出模式(detail:详细模式;simple:极简模式)
     */
    private String model = LogModel.DETAIL.value;

    public enum LogModel {
        DETAIL("detail"),//详细模式
        SIMPLE("simple");//极简模式
        private String value;
        LogModel(String value) {
            this.value = value;
        }
        public String getValue() {
            return value;
        }
    }

    public Long getCycle() {
        return cycle;
    }

    public void setCycle(Long cycle) {
        this.cycle = cycle;
    }

    public boolean isCycleReset() {
        return cycleReset;
    }

    public void setCycleReset(boolean cycleReset) {
        this.cycleReset = cycleReset;
    }

    public String getModel() {
        return model;
    }

    public void setModel(String model) {
        this.model = model;
    }
}
在拦截器中只要拦截到请求,就调用IP记录器的记录方法。
public class IpCountInterceptor implements HandlerInterceptor {
    @Autowired
    IpCountService ipCountService;

    @Override
    public boolean preHandle(HttpServletRequest request, HttpServletResponse response, Object handler) throws Exception {
        ipCountService.count();
        return true;
    }
}
配置拦截所有路径的请求:
@Configuration(proxyBeanMethods = true)
public class SpringMvcConfig implements WebMvcConfigurer {
    @Override
    public void addInterceptors(InterceptorRegistry registry) {
        registry.addInterceptor(ipCountInterceptor()).addPathPatterns("/**");
    }

    @Bean
    public IpCountInterceptor ipCountInterceptor() {
        return new IpCountInterceptor();
    }
}
配置Bean并且开启定时器:(创建对象时顺便输出一下,显得高级一点)
@EnableScheduling//开启定时任务功能
@Import({IpProperties.class, SpringMvcConfig.class})
public class IpAutoConfiguration {
    @Bean
    public IpCountService ipCountService() {
        System.out.println();
        System.out.println("+  +--+  +---  +---+  +   +  +---+  --+--");
        System.out.println("|  |  |  |     |   |  |   |  |   |    |  ");
        System.out.println("|  |__+  |     |   |  |   |  |   |    |  ");
        System.out.println("|  |     |     |   |  |   |  |   |    |  ");
        System.out.println("+  |     +---  +---+  +---+  |   |    |  ");
        System.out.println("\033[32m :: Ip Auto Count ::\033[0m               (v0.1)");
        System.out.println();
        return new IpCountService();
    }
}
现在来看IP记录器中显示日志的方法:
其中#{ipProperties.cycle}是从ipProperties中获取属性(注意:ipProperties不是对象名称,而是配置类创建Bean时自定义的名称)
@Autowired
private IpProperties ipProperties;

@Scheduled(cron = "0/#{ipProperties.cycle} * * * * ?")
public void print() {
    //以详细模式或者极简模式显示
    if (ipProperties.getModel().equals(IpProperties.LogModel.DETAIL.getValue())) {
        System.out.println("+------ip-address------+--num--+");
        for (Map.Entry<String, Integer> entry : ipCountMap.entrySet()) {
            String key = entry.getKey();
            Integer value = entry.getValue();
            System.out.printf("| %-20s | %-5d |\n", key, value);
        }
        System.out.println("+----------------------+-------+");
    } else {
        System.out.println("+------ip-address------+");
        for (String key : ipCountMap.keySet()) {
            System.out.printf("| %-20s |\n", key);
        }
        System.out.println("+----------------------+");
    }
    if (ipProperties.isCycleReset()) {
        this.ipCountMap.clear();
    }
}
最后我们需要在resource中创建META-INF目录并创建spring.factories文件(确保可以在运行时自动装配):
org.springframework.boot.autoconfigure.EnableAutoConfiguration=\
  com.ipautocount.config.IpAutoConfiguration
二、导入自定义Starter(主要)
1、maven中执行clean清楚个人数据,然后在执行install将项目安装在maven仓库中。
2、在需要使用的项目中只需导入以下坐标,即可直接使用啦!
<dependency>
    <groupId>com.ipautocount</groupId>
    <artifactId>ipautocount-spring-boot-starter</artifactId>
    <version>0.0.1-SNAPSHOT</version>
</dependency>
三、开启yml提示功能(主要)
在前面提到我们有一个配置类:
Long cycle = 2L;//日志显示周期
boolean cycleReset = false;//是否周期重置数据
String model = LogModel.DETAIL.value;日志输出模式(detail:详细模式;simple:极简模式)
并且绑定了配置文件中的ipautocount,所以我们可以一下来自定义配置:
ipautocount:
  cycle: 10
  cycle-reset: false
  model: detail
但是使用时我们会发现一个问题,就是在配置文件中书写这一块时并不会出现代码提示,这无疑会提高开发者的使用难度!此时我们只需导入spring提供的配置处理器即可:
<dependency>
    <groupId>org.springframework.boot</groupId>
    <artifactId>spring-boot-configuration-processor</artifactId>
</dependency>
这时在重复导入自定义Starter的方法,并且刷新当前项目之后,我们就会发现出现了代码提示!(而且之前在配置类中写的注释也会在这里出现!)
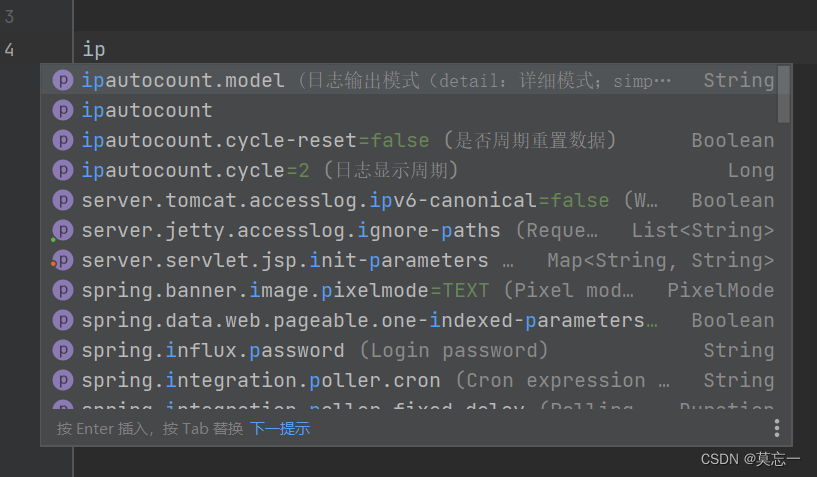
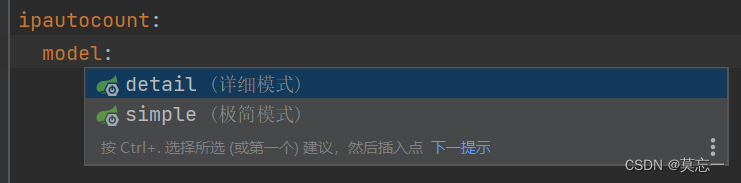
但是此时还会有一个问题,我们发现当出现像model这样的字符串类型时,还是不会出现代码提示,因为系统并不知道需要提供哪些字符串!这时我们可以找到target/classes/META-INF/spring-configuration-metadata.json文件,把这个文件复制到自己的resources/META-INF目录中,打开这个文件并编辑,在文件最后找到"hints"并在其中加入这样一段代码:
{
      "name": "ipautocount.model",
      "values": [
        {
          "value": "detail",
          "description": "详细模式"
        },
        {
          "value": "simple",
          "description": "极简模式"
        }
      ]
    }
现在我们其实就可以去掉spring-boot-configuration-processor的坐标啦!因为我们在yml中的代码提示功能只需要这一个文件就可以了。随后出现安装到maven库中,项目里就可以出现代码提示啦!
最后如果发现代码提示出现了两个,是因为resources目录和target目录中各有一个spring-configuration-metadata.json文件,所以会导致这样的清空,只需要删除掉其中的一个文件就可以了。
全部代码:ipautocount-spring-boot-starter


 2534
2534


 被折叠的 条评论
为什么被折叠?
被折叠的 条评论
为什么被折叠?
 到【灌水乐园】发言


