


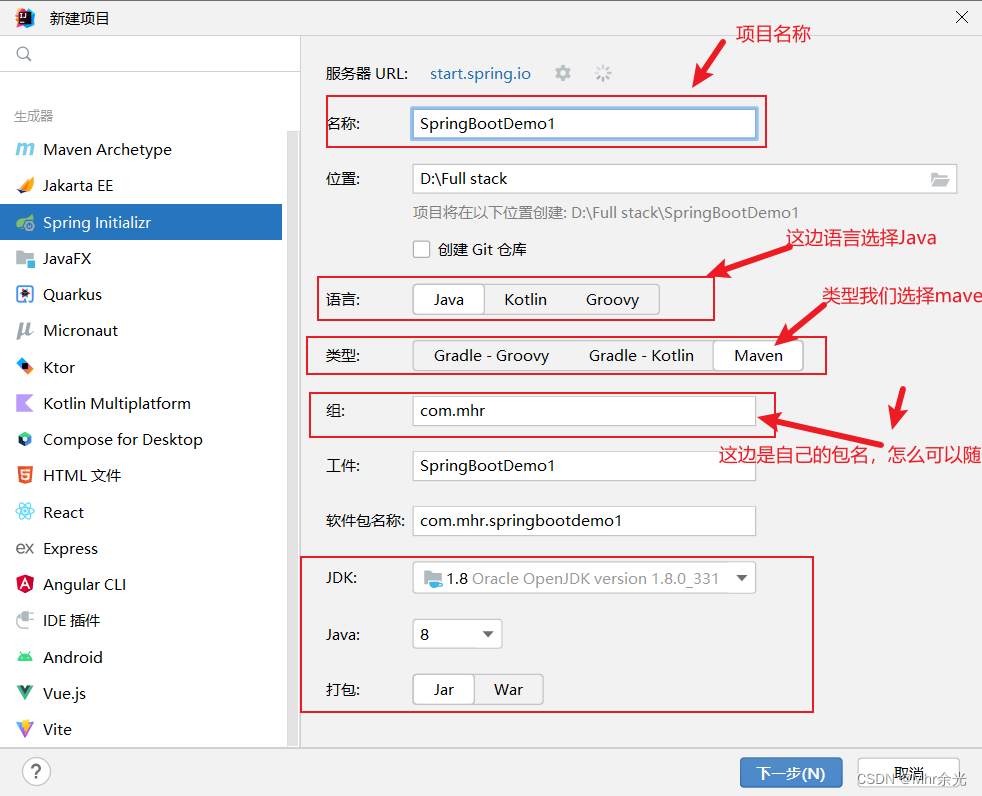
1. 创建一个springBoot项目,按照如何所示,进行创建,当时也可以直接用maven创建
2. 导入swagger2和swagger-ui的依赖,我这边用到的是2.9.2
<dependency>
    <groupId>io.springfox</groupId>
    <artifactId>springfox-swagger2</artifactId>
    <version>2.9.2</version>
</dependency>

<dependency>
    <groupId>io.springfox</groupId>
    <artifactId>springfox-swagger-ui</artifactId>
    <version>2.9.2</version>
</dependency>
3.导入依赖之后,开始写配置类
3.1首先写一些SwaggerConfig配置类,可以直接创建一个类,然后直接复制我的就可以了
import io.swagger.annotations.Api;
import org.springframework.context.annotation.Bean;
import org.springframework.context.annotation.Configuration;
import org.springframework.web.servlet.config.annotation.EnableWebMvc;
import org.springframework.web.servlet.config.annotation.ResourceHandlerRegistry;
import org.springframework.web.servlet.config.annotation.WebMvcConfigurationSupport;
import org.springframework.web.servlet.config.annotation.WebMvcConfigurer;
import springfox.documentation.builders.ApiInfoBuilder;
import springfox.documentation.builders.PathSelectors;
import springfox.documentation.builders.RequestHandlerSelectors;
import springfox.documentation.service.ApiInfo;
import springfox.documentation.spi.DocumentationType;
import springfox.documentation.spring.web.plugins.Docket;
import springfox.documentation.swagger.web.*;
import springfox.documentation.swagger2.annotations.EnableSwagger2;

/**
 * @author create17
 * @date 2020/6/3
 */
@Configuration  //  告诉spring容器,这个类是个配置类
@EnableSwagger2  //  启用Swagger2功能
public class SwaggerConfig  {

    @Bean
    public Docket createRestApi(){
        return new Docket(DocumentationType.SWAGGER_2)
                .apiInfo(apiInfo())
                .select()
                //com包下所有的API都交给Swagger管理
                .apis(RequestHandlerSelectors.basePackage("com"))
                .paths(PathSelectors.any()).build();
    }

    private ApiInfo apiInfo() {
        return new ApiInfoBuilder()
                .title("演示项目Api")  //标题
                .description("学习Swagger2的演示项目") //描述
                .version("1.0")  //版本
                .build();
    }
3.2 创建另一个类WebMvcConfigurer
import org.springframework.context.annotation.Configuration;
import org.springframework.web.servlet.config.annotation.ResourceHandlerRegistry;
import org.springframework.web.servlet.config.annotation.WebMvcConfigurationSupport;

/**
 * @author Andon
 * 2021/12/29
 */
@Configuration
public class WebMvcConfigurer extends WebMvcConfigurationSupport {

    /**
     * 发现如果继承了WebMvcConfigurationSupport,则在yml中配置的相关内容会失效。 需要重新指定静态资源
     */
    @Override
    public void addResourceHandlers(ResourceHandlerRegistry registry) {
        registry.addResourceHandler("/**").addResourceLocations(
                "classpath:/static/");
        registry.addResourceHandler("swagger-ui.html", "doc.html").addResourceLocations(
                "classpath:/META-INF/resources/");
        registry.addResourceHandler("/webjars/**").addResourceLocations(
                "classpath:/META-INF/resources/webjars/");
        super.addResourceHandlers(registry);
    }

}
4. 启动springboot项目
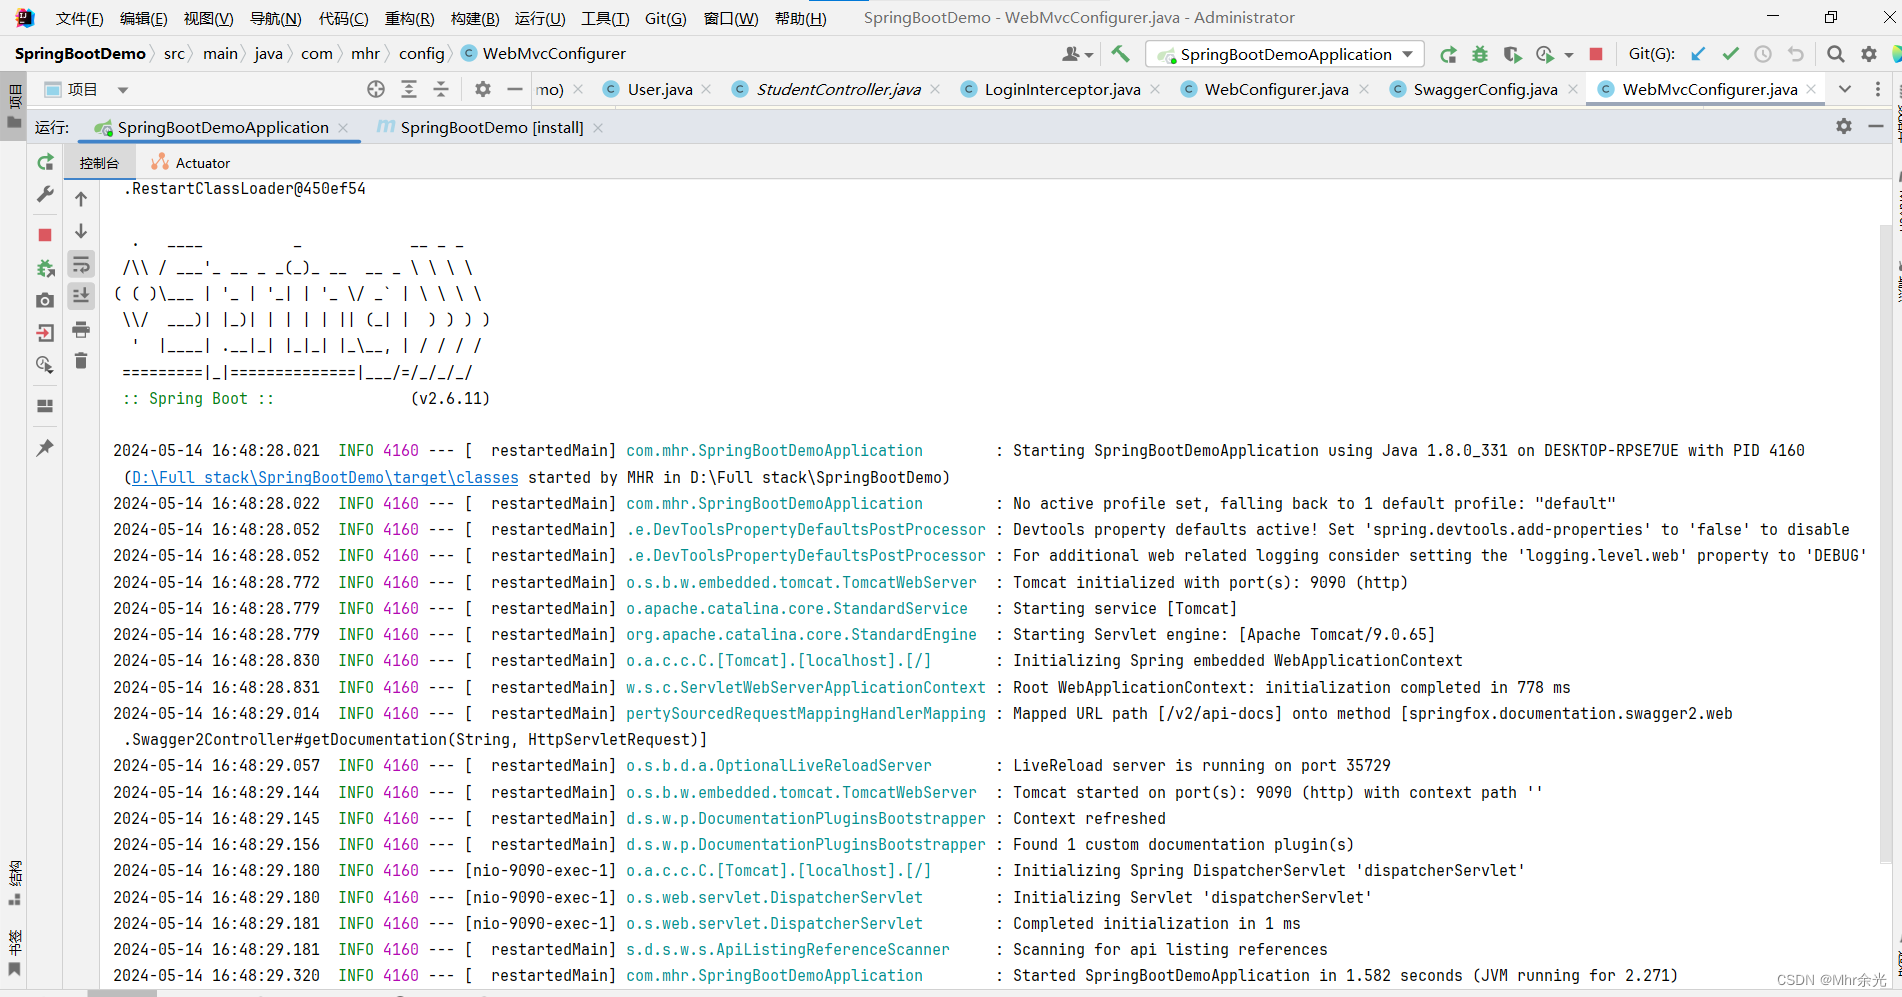
4. 最后打开浏览器 访问http://localhost:8080/swagger-ui.html
注意:默认的端口是8080,如若直接更改了端口,请用自己所更改的端口

如果显示的是这个页面,那么springboot+swagger2整合完毕了
如果显示的是404,就自己看看自己拿个地方配置出错了,对于有些版本而言 不配置WebMvcConfigurer会报错


 2万+
2万+


 被折叠的 条评论
为什么被折叠?
被折叠的 条评论
为什么被折叠?
 到【灌水乐园】发言


