


 本文详细介绍了Spring的@ComponentScan注解的使用,包括无注解方式的component-scan配置,注解方式的@ComponentScan使用,以及@ComponentScan的扫描规则。讲解了如何通过@ComponentScan扫描特定包下的注解类,如@Controller、@Service、@Repository等,并展示了如何通过@Filter进行自定义扫描过滤规则。此外,还提到了自定义扫描策略,如ASSIGNABLE_TYPE等,帮助读者深入理解Spring组件扫描的机制。
目录
无注解方式component-scan使用
之前,我们需要扫描工程下一些类上所标注的注解,这些常用注解有:
@Controller,@Service,@Component,@Repository
通过在Spring的配置文件中配置context:component-scan扫描对应包下扫描这些注解的方式:
<beans xmlns="http://www.springframework.org/schema/beans"
	xmlns:xsi="http://www.w3.org/2001/XMLSchema-instance"
	xmlns:p="http://www.springframework.org/schema/p"
	xmlns:context="http://www.springframework.org/schema/context"
	xsi:schemaLocation="http://www.springframework.org/schema/beans
         http://www.springframework.org/schema/beans/spring-beans.xsd
         http://www.springframework.org/schema/context
         http://www.springframework.org/schema/context/spring-context-2.5.xsd">

    <!--@Controller,@Service,@Component,@Repository-->
	<context:component-scan base-package="com.jektong.spring"/>

</beans>
注解方式**@ComponentScan**使用
建三个类,依次将
@Controller,@Repository,@Service,标注这些类:
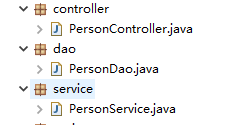
图1
现在通过使用注解**@ComponentScan的方式来扫描所在包下面的这些类:之前定义的PersonConfig修改:**
package com.jektong.config;

import org.springframework.context.annotation.Bean;
import org.springframework.context.annotation.ComponentScan;
import org.springframework.context.annotation.
最低0.47元/天 解锁文章


 1333
1333


 被折叠的 条评论
为什么被折叠?
被折叠的 条评论
为什么被折叠?
 到【灌水乐园】发言


