


在本文中,我们将讨论如何使用 Arquillian 测试框架在 Servlet 容器中测试这些组件。Arquillian 项目官方支持 Apache Tomcat 和 Eclipse Jetty,更多信息请访问Arquillian Container Tomcat和Arquillian Container Jetty。目前,这两个项目都提供了一个嵌入式容器适配器,支持最新的 Apache Tomcat 10 和 Eclipse Jetty 11,但没有可用的托管和远程适配器。如果你是 Arquillian 新手,请先阅读官方入门指南,以了解 Arquillian 的基本知识。
配置 Arquillian
首先将 Arquillian Core 和 JUnit BOM添加到项目pom.xml文件的dependencyManagement 部分。
<dependencyManagement>
    // ...
    <dependencies>
        <dependency>
            <groupId>org.jboss.arquillian</groupId>
            <artifactId>arquillian-bom</artifactId>
            <version>${arquillian-bom.version}</version>
            <scope>import</scope>
            <type>pom</type>
        </dependency>
        <dependency>
            <groupId>org.junit</groupId>
            <artifactId>junit-bom</artifactId>
            <version>${junit-jupiter.version}</version>
            <type>pom</type>
            <scope>import</scope>
        </dependency>
    </dependencies>
</dependencyManagement>
在项目dependencies 部分添加以下依赖项。
<dependencies>
    //...
    <dependency>
        <groupId>org.jboss.arquillian.protocol</groupId>
        <artifactId>arquillian-protocol-servlet-jakarta</artifactId>
        <scope>test</scope>
    </dependency>
    <dependency>
        <groupId>org.jboss.shrinkwrap.resolver</groupId>
        <artifactId>shrinkwrap-resolver-impl-maven</artifactId>
        <scope>test</scope>
    </dependency>
    <dependency>
        <groupId>org.junit.jupiter</groupId>
        <artifactId>junit-jupiter</artifactId>
        <scope>test</scope>
    </dependency>
</dependencies>
还可以添加以下测试utility libs来改进测试代码。
<dependencies>
    //....
    <dependency>
        <groupId>org.junit.jupiter</groupId>
        <artifactId>junit-jupiter-params</artifactId>
        <scope>test</scope>
    </dependency>
    <dependency>
        <groupId>org.mockito</groupId>
        <artifactId>mockito-core</artifactId>
        <scope>test</scope>
    </dependency>
    <dependency>
        <groupId>org.hamcrest</groupId>
        <artifactId>hamcrest</artifactId>
        <scope>test</scope>
    </dependency>
    <dependency>
        <groupId>org.assertj</groupId>
        <artifactId>assertj-core</artifactId>
        <scope>test</scope>
    </dependency>
</dependencies>
接下来,我们将配置 Arquillian Tomcat 嵌入式适配器以针对嵌入式 Apache Tomcat 容器运行测试代码。
配置 Arquillian Tomcat 嵌入式适配器
创建一个新的 Maven 配置文件以集中 Arquillian tomcat embedded adapter.的所有配置。
<profile>
    <id>arq-tomcat-embedded</id>
    <properties>
        <skipTests>false</skipTests>
    </properties>
    <dependencies>
        <dependency>
            <groupId>org.jboss.arquillian.container</groupId>
            <artifactId>arquillian-tomcat-embedded-10</artifactId>
            <version>${arquillian-tomcat.version}</version>
            <scope>test</scope>
        </dependency>
        <dependency>
            <groupId>org.apache.tomcat.embed</groupId>
            <artifactId>tomcat-embed-core</artifactId>
            <version>${tomcat.version}</version>
            <scope>test</scope>
        </dependency>
        <dependency>
            <groupId>org.apache.tomcat.embed</groupId>
            <artifactId>tomcat-embed-jasper</artifactId>
            <version>${tomcat.version}</version>
            <scope>test</scope>
        </dependency>
        <dependency>
            <groupId>org.apache.tomcat.embed</groupId>
            <artifactId>tomcat-embed-websocket</artifactId>
            <version>${tomcat.version}</version>
            <scope>test</scope>
        </dependency>
    </dependencies>
</profile>
测试 Jakarta 组件
对于简单的 POJO,可以编写一个简单的 JUnit 测试来验证功能。例如,GreetingMessage是一个用于组装可读问候消息的简单 POJO。我们可以编写一个简单的 JUnit 测试来检查它是否按预期工作。
public class GreetingMessageTest {
    @Test
    public void testGreetingMessage() {
        var message = GreetingMessage.of("Say Hello to JatartaEE");
        assertThat(message.getMessage()).isEqualTo("Say Hello to JatartaEE");
    }
}
GreetingService bean 本身只是实现了向目标问候的简单功能,其中目标来自于用buildGreetingMessage方法接收的参数。就像前面的测试示例一样,创建一个简单的 JUnit 测试来验证它是否按预期运行。
public class GreetingServiceUnitTest {
GreetingService service;
    @BeforeEach
    public void setup() {
        service = new GreetingService();
    }
    @Test
    public void testGreeting() {
        var message = service.buildGreetingMessage("JakartaEE");
        assertThat(message.getMessage()).startsWith("Say Hello to JakartaEE");
    }
}Hellobean 取决于GreetingServicebean 。要在单元测试中测试Hello的功能,我们可以使用 Mockito 来隔离依赖项 - GreetingService. 在下面的HelloTest中,tests里面创建了一个GreetingService的模拟对象
public class HelloTest {
    @ParameterizedTest
    @MethodSource("provideQueryCriteria")
    public void testCreateMessage(String name, String result) {
        var service = mock(GreetingService.class);
        given(service.buildGreetingMessage(name)).willReturn(GreetingMessage.of("Say Hello to " + name));
        var hello = new Hello(service);
        hello.setName(name);
        hello.createMessage();
        assertThat(hello.getName()).isEqualTo(name);
        assertThat(hello.getMessage().getMessage()).isEqualTo(result);
        verify(service, times(1)).buildGreetingMessage(anyString());
        verifyNoMoreInteractions(service);
    }

    static Stream<Arguments> provideQueryCriteria() {
        return Stream.of(
                Arguments.of("Tomcat", "Say Hello to Tomcat"),
                Arguments.of("JakartaEE", "Say Hello to JakartaEE")
        );
    }
}
我们已经在单元测试中测试了简单的 POJO,对于其他 Jakarta EE 组件,例如 Servlet、Jakarta Pages 等,必须在 Servlet 容器中验证功能,要使用 Arquillian 为这种场景编写集成测试。
为了在不同的阶段运行单元测试和集成测试,我们可以像下面的示例一样,配置maven-surefire-plugin以及maven-failsafe-plugin,以确保集成测试用例在integration-test阶段运行。
<plugins>
    //...
    <plugin>
        <groupId>org.apache.maven.plugins</groupId>
        <artifactId>maven-surefire-plugin</artifactId>
        <version>${maven-surefire-plugin.version}</version>
        <configuration>
            <skipTests>${skipTests}</skipTests>
        </configuration>
        <executions>
            <execution>
                <id>default-test</id>
                <phase>test</phase>
                <goals>
                    <goal>test</goal>
                </goals>
                <configuration>
                    <excludes>
                        <exclude>/it/</exclude>
                    </excludes>
                </configuration>
            </execution>
        </executions>
    </plugin>
    <plugin>
        <groupId>org.apache.maven.plugins</groupId>
        <artifactId>maven-failsafe-plugin</artifactId>
        <version>${maven-failsafe-plugin.version}</version>
        <configuration>
            <skipITs>${skipTests}</skipITs>
        </configuration>
        <executions>
            <execution>
                <id>integration-test</id>
                <phase>integration-test</phase>
                <goals>
                    <goal>integration-test</goal>
                    <goal>verify</goal>
                </goals>
                <configuration>
                    <includes>
                        <include>/it/</include>
                    </includes>
                </configuration>
            </execution>
        </executions>
    </plugin>
</plugins>
首先,让我们看一下用于测试简单 CDI bean GreetingService的`GreetingServiceTest
@ExtendWith(ArquillianExtension.class)
public class GreetingServiceTest {

    private final static Logger LOGGER = Logger.getLogger(GreetingServiceTest.class.getName());

    @Deployment
    public static WebArchive createDeployment() {
        var war = ShrinkWrap.create(WebArchive.class)
                .addClass(GreetingMessage.class)
                .addClass(GreetingService.class)
                .addAsWebInfResource(EmptyAsset.INSTANCE, "beans.xml")
                .addAsWebInfResource("test-web.xml", "web.xml")
                .addAsWebInfResource(new File("src/main/webapp/WEB-INF/jetty-env.xml"), "jetty-env.xml");

        Deployments.addExtraJars(war);

        LOGGER.log(Level.INFO, "war deployment: {0}", war.toString(true));
        return war;
    }

    @Inject
    GreetingService service;

    @Test
    @DisplayName("testing buildGreetingMessage")
    public void should_create_greeting() {
        LOGGER.log(Level.INFO, " Running test:: GreetingServiceTest#should_create_greeting ... ");
        var message = service.buildGreetingMessage("Jakarta EE");
        assertTrue(message.getMessage().startsWith("Say Hello to Jakarta EE at "),
                "message should start with \"Say Hello to Jakarta EE at \"");
    }
}
如你所见,Arquillian 集成测试用 @ExtendWith(ArquillianExtension.class)注释,这是标准的 JUnit 5 扩展。
在 Arquillian 测试中,必须通过静态 @Deployment注解方法创建最小部署存档。在 @Deployment方法中,可以在运行测试用例之前准备要打包并部署到目标运行时的资源。
在测试类中,可以像CDI bean一样注入可用的bean,比如在 GreetingService这里注入,然后在测试方法中,使用 GreetingServicebean来验证功能。
打开终端,执行以下命令运行 GreetingServiceTest.
mvn clean verify -Parq-tomcat-embeded -Dit.test=GreetingServiceTest- 在运行 Arquillian 测试时,它会将部署资源打包成一个可部署的归档文件,并将其部署到目标容器中,然后在容器中运行测试,JUnit 客户端代理将在容器中通过与测试交互的代理收集运行结果。
接下来测试GreetingResource。
@ExtendWith(ArquillianExtension.class)
public class GreetingResourceTest {

    private final static Logger LOGGER = Logger.getLogger(GreetingResourceTest.class.getName());

    @Deployment(testable = false)
    public static WebArchive createDeployment() {
        var war = ShrinkWrap.create(WebArchive.class)
                .addClass(GreetingMessage.class)
                .addClass(GreetingService.class)
                .addClasses(GreetingResource.class)
                .addClasses(RestActivator.class)
                // Enable CDI (Optional since Java EE 7.0)
                .addAsWebInfResource(EmptyAsset.INSTANCE, "beans.xml")
                .addAsWebInfResource("test-web.xml", "web.xml")
                .addAsWebInfResource(new File("src/main/webapp/WEB-INF/jetty-env.xml"), "jetty-env.xml");

        Deployments.addExtraJars(war);

        LOGGER.log(Level.INFO, "war deployment: {0}", war.toString(true));
        return war;
    }

    @ArquillianResource
    private URL base;

    private Client client;

    @BeforeEach
    public void setup() {
        LOGGER.info("call BeforeEach");
        this.client = ClientBuilder.newClient();
    }

    @AfterEach
    public void teardown() {
        LOGGER.info("call AfterEach");
        if (this.client != null) {
            this.client.close();
        }
    }

    @Test
    @DisplayName("Given a name:`JakartaEE` should return `Say Hello to JakartaEE`")
    public void should_create_greeting() throws MalformedURLException {
        LOGGER.log(Level.INFO, " client: {0}, baseURL: {1}", new Object[]{client, base});
        final var greetingTarget = this.client.target(new URL(this.base, "api/greeting/JakartaEE").toExternalForm());
        try (final Response greetingGetResponse = greetingTarget.request()
                .accept(MediaType.APPLICATION_JSON)
                .get()) {
            assertThat(greetingGetResponse.getStatus()).isEqualTo(200);
            assertThat(greetingGetResponse.readEntity(GreetingMessage.class).getMessage())
                    .startsWith("Say Hello to JakartaEE");
        }
    }
}
与 GreetingServiceTest不同,为了测试 GreetingResource 的功能,我们使用 Jakarta REST Client API 在客户端视图中与 HTTP API 进行交互。
在注解 @Deployment中添加 testable=false属性,意味着所有测试都将在客户端模式下运行。或者,也可以在测试方法上添加一个 @RunAsClient以在本地运行它。部署后, @ArquillianResource将在容器中注入部署存档的基础 URL。
执行以下命令运行 GreetingServiceTest。
如果@Deployment(testable=true)应用于部署方法,所有测试都以客户端模式运行,不能像前面的示例那样在测试类中注入 bean。
同样,我们可以创建 client mode 测试来验证简单的 Jakarta Servlet、Jakarta Faces、Jakarta Pages 等的功能。完整的代码可以在这里找到。
要验证呈现的 HTML 页面中的 HTML 元素和 Ajax 交互,请检查Arquillian Extension Drone和Arquillian Graphene。
配置 Jetty 嵌入式适配器
添加用于配置 Arquillian Jetty 嵌入式适配器的新 Maven 配置文件。
<profile>
    <id>arq-jetty-embedded</id>
    <properties>
        <skipTests>false</skipTests>
    </properties>
    <dependencies>
        <dependency>
            <groupId>org.jboss.arquillian.container</groupId>
            <artifactId>arquillian-jetty-embedded-11</artifactId>
            <version>${arquillian-jetty.version}</version>
            <scope>test</scope>
        </dependency>
        <dependency>
            <groupId>org.eclipse.jetty</groupId>
            <artifactId>jetty-annotations</artifactId>
            <scope>test</scope>
        </dependency>
        <dependency>
            <groupId>org.eclipse.jetty</groupId>
            <artifactId>jetty-plus</artifactId>
            <scope>test</scope>
        </dependency>
        <dependency>
            <groupId>org.eclipse.jetty</groupId>
            <artifactId>jetty-deploy</artifactId>
            <scope>test</scope>
        </dependency>
        <dependency>
            <groupId>org.eclipse.jetty</groupId>
            <artifactId>jetty-servlet</artifactId>
            <scope>test</scope>
        </dependency>
        <dependency>
            <groupId>org.eclipse.jetty</groupId>
            <artifactId>jetty-webapp</artifactId>
            <scope>test</scope>
        </dependency>
        <dependency>
            <groupId>org.eclipse.jetty</groupId>
            <artifactId>jetty-cdi</artifactId>
            <scope>test</scope>
            <!-- to remove when 11.0.10 released -->
            <!-- see https://github.com/eclipse/jetty.project/pull/7991 -->
            <version>${jetty.version}</version>
        </dependency>
        <dependency>
            <groupId>org.eclipse.jetty.websocket</groupId>
            <artifactId>websocket-jakarta-server</artifactId>
            <scope>test</scope>
        </dependency>
        <dependency>
            <groupId>org.eclipse.jetty</groupId>
            <artifactId>apache-jsp</artifactId>
            <scope>test</scope>
        </dependency>
        <dependency>
            <groupId>org.slf4j</groupId>
            <artifactId>slf4j-simple</artifactId>
            <version>1.7.36</version>
            <scope>test</scope>
        </dependency>
        <!-- see: https://github.com/arquillian/arquillian-container-jetty/pull/108 -->
        <!--<dependency>
            <groupId>org.jboss.arquillian.testenricher</groupId>
            <artifactId>arquillian-testenricher-cdi-jakarta</artifactId>
        </dependency>-->
    </dependencies>
</profile>
例如,基于嵌入jetty容器的配置再次执行测试:
mvn clean verify -Parq-jetty-embeded -Dit.test=GreetingResourceTest配置 Arquillian Weld Embedded
Arquillian 项目提供了一个官方扩展来测试Weld 容器中的 CDI bean。
新建Maven配置文件配置Arquillian Weld Embedded Adapter,maven-failsafe-plugin用于过滤Jakarta Servlet、Jakarta Faces等测试。
<profile>
    <id>arq-weld</id>
    <properties>
        <skipTests>false</skipTests>
    </properties>
    <dependencies>
        <dependency>
            <groupId>org.jboss.arquillian.container</groupId>
            <artifactId>arquillian-weld-embedded</artifactId>
            <version>${arquillian-weld-embedded.version}</version>
            <scope>test</scope>
        </dependency>
        <dependency>
            <groupId>org.jboss.weld</groupId>
            <artifactId>weld-core-impl</artifactId>
            <version>${weld.version}</version>
            <scope>test</scope>
        </dependency>
    </dependencies>
    <build>
        <plugins>
            <plugin>
                <groupId>org.apache.maven.plugins</groupId>
                <artifactId>maven-failsafe-plugin</artifactId>
                <version>${maven-failsafe-plugin.version}</version>
                <configuration>
                    <systemPropertyVariables>
                        <arquillian.launch>arq-weld</arquillian.launch>
                    </systemPropertyVariables>
                    <excludes>
                        <exclude>*/it/GreetingResourceTest</exclude>
                        <exclude>*/it/GreetingServletTest</exclude>
                    </excludes>
                </configuration>
            </plugin>
        </plugins>
    </build>
</profile>执行以下命令以运行GreetingServiceTest.
mvn clean verify -Parq-weld -Dit.test=GreetingServiceTestJakarta Servlet、Jakarta Pages 和 Jakarta Faces 的测试代码需要一个 Servlet 容器。
完整代码可从github上获取。
https://github.com/hantsy/jakartaee9-servlet-starter-boilerplate
最后: 下方这份完整的软件测试视频学习教程已经整理上传完成,朋友们如果需要可以自行免费领取【保证100%免费】
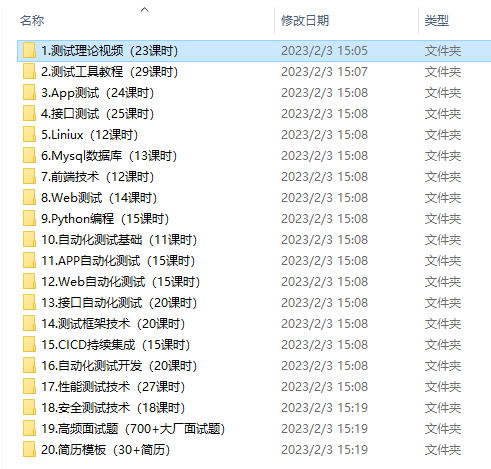
这些资料,对于【软件测试】的朋友来说应该是最全面最完整的备战仓库,这个仓库也陪伴上万个测试工程师们走过最艰难的路程,希望也能帮助到你!


 192
192


 被折叠的 条评论
为什么被折叠?
被折叠的 条评论
为什么被折叠?
 到【灌水乐园】发言


