


1.安装
pnpm i vite-plugin-svg-icons -D
2.配置main.ts
import 'virtual:svg-icons-register'
3.配置vite.config.ts
import { createSvgIconsPlugin } from 'vite-plugin-svg-icons'
import path from 'path'
export default () => {
  return {
    plugins: [
    ...
      createSvgIconsPlugin({
          // src/assets/下新建icons文件夹,用来放.svg文件
        iconDirs: [path.resolve(process.cwd(), 'src/assets/icons')],
        symbolId: 'icon-[dir]-[name]',
      }),
      ...
    ],
  }
}
4.在src/components目录下创建一个全局组件SvgIcon/index.vue,配置如下
<template>
  <div>
    <svg :style="{ width: width, height: height }">
      <use :xlink:href="prefix + name" :fill="color"></use>
    </svg>
  </div>
</template>

<script setup lang="ts">
defineProps({
  //xlink:href属性值的前缀
  prefix: {
    type: String,
    default: '#icon-'
  },
  //svg矢量图的名字
  name: {
      type:String,
      default:''
  },
  //svg图标的颜色
  color: {
    type: String,
    default: ""
  },
  //svg宽度
  width: {
    type: String,
    default: '16px'
  },
  //svg高度
  height: {
    type: String,
    default: '16px'
  }

})
</script>
<style scoped></style>
5.在components文件夹下创建index.ts文件,用于统一注册components文件夹内部全部全局组件
import SvgIcon from './SvgIcon/index.vue'
import type { App, Component } from 'vue'
const components: { [name: string]: Component } = { SvgIcon }
export default {
    install(app: App) {
        Object.keys(components).forEach((key: string) => {
            app.component(key, components[key]);
        })
    }
}
6.配置main.ts
...
import gloablComponent from '@/components'
...
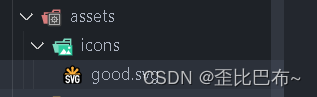
app.use(gloablComponent)7.测试使用(先从图标库中下载一个svg图标,放到icons文件夹中)
在vue文件中使用
<template>
  <div class="test">
    <!-- good为icons文件夹下的.svg文件的名字 -->
    <svg-icon name="good" color="red" width="100px" height="100px"></svg-icon>
  </div>
</template>

<script lang="ts" setup></script>
<style lang="scss" scoped></style>
8.解决自定义颜色无效问题

仅需要删除svg原代码文件中的fill属性即可


 727
727

 被折叠的 条评论
为什么被折叠?
被折叠的 条评论
为什么被折叠?
 到【灌水乐园】发言


