


翻出来之前写的代码,那时候我还不知道动态类,写的很累赘,今天想着优化一下,总结并对比一下两次的写法
确定需求
导航的设计图:

目标:实现点击和左右滑动切换导航
分析需求
原生的顶栏无法做到,需要自定义导航,于是我查看uniapp官方文档:
链接:https://uniapp.dcloud.net.cn/collocation/pages.html#customnav
在这要注意一个问题,当我们取消默认导航选择自定义导航时,非H5端,手机顶部状态栏区域会被页面内容覆盖
比如这样:
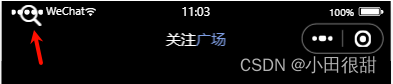
官方文档里给了详细的解释,照着文档就可以解决:

实现
方案一
方案一是我最开始写的,切换的是组件页面,适用于各种场景,但比较繁琐,不够简洁,不想看的小伙伴可直接看方案二!!
方案一完整代码:
<template>
	<view>
		<view class="status_bar">
			<!-- 状态栏占位 -->
		</view>
		<view class="container">
			<!-- 搜索/导航 -->
			<view class="top">
				<view class="tabTop">
					<uni-icons type="search" size="30" color="#fff" style="padding-left: 30rpx;"></uni-icons>
					<view class="title">
						<text class="follow" @tap="onFollow" :style="clickFollowStyle">关注</text>
						<text class="square" @tap="onSquare" :style="clickSquareStyle">广场</text>
					</view>
				</view>
			</view>

			<!-- 广场 -->
			<view class="squareMain" v-if="isSquare===1">
				<!-- 导航栏 -->
				<view class="tabBar">
					<text v-for="(i,index) in tabBarData" :key="index" @tap="onclick(index)"
						:style="i.style">{{i.text}}</text>
				</view>
				<swiper :current="swiperIndex" style="height: calc(100vh - 260rpx);" @change=handelSwiper>
					<!-- 根据条件显示各个组件页面 -->
					<swiper-item>
						<find v-if="![1, 2, 3, 4, 5, 6].includes(swiperIndex)" />
					</swiper-item>
					<swiper-item>
						<city v-if="swiperIndex===1" />
					</swiper-item>
					<swiper-item>
						<walking v-if="swiperIndex===2" />
					</swiper-item>
					<swiper-item>
						<sea v-if="swiperIndex===3" />
					</swiper-item>
					<swiper-item>
						<play v-if="swiperIndex===4" />
					</swiper-item>
					<swiper-item>
						<hotel v-if="swiperIndex===5" />
					</swiper-item>
					<swiper-item>
						<delicious v-if="swiperIndex===6" />
					</swiper-item>
				</swiper>
			</view>
			<!-- 关注 -->
			<view class="followMain" v-else>
				<follow />
			</view>
		</view>
	</view>
</template>

<script setup>
	import {
		ref,
		watch,
		onMounted,
	} from "vue";

	// 导入页面组件
	import find from "../../pages/community/find.vue"
	import city from "../../pages/community/city.vue"
	import walking from "../../pages/community/walking.vue"
	import sea from "../../pages/community/sea.vue"
	import play from "../../pages/community/play.vue"
	import hotel from "../../pages/community/hotel.vue"
	import delicious from "../../pages/community/delicious.vue"
	import follow from "../../pages/community/follow/follow.vue"

	//控制“关注”和“广场”
	const isSquare = ref(1)
	const clickFollowStyle = ref('color: #FFF;');
	const clickSquareStyle = ref('color: #7e9de2;')
	const onFollow = () => {
		isSquare.value = 0;
		clickFollowStyle.value = 'color: #7e9de2;';
		clickSquareStyle.value = 'color: #FFF;';
	}
	const onSquare = () => {
		isSquare.value = 1
		clickSquareStyle.value = 'color: #7e9de2;';
		clickFollowStyle.value = 'color: #FFF;';
	}

	const fold = ref("展开")

	// 广场导航
	const tabBarData = ref([{
			text: '发现',
			style: 'color:#7e9de2;border-bottom: 2px solid #7e9de2;'
		},
		{
			text: '城市',
			style: 'color: #fff;'
		},
		{
			text: '徒步',
			style: 'color: #fff;'
		},
		{
			text: '看海',
			style: 'color: #fff;'
		},
		{
			text: '玩乐',
			style: 'color: #fff;'
		},
		{
			text: '酒店',
			style: 'color: #fff;'
		},
		{
			text: '美食',
			style: 'color: #fff;'
		},
	])

	// 获取当前页面路径信息
	const pages = getCurrentPages()
	const currentPage = pages[pages.length - 1]
	console.log('当前页面路径:', currentPage.route)

	// 滑动触发导航
	const swiperIndex = ref()
	const handelSwiper = (e) => {
		console.log(e.detail.current);
		swiperIndex.value = e.detail.current
		// 导航初始样式
		tabBarData.value.forEach((item, i) => {
			item.style = 'color: #fff;';
		});
		// 滑动导航的样式
		tabBarData.value[e.detail.current].style =
			'color:#7e9de2;border-bottom: 2px solid #7e9de2;font - size: large;';
	}

	// 点击触发导航
	const tabIndex = ref()
	const onclick = (index) => {
		console.log(index);
		tabIndex.value = index
		swiperIndex.value = tabIndex.value
		// 导航初始样式
		tabBarData.value.forEach((item, i) => {
			item.style = 'color: #fff;';
		});
		// 点击导航后的样式
		tabBarData.value[index].style = 'color: #7e9de2;border-bottom: 2px solid #7e9de2;font - size: large;';
	}
</script>

<style scoped lang="scss">
	.status_bar {
		height: var(--status-bar-height);
		width: 100%;
	}

	.container {
		.top {
			position: fixed;
			top: var(--status-bar-height);
			margin-bottom: 10px;

			.tabTop {
				display: flex;
				width: 100vw;
				font-size: 40rpx;
				display: flex;
				align-items: center;
				margin-top: 10px;

				.title {
					flex: 1;
					text-align: center;
					padding: 18rpx 0;

					.follow {
						display: inline;
						margin: 0 30rpx 0 -90rpx
					}
				}
			}
		}

		.squareMain {
			.tabBar {
				display: flex;
				align-items: center;
				justify-content: space-around;
				margin: 10px 0;

				text {
					display: block;
					padding-bottom: 2px;
				}
			}

			position: fixed;
			width: 100vw;
			margin-top: 130rpx;
		}

		.followMain {
			position: static;
			margin-top: 130rpx;
		}
	}
</style>
方案二
这个方案是我在看其他博主写的文章时借鉴的思想,比较简练,该博主文章链接:
该博主写的是关于微信小程序的。
借鉴该博主思想和AI助手,利用动态类重新实现。
完整代码:
<template>
	<view class="status_bar">
		<!-- 状态栏占位 -->
	</view>
	<view class="tabs-container">
		<view v-for="(tab, index) in tabList" :key="index" @tap="tabsOn(index)" :class="{ active: tabsId === index }"
			class="tab">{{ tab.title }}</view>
	</view>
	<swiper @change="slideOn" :current="tabsId">
		<swiper-item v-for="(tab, index) in tabList" :key="index">
			<view>{{ tab.title }} content</view>
		</swiper-item>
	</swiper>
</template>

<script setup>
	import {
		ref
	} from 'vue';

	const tabList = [{
			title: "发现",
			index: "0"
		},
		{
			title: "城市",
			index: "1"
		},
		{
			title: "徒步",
			index: "2"
		},
		{
			title: "看海",
			index: "3"
		},
		{
			title: "玩乐",
			index: "4"
		},
		{
			title: "酒店",
			index: "5"
		},
		{
			title: "美食",
			index: "6"
		}
	];

	const tabsId = ref(0);

	const slideOn = (e) => {
		tabsId.value = e.detail.current;
	};

	const tabsOn = (index) => {
		tabsId.value = index;
	};
</script>

<style scoped lang="scss">
	.status_bar {
		height: var(--status-bar-height);
		width: 100%;
	}

	.tabs-container {
		display: flex;
		justify-content: space-between;
		padding: 20px;

		.tab {
			padding: 10px;
		}

		.active {
			color: #7e9de2;
		}
	}
</style>
效果图:
结语
超级简练有没有,就应该这样写才对嘛,有了这种简单的再看之前写的,,enn,,,
有需要的再补充~


 5474
5474


 被折叠的 条评论
为什么被折叠?
被折叠的 条评论
为什么被折叠?
 到【灌水乐园】发言


