


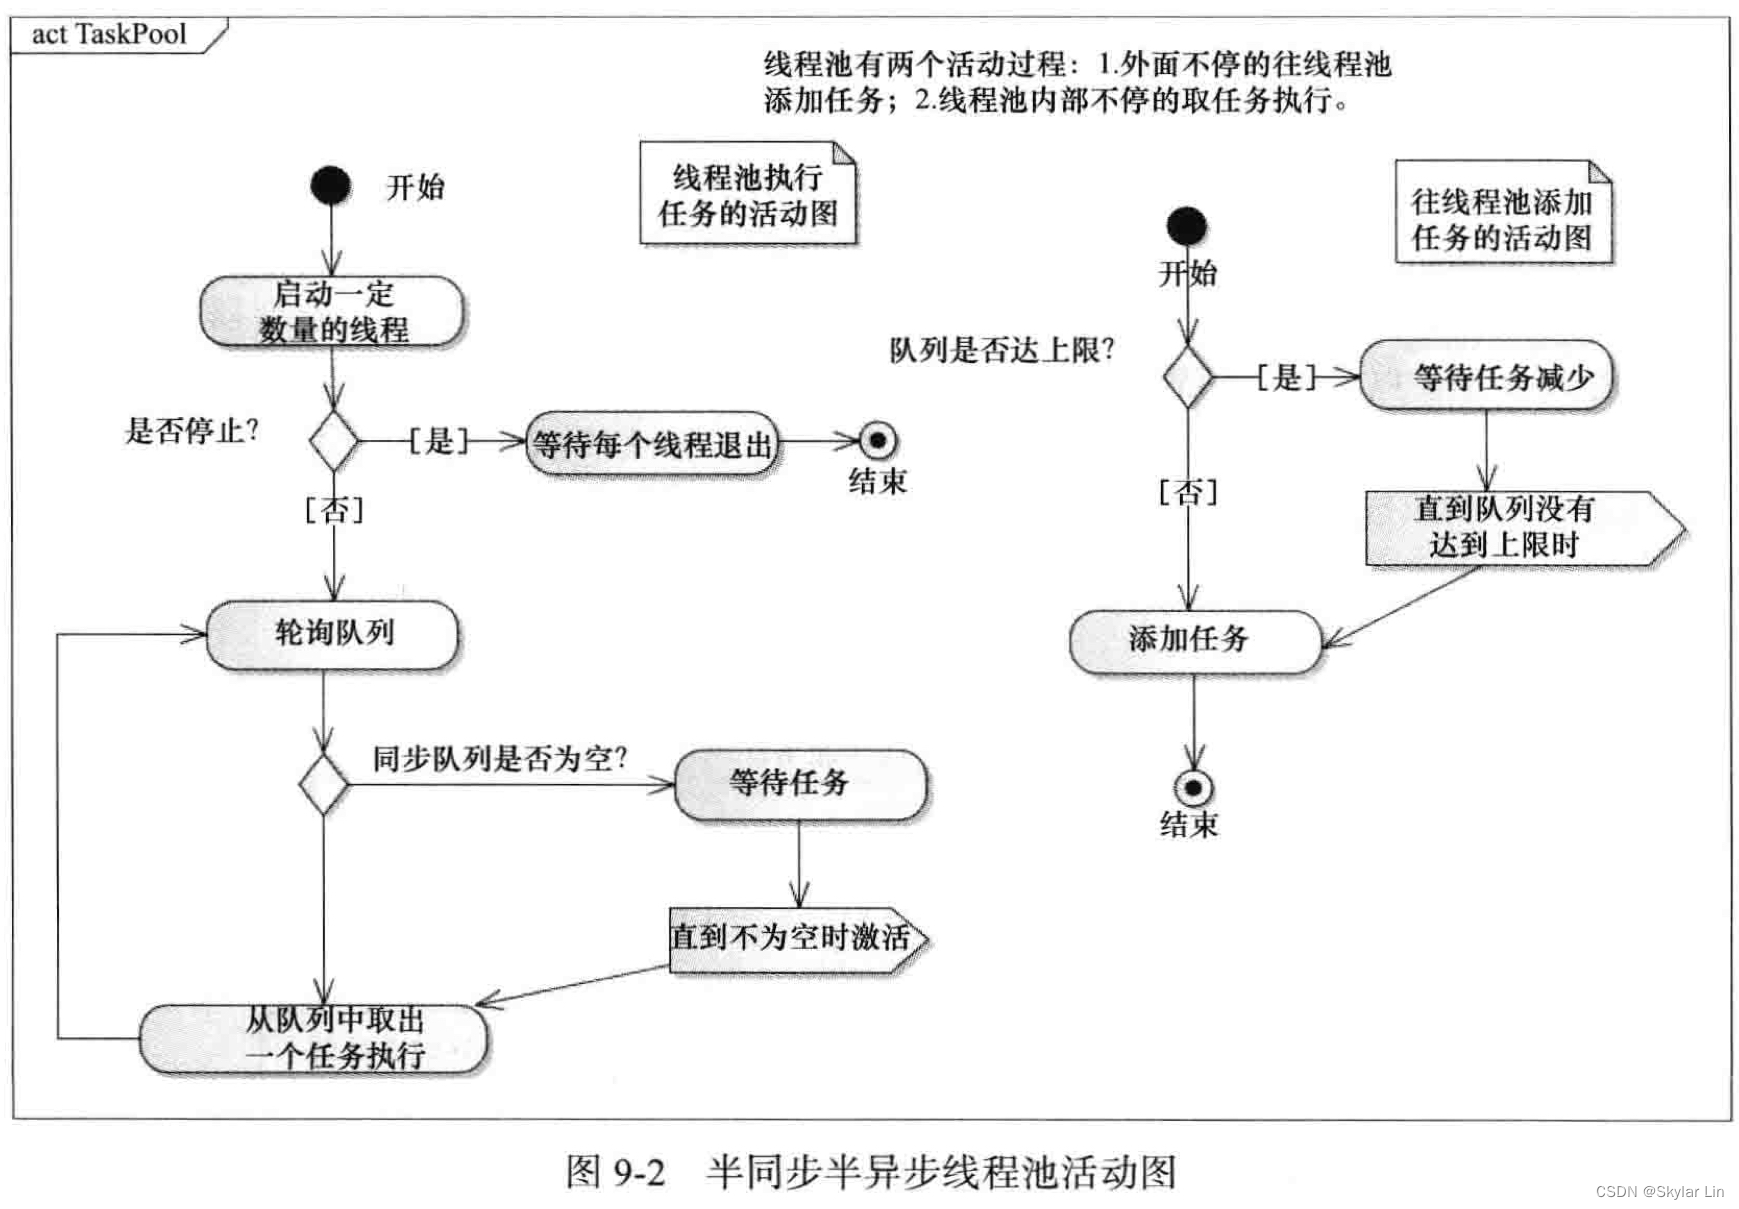
半同步半异步线程池
半同步半异步线程池分为三层:
-
同步服务层 —— 处理来自上层的任务请求,将它们加入到排队层中等待处理。
-
同步排队层 —— 实际上是一个“同步队列”,允许多线程添加/取出任务,并保证线程安全。
-
异步服务层 —— 从排队层中取出任务,多线程并发处理排队层中的任务。
不想码字,想看的凑活着看吧!
首先,我们来实现一个 同步队列 的模板:
#pragma once

#include<iostream>
#include<thread>
#include<mutex>
#include<list>


template <typename T>
class Sync_Queue
{
public:
	Sync_Queue(int size) : max_size(size), _stop(false){}

	void push(T&& x)    // 添加任务
	{
		std::unique_lock<std::mutex> lock(_mutex);
		_notFull.wait(lock, [this] { return NotFull() || _stop; });  // 若满足其中任一条件,则继续执行

		if (_stop)
			return;
		_queue.push_back(std::forward<T>(x));
		_notEmpty.notify_one();
	}

	void pop(std::list<T>& list)    // 取出任务
	{
		std::unique_lock<std::mutex> lock(_mutex);
		_notEmpty.wait(lock, [this] { return NotEmpty() || _stop; });

		if (_stop)
			return;
		list = std::move(_queue);
		_notFull.notify_one();
	}

	void stop()    // 停止队列
	{
		{
			std::lock_guard<std::mutex> lock(_mutex);    // 先锁住, 再将 _stop 标志设置为 true
			_stop = true;
		}
		_notFull.notify_all();   // 在 lock_guard 外面 notify, 被唤醒的线程不需要等待 lock_guard 释放锁
		_notEmpty.notify_all();
	}

	bool Empty()
	{
		std::lock_guard<std::mutex> lock(_mutex);
		return _queue.empty();
	}

	bool Full()
	{
		std::lock_guard<std::mutex> lock(_mutex);
		return _queue.size() == max_size;
	}

	size_t size()
	{
		std::lock_guard<std::mutex> lock(_mutex);
		return _queue.size();
	}

private:
	bool NotFull() const
	{
		bool notfull = _queue.size() < max_size;
		if (!notfull) std::cout << "Sync_Queue is full, waiting..." << std::endl;
		return notfull;
	}

	bool NotEmpty() const
	{
		bool notempty = !_queue.empty();
		if (!notempty) std::cout << "Sync_Queue is empty, waiting..." << std::endl;
		return notempty;
	}

private:
	std::list<T> _queue;
	std::mutex _mutex;
	std::condition_variable _notEmpty;    // 非空的条件变量
	std::condition_variable _notFull;     // 未满的条件变量
	int max_size;
	bool _stop;
};
现在,我们再来实现 线程池:
// ThreadPool.h
#pragma once

#include "Sync_Queue.h"
#include <atomic>
#include <memory>
#include <functional>

using Task = std::function<void()>;  // 任务类型为一个 “可调用对象”

const int MaxTaskCount = 100;

class ThreadPool {
public:
	ThreadPool(int thread_num = std::thread::hardware_concurrency())  // 默认创建 CPU 核数的线程
		: _queue(MaxTaskCount), thread_stop(false)
	{
		start(thread_num);
	}

	~ThreadPool()
	{
		stop();
	}

	void stop()
	{
		std::call_once(_flag, [this] { StopThreadPool(); });  // 确保多线程下只调用一次
	}

	void add_task(Task&& task)      // 添加任务
	{
		_queue.push(std::forward<Task>(task));
	}

private:
	void start(int thread_num)     // 创建 thread_num 数量的线程
	{
		for (int i = 0; i < thread_num; ++i)
		{
			thread_group.push_back(std::make_shared<std::thread>(&ThreadPool::RunInThread, this));
		}
	}

	void RunInThread()
	{
		while (!thread_stop) {
			std::list<Task> list;
			_queue.pop(list);      // 取任务; 若消息队列为空,则阻塞

			for (auto& task : list)
			{
				if (thread_stop)
					return;
				task();     // 执行任务
			}
		}
	}

	void StopThreadPool()
	{
		_queue.stop();
		thread_stop = true;

		for (auto thread : thread_group) {
			if (thread->joinable())
				thread->join();
		}

		thread_group.clear();
	}

private:
	Sync_Queue<Task> _queue;   // 同步队列
	std::list<std::shared_ptr<std::thread>> thread_group;   // 线程组
	std::atomic_bool thread_stop;
	std::once_flag _flag;
};
测试代码:
#include "ThreadPool.h"
#include <chrono>

void test()
{
    ThreadPool pool(3);

    std::thread t1([&pool] {
        for (int i = 0; i < 10; ++i)
        {
            auto id = std::this_thread::get_id();
            pool.add_task(std::move([id] {
                std::cout << "thread id is " << id << std::endl;
            }));
        }
    });

    std::this_thread::sleep_for(std::chrono::seconds(2));
    getchar();
    t1.join();
}

int main()
{
    test();

    return 0;
}
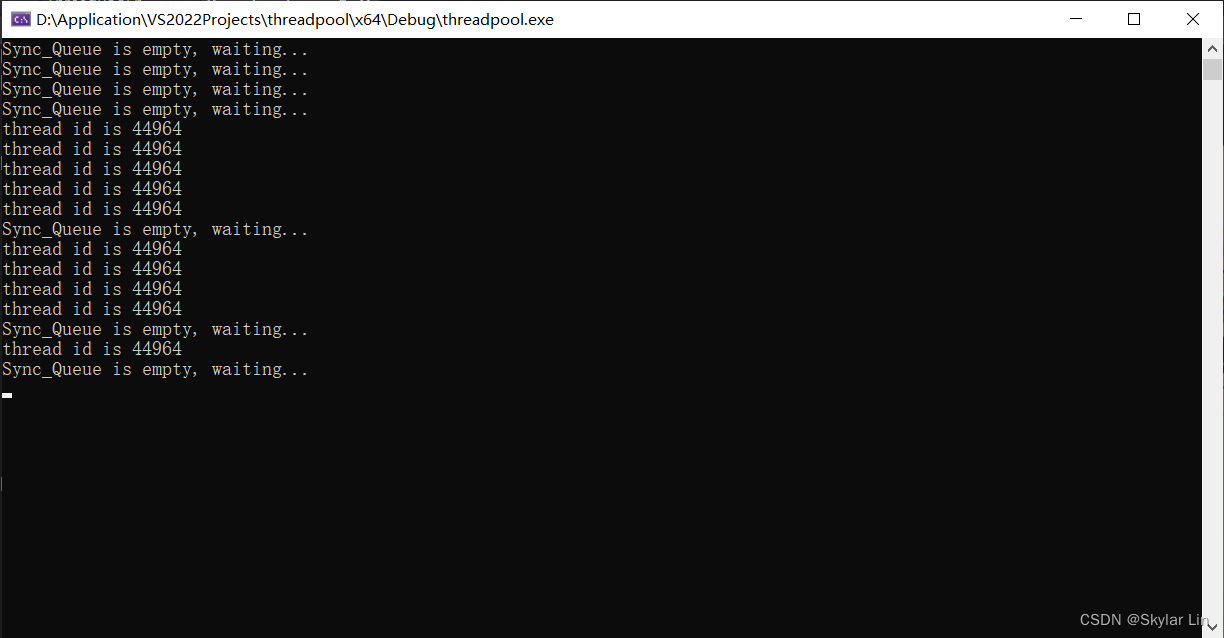
输出如下:


 8791
8791

 被折叠的 条评论
为什么被折叠?
被折叠的 条评论
为什么被折叠?
 到【灌水乐园】发言


