


一:腾讯动漫爬虫代码
import requests
from fake_useragent import UserAgent
import re
import threading


def replace_mark(my_str):
    return my_str.replace(",", ",").replace('"', "“")


def format_html(html):
    li_pattern = re.compile(
        '<li\sclass="ret-search-item clearfix">[\s\S]+?</li>')
    title_url_pattern = re.compile(
        '<a href="(.*?)" target="_blank" title=".*?">(.*?)</a>')
    sign_pattern = re.compile('<i class="ui-icon-sign">签约</i>')
    exclusive_pattern = re.compile('<i class="ui-icon-exclusive">独家</i>')
    author_pattern = re.compile(
        '<p class="ret-works-author" title=".*?">(.*?)</p>')
    tags_pattern = re.compile('<span href=".*?" target="_blank">(.*?)</span>')
    score_pattern = re.compile('<span>人气:<em>(.*?)</em></span>')
    items = li_pattern.findall(html)
    for item in items:
        title_url = title_url_pattern.search(item)
        title = title_url.group(2)
        url = title_url.group(1)
        sign = 0
        exclusive = 0
        if sign_pattern.search(item) is not None:
            sign = 1
        if exclusive_pattern.search(item) is not None:
            exclusive = 1

        author = author_pattern.search(item).group(1)

        tags = tags_pattern.findall(item)

        score = score_pattern.search(item).group(1)
        lock.acquire()
        with open("./qq.csv", "a+", encoding="utf-8") as f:
            f.write(
                f'{replace_mark(title)},{url},{sign},{exclusive},{replace_mark(author)},{"#".join(tags)},"{replace_mark(score)}" \n')

        lock.release()


def run(index):

    ua = UserAgent(use_cache_server=False)

    response = requests.get(
        f"https://ac.qq.com/Comic/index/page/{index}", headers={'User-Agent': ua.random})
    html = response.text
    format_html(html)
    semaphore.release()


lock = threading.Lock()
if __name__ == "__main__":

    num = 0

    semaphore = threading.BoundedSemaphore(5)
    lst_record_threads = []
    for index in range(1, 462):
        print(f"正在抓取{index}")
        semaphore.acquire()
        t = threading.Thread(target=run, args=(index, ))
        t.start()
        lst_record_threads.append(t)

    for rt in lst_record_threads:
        rt.join()

    print("数据爬取完毕")
二:19lou相亲爬虫
import requests
from lxml import etree
from fake_useragent import UserAgent
import time


def save(src, title):
    try:
        res = requests.get(src)
        with open(f"imgs/{title}.jpg", "wb+") as f:
            f.write(res.content)
    except Exception as e:
        print(e)


def run(url):
    # ua = UserAgent(cache=False)
    ua = "Mozilla/5.0 (Windows NT 6.1; Win64; x64) AppleWebKit/537.36 (KHTML, like Gecko) Chrome/90.0.4430.85 Safari/537.36"
    headers = {
        "User-Agent": ua,
        "Host": "www.19lou.com",
        "Referer": "https://www.19lou.com/r/1/19lnsxq-233.html",
        "Cookie": "_Z3nY0d4C_=37XgPK9h"  # 从反爬代码中获取到的值
    }
    try:
        res = requests.get(url=url, headers=headers)
        text = res.text
        # 将 html 转换成 Element 对象
        html = etree.HTML(text)
        # xpath 路径提取 @class 为选取 class 属性
        divs = html.xpath("//div[@class='pics']")
        # print(len(divs))
        # 遍历 Elements 节点
        for div in divs:
            # 提取地址,注意提取的属性为 data-src 而不是 src
            src = div.xpath("./img/@data-src")[0]
            # 提取标题
            title = div.xpath("./img/@alt")[0]
            save(src, title)
    except Exception as e:
        print(e)


if __name__ == '__main__':
    urls = ["https://www.19lou.com/r/1/19lnsxq.html"]
    for i in range(114, 243):
        urls.append(f"https://www.19lou.com/r/1/19lnsxq-{i}.html")
    for url in urls:
        print(f"正在抓取{url}")
        run(url)
        # time.sleep(5)

    print("全部爬取完毕")
三:小吃加盟店数据
import requests
from lxml import etree
import time
import re
import random

USER_AGENTS = [
    "Mozilla/4.0 (compatible; MSIE 6.0; Windows NT 5.1; SV1; AcooBrowser; .NET CLR 1.1.4322; .NET CLR 2.0.50727)",
    "Mozilla/4.0 (compatible; MSIE 7.0; Windows NT 6.0; Acoo Browser; SLCC1; .NET CLR 2.0.50727; Media Center PC 5.0; .NET CLR 3.0.04506)",
    "Mozilla/4.0 (compatible; MSIE 7.0; AOL 9.5; AOLBuild 4337.35; Windows NT 5.1; .NET CLR 1.1.4322; .NET CLR 2.0.50727)",
    "Mozilla/5.0 (Windows; U; MSIE 9.0; Windows NT 9.0; en-US)",
    "Mozilla/5.0 (compatible; MSIE 9.0; Windows NT 6.1; Win64; x64; Trident/5.0; .NET CLR 3.5.30729; .NET CLR 3.0.30729; .NET CLR 2.0.50727; Media Center PC 6.0)",
    "Mozilla/5.0 (compatible; MSIE 8.0; Windows NT 6.0; Trident/4.0; WOW64; Trident/4.0; SLCC2; .NET CLR 2.0.50727; .NET CLR 3.5.30729; .NET CLR 3.0.30729; .NET CLR 1.0.3705; .NET CLR 1.1.4322)",
    "Mozilla/4.0 (compatible; MSIE 7.0b; Windows NT 5.2; .NET CLR 1.1.4322; .NET CLR 2.0.50727; InfoPath.2; .NET CLR 3.0.04506.30)",
    "Mozilla/5.0 (Windows; U; Windows NT 5.1; zh-CN) AppleWebKit/523.15 (KHTML, like Gecko, Safari/419.3) Arora/0.3 (Change: 287 c9dfb30)",
    "Mozilla/5.0 (X11; U; Linux; en-US) AppleWebKit/527+ (KHTML, like Gecko, Safari/419.3) Arora/0.6",
    "Mozilla/5.0 (Windows; U; Windows NT 5.1; en-US; rv:1.8.1.2pre) Gecko/20070215 K-Ninja/2.1.1",
    "Mozilla/5.0 (Windows; U; Windows NT 5.1; zh-CN; rv:1.9) Gecko/20080705 Firefox/3.0 Kapiko/3.0",
    "Mozilla/5.0 (X11; Linux i686; U;) Gecko/20070322 Kazehakase/0.4.5",
    "Mozilla/5.0 (X11; U; Linux i686; en-US; rv:1.9.0.8) Gecko Fedora/1.9.0.8-1.fc10 Kazehakase/0.5.6",
    "Mozilla/5.0 (Windows NT 6.1; WOW64) AppleWebKit/535.11 (KHTML, like Gecko) Chrome/17.0.963.56 Safari/535.11",
    "Mozilla/5.0 (Macintosh; Intel Mac OS X 10_7_3) AppleWebKit/535.20 (KHTML, like Gecko) Chrome/19.0.1036.7 Safari/535.20",
    "Opera/9.80 (Macintosh; Intel Mac OS X 10.6.8; U; fr) Presto/2.9.168 Version/11.52",
]


def run(url, index):
    try:
        headers = {"User-Agent": random.choice(USER_AGENTS)}
        res = requests.get(url=url, headers=headers)
        res.encoding = "utf-8"
        html = res.text
        with open(f"./html/{index}.html", "w+", encoding="utf-8") as f:
            f.write(html)
    except Exception as e:
        print(e)


def list_str(my_list):
    return ",".join(my_list)


def get_data():
    for i in range(1, 130):
        with open(f"./html/{i}.html", "r", encoding="utf-8") as f:
            html = f.read()
            element = etree.HTML(html)
            # contains 函数 获取包含 xxx 的元素,类似的还有 starts-with,ends-with,last
            origin_li = element.xpath("//ul[contains(@class,'xm-list')]/li")
            # 循环抓取 li 内部数据
            for item in origin_li:

                # 提取加盟名称
                # title = item.xpath(".//div[@class='r']/h4/text()")[0]
                title = item.xpath("./div[@class='top']/a/@title")[0]
                # 提取超链接
                detail_link = "http:" + item.xpath("./div[@class='top']/a/@href")[0]


                # 提取特殊标签
                special_tag = list_str(item.xpath("./@class"))
                # 当包含特殊标签 xm-list2 时,使用不同的提取规则

                if special_tag != "xm-list2":
                     # 提取标签
                    tags = "#".join(item.xpath(".//div[@class='bot']/span[@class='label']/text()"))
                    # 提取投资价格
                    price = list_str(item.xpath(".//div[@class='bot']/span[@class='money']/b/text()"))
                    # 地址和行业
                    city_industry = list_str(item.xpath("./div[@class='bot']/p/span/text()"))

                    long_str = f"{title},{detail_link}, {tags}, {price}, {city_industry}"
                    save(long_str)
                else:
                    # 地址和行业
                    city_industry = list_str(item.xpath("./div[@class='top']/a/div/p[2]/span/text()"))
                    long_str = f"{title},{detail_link}, {0}, {0}, {city_industry}"
                    save(long_str)


def save(long_str):
    try:
        with open(f"./jiameng.csv", "a+",encoding="utf-8") as f:
            f.write("\n"+long_str)
    except Exception as e:
        print(e)

if __name__ == '__main__':

    # for i in range(1, 130):
    #     print(f"正在爬取第{i}页数据")
    #     run(f"https://www.3158.cn/xiangmu/canyin/?pt=all&page={i}", i)

    get_data()

    print("全部提取完毕")
四:音频爬虫
import time

import asyncio
import aiohttp

from bs4 import BeautifulSoup
import lxml


async def get_html(client, url):
    print("正在采集", url)
    async with client.get(url, timeout=5) as resp:
        html = await resp.text()
        soup = BeautifulSoup(html, 'lxml')
        divs = soup.find_all(attrs={'class': 'img_mini'})
        mp3_urls = [get_mp3_url("https://www.bensound.com/" + div.a.img["src"]) for div in divs]
        return mp3_urls


def get_mp3_url(img_url):
    img_url = img_url
    name = img_url[img_url.rfind("/") + 1:img_url.rfind(".")]

    mp3_url = f"https://www.bensound.com/bensound-music/bensound-{name}.mp3"
    return mp3_url


async def get_mp3_file(client, url):
    print("正在采集 mp3 文件", url)
    headers = {
        "User-Agent": "Mozilla/5.0 (Windows NT 6.1; Win64; x64) AppleWebKit/537.36 (KHTML, like Gecko) Chrome/94.0.4606.61 Safari/537.36",
        "Referer": "https://www.bensound.com/royalty-free-music"
    }
    mp3_file_name = url[url.rfind('-') + 1:url.rfind('.')]
    print(mp3_file_name)
    async with client.get(url, headers=headers) as resp:
        content = await resp.read()
        with open(f'./mp3/{mp3_file_name}.mp3', "wb") as f:
            f.write(content)
        return (url, "success")


async def main(urls):
    timeout = aiohttp.ClientTimeout(total=600)  # 将超时时间设置为600秒
    connector = aiohttp.TCPConnector(limit=50)  # 将并发数量降低
    async with aiohttp.ClientSession(connector=connector, timeout=timeout) as client:
        tasks = [asyncio.ensure_future(get_html(client, urls[i])) for i in range(len(urls))]

        dones, pendings = await asyncio.wait(tasks)
        print("异步执行完毕,开始输出对应结果:")
        all_mp3 = []
        for task in dones:
            all_mp3.extend(task.result())

        totle = len(all_mp3)
        print("累计获取到【", totle, "】个 MP3 文件")
        print("_" * 100)
        print("准备下载 MP3 文件")

        # 每次下载10个
        totle_page = totle // 10 if totle % 10 == 0 else totle // 10 + 1

        for page in range(0, totle_page):
            print("正在下载第{}页 MP3 文件".format(page + 1))
            start_page = 0 if page == 0 else page * 10
            end_page = (page + 1) * 10
            print("待下载地址")
            print(all_mp3[start_page:end_page])
            mp3_download_tasks = [asyncio.ensure_future(get_mp3_file(client, url)) for url in
                                  all_mp3[start_page:end_page]]
            mp3_dones, mp3_pendings = await asyncio.wait(mp3_download_tasks)
            for task in mp3_dones:
                print(task.result())


if __name__ == '__main__':
    url_format = "https://www.bensound.com/royalty-free-music/{}"
    urls = [url_format.format(i) for i in range(1, 5)]
    start_time = time.perf_counter()
    asyncio.run(main(urls))
    print("aiohttp 异步采集消耗时间为:", time.perf_counter() - start_time)
五:手机壁纸抓取
import requests
import re
import threading


headers = {
    "User-Agent": "Mozilla/5.0 (Windows NT 6.1; Win64; x64) AppleWebKit/537.36 (KHTML, like Gecko) Chrome/90.0.4430.93 Safari/537.36"}

# 循环获取 URL


def get_image(base_url):

    res = requests.get(
        url=base_url, headers=headers)

    if res is not None:
        html = res.text

        pattern = re.compile(
            '<img lazysrc="(.*?)" lazysrc2x=".*?" width="221" height="362" alt=".*?" title="(.*?)"')
        match_list = pattern.findall(html)
        for url, title in match_list:
            save_image(url[:url.find('jpg')+3], title)

        print(match_list)


def save_image(url, title):
    try:
        print(f"{title} - {url}")
        res = requests.get(url=url, headers=headers)

        if res is not None:
            html = res.content

            with open(f"images/{title}.jpg", "wb+") as f:
                f.write(res.content)
    except Exception as e:
        print(e)


if __name__ == '__main__':
    num = 0
    # 最多开启5个线程
    semaphore = threading.BoundedSemaphore(5)
    for index in range(189):
        t = threading.Thread(target=get_image, args=(
            f"https://www.3gbizhi.com/sjbz/index_{index}.html",))
        t.start()
    while threading.active_count() != 1:
        pass
    else:
        print('所有线程运行完毕')
一、什么是爬虫
爬虫:一段自动抓取互联网信息的程序,从互联网上抓取对于我们有价值的信息。
二、Python爬虫架构
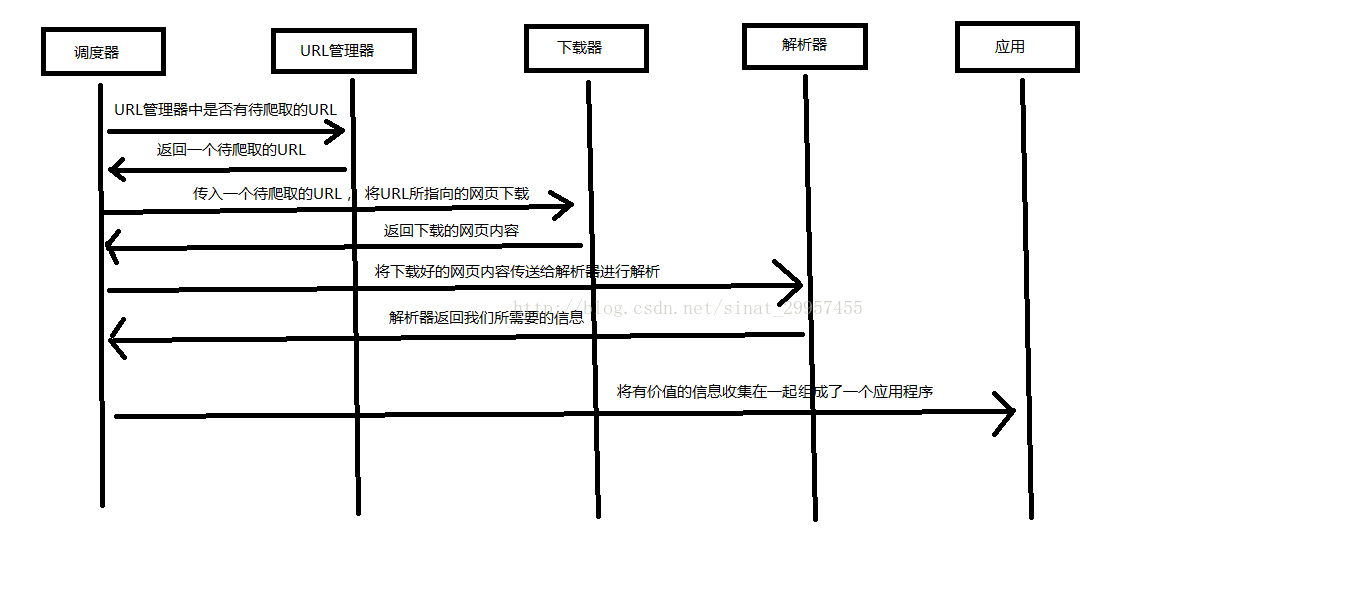
Python 爬虫架构主要由五个部分组成,分别是调度器、URL管理器、网页下载器、网页解析器、应用程序(爬取的有价值数据)。
- 调度器:相当于一台电脑的CPU,主要负责调度URL管理器、下载器、解析器之间的协调工作。
- URL管理器:包括待爬取的URL地址和已爬取的URL地址,防止重复抓取URL和循环抓取URL,实现URL管理器主要用三种方式,通过内存、数据库、缓存数据库来实现。
- 网页下载器:通过传入一个URL地址来下载网页,将网页转换成一个字符串,网页下载器有urllib2(Python官方基础模块)包括需要登录、代理、和cookie,requests(第三方包)
- 网页解析器:将一个网页字符串进行解析,可以按照我们的要求来提取出我们有用的信息,也可以根据DOM树的解析方式来解析。网页解析器有正则表达式(直观,将网页转成字符串通过模糊匹配的方式来提取有价值的信息,当文档比较复杂的时候,该方法提取数据的时候就会非常的困难)、html.parser(Python自带的)、beautifulsoup(第三方插件,可以使用Python自带的html.parser进行解析,也可以使用lxml进行解析,相对于其他几种来说要强大一些)、lxml(第三方插件,可以解析 xml 和 HTML),html.parser 和 beautifulsoup 以及 lxml 都是以 DOM 树的方式进行解析的。
- 应用程序:就是从网页中提取的有用数据组成的一个应用。
下面用一个图来解释一下调度器是如何协调工作的:
三、urllib2 实现下载网页的三种方式
#!/usr/bin/python # -*- coding: UTF-8 -*- import cookielib import urllib2 url = "http://www.baidu.com" response1 = urllib2.urlopen(url) print "第一种方法" #获取状态码,200表示成功 print response1.getcode() #获取网页内容的长度 print len(response1.read()) print "第二种方法" request = urllib2.Request(url) #模拟Mozilla浏览器进行爬虫 request.add_header("user-agent","Mozilla/5.0") response2 = urllib2.urlopen(request) print response2.getcode() print len(response2.read()) print "第三种方法" cookie = cookielib.CookieJar() #加入urllib2处理cookie的能力 opener = urllib2.build_opener(urllib2.HTTPCookieProcessor(cookie)) urllib2.install_opener(opener) response3 = urllib2.urlopen(url) print response3.getcode() print len(response3.read()) print cookie
四、第三方库 Beautiful Soup 的安装
Beautiful Soup: Python 的第三方插件用来提取 xml 和 HTML 中的数据,官网地址 Beautiful Soup: We called him Tortoise because he taught us.
1、安装 Beautiful Soup
打开 cmd(命令提示符),进入到 Python(Python2.7版本)安装目录中的 scripts 下,输入 dir 查看是否有 pip.exe, 如果用就可以使用 Python 自带的 pip 命令进行安装,输入以下命令进行安装即可:
pip install beautifulsoup4
2、测试是否安装成功
编写一个 Python 文件,输入:
import bs4
print bs4
运行该文件,如果能够正常输出则安装成功。
五、使用 Beautiful Soup 解析 html 文件
#!/usr/bin/python # -*- coding: UTF-8 -*- import re from bs4 import BeautifulSoup html_doc = """ <html><head><title>The Dormouse's story</title></head> <body> <p class="title"><b>The Dormouse's story</b></p> <p class="story">Once upon a time there were three little sisters; and their names were <a href="http://example.com/elsie" class="sister" id="link1">Elsie</a>, <a href="http://example.com/lacie" class="sister" id="link2">Lacie</a> and <a href="http://example.com/tillie" class="sister" id="link3">Tillie</a>; and they lived at the bottom of a well.</p> <p class="story">...</p> """ #创建一个BeautifulSoup解析对象 soup = BeautifulSoup(html_doc,"html.parser",from_encoding="utf-8") #获取所有的链接 links = soup.find_all('a') print "所有的链接" for link in links: print link.name,link['href'],link.get_text() print "获取特定的URL地址" link_node = soup.find('a',href="http://example.com/elsie") print link_node.name,link_node['href'],link_node['class'],link_node.get_text() print "正则表达式匹配" link_node = soup.find('a',href=re.compile(r"ti")) print link_node.name,link_node['href'],link_node['class'],link_node.get_text() print "获取P段落的文字" p_node = soup.find('p',class_='story') print p_node.name,p_node['class'],p_node.get_text()
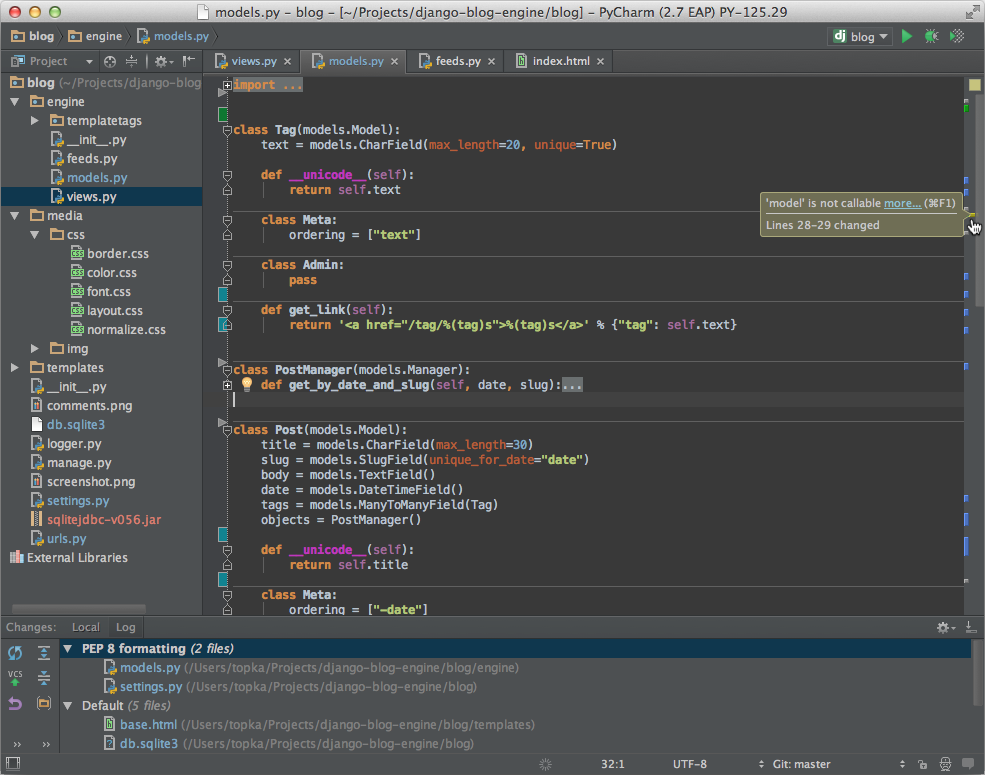
PyCharm
PyCharm 是由 JetBrains 打造的一款 Python IDE。
PyCharm 具备一般 Python IDE 的功能,比如:调试、语法高亮、项目管理、代码跳转、智能提示、自动完成、单元测试、版本控制等。
另外,PyCharm 还提供了一些很好的功能用于 Django 开发,同时支持 Google App Engine,更酷的是,PyCharm 支持 IronPython。
PyCharm 官方下载地址:Download PyCharm: Python IDE for Professional Developers by JetBrains
效果图查看:
Sublime Text
Sublime Text 具有漂亮的用户界面和强大的功能,例如代码缩略图,Python 的插件,代码段等。还可自定义键绑定,菜单和工具栏。
Sublime Text 的主要功能包括:拼写检查,书签,完整的 Python API , Goto 功能,即时项目切换,多选择,多窗口等等。
Sublime Text 是一个跨平台的编辑器,同时支持 Windows、Linux、Mac OS X等操作系统。
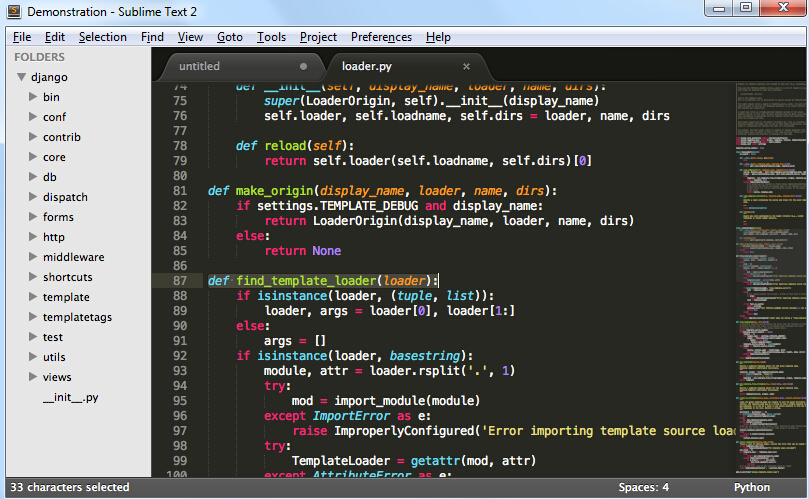
使用Sublime Text 2的插件扩展功能,你可以轻松的打造一款不错的 Python IDE,以下推荐几款插件(你可以找到更多):
- CodeIntel:自动补全+成员/方法提示(强烈推荐)
- SublimeREPL:用于运行和调试一些需要交互的程序(E.G. 使用了Input()的程序)
- Bracket Highlighter:括号匹配及高亮
- SublimeLinter:代码pep8格式检查
Eclipse+Pydev
1、安装Eclipse
Eclipse可以在它的官方网站Eclipse.org找到并下载,通常我们可以选择适合自己的Eclipse版本,比如Eclipse Classic。下载完成后解压到到你想安装的目录中即可。
当然在执行Eclipse之前,你必须确认安装了Java运行环境,即必须安装JRE或JDK,你可以到(http://www.java.com/en/download/manual.jsp)找到JRE下载并安装。
2、安装Pydev
运行Eclipse之后,选择help-->Install new Software,如下图所示。
点击Add,添加pydev的安装地址:http://pydev.org/updates/,如下图所示。
完成后点击"ok",接着点击PyDev的"+",展开PyDev的节点,要等一小段时间,让它从网上获取PyDev的相关套件,当完成后会多出PyDev的相关套件在子节点里,勾选它们然后按next进行安装。如下图所示。
安装完成后,重启Eclipse即可
3、设置Pydev
安装完成后,还需要设置一下PyDev,选择Window -> Preferences来设置PyDev。设置Python的路径,从Pydev的Interpreter - Python页面选择New
会弹出一个窗口让你选择Python的安装位置,选择你安装Python的所在位置。
完成之后PyDev就设置完成,可以开始使用。
4、建立Python Project:
安装好Eclipse+PyDev以后,我们就可以开始使用它来开发项目了。首先要创建一个项目,选择File -> New ->Pydev Project
会弹出一个新窗口,填写Project Name,以及项目保存地址,然后点击next完成项目的创建。
5、创建新的Pydev Module
光有项目是无法执行的,接着必须创建新的Pydev Moudle,选择File -> New -> Pydev Module
在弹出的窗口中选择文件存放位置以及Moudle Name,注意Name不用加.py,它会自动帮助我们添加。然后点击Finish完成创建。
输入"hello world"的代码。
6、执行程序
程序写完后,我们可以开始执行程序,在上方的工具栏上面找到执行的按钮。
之后会弹出一个让你选择执行方式的窗口,通常我们选择Python Run,开始执行程序。


 1005
1005


 被折叠的 条评论
为什么被折叠?
被折叠的 条评论
为什么被折叠?
 到【灌水乐园】发言


