


如何设计这个组件?
在做这个组件之前,我想应该考滤如下几个问题
- 我们不是对所有的插入的数据进行分库分表,我应该有一个标记来标记哪些插入的操作要进行分库分表。
- 插入的数据应该分到哪张表?分库的时候我应该如何让数据更新散列的分到不同的表中。
对于第一个问题,因为这个组件是做的一个Spring一个分库分表的组件,我们大可使用SpringAop的特性来解决这个问题,比如:我自定义一个注解,只要在Mybatis的接口上标记了这个注解,在通过Spring Aop完美解决,那么在插入的时候我就需要分库分表的操作。
对于第二个问题,我可以采用Hash散列的方式来处理,在Java中的HashMap类中的put方法,我们完全可以借鉴这种思路。我想了解过HashMap源码的同鞋可能更加的清楚一些,在HashMap类中有一个hash的方扰动方法,这个方法中他把key的hash值进行了一个高半位和低半位的混合异或运算。这个便更好的增加随机性,更好的让数据均匀的散列。
可以看下下面这张图(图片来源:虫洞栈) 在使用了扰动函数后,数据分配的更加的均匀,这个可以更好的减少了hash碰撞。所以在解决第二个问题的时候,我们可以把这种Hash散列运用到数据库路由上。

代码实现
那我们先来解决第一个问题。如何让程序知道,我们在某个数据库操作的时候需要进行分库分表,这里涉及到知识有自定义注解和Spring AOP相关的(对这两点不太清楚的可以看下这篇文章:链接)
project
└─src
└─main
├─java
│  └─com
│      └─yqs
│          └─db
│              └─router
│                  ├─annotation
│                  ├─config
│                  ├─dynamic
│                  ├─strategy
│                  │  └─impl
│                  └─util
└─resources
└─META-INF
复制代码
先来大致的分下包:
- annotation 这个包下就是和注解相关的一些文件
- config starter的自动配置类
- dynamic 数据源的切换相关
- stategy 计算被分到哪个库那个表策略相关的(这里用到的策略模式,在扩展功能时也很方便)
- util 一些工具包,这里后面再说
注解讲解
先来看下在自定义注解中用到的元注解
- Retention 标记当前注解的生命周期
- Target 当前注解可以标记在哪些地方
Retention
注解有3种不同的生命周期 Class、Source、Runtime
- 注解只保留在源代码中,当把Java文件编辑成Class字节码的时候,此注解消失。
- 注解只保留在Class字节码中,当JVM在加载Class文件的时候,此注解消失。
- 注解在运行期间一直保留。
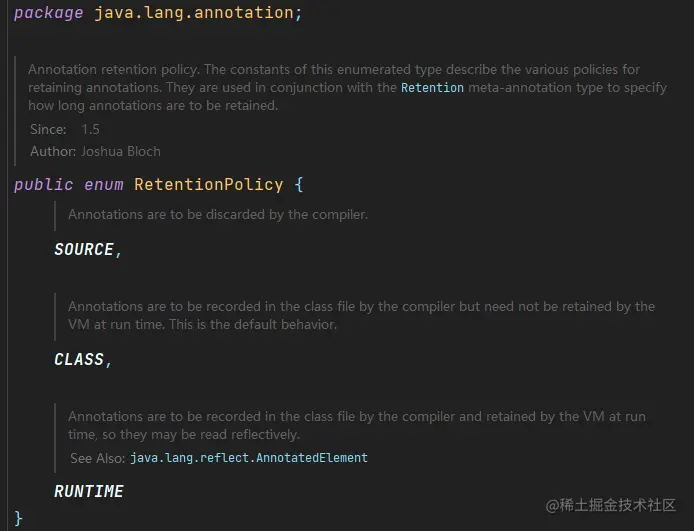
这个枚举类中就对应了上面说的三种生命周期
| 类型 | 描述 |
|---|---|
| CLASS | 注解只保留在Class字节码中,当JVM在加载Class文件的时候 |
| SOURCE | 注解只保留在源代码中 |
| RUNTIME | 注解在运行期间一直保留 |
Target
Target和上面说的那个注解一样,都是Java的元注解,Target注解标记当前注解可以标记在哪些位置,这里只看本文章用到的注解,注解也可以标记在不同的地方,比如 类、方法、字段、构造方法。
@Target({ElementType.TYPE,ElementType.METHOD})
复制代码
我想你一定在代码见过如上代码,此代码表明,当前的注解可以作用在方法,类上。加在其它的位置就会出现语法的错误。
在项目中使用此组件配置文件
我想在做这个项目之前应该先了解下这个组件的配置文件是什么样子的,这样在看后面的文章的时候可能更容易理解一些
spring.datasource.driver-class-name=com.mysql.jdbc.Driver
spring.datasource.username=root
spring.datasource.password=123456
spring.datasource.url=jdbc:mysql://ip:port/vipuser?useSSL=false

server.port=8080

mybatis.mapper-locations=classpath:mapper/*.xml

# 有几个库
db-router.db.datasource.dbCount=3
# 每一个库里有几个表
# 这里所说的表是相同的表比如有一个user表,
# 然后会多复制出几个相同的表比如命名成 user_01,user_02,user_03,user_04
db-router.db.datasource.tbCount=4
# 这个配置你可以理解成默认的数据源是哪一个
db-router.db.datasource.default=db00
# 这个配置是除了默认的数据源外的数据源
db-router.db.datasource.list=db01,db02
db-router.db.datasource.db00.driver-class-name=com.mysql.jdbc.Driver
db-router.db.datasource.db00.url=jdbc:mysql://ip:port/vipuser?useSSL=false
db-router.db.datasource.db00.username=root
db-router.db.datasource.db00.password=123456

db-router.db.datasource.db01.driver-class-name=com.mysql.jdbc.Driver
db-router.db.datasource.db01.url=jdbc:mysql://ip:port/vipuser?useSSL=false
db-router.db.datasource.db01.username=root
db-router.db.datasource.db01.password=123456

db-router.db.datasource.db02.driver-class-name=com.mysql.jdbc.Driver
db-router.db.datasource.db02.url=jdbc:mysql://ip:port/vipuser?useSSL=false
db-router.db.datasource.db02.username=root
db-router.db.datasource.db02.password=123456
复制代码
实现自定义注解
首页,我们上面说过要根据存入数据库的数据来计算将数据分配到哪个库哪张表里面。所以在定义这个注解的时候,我需要一个注解内的参数用来表明,根据哪个字段的数据计算所分配的库表。
@Documented
@Retention(RetentionPolicy.RUNTIME)
@Target({ElementType.TYPE,ElementType.METHOD})
public @interface DBRouter {

    /**
     * 需要进行分表分库的字段
     * 通过此字段来计算分到哪个表哪个库
     * @return
     */
    String key() default "";
}
复制代码因为当前这个注解的生命周期需要一直留,即使是在运行期,所以这里的Retention使用的是RetentionPolicy.RUNTIME
因为这次写的这个分库分表的组件是针对方法的,所以在这个**Target**使用的是ElementType.METHOD。
这里的key方法,就是需要指定需要根据某个字段来计算库表。
关于自定义注解的这里其实就挺简单的,主要就是创建了一个类,其他的并没有做什么。
这里还需要用到一个自定义注解,通过这个注解来标名当前所执行的这个SQL是否需要分表的操作,这个注解就是启到一个标识的作用,对此并没有针对于他的AOP切面类。这个将会在后面所说的Mybatis的拦截中用到
@Documented
@Retention(RetentionPolicy.RUNTIME)
@Target({ElementType.TYPE,ElementType.METHOD})
public @interface DBRouterStrategy {

    boolean splitTable() default false;

}
复制代码
先来些准备工作
说到这里,这个里的准备工作是说的啥呢?
试想下我们所计算数据应该分到哪个库哪个表的逻辑是在切面类中计算的,所以在创建这个切面类的时候,我们至少应该知道有几个库几个表,还有就是需要计算的策略,这个组件中计算的策略是使用的策略模式,当然你也可以将这个计算库表的逻辑写到切面类中,这样做反而不好,第一:逻辑混乱,第二:不易扩展,如果我想要再新增一种策略的话需要还需要修改切面类。所以这里我就干脆使用策略模式。
先来创建一个路由的配置类,这个类中保存有几张表,有几个库,还有就是需要一个路由字段
public class DBRouterConfig {

    /**
     * 分库数量
     */
    private int dbCount;

    /**
     * 分表数量
     */
    private int tbCount;

    /**
     * 路由字段
     */
    private String routerKey;

    public DBRouterConfig() {
    }

    public DBRouterConfig(int dbCount, int tbCount, String routerKey) {
        this.dbCount = dbCount;
        this.tbCount = tbCount;
        this.routerKey = routerKey;
    }
	//.....get/set
}
复制代码
上面这些代码我想应该没有什么需要解释的了。
接下来我应该还需要一种策略,这个策略关系到了数据会分到哪个库哪个表里面,先来一个接口,用来规范所有的策略里应该有哪些方法。
public interface IDBRouterStrategy {

    /**
     * 路由计算
     * @param dbKeyAttr
     */
    void doRouter(String dbKeyAttr);

    /**
     * 手动设置分库路由
     * @param dbIdx
     */
    void setDBKey(int dbIdx);

    /**
     * 手动设置分表路由
     * @param tbIdx
     */
    void setTBKey(int tbIdx);

    /**
     * 获取分库数
     * @return
     */
    int dbCount();

    /**
     * 获取分表库
     * @return
     */
    int tbCount();

    /**
     * 清除路由
     */
    void clear();
}
复制代码
接定好接口后,我就应该实现一种计算的策略, 这个策略就用前面说的参考HashMap的那种策略就可以了。
public class DBRouterStrategyHashCode implements IDBRouterStrategy {

	private DBRouterConfig dbRouterConfig;

	public DBRouterStrategyHashCode(DBRouterConfig dbRouterConfig) {
        this.dbRouterConfig = dbRouterConfig;
    }

	@Override
    public void doRouter(String dbKeyAttr) {
        //总表数
        int size = dbRouterConfig.getDbCount() * dbRouterConfig.getTbCount();

        int idx = (size - 1) & (dbKeyAttr.hashCode() ^ (dbKeyAttr.hashCode()) >>> 16);

        int dbIdx = idx / dbRouterConfig.getTbCount() + 1;
        int tbIdx = idx - dbRouterConfig.getTbCount() * (dbIdx - 1);

        DBContextHolder.setDbKey(String.format("%02d",dbIdx));
        DBContextHolder.setTbKey(String.format("%03d",tbIdx));

        logger.debug("数据库路由 dbIdx:{} tbIdx:{}",  dbIdx, tbIdx);
    }

	@Override
    public void clear() {
        DBContextHolder.clearDBKey();
        DBContextHolder.clearTBKey();
    }
}
复制代码
先来看这个doRouter方法就好,这个类中最重要的就是这个方法,他就是用来计算数据将要分到哪里的。
这个方法的逻辑就是先计算出一共有多少张表。你可以将这个一共有多少张表的数量想像成HashMap中桶的数量。
然后根据所传入这个的dbKeyAttr进行扰动计算然后再和表的总数进行与的运算,这样将得到的结果就是我们所要放入库的位置。
当然,计算得到的这个数并不能直接的使用,因为我们表或库的数量是在1开始的,所以这里还要单独的计算出一个值。
最后将这个值存入DBContextHolder中。
对了,这里还用到的一个DBContextHolder这个类中主要就是存放了计算后的库位置和表位置,这个类就就是使用了ThreadLocal来存下
public class DBContextHolder {

    private static final ThreadLocal<String> dbKey = new ThreadLocal<String>();
    private static final ThreadLocal<String> tbKey = new ThreadLocal<String>();

    public static void setDbKey(String dbKeyIdx){
        dbKey.set(dbKeyIdx);
    }

    public static String getDBKey(){
        return dbKey.get();
    }

    public static void setTbKey(String dbKeyIdx){
        tbKey.set(dbKeyIdx);
    }

    public static String getTBKey(){
        return tbKey.get();
    }

    public static void clearDBKey(){
        dbKey.remove();
    }

    public static void clearTBKey(){
        tbKey.remove();
    }
}
复制代码
这个类大家看下就好,没有什么难度,就是一堆set get clear啥的,ThreadLocal最基本的API
上面的准备工作完成后,下面就来实现切面类的代码。
如何让注解生效呢?
我在上面单纯的创建了一个注解类,把他标记到了方法,这样运行而来并没有什么用。如何让他生效呢?这里就需要引入Spring中AOP相关的模块。
Tip:AOP模块在整个Spring中占有很高的地位,大家有时间可以针对性的看下AOP相关的文章。
首先需要在项目中引入SpringAop相关的包,缺少了他们,我们并不能很好的完成这个项目。
<dependency>
      <groupId>org.springframework.boot</groupId>
      <artifactId>spring-boot-starter</artifactId>
</dependency>

<dependency>
      <groupId>org.springframework.boot</groupId>
      <artifactId>spring-boot-starter-aop</artifactId>
</dependency>
复制代码
有了前面这些步骤的铺垫,也就可以开始写让注解生效的代码了。首先我们需要一个**切入点**,这个切入点的作用在于,当某一个方法标记上这个注解的时候,AOP会对这个方法进行增强。说白了就是动态代理。
@Aspect
public class DBRouterJoinPoint {

    private DBRouterConfig dbRouterConfig;

    private IDBRouterStrategy dbRouterStrategy;

    public DBRouterJoinPoint(DBRouterConfig dbRouterConfig, IDBRouterStrategy dbRouterStrategy) {
        this.dbRouterConfig = dbRouterConfig;
        this.dbRouterStrategy = dbRouterStrategy;
    }

	@Pointcut("@annotation(com.yqs.db.router.annotation.DBRouter)")
    public void aopPoint(){}

    @Around("aopPoint() && @annotation(dbRouter)")
    public Object doRouter(ProceedingJoinPoint jp, DBRouter dbRouter) throws Throwable{
        //计算分到某个库或表的字段
        String fieldKey = dbRouter.key();

        if(StringUtils.isBlank(fieldKey) && StringUtils.isBlank(dbRouterConfig.getRouterKey()) ){
            logger.error("annotation DBRouter key is null");
            throw new RuntimeException("annotation DBRouter key is null");
        }
        fieldKey = StringUtils.isNotBlank(fieldKey) ? fieldKey : dbRouterConfig.getRouterKey();
        //路由属性
        String dbKeyAttr = getAttrValue(fieldKey,jp.getArgs());
        dbRouterStrategy.doRouter(dbKeyAttr);
        try{
            return jp.proceed();
        }finally {
            dbRouterStrategy.clear();
        }
    }

	private String getAttrValue(String attr, Object[] args) {
        if (1 == args.length) {
            Object arg = args[0];
            if(arg instanceof String){
                return arg.toString();
            }
        }
        String filedValue = null;
        for(Object arg : args){
            try{
                if(StringUtils.isNotBlank(filedValue)){
                    break;
                }
                filedValue = BeanUtils.getProperty(arg,attr);
            }catch (Exception e){
                logger.error("获取路由属性值失败 attr:{}", attr, e);
            }
        }
        return filedValue;
    }
}
复制代码
类中的getAttrValue方法主要就是用来获取字段中的数据的。
比如有一个User类,字段有username。
那这个方法的作用就是将这个User对象中的username的值获取出来。后面在计算分到库表位置的也候就是通过这个获取到的值进行hash计算的。
然后获取到这个值后传入到dbRouterStrategy#doRouter方法中将库位置和表位置计算出来保存到DBContextHolder中。
加载配置文件中的配置
现在我们这个组件的进度已经完成了核心的代码,在这些核心代码使用的前提是需要将配置文件中的配置加载到内存中,这样在计算出哪个库哪个表后,我们才可以把数据插入到数据库里面。
Tip:配置文件的格式已经在上面列了出来。在看这节的时候大家可以参考着配置文件的格式来看这节内容。
到了这里加载配置文件的时候,我现在遇到了一个问题,如何在SpringBoot项目启动成功时将配置文件中组件的配置加载到内存呢?
解决这个问题,我们可以通过SpringBoot给我们提供的扩展点来实现。在SpringBoot中有一个EnvironmentAware接口,当一个让Spring来管理的Bean实现了这个接口的时候,在SpringBoot启动成功时,便会回调这个类中的setEnvironment方法,在这个方法的environment参数中便可以获取到配置文件的信息。所以,遇到的这个问题可以通过这种方式解决。
public class DataSourceAutoConfig implements EnvironmentAware {

	/**
     * 数据库列表的分割符
     */
    private static final String DATA_SOURCE_SPLIT_CHAR = ",";

	/**
     * 数据源配置组
     */
    private Map<String, Map<String, Object>> dataSourceMap = new HashMap<>();
    /**
     * 默认数据源配置
     */
    private Map<String, Object> defaultDataSourceConfig;

	private int dbCount;

    /**
     * 分表数量
     */
    private int tbCount;

    /**
     * 路由字段
     */
    private String routerKey;

 	@Override
    public void setEnvironment(Environment environment) {
        String prefix = "db-router.db.datasource.";
        //获取数据库的数量
        dbCount = Integer.valueOf(environment.getProperty(prefix + "dbCount"));
        //获取表的数量
        tbCount = Integer.valueOf(environment.getProperty(prefix + "tbCount"));
        //获取出数据源列表
        String dataSource = environment.getProperty(prefix + "list");
        //如果数据源列表是空的,则停止往下执行
        assert dataSource != null;

        //获取数据源的配置
        for(String dbInfo : dataSource.split(DATA_SOURCE_SPLIT_CHAR)){
            Map<String, Object> dataSourceProps = PropertyUtil.handle(environment, prefix + dbInfo, Map.class);
            dataSourceMap.put(dbInfo,dataSourceProps);
        }
        //获取出默认的数据源
        String defaultDataSource = environment.getProperty(prefix + "default");
        defaultDataSourceConfig = PropertyUtil.handle(environment,prefix + defaultDataSource, Map.class);
    }
}
复制代码
这些代码里面还自定义了一个工具类**PropertyUtil**因为在获取数据源配置的时候,通过PropertyUtil#handle就直接把当前这个数据源信息获取出来并转成了Map.
在SpringBoot中1.x的版本和2.x的版本获取的方式不一样,这里我只完成了2.x的版本获取配置的方式。1.x版本的结构我也写好了,只不过没有完善,感兴趣的可以自已完善下
public class PropertyUtil {

    /**
     * <link>此标记为SpringBoot的大版本号如:1.x和2.x</link>
     * 在加载属性的时候SpringBoot1.x和2.x使用的方法有些差异
     * 在获取属性的时候根据此版本号来区分代码
     */
    private static int springBootVersion = 1;

    static {
        try{
            Class.forName("org.springframework.boot.bind.RelaxedPropertyResolver");
        }catch (ClassNotFoundException e) {
            springBootVersion = 2;
        }
    }

    /**
     * Spring Boot 1.x和2.x使用的加载属性的代码有差异在这里区分
     * @param environment
     * @param path
     * @param clazz
     * @return
     * @param <T>
     */
    public static <T> T handle(Environment environment,String path,Class<T> clazz){
        switch (springBootVersion){
            case 1:
                return (T)v1(environment,path);
            case 2:
                return (T)v2(environment,path,clazz);
        }
        return null;
    }

    /**
     * Spring Boot 1.x使用的方法
     * @param environment
     * @param path
     * @return
     */
    private static Object v1(final Environment environment,final String path){
        return null;
    }

    /**
     * Spring Boot 2.x使用的方法
     * @param environment
     * @param path
     * @return
     */
    private static Object v2(final Environment environment,final String path,final Class<?> targetClass){
        try {
            Class<?> binderClass = Class.forName("org.springframework.boot.context.properties.bind.Binder");
            Method getMethod = binderClass.getDeclaredMethod("get", Environment.class);
            Method bindMethod = binderClass.getDeclaredMethod("bind", String.class, Class.class);
            Object bindObject = getMethod.invoke(null, environment);
            String prefixParam = path.endsWith(".") ? path.substring(0,path.length() - 1) : path;
            Object bindResultObject = bindMethod.invoke(bindObject, prefixParam, targetClass);
            Method resultGetMethod = bindResultObject.getClass().getDeclaredMethod("get");
            return resultGetMethod.invoke(bindResultObject);
        } catch (ClassNotFoundException | NoSuchMethodException | InvocationTargetException | IllegalAccessException e) {
            throw new RuntimeException(e);
        }
    }
}
复制代码
以上代码就完成了在SpringBoot启动的时候加载配置文件的功能
到此DataSourceAutoConfig类中的代码还没有写完。这个里面还有一些创建数据库 事务对象的创建操作。这些东西我们在下一节在细细道来。
完善自动配置类的代码
大家可以想下,代码咱们写到里,似乎还缺少一些关键的东西。
具体缺少啥 ,咱们来分析一下,在配置文件中,我们写了多个数据库的配置,肯定需要将这配置的多个数据库给创建出多个数据源,然后在保存数据计算出库的位置,然后来回切换数据源,达到保存到指定的数据库里面。
在DataSourceAutoConfig#setEnvironment的方法中已经把相关的数据库的配置保存在了Map中,所以我只需要通过这个Map把数据源创建出来即可。
@Bean
public DataSource dataSource(){
        Map<Object,Object> targetDataSource = new HashMap<>();
        for(String dbInfo : dataSourceMap.keySet()){
            Map<String, Object> objMap = dataSourceMap.get(dbInfo);
            targetDataSource.put(dbInfo,new DriverManagerDataSource(
                    objMap.get("url").toString(),
                    objMap.get("username").toString(),
                    objMap.get("password").toString()
            ));
        }
        //设置默认数据源
        DynamicDataSource defaultDataSource = new DynamicDataSource();
        defaultDataSource.setTargetDataSources(targetDataSource);
        defaultDataSource.setDefaultTargetDataSource(new DriverManagerDataSource(
                defaultDataSourceConfig.get("url").toString(),
                defaultDataSourceConfig.get("username").toString(),
                defaultDataSourceConfig.get("password").toString()
        ));
        return defaultDataSource;
}
复制代码
在DynamicDataSource对象中需要设置默认的数据源和目标数据源(你可以将这个理解成除了默认数据源外其它有哪些数据源)
这些代码中用到一个类DynamicDataSource,这个类是由我自定义的他主要的作用就是用来数据源的切换。而这个自定义的类继承自AbstractRoutingDataSource类,这个是spring.jdbc中提供的一个,他的作用在于在执行DML操作之前可以根据规则来使用哪一个数据源。在执行DML之前会回调这个类中的determineCurrentLookupKey方法来切换数据源。
public class DynamicDataSource extends AbstractRoutingDataSource {

    private Logger logger = LoggerFactory.getLogger(DynamicDataSource.class);

    @Override
    protected Object determineCurrentLookupKey() {
        logger.info("切换数据源:{}","db" + DBContextHolder.getDBKey());
        return "db" + DBContextHolder.getDBKey();
    }
}
复制代码
这个自动配置类中还需要创建出其它的对象,这里一块就贴出来吧,
 @Bean(name = "db-router-point")
    @ConditionalOnMissingBean
    public DBRouterJoinPoint point(DBRouterConfig dbRouterConfig, IDBRouterStrategy dbRouterStrategy){
        return new DBRouterJoinPoint(dbRouterConfig,dbRouterStrategy);
    }

    @Bean
    public DBRouterConfig dbRouterConfig(){
        return new DBRouterConfig(dbCount,tbCount,routerKey);
    }

    @Bean
    public Interceptor plugin(){
        return new DynamicMybatisPlugin();
    }

    @Bean
    public IDBRouterStrategy dbRouterStrategy(DBRouterConfig dbRouterConfig){
        return new DBRouterStrategyHashCode(dbRouterConfig);
    }
复制代码
这里分别创建出了 切面类、路由配置类、路由策略、还有一个Mybaits的插件对象
其它的那个几倒是没有什么可解释的,这里来说下Mybaits的插件对象。
在上面我们通过自定义的DynamicDataSource类实现了数据源的切换,现在我没还缺一个表的切换。因为这个组件是和Mybatis配合使用的,所有这里我们可以使用Mybatis的扩展点来实现,通过Mybaits的拦截器就可以实现这个功能。
@Intercepts({@Signature(type = StatementHandler.class,method = "prepare",args = {Connection.class,Integer.class})})
public class DynamicMybatisPlugin implements Interceptor {

    private Pattern pattern = Pattern.compile("(from|into|update)[\\s]{1,}(\\w{1,})", Pattern.CASE_INSENSITIVE);

    @Override
    public Object intercept(Invocation invocation) throws Throwable {
        //获取到语句处理程序
        StatementHandler statementHandler = (StatementHandler)invocation.getTarget();
        MetaObject metaObject = MetaObject.forObject(statementHandler, SystemMetaObject.DEFAULT_OBJECT_FACTORY, SystemMetaObject.DEFAULT_OBJECT_WRAPPER_FACTORY, new DefaultReflectorFactory());
        MappedStatement mappedStatement = (MappedStatement)metaObject.getValue("delegate.mappedStatement");

        //获取自定义注解判断是否进行分表操作
        String id = mappedStatement.getId();
        String className = id.substring(0, id.lastIndexOf("."));
        Class<?> clazz = Class.forName(className);
        DBRouterStrategy dbRouterStrategy = clazz.getAnnotation(DBRouterStrategy.class);
        if(null == dbRouterStrategy || !dbRouterStrategy.splitTable()){
            return invocation.proceed();
        }

        //获取SQL语句
        BoundSql boundSql = statementHandler.getBoundSql();
        String sql = boundSql.getSql();

        //替换表名
        Matcher matcher = pattern.matcher(sql);
        String tableName = null;
        if(matcher.find()){
            tableName = matcher.group().trim();
        }
        assert null != tableName;
        //将原来的表名替换成计算后的表名
        String replaceSql = matcher.replaceAll(tableName + "_" + DBContextHolder.getTBKey());

        //通过反射修改SQL
        Field sqlField = boundSql.getClass().getDeclaredField("sql");
        sqlField.setAccessible(true);
        sqlField.set(boundSql,replaceSql);
        sqlField.setAccessible(false);
        return invocation.proceed();
    }
}
复制代码
这个拦截器的主要作用就是通过拦截StatementHandler,来实现在执行SQL之前把sql中的表名给替换掉,就完成了表的切换。
到此,相关的代码就完成了开发,在引入咱们写的这个组件的时候,我希望他可以自动的配置,所以这里我还需要再加一个东西。来请他在SpringBoot启动的时候完成自动的配置
在resource目录下创建一个META-INF文件下创建一个spring.factories文件.
org.springframework.boot.autoconfigure.EnableAutoConfiguration=com.yqs.db.router.config.DataSourceAutoConfig
复制代码
为什么加了这个东西就可以实现自动配置,这里和Java中的SPI机制相似,但是还不能说他就是Java中的SPI,有兴趣的可以查下相关资料。
到此,我想这个组件就已经开发完成了。大家就可以打包在写一个DEMO引入下测试下了。


 788
788


 被折叠的 条评论
为什么被折叠?
被折叠的 条评论
为什么被折叠?
 到【灌水乐园】发言


