


目录
用户中心
1.用户中心菜单
修改src\pages\User.vue,添加菜单和子路由视图。
<template>
<div>
<div class="row" v-show="isLogin">
<div class="col-sm-4">
<div class="list-group text-center mb-2">
<router-link :to="{ name: 'user/profile' }" class="list-group-item list-group-item-action p-2" title="个人信息">
<i class="fa fa-list"></i><span>个人信息</span>
</router-link>
<router-link :to="{ name: 'user/avatar' }" class="list-group-item list-group-item-action p-2" title="修改头像">
<i class="fa fa-picture-o"></i><span>修改头像</span>
</router-link>
<router-link :to="{ name: 'user/email' }" class="list-group-item list-group-item-action p-2" title="修改邮箱">
<i class="fa fa-envelope"></i><span>修改邮箱</span>
</router-link>
<router-link :to="{ name: 'user/password' }" class="list-group-item list-group-item-action p-2" title="修改密码">
<i class="fa fa-lock"></i><span>修改密码</span>
</router-link>
</div>
</div>
<div class="col-sm-8">
<router-view></router-view>
</div>
</div>
</div>
</template>
检查用户是否已经登录。
<script>
import { mapState } from 'vuex'
export default {
computed: {
...mapState(['isLogin'])
},
watch: {
isLogin (val) {
if (val === false) {
this.$router.replace({ name: 'login' })
}
}
}
}
</script>
添加样式。
<style scoped>
.fa-list {
margin-right: 10px;
}
.fa-picture-o, .fa-envelope, .fa-lock {
margin-right: 10px;
}
</style>
在src\router\index.js中修改user路由,添加子路由。
routes: [
……(原有代码)
{
path: '/user', name: 'user', redirect: '/user/profile', component: resolve => require(['@/pages/User.vue'], resolve),
children: [
{ path: 'profile', name: 'user/profile', component: resolve => require(['@/pages/user/Profile.vue'], resolve), meta: { title: '个人信息' } },
{ path: 'avatar', name: 'user/avatar', component: resolve => require(['@/pages/user/Avatar.vue'], resolve), meta: { title: '修改头像' } },
{ path: 'email', name: 'user/email', component: resolve => require(['@/pages/user/Email.vue'], resolve), meta: { title: '修改邮箱' } },
{ path: 'password', name: 'user/password', component: resolve => require(['@/pages/user/Password.vue'], resolve), meta: { title: '修改密码' } },
]
},
],
将4个子页面创建出来。
创建src\pages\user\Profile.vue。
<template>
<div>
个人信息
</div>
</template>
创建src\pages\user\Avatar.vue。
<template>
<div>
修改头像
</div>
</template>
创建src\pages\user\Email.vue。
<template>
<div>
修改邮箱
</div>
</template>
创建src\pages\user\Password.vue。
<template>
<div>
修改密码
</div>
</template>
查看页面效果:
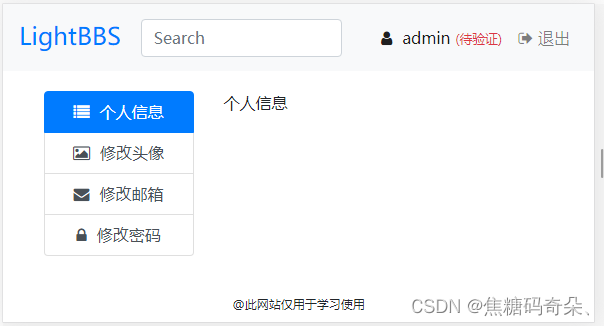
2.显示个人信息
打开src\pages\user\Profile.vue,查询用户信息。。
<script>
export default {
data () {
return {
user: {}
}
},
created () {
this.getProfile()
},
methods: {
getProfile () {
this.$http.get('user/profile').then(res => {
if (res.data.code === 1) {
this.user = res.data.data
}
}).catch(() => {
this.$toastr.e('操作失败,服务器异常。')
})
}
}
}
</script>
打开route\route.php,添加路由。
Route::get('user/profile', 'api/User/profile');
打开application\api\controller\User.php,编写profile()方法。
public function profile()
{
}
在文件中导入UserModel模型。
use app\api\model\User as UserModel;
use app\api\validate\User as UserValidate;
查询用户个人信息,返回查询结果。
public function profile()
{
$data = UserModel::field('id,name,email,is_active,role,img_url,create_time,update_time')->get($this->user->id);
$this->success('', null, $data);
}
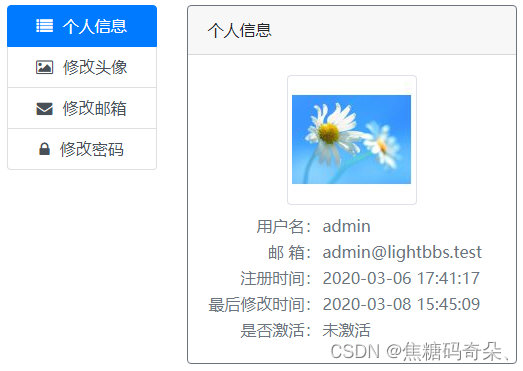
打开src\pages\user\Profile.vue,将个人信息输出到页面中。
<template>
<div class="profile">
<div class="card border-secondary">
<div class="card-header">个人信息</div>
<div class="card-body text-secondary">
<table>
<tbody>
<tr>
<td class="text-right">用户名:</td>
<td>{{ user.name }}</td>
</tr>
<tr>
<td class="text-right">邮 箱:</td>
<td>{{ user.email }}</td>
</tr>
<tr>
<td class="text-right">注册时间:</td>
<td>{{ user.create_time }}</td>
</tr>
<tr>
<td class="text-right">最后修改时间:</td>
<td>{{ user.update_time }}</td>
</tr>
<tr>
<td class="text-right">是否激活:</td>
<td>
<span v-if="user.is_active !== undefined">
<span v-if="user.is_active" class="text-success">已激活</span><span v-else>未激活</span>
</span>
</td>
</tr>
</tbody>
</table>
</div>
</div>
</div>
</template>
添加样式。
<style scoped>
.profile {
line-height: 1.5em;
}
</style>
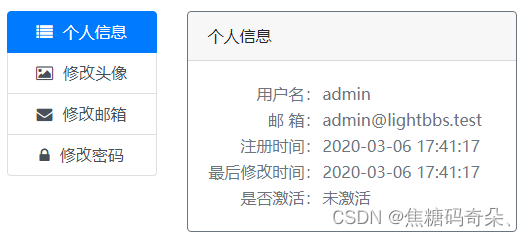
页面效果:
3.切换动画
安装animate.css。
npm install animate.css@3.7 --save
在main.js中进行导入。
import animated from 'animate.css'
Vue.use(animated)
打开src\pages\user\Profile.vue,添加动画。
<template>
<div class="profile">
<transition appear appear-active-class="animated fadeIn">
……(原有代码)
</transition>
</div>
</template>
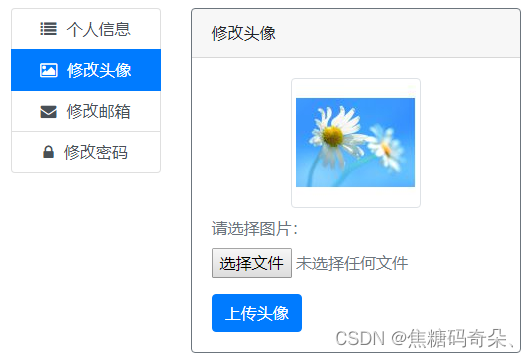
4.上传头像
打开src\pages\user\Avatar.vue,编写上传头像页面。
<template>
<div>
<transition appear appear-active-class="animated fadeIn">
<div class="card border-secondary">
<div class="card-header">修改头像</div>
<div class="card-body text-secondary">
<div>
<div class="form-group">
<label>请选择图片:</label>
<input type="file" ref="avatar" class="form-control-file" />
</div>
<input @click="submit" type="button" class="btn btn-primary" value="上传头像" />
</div>
</div>
</div>
</transition>
</div>
</template>
添加上传按钮方法。
<script>
export default {
methods: {
submit () {
// 上传头像
}
}
}
</script>
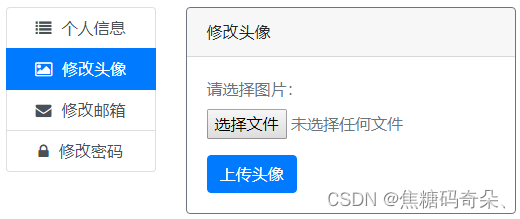
页面效果:
编写submit()方法,提交头像。
submit () {
var file = this.$refs.avatar.files[0]
if (!file) {
this.$toastr.e('请选择一个文件!')
return
}
var formData = new FormData()
formData.append('image', file)
this.$http.post('user/updateAvatar', formData).then(res => {
if (res.data.code === 0) {
this.$toastr.e(res.data.msg)
} else if (res.data.code === 1) {
this.$toastr.s(res.data.msg)
}
}).catch(() => {
this.$toastr.e('操作失败,服务器异常。')
})
}
服务器接收头像,先定义路由。
Route::post('user/updateAvatar', 'api/User/updateAvatar');
打开application\api\controller\Common.php,定义上传目录。
protected $uploadPath = 'static/uploads';
打开application\api\controller\User.php,保存一些上传选项。
protected $imageExt = 'gif,jpg,jpeg,bmp,png';
protected $avatarDir = 'avatar';
protected $tempDir = 'temp';
protected $avatarWidth = 120;
protected $avatarHeight = 120;
编写updateAvatar()方法。
public function updateAvatar()
{
if (!$file = $this->request->file('image')) {
$this->error('上传失败,没有文件上传。');
}
$tempPath = './' . $this->uploadPath . '/' . $this->tempDir;
$info = $file->validate(['ext' => $this->imageExt])->rule(function () {
return md5(microtime(true));
})->move($tempPath . '/');
if (!$info) {
$this->error('上传失败,' . $file->getError());
}
$subDir = $this->avatarDir . date('/Y/m/d');
$createPath = './' . $this->uploadPath . '/' . $subDir;
if (!file_exists($createPath) && !mkdir($createPath, 0777, true)) {
$this->error('上传失败,服务器无法创建保存目录。');
}
$saveName = $info->getSaveName();
}
安装图像处理扩展。
composer require topthink/think-image=1.0
打开application\api\controller\User.php,导入命名空间。
use think\Image;
处理头像后保存起来。
public function updateAvatar()
{
……(原有代码)
$tempFilePath = $tempPath . '/' . $saveName;
$image = Image::open($tempFilePath);
$avatarPath = $createPath . '/' . $saveName;
$image->thumb($this->avatarWidth, $this->avatarHeight, Image::THUMB_FILLED)->save($avatarPath);
unset($image);
// unlink($tempFilePath);
$user = UserModel::get($this->user->id);
$user->img_url = $subDir . '/' . $saveName;
$user->save();
}
返回头像地址,需要对地址进行处理。
打开application\api\controller\Common.php,编写avatarUrl()方法。
protected function avatarUrl($path = '')
{
$domain = $this->request->domain();
if ($path === '') {
return $domain . '/static/avatar/noimg.png';
}
return $domain . '/' . $this->uploadPath . '/' . $path;
}
当用户没有上传头像的时候,使用默认头像。需要从源代码中将“默认头像”素材复制到项目目录下,路径为public\static\avatar\noimg.png。
打开application\api\controller\User.php,返回头像路径。
public function updateAvatar()
{
……(原有代码)
$this->success('头像修改成功。', null, [
'img_url' => $this->avatarUrl($user->img_url)
]);
}
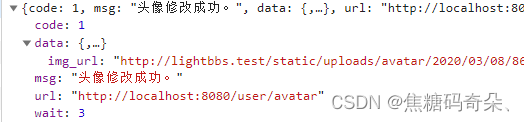
测试程序
5.显示头像
打开src\pages\user\Avatar.vue,在页面打开后,查询用户已有的头像。
<script>
export default {
data () {
return {
user: {}
}
},
created () {
this.getProfile()
},
methods: {
getProfile () {
this.$http.get('user/profile').then(res => {
if (res.data.code === 1) {
this.user = res.data.data
}
}).catch(() => {
this.$toastr.e('操作失败,服务器异常。')
})
},
……(原有代码)
}
}
</script>
修改application\api\controller\User.php中的profile()方法,对头像路径进行处理。
public function profile()
{
……(原有代码)
$data['img_url'] = $this->avatarUrl($data['img_url']);
$this->success('', null, $data);
}
将头像显示在页面中。
<div class="card-body text-secondary">
……(原有代码)
<div class="mb-2">
<div class="col-12 col-md-7 text-center avatar">
<div>
<img v-if="user.img_url" :src="user.img_url" alt="头像" class="img-thumbnail" />
</div>
</div>
</div>
</div>
添加样式。
<style scoped>
.avatar {
height: 130px;
}
.avatar > div {
display: inline-block;
width: 130px;
height: 130px;
background: #eee;
border-radius: 0.25rem;
}
</style>
查看页面效果
在上传头像成功后,更新当前显示的头像。
this.$http.post('user/updateAvatar', formData).then(res => {
if (res.data.code === 0) {
this.$toastr.e(res.data.msg)
} else if (res.data.code === 1) {
this.user.img_url = res.data.data.img_url
this.$toastr.s(res.data.msg)
}
}).catch(() => {
this.$toastr.e('操作失败,服务器异常。')
})
打开src\pages\user\Profile.vue,在个人信息页面也显示头像。
<div class="card-body text-secondary">
<div class="mb-2">
<div class="col-12 col-md-7 text-center avatar">
<div>
<img v-if="user.img_url" :src="user.img_url" alt="头像" class="img-thumbnail">
</div>
</div>
</div>
</div>
添加样式。
<style scoped>
……(原有代码)
.avatar {
height: 130px;
}
.avatar > div {
display: inline-block;
width: 130px;
height: 130px;
background: #eee;
border-radius: 0.25rem;
}
</style>
页面效果:
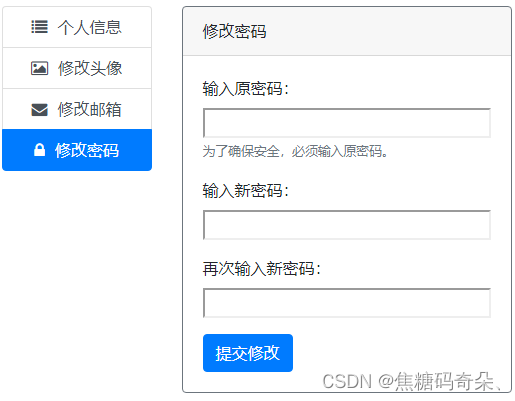
6.修改密码
打开src\pages\user\Password.vue,编写页面结构。
<template>
<div>
<transition appear appear-active-class="animated fadeIn">
<div class="card border-secondary">
<div class="card-header">修改密码</div>
<div class="card-body">
<div class="form-group">
<label>输入原密码:</label>
<input type="password" class="form-control-file" v-model="form.old_password" />
<small class="text-secondary">为了确保安全,必须输入原密码。</small>
</div>
<div class="form-group">
<label>输入新密码:</label>
<input type="password" class="form-control-file" v-model="form.password" />
</div>
<div class="form-group">
<label>再次输入新密码:</label>
<input type="password" class="form-control-file" v-model="repassword" />
</div>
<input @click="submit" type="button" class="btn btn-primary" value="提交修改" />
</div>
</div>
</transition>
</div>
</template>
绑定数据。
<script>
export default {
data () {
return {
form: {
old_password: '',
password: ''
},
repassword: ''
}
},
methods: {
submit () {
// 修改密码
}
}
}
</script>
页面效果如下
打开route\route.php,编写服务器端接口。
Route::post('user/updatePassword', 'api/User/updatePassword');
打开application\api\controller\User.php,编写updatePassword()方法。
public function updatePassword()
{
$old_password = $this->request->post('old_password/s', '');
$password = $this->request->post('password/s', '');
}
在application\api\validate\User.php中添加修改密码的验证。
public function scenePassword()
{
return $this->remove('name');
}
在application\api\controller\User.php中验证旧密码和新密码的格式。
public function updatePassword()
{
……(原有代码)
$validate = new UserValidate;
if (!$validate->scene('password')->check(['password' => $old_password])) {
$this->error('修改失败,原密码格式有误:' . $validate->getError() . '。');
}
if (!$validate->scene('password')->check(['password' => $password])) {
$this->error('修改失败,新密码格式有误:' . $validate->getError() . '。');
}
if ($old_password === $password) {
$this->error('修改失败,原密码和新密码相同,请换一个新密码。');
}
}
然后查询出用户原来的密码,进行修改。
public function updatePassword()
{
……(原有代码)
$id = $this->user->id;
$user = UserModel::get($id);
if (!$user) {
$this->error('修改失败,用户不存在。');
}
if ($user->password != $this->auth->passwordMD5($old_password, $user->salt)) {
$this->error('修改失败,原密码不正确。');
}
$user->salt = $this->auth->salt();
$user->password = $this->auth->passwordMD5($password, $user->salt);
if (!$user->save()) {
$this->error('修改密码失败。');
}
$this->success('修改密码成功。');
}
打开src\pages\user\Password.vue,编写submit()方法。
submit () {
if (this.password && this.form.password !== this.repassword) {
this.$toastr.e('两次输入密码不一致')
return
}
this.$http.post('user/updatePassword', this.form).then(res => {
if (res.data.code === 0) {
this.$toastr.e(res.data.msg)
} else if (res.data.code === 1) {
this.$toastr.s(res.data.msg)
this.form.old_password = ''
this.form.password = ''
this.repassword = ''
}
}).catch(() => {
this.$toastr.e('操作失败,服务器异常。')
})
}
测试程序
恭喜你又完成这个小任务啦~~嘿嘿~~


 314
314

 被折叠的 条评论
为什么被折叠?
被折叠的 条评论
为什么被折叠?
 到【灌水乐园】发言


