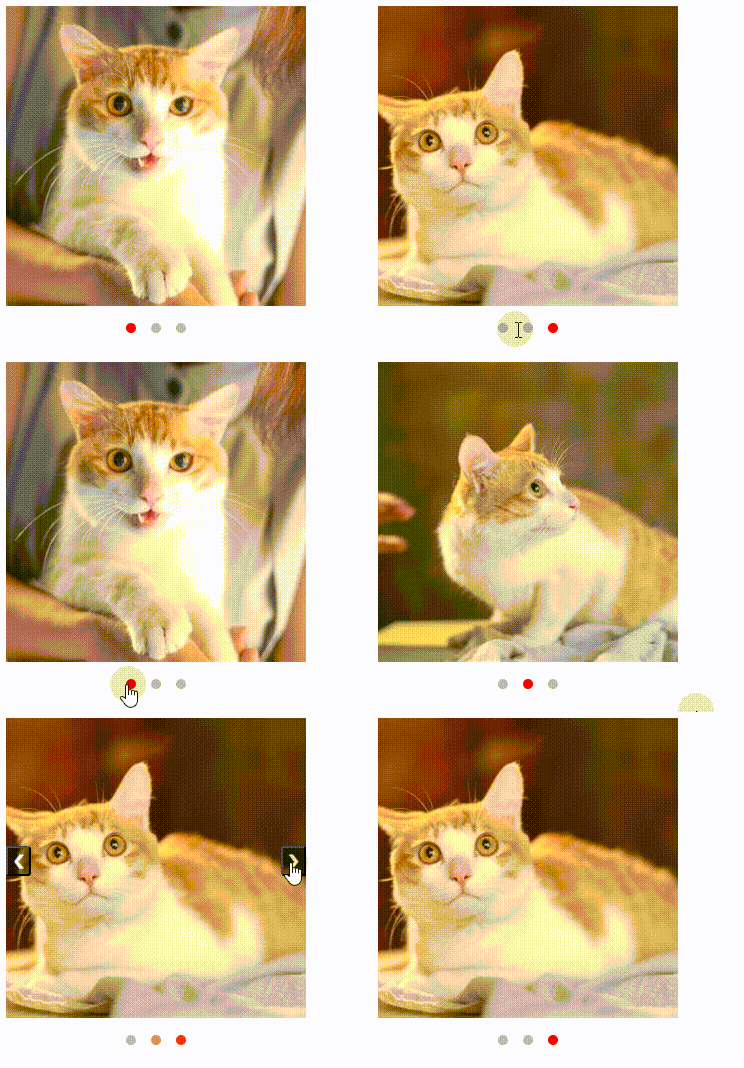
一、使用原生 JavaScript 和 CSS
主要思路是动态计算活动项的节点和指示器

<!DOCTYPE html>
<html lang="en">
<head>
<meta charset="UTF-8">
<meta name="viewport" content="width=device-width, initial-scale=1.0">
<title>轮播图</title>
<style>
/* 轮播图容器样式 */
.carousel {
position: relative;
width: 300px;
height: 300px;
overflow: hidden;
}
/* 每个幻灯片样式 */
.slide {
width: 100%;
height: 100%;
display: none;
}
/* 当前显示的幻灯片样式 */
.slide.active {
display: block;
}
/* 幻灯片中的图片样式 */
.slide img {
width: 100%;
height: 100%;
display: block;
object-fit: cover;
}
/* 上一个按钮样式 */
.prev,
.next {
cursor: pointer;
position: absolute;
top: 50%;
width: auto;
margin-top: -22px;
color: white;
font-weight: bold;
font-size: 18px;
transition: 0.1s ease;
border-radius: 0 3px 3px 0;
user-select: none;
background-color: rgba(0, 0, 0, 0.5);
}
/* 下一个按钮样式 */
.next {
right: 0;
border-radius: 3px 0 0 3px;
}
/* 悬停时按钮背景颜色变化 */
.prev:hover,
.next:hover {
background-color: rgba(0, 0, 0, 0.8);
}
/* 过渡效果 */
.fade-enter-active,
.fade-leave-active {
transition: opacity 1s;
}
.fade-enter,
.fade-leave-to {
opacity: 0;
}
/* 指示器样式 */
.indicators {
text-align: center;
margin-top: 10px;
}
/* 单个指示器样式 */
.indicator {
display: inline-block;
width: 10px;
height: 10px;
margin: 0 5px;
background-color: #bbb;
border-radius: 50%;
cursor: pointer;
transition: background-color 0.3s;
}
/* 当前活动指示器样式 */
.indicator.active {
background-color: red;
}
</style>
</head>
<body>
<div style="position: absolute;">
<!-- 轮播图容器 -->
<div id="carousel" class="carousel">
<!-- 幻灯片1 -->
<div class="slide active">
<img src="image/cat2.jpg" alt="slide image" />
</div>
<!-- 幻灯片2 -->
<div class="slide">
<img src="image/cat3.jpg" alt="slide image" />
</div>
<!-- 幻灯片3 -->
<div class="slide">
<img src="image/cat4.jpg" alt="slide image" />
</div>
<!-- 上一个按钮 -->
<button id="prevButton" class="prev" onclick="prevSlide()" style="display:none;">❮</button>
<!-- 下一个按钮 -->
<button id="nextButton" class="next" onclick="nextSlide()" style="display:none;">❯</button>
</div>
<!-- 指示器容器 -->
<div id="indicators" class="indicators">
<!-- 指示器1 -->
<span class="indicator active"></span>
<!-- 指示器2 -->
<span class="indicator"></span>
<!-- 指示器3 -->
<span class="indicator"></span>
</div>
</div>
<script>
// 当前显示的幻灯片索引
let currentSlide=0;
// 标志位,用于控制轮播是否暂停
let flag=false;
// 获取所有幻灯片元素
const slides=document.querySelectorAll('.slide');
// 定时器变量
let interval;
// 获取上一个按钮元素
const prevButton=document.getElementById('prevButton');
// 获取下一个按钮元素
const nextButton=document.getElementById('nextButton');
// 获取所有指示器元素
const indicators=document.querySelectorAll('.indicator');
// 显示指定索引的幻灯片,并更新指示器
function showSlide (index) {
slides.forEach((slide,i) => {
slide.classList.toggle('active',i===index);
});
indicators.forEach((indicator,i) => {
indicator.classList.toggle('active',i===index);
});
}
// 切换到下一个幻灯片
function nextSlide () {
currentSlide=(currentSlide+1)%slides.length;
// currentSlide + 1:将当前幻灯片索引增加1,表示移动到下一个幻灯片。
// % slides.length:使用取模运算符 % 确保索引不会超出幻灯片的数量范围。当 currentSlide 达到最后一张幻灯片的索引时,(currentSlide + 1) % slides.length 会重新回到0,即回到第一张幻灯片。
showSlide(currentSlide);
}
// 切换到上一个幻灯片
function prevSlide () {
currentSlide=(currentSlide-1+slides.length)%slides.length;
showSlide(currentSlide);
}
// 开始自动播放轮播
function startSlideShow () {
if(!interval) { // 避免重复设置 interval
interval=setInterval(() => {
nextSlide();
},3000);
}
}
// 停止轮播并显示导航按钮
function stopSlide () {
console.log('停止轮播->',flag);
flag=true;
stopSlideShow();
prevButton.style.display='block';
nextButton.style.display='block';
}
// 开始轮播并隐藏导航按钮
function startSlide () {
flag=false;
startSlideShow();
prevButton.style.display='none';
nextButton.style.display='none';
}
// 停止自动播放轮播
function stopSlideShow () {
clearInterval(interval);
interval=null; // 清空 interval 变量
}
// 页面加载完成后初始化轮播
window.onload=() => {
startSlideShow();
slides.forEach(slide => {
// 鼠标悬停时停止轮播
slide.addEventListener('mouseenter',stopSlide);
// 鼠标离开时开始轮播
slide.addEventListener('mouseleave',startSlide);
});
indicators.forEach((indicator,index) => {
// 点击指示器时切换到对应的幻灯片
indicator.addEventListener('click',() => {
currentSlide=index;
showSlide(currentSlide);
});
});
};
// 页面卸载前停止轮播
window.onbeforeunload=() => {
stopSlideShow();
};
</script>
</body>
</html>
二、使用 jQuery
主要实现思路是把所有的图片都在轮播的容器里面将其所有都隐藏除了指示器激活项显示。

<!DOCTYPE html>
<html lang="en">
<head>
<meta charset="UTF-8">
<meta name="viewport" content="width=device-width, initial-scale=1.0">
<title>轮播图</title>
<script src="https://code.jquery.com/jquery-3.6.0.min.js"></script>
<style>
.carousel {
position: relative;
width: 600px;
height: 400px;
overflow: hidden;
}
.carousel-images {
display: flex;
}
.carousel-image {
width: 600px;
height: 400px;
background-size: cover;
background-position: center;
background-repeat: no-repeat;
flex-shrink: 0;
/* 确保每张图片不会缩小 */
display: none;
/* 默认隐藏所有图片 */
}
.carousel-image.active {
display: block;
/* 显示激活的图片 */
}
.carousel-buttons {
position: absolute;
top: 50%;
width: 100%;
display: flex;
justify-content: space-between;
transform: translateY(-50%);
}
.carousel-button {
background-color: rgba(0, 0, 0, 0.5);
color: white;
padding: 10px;
border: none;
cursor: pointer;
}
.indicators {
position: absolute;
bottom: 10px;
left: 50%;
transform: translateX(-50%);
display: flex;
}
.indicator {
width: 10px;
height: 10px;
margin: 0 5px;
border-radius: 50%;
background-color: rgba(255, 255, 255, 0.5);
cursor: pointer;
}
.active {
background-color: white;
}
</style>
</head>
<body>
<div class="carousel">
<div class="carousel-images">
<div class="carousel-image active" style="background-image: url('image/cat2.jpg');"></div>
<div class="carousel-image" style="background-image: url('image/cat3.jpg');"></div>
<div class="carousel-image" style="background-image: url('image/cat4.jpg');"></div>
</div>
<div class="carousel-buttons">
<button class="carousel-button" id="prevBtn">❮</button>
<button class="carousel-button" id="nextBtn">❯</button>
</div>
<div class="indicators">
<div class="indicator active" data-index="0"></div>
<div class="indicator" data-index="1"></div>
<div class="indicator" data-index="2"></div>
</div>
</div>
<script>
let currentIndex=0;
const realTotalImages=$('.carousel-image').length; // 实际图片数量
let intervalId;
function updateCarousel () {
$('.carousel-image').removeClass('active'); // 移除所有图片的 active 类
$('.carousel-image').eq(currentIndex%realTotalImages).addClass('active'); // 给当前索引的图片添加 active 类
$('.indicator').removeClass('active'); // 移除所有指示器的 active 类
$(`.indicator[data-index=${currentIndex%realTotalImages}]`).addClass('active'); // 给当前索引的指示器添加 active 类
}
function startAutoPlay () {
intervalId=setInterval(function() {
currentIndex++;
updateCarousel();
},3000);
}
function stopAutoPlay () {
clearInterval(intervalId);
}
$('#prevBtn').click(function() {
stopAutoPlay(); // 停止自动播放
currentIndex--;
updateCarousel();
startAutoPlay(); // 重新开始自动播放
});
$('#nextBtn').click(function() {
stopAutoPlay(); // 停止自动播放
currentIndex++;
updateCarousel();
startAutoPlay(); // 重新开始自动播放
});
$('.indicator').click(function() {
stopAutoPlay(); // 停止自动播放
currentIndex=$(this).data('index');
updateCarousel();
startAutoPlay(); // 重新开始自动播放
});
startAutoPlay(); // 初始化自动播放
updateCarousel(); // 初始化轮播
</script>
</body>
</html>
三、借助Swiper封装好的轮播图来实现
Swiper官方文档地址

<!DOCTYPE html>
<html lang="en">

<head>
  <meta charset="UTF-8">
  <meta name="viewport" content="width=device-width, initial-scale=1.0">
  <title>轮播图</title>
  <!-- 引入 Swiper 的 CSS -->
  <link rel="stylesheet" href="https://unpkg.com/swiper/swiper-bundle.min.css">
  <style>
    .swiper-container {
      width: 600px;
      height: 400px;
      position: absolute;
      top: 0;
      left: 0;
      overflow: hidden;
    }

    .swiper-slide img {
      width: 100%;
      height: 100%;
      object-fit: cover;
    }

    .swiper-pagination-bullet-active {
      background-color: green;
    }
  </style>
</head>

<body>

  <div class="swiper-container">
    <div class="swiper-wrapper">
      <div class="swiper-slide"><img src="https://via.placeholder.com/600x400?text=Image+1" alt="Image 1"></div>
      <div class="swiper-slide"><img src="https://via.placeholder.com/600x400?text=Image+2" alt="Image 2"></div>
      <div class="swiper-slide"><img src="https://via.placeholder.com/600x400?text=Image+3" alt="Image 3"></div>
    </div>
    <!-- 如果需要分页器 -->
    <div class="swiper-pagination"></div>
    <!-- 如果需要导航按钮 -->
    <div class="swiper-button-prev"></div>
    <div class="swiper-button-next"></div>
  </div>

  <!-- 引入 Swiper 的 JavaScript -->
  <script src="https://unpkg.com/swiper/swiper-bundle.min.js"></script>
  <script>
    var swiper=new Swiper('.swiper-container',{
      // 配置选项
      loop: true,
      autoplay: {
        delay: 3000, // 自动播放间隔时间,单位为毫秒
      },
      pagination: {
        el: '.swiper-pagination',
        clickable: true,
      },
      navigation: {
        nextEl: '.swiper-button-next',
        prevEl: '.swiper-button-prev',
      },
    });
  </script>

</body>

</html>
四、操作单张图片容器动态更换对应活动项的信息

<!DOCTYPE html>
<html>
<head>
<meta charset="utf-8">
<title>轮播图</title>
<style type="text/css">
.banner {
width: 900px;
/* 设置轮播图容器宽度 */
height: 400px;
/* 设置轮播图容器高度 */
margin: 100px auto;
/* 设置轮播图容器居中并上下外边距为100px */
position: relative;
/* 设置相对定位,以便子元素绝对定位 */
}
.banner img {
width: 100%;
/* 设置图片宽度为父容器宽度 */
height: 100%;
/* 设置图片高度为父容器高度 */
position: absolute;
/* 绝对定位图片 */
left: 0;
/* 图片左上角与父容器左上角对齐 */
top: 0;
/* 图片左上角与父容器左上角对齐 */
}
.indicators {
text-align: center;
/* 指示器居中显示 */
margin-top: 10px;
/* 指示器距离轮播图底部10px */
position: absolute;
/* 绝对定位指示器 */
bottom: 0;
/* 指示器位于轮播图底部 */
left: 45%;
/* 指示器水平居中 */
}
.dot {
cursor: pointer;
/* 鼠标悬停时显示为指针 */
height: 15px;
/* 设置指示器圆点高度 */
width: 15px;
/* 设置指示器圆点宽度 */
margin: 0 2px;
/* 设置圆点左右间距 */
background-color: #bbb;
/* 设置圆点背景颜色 */
border-radius: 50%;
/* 设置圆点为圆形 */
display: inline-block;
/* 设置圆点为行内块元素 */
transition: background-color 0.6s ease;
/* 设置背景颜色过渡效果 */
}
.dot.active {
background-color: green;
/* 设置当前活动圆点的背景颜色 */
}
.prev,
.next {
cursor: pointer;
/* 鼠标悬停时显示为指针 */
position: absolute;
/* 绝对定位按钮 */
top: 50%;
/* 按钮垂直居中 */
width: auto;
/* 自动设置按钮宽度 */
margin-top: -22px;
/* 调整按钮位置使其居中 */
color: white;
/* 设置按钮文字颜色 */
font-weight: bold;
/* 设置按钮文字加粗 */
font-size: 18px;
/* 设置按钮文字大小 */
transition: 0.6s ease;
/* 设置背景颜色过渡效果 */
border-radius: 0 3px 3px 0;
/* 设置按钮圆角 */
user-select: none;
/* 防止拖动和用户选中 */
border: none;
/* 去掉按钮边框 */
}
.next {
right: 0;
/* 下一个按钮位于右侧 */
border-radius: 3px 0 0 3px;
/* 设置按钮圆角 */
}
.prev:hover,
.next:hover {
background-color: green;
/* 鼠标悬停时改变按钮背景颜色 */
}
</style>
</head>
<body>
<div class="banner">
<img id="banner_img" src="https://via.placeholder.com/600x400?text=Image+1"> <!-- 轮播图图片 -->
<button class="prev" onclick="plusSlides(-1)">❮</button> <!-- 上一张按钮 -->
<button class="next" onclick="plusSlides(1)">❯</button> <!-- 下一张按钮 -->
<div class="indicators">
<span class="dot active" onclick="currentSlide(1)"></span> <!-- 第一个指示器圆点 -->
<span class="dot" onclick="currentSlide(2)"></span> <!-- 第二个指示器圆点 -->
<span class="dot" onclick="currentSlide(3)"></span> <!-- 第三个指示器圆点 -->
</div>
</div>
<script>
var index=1; // 当前显示的图片索引,初始值为1
showSlides(index); // 初始化显示第一张图片
function plusSlides (n) {
showSlides(index+=n); // 根据传入参数切换图片
}
function currentSlide (n) {
showSlides(index=n); // 直接跳转到指定索引的图片
}
function showSlides (n) {
var i;
var slides=document.getElementsByClassName("dot"); // 获取所有指示器圆点
var img=document.getElementById("banner_img"); // 获取轮播图图片元素
if(n>3) {index=1} // 如果索引大于3,重置为1
if(n<1) {index=3} // 如果索引小于1,重置为3
for(i=0;i<slides.length;i++) {
slides[i].className=slides[i].className.replace(" active",""); // 移除所有圆点的active类
}
img.src="https://via.placeholder.com/600x400?text=Image+"+index; // 更新图片src属性以显示新图片
slides[index-1].className+=" active"; // 为当前图片对应的圆点添加active类
}
setInterval(function() {
plusSlides(1); // 每隔2秒自动切换到下一张图片
},2000);
</script>
</body>
</html>


 5362
5362

 被折叠的 条评论
为什么被折叠?


