


一、前言
虚拟机(Virtual Machine)指通过软件模拟的具有完整硬件系统功能的、运行在一个完全隔离环境中的完整计算机系统。在实体计算机中能够完成的工作在虚拟机中都能够实现。
虚拟机是在一些开发测试工作中常常需要用到的功能,常见的虚拟机软件主要有两款
VMware和VirtualBox。VMware是商付费软件,而VirtualBox是免费软件,对于一般用用的话VirtualBox基本可以应付大多数情况了。这篇文章就讲讲VirtualBox入门使用相关内容。
二、下载与安装
2.1、下载
VirtualBox官网地址如下:Oracle VM VirtualBox
镜像文件下载:
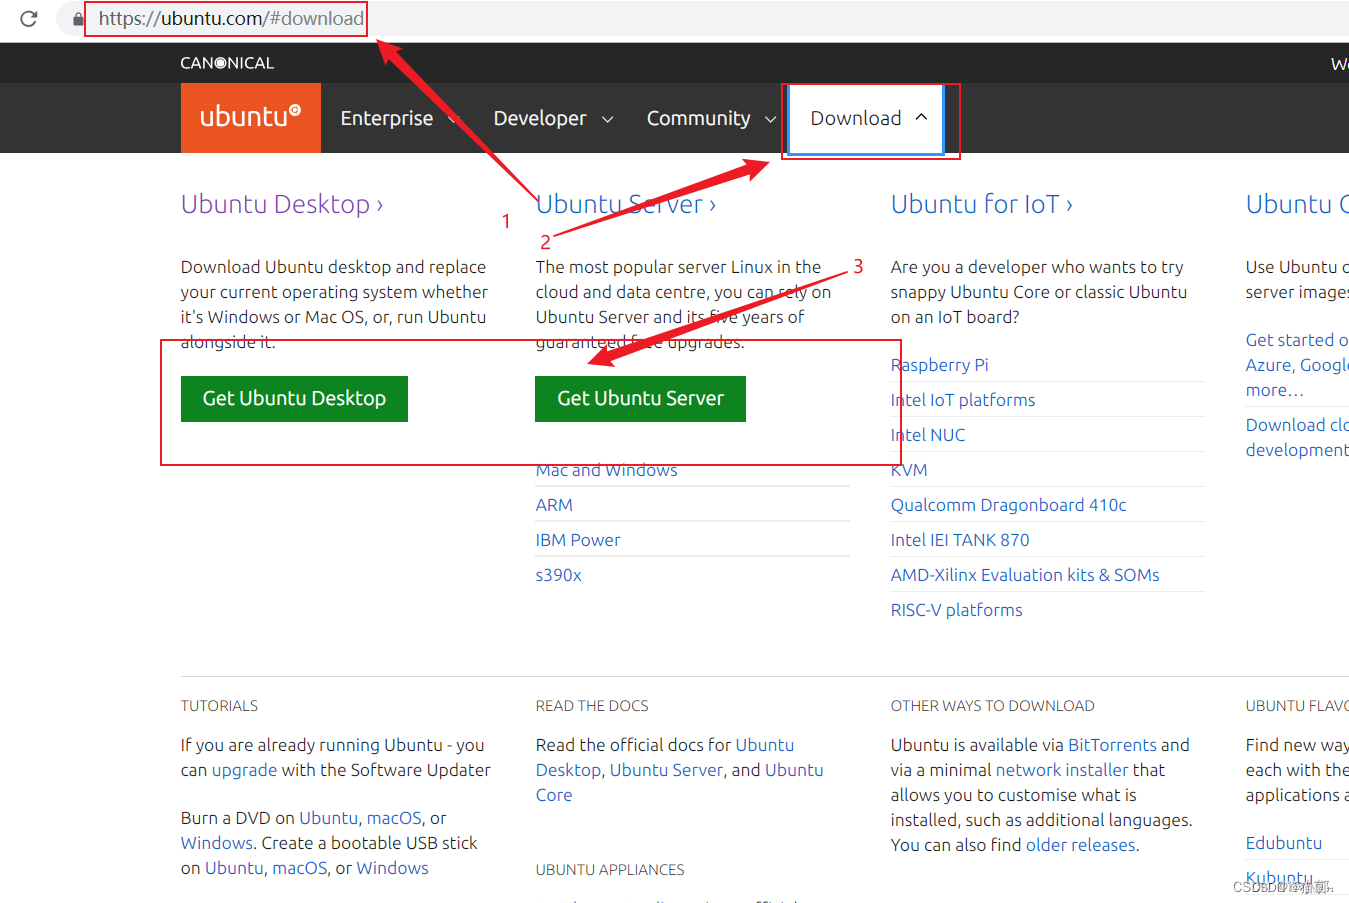
ubuntu官网地址如下:Enterprise Open Source and Linux | Ubuntu
windows官网地址如下:Microsoft Corporation
阿里官网镜像地址如下:阿里巴巴开源镜像站-OPSX镜像站-阿里云开发者社区
你可以在Downloads中找到合适自己当前电脑系统版本的软件安装包下载,下载完成后默认安装即可。
20240313_174300
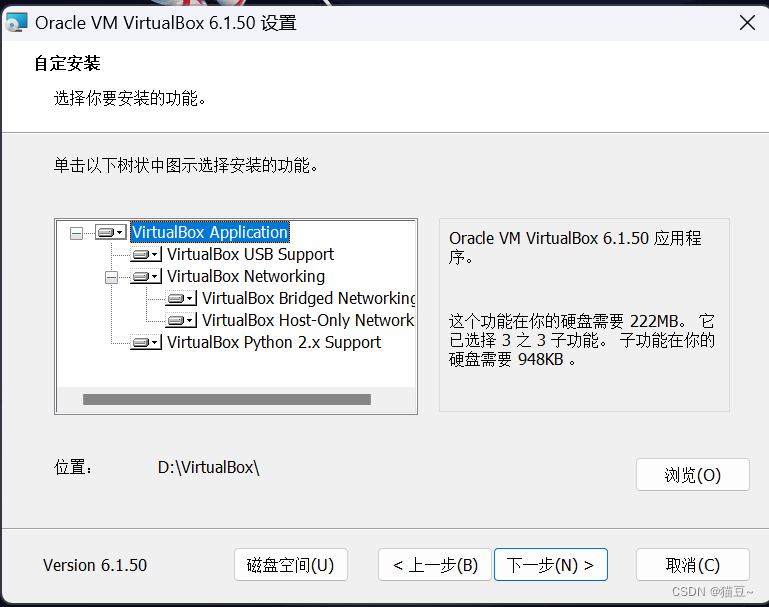
如果需要用到USB等功能的话可以在下载VirtualBox软件安装包的同时下载下面的 VirtualBox Extension Pack ,注意扩展包和本体软件版本保持一致。
2.2、安装
2.2.1、然后,我们双击打开安装包,开始安装,点击【下一步】按钮

2.2.2、选择安装路径
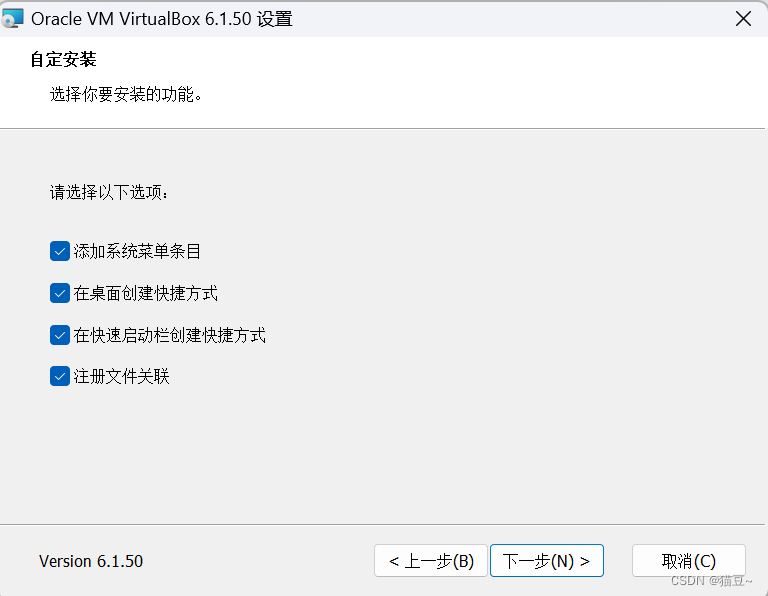
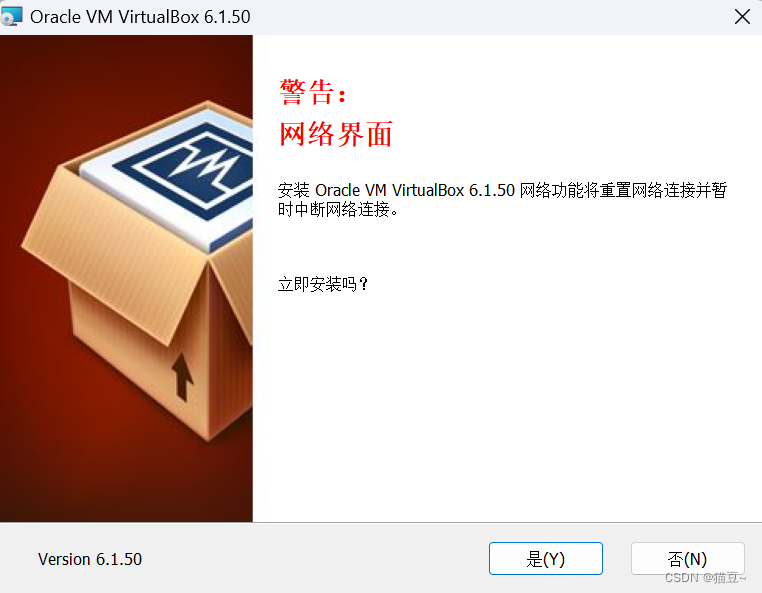
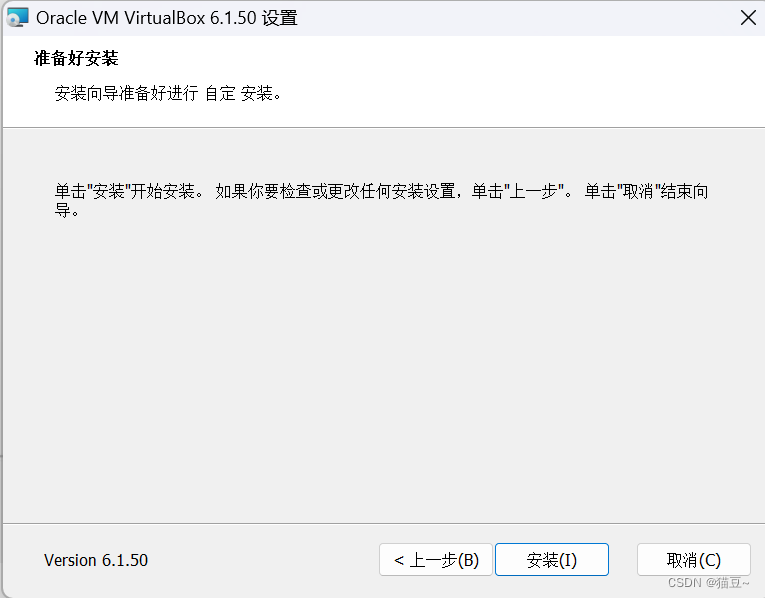
2.2.3、之后出现的默认就行了,出现安装界面就点安装即可。
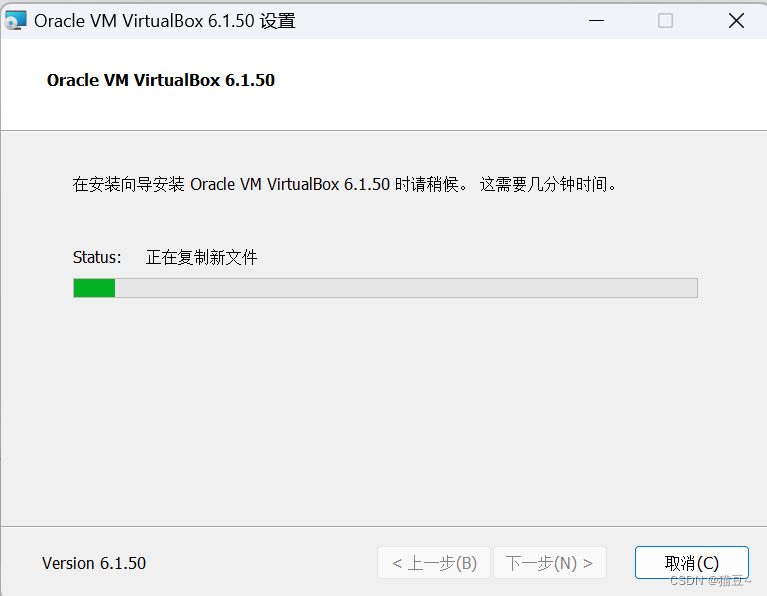
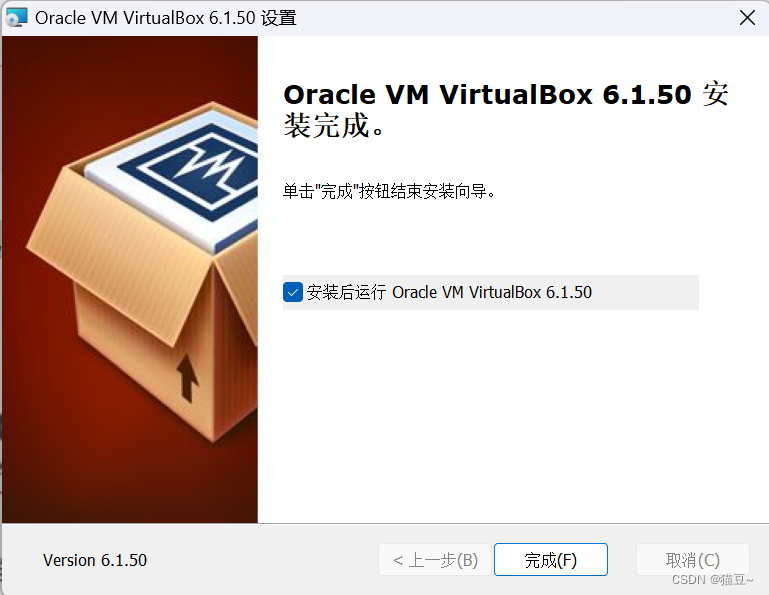
2.2.4、然后,等待最后安装完成,至此,安装过程结束了。
三、使用虚拟机
3.1、ISO文件下载
就像平时给电脑装系统一样,自己需要什么操作系统就去下载什么,这里要安装Ubuntu系统,还是直接bing搜索,找到官方网站。我们这里使用 ubuntu 做为演示 。
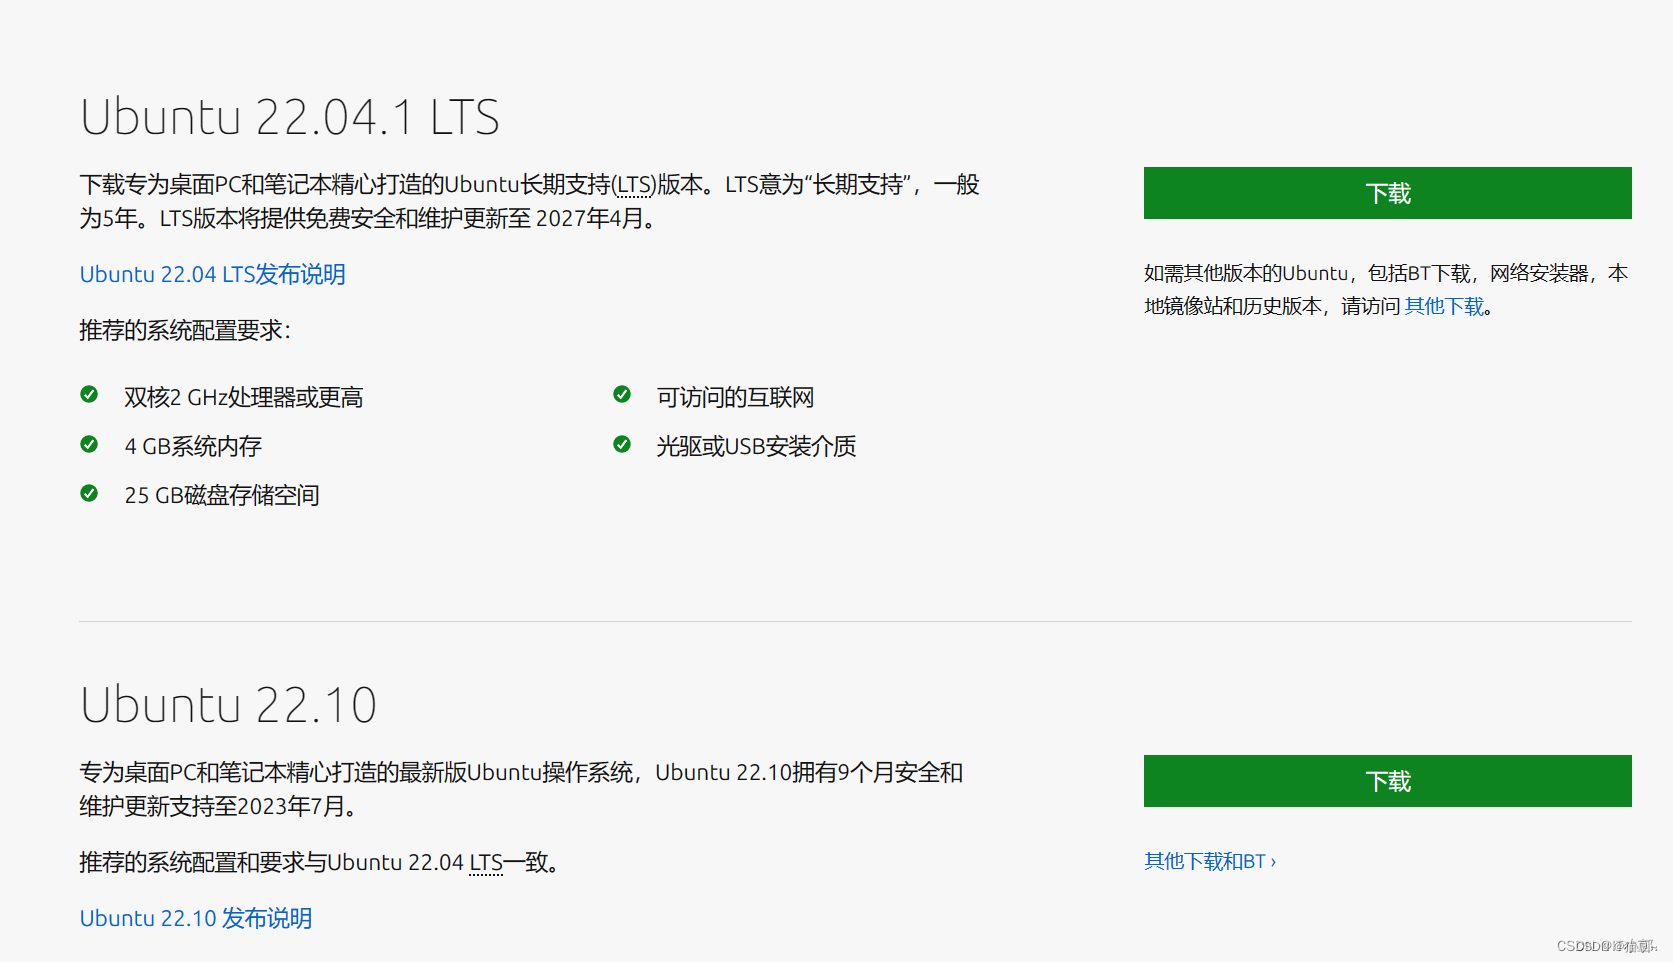
ubuntu一年分为两个版本,4月份的版本比较稳定。下载时可以右键下载复制链接,然后打开迅雷,创建新任务,粘贴链接。迅雷速度还行。
3.1.1、ISO 镜像文件下载:
ubuntu官网地址如下:Enterprise Open Source and Linux | Ubuntu
windows官网地址如下:Microsoft Corporation
阿里官网镜像地址如下:阿里巴巴开源镜像站-OPSX镜像站-阿里云开发者社区
3.1.2、ubuntu ISO 镜像文件下载

3.2、新建虚拟机
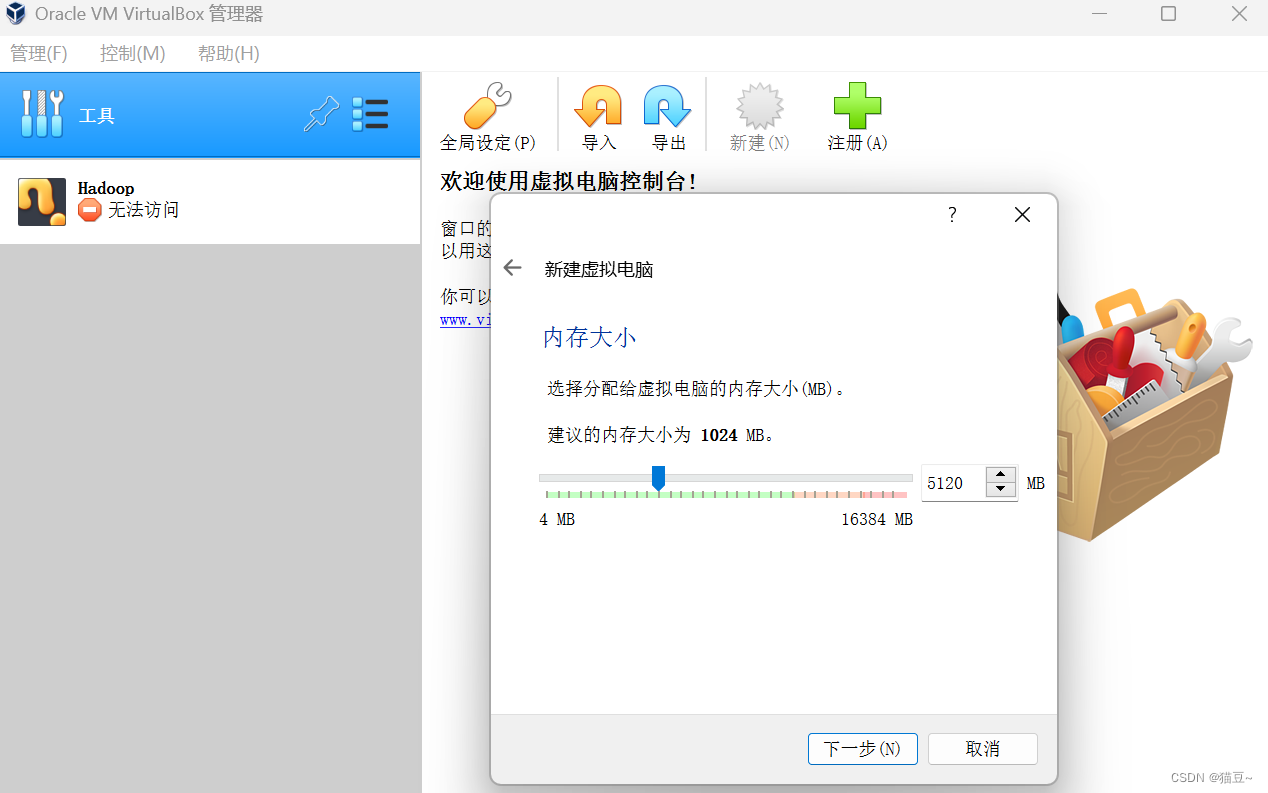
VirtualBox中新建虚拟很简单,确定好虚拟机名称和要安装的操作系统,然后分配内存,选择虚拟硬盘就行。内存大小可以随便选,之后使用中要是不够可以更改。虚拟硬盘最好选择动态分配,大小可以选大点。
1、打开virtualbox,点击欢迎页面的新建——输入名称——选择放置虚拟机文件的文件夹——选择操作系统类型和版本——下一步。

2、内存和cpu线程分配尽可能选大一点,只要指标在绿色区域就行。不过安装完成后觉得不够还可以更改。
3.单击”下一步“按钮,在界面中选中”现在创建虚拟硬盘“单选按钮,然后单击”创建“按钮,如图所示。

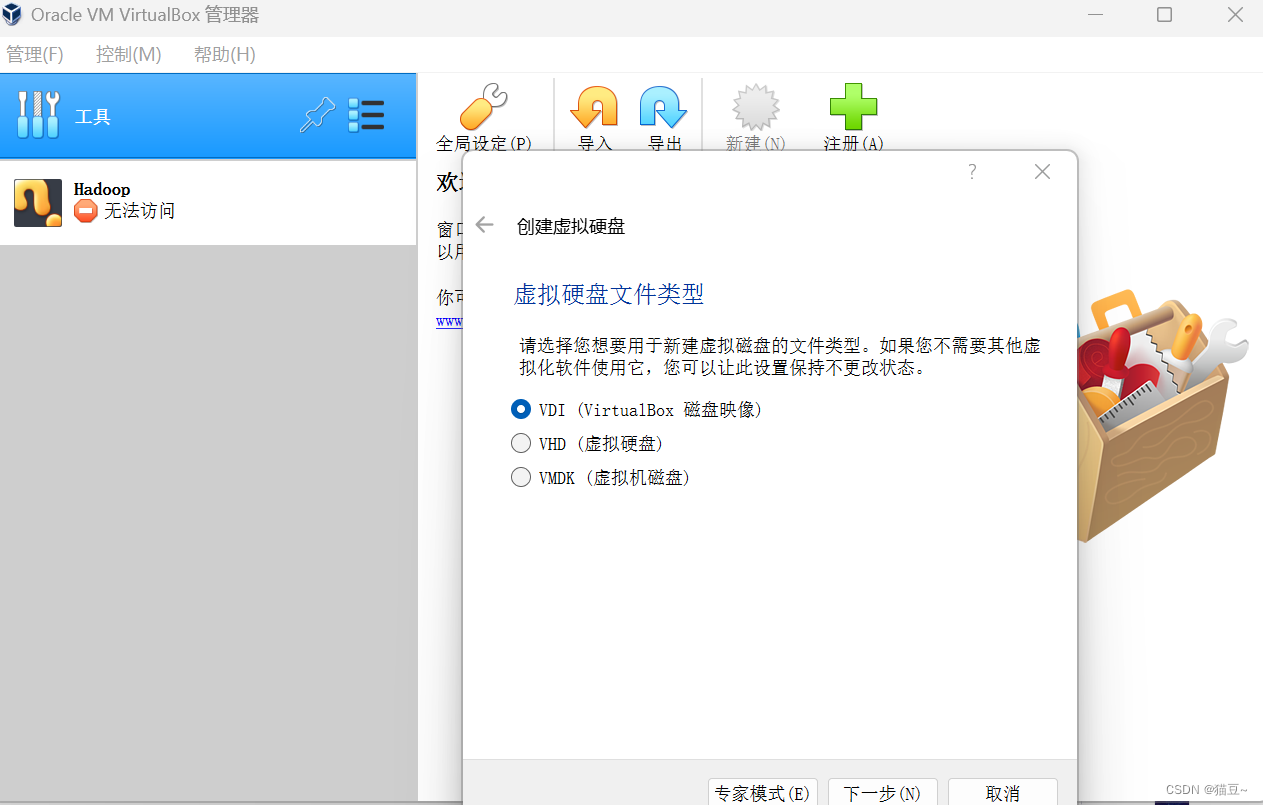
4.在打开的界面中默认选中”VDI(Virtual Box磁盘映像)“单选按钮,单击”下一步“按钮,如图所示。
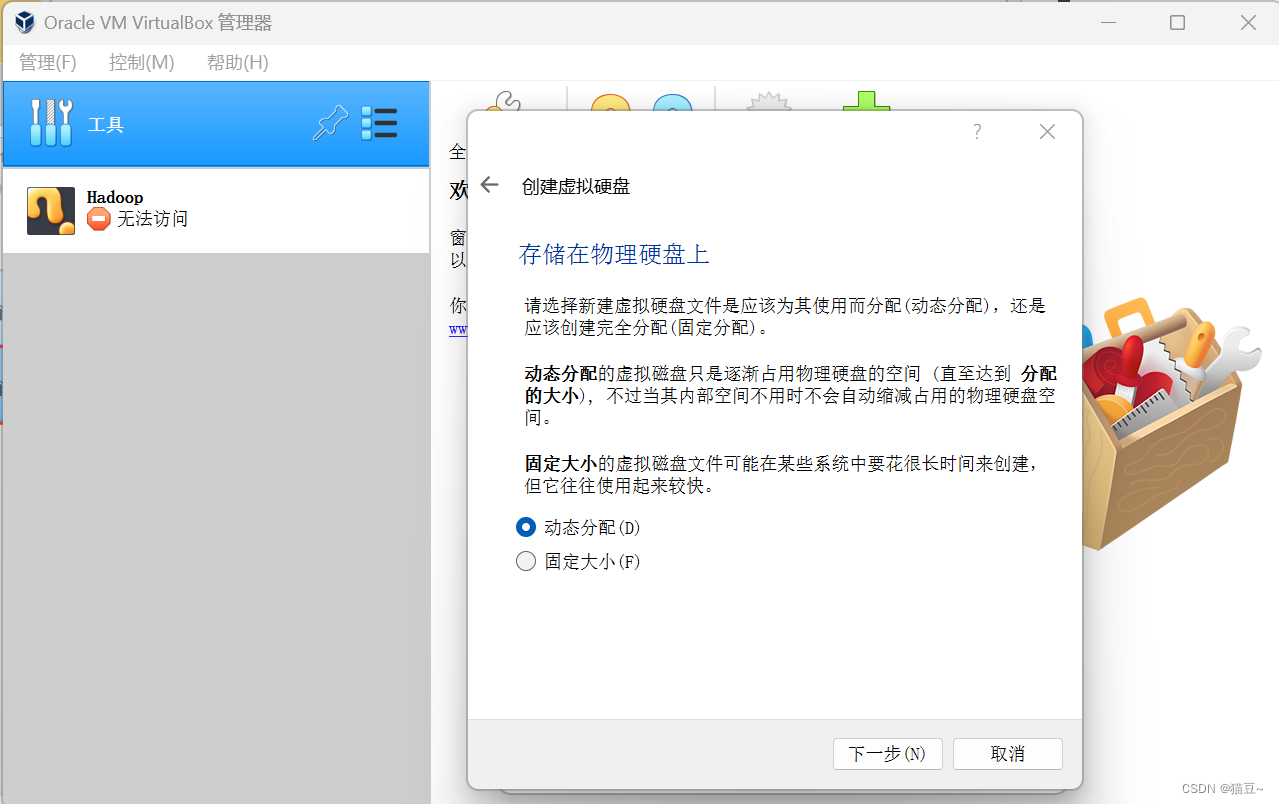
5.在打开的界面中选中”动态分布“单选按钮,单击”下一步“按钮,如图所示。
6.在打开的界面中设置文件的存储位置和大小
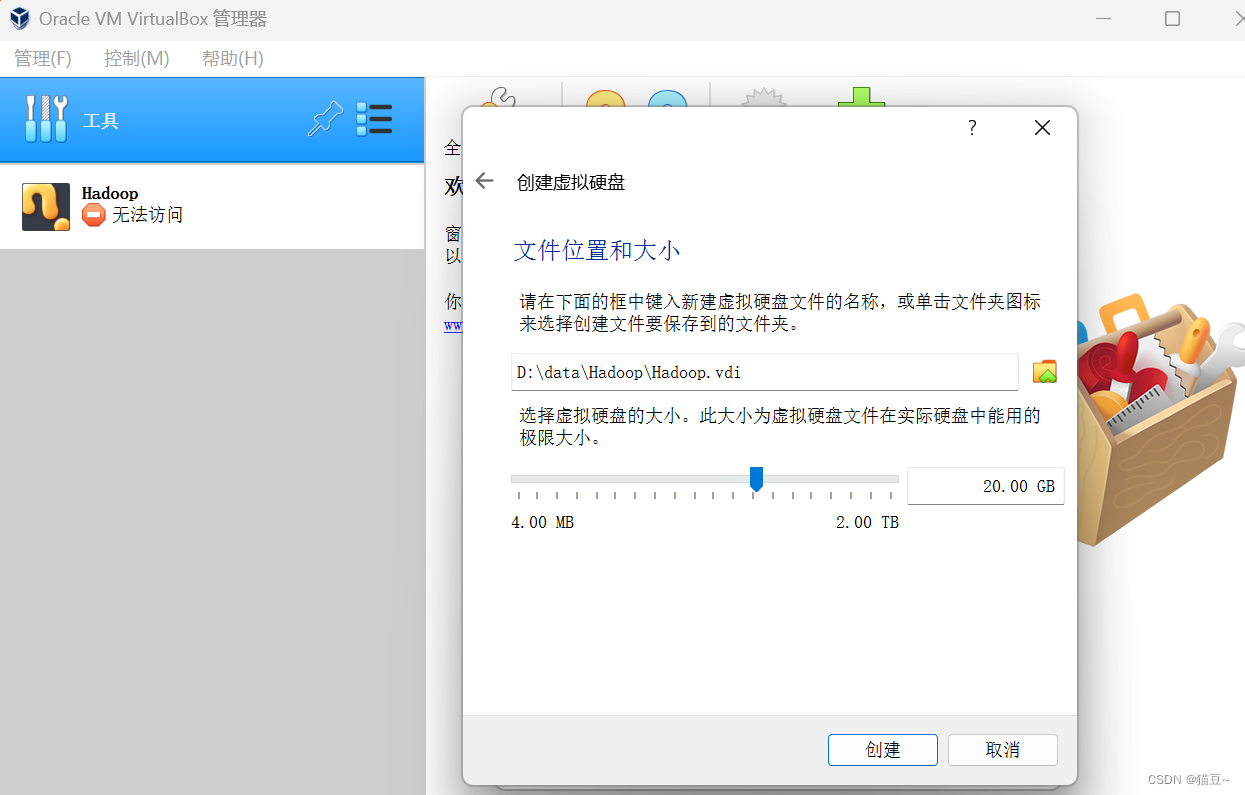
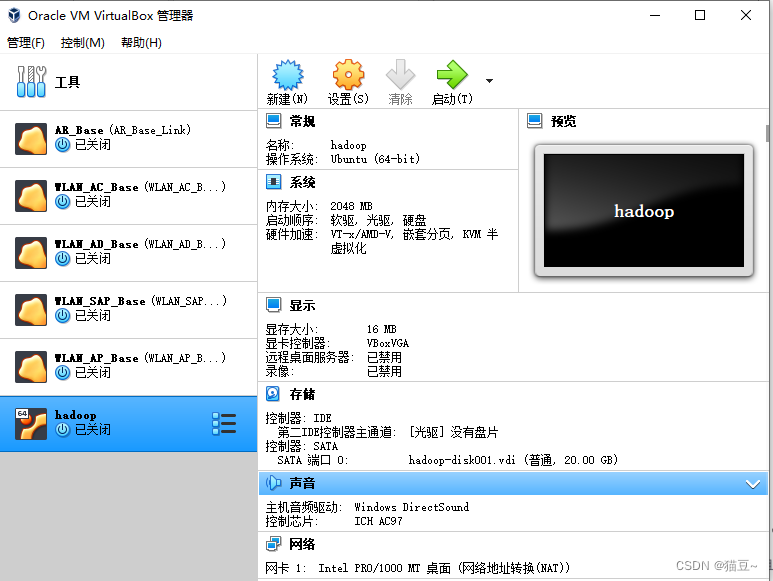
7.单击”创建“按钮,虚拟机创建成功,如图所示。

四、Linux操作系统(Ubuntu)的安装
4.1安装Ubuntu
1.打开VirtualBox,设置虚拟光盘文件,选中已经创建好的虚拟机Hadoop,在菜单栏中单击”设置“按钮,如图所示。
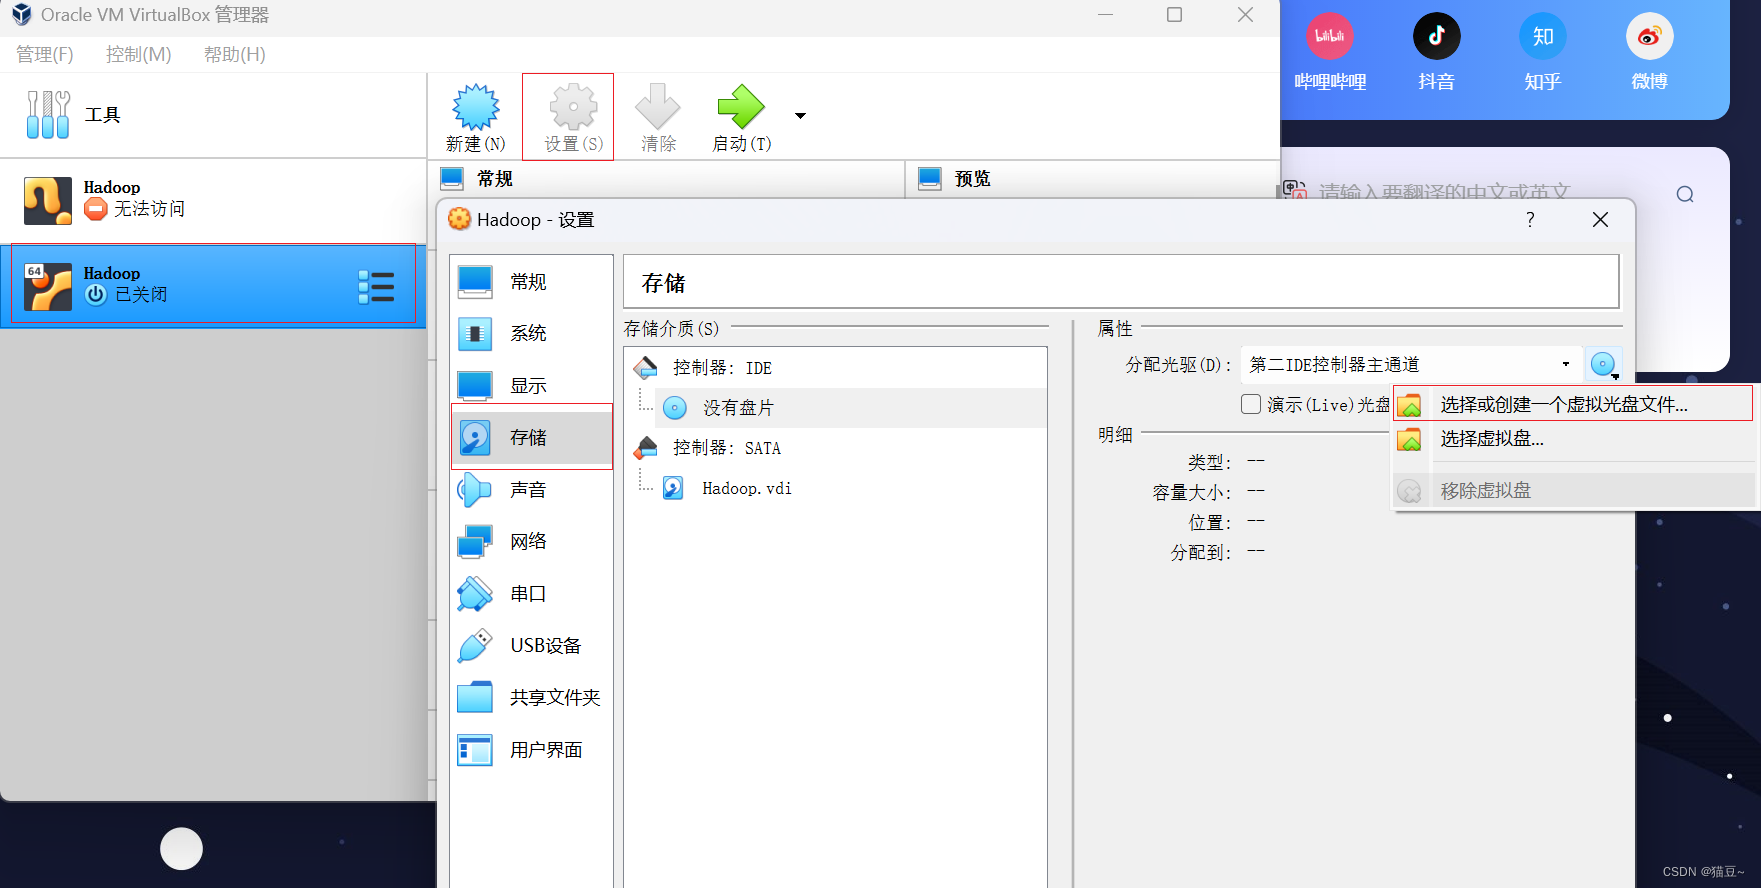
2.显示虚拟光盘文件。

3.在设置安装 Ubuntu的光盘文件之后,就需要启动虚拟机了。

未完待续……
五、JDK的检查与安装
5.1、检查是否安装
1.JDK 打开终端,输入 javac,来检查 JDK 是否可用 new@new-VirtualBox:~$ javac 如果没有安装 JDK,执行结果如下图所示

2.安装 JDK
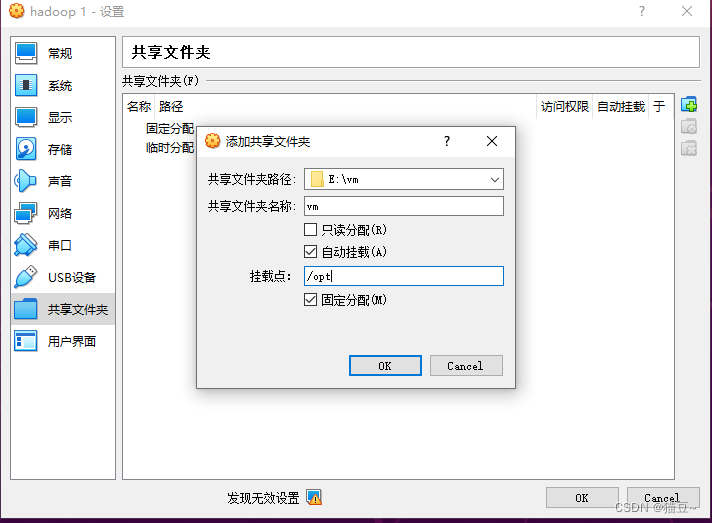
把官网中的 JDK 安装包放到共享文件夹中,从共享文件夹移到任意位置,案例是移动到 Ubuntu 系统的 home 目录(主目录)下的。
new@new-VirtualBox:~/桌面$ sudo usermod -aG vboxsf $(whoami)
[sudo] new 的密码:
new@new-VirtualBox:/root$ ls /opt/
新建文本文档.txt  hadoop-3.3.6.tar.gz  jdk-8u191-linux-x64.tar.gz
new@new-VirtualBox:~/桌面$ sudo -i
root@new-VirtualBox:~# tar -zxvf /opt/jdk-8u191-linux-x64.tar.gz -C /home/new/
root@new-VirtualBox:~# su new
3.下载一些工具
new@new-VirtualBox:/root$ sudo apt update
new@new-VirtualBox:/root$ sudo apt install vim -y
new@new-VirtualBox:~/桌面$ sudo apt install openssh-server -y
4.设置环境变量
new@new-VirtualBox:~/桌面$ sudo cat /etc/profile
# /etc/profile: system-wide .profile file for the Bourne shell (sh(1))
# and Bourne compatible shells (bash(1), ksh(1), ash(1), ...).

if [ "${PS1-}" ]; then
  if [ "${BASH-}" ] && [ "$BASH" != "/bin/sh" ]; then
    # The file bash.bashrc already sets the default PS1.
    # PS1='\h:\w\$ '
    if [ -f /etc/bash.bashrc ]; then
      . /etc/bash.bashrc
    fi
  else
    if [ "`id -u`" -eq 0 ]; then
      PS1='# '
    else
      PS1='$ '
    fi
  fi
fi

if [ -d /etc/profile.d ]; then
  for i in /etc/profile.d/*.sh; do
    if [ -r $i ]; then
      . $i
    fi
  done
  unset i
fi
export JAVA_HOME=/home/new/jdk1.8.0_191
export JRE_HOME=${JAVA_HOME}/jre
export CLASSPATH=.:${JAVA_HOME}/lib:${JRE_HOME}/lib
export PATH=${JAVA_HOME}/bin:$PATH
5.重新加载配置文件,命令如下。
new@new-VirtualBox:~/桌面$ source /etc/profile
6.验证是否成功安装JDK

5.2 配置SSH无密码登入
1.产生SSH Key。接着输入以下命令。
new@new-VirtualBox:~/桌面$ ssh-keygen -t rsa
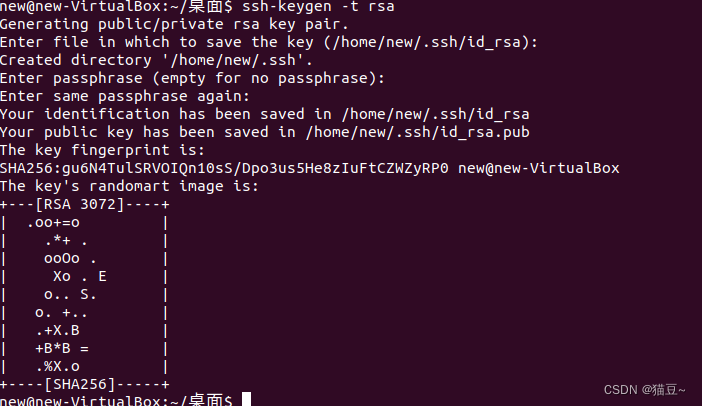
使用如下命令查看产生的SSH Key。
new@new-VirtualBox:~/桌面$ ll ~/.ssh/
总用量 16
drwx------  2 new new 4096 3月  14 09:14 ./
drwxr-xr-x 17 new new 4096 3月  14 09:14 ../
-rw-------  1 new new 2602 3月  14 09:14 id_rsa
-rw-r--r--  1 new new  572 3月  14 09:14 id_rsa.pub
2.将id_rsa.pub(公钥)放到许可证文件(authorized_keys)中,命令如下。
new@new-VirtualBox:~/桌面$ cat ~/.ssh/id_rsa.pub >> ~/.ssh/authorized_keys
3.更改权限,命令如下。
new@new-VirtualBox:~/桌面$ chmod 755 ~
new@new-VirtualBox:~/桌面$ chmod 700 ~/.ssh/
new@new-VirtualBox:~/桌面$ chmod 600 ~/.ssh/authorized_keys
4.验证SSH是否安装成功,输入命令如下。
![]()
接下来,验证是否可以无密码登入本机,命令如下。
5.退出SSH连接,代码如下。
![]()
六、Hadoop的下载与安装
6.1、Hadoop的安装
1.Hadoop安装包解压缩
![]()
root@new-VirtualBox:~# tar -zxvf /opt/hadoop-3.3.6.tar.gz -C /home/new/
2.查看一下Hadoop安装目录中的安装文件

6.2 配置Hadoop前期准备
1.配置本机的IP地址,命令如下。
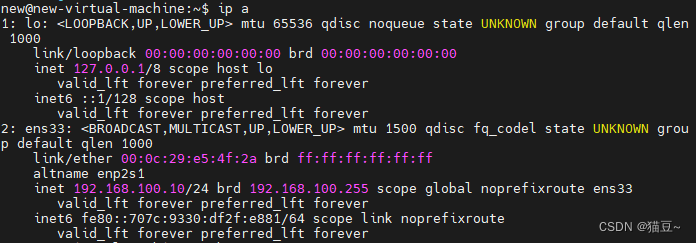
2.查看本机的主机名
![]()
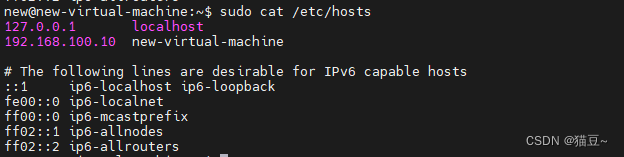
3.将IP地址和主机名写进/etc/hosts配置文件,命令如下。
6.3Hadoop环境变量的配置
1.在终端输入以下命令
new@new-VirtualBox:/root$ sudo vim ~/.bashrc
new@new-VirtualBox:/root$ sudo cat ~/.bashrc
# ~/.bashrc: executed by bash(1) for non-login shells.
# see /usr/share/doc/bash/examples/startup-files (in the package bash-doc)
# for examples

# If not running interactively, don't do anything
case $- in
    *i*) ;;
      *) return;;
esac

# don't put duplicate lines or lines starting with space in the history.
# See bash(1) for more options
HISTCONTROL=ignoreboth

# append to the history file, don't overwrite it
shopt -s histappend

# for setting history length see HISTSIZE and HISTFILESIZE in bash(1)
HISTSIZE=1000
HISTFILESIZE=2000

# check the window size after each command and, if necessary,
# update the values of LINES and COLUMNS.
shopt -s checkwinsize

# If set, the pattern "**" used in a pathname expansion context will
# match all files and zero or more directories and subdirectories.
#shopt -s globstar

# make less more friendly for non-text input files, see lesspipe(1)
[ -x /usr/bin/lesspipe ] && eval "$(SHELL=/bin/sh lesspipe)"

# set variable identifying the chroot you work in (used in the prompt below)
if [ -z "${debian_chroot:-}" ] && [ -r /etc/debian_chroot ]; then
    debian_chroot=$(cat /etc/debian_chroot)
fi

# set a fancy prompt (non-color, unless we know we "want" color)
case "$TERM" in
    xterm-color|*-256color) color_prompt=yes;;
esac

# uncomment for a colored prompt, if the terminal has the capability; turned
# off by default to not distract the user: the focus in a terminal window
# should be on the output of commands, not on the prompt
#force_color_prompt=yes

if [ -n "$force_color_prompt" ]; then
    if [ -x /usr/bin/tput ] && tput setaf 1 >&/dev/null; then
	# We have color support; assume it's compliant with Ecma-48
	# (ISO/IEC-6429). (Lack of such support is extremely rare, and such
	# a case would tend to support setf rather than setaf.)
	color_prompt=yes
    else
	color_prompt=
    fi
fi

if [ "$color_prompt" = yes ]; then
    PS1='${debian_chroot:+($debian_chroot)}\[\033[01;32m\]\u@\h\[\033[00m\]:\[\033[01;34m\]\w\[\033[00m\]\$ '
else
    PS1='${debian_chroot:+($debian_chroot)}\u@\h:\w\$ '
fi
unset color_prompt force_color_prompt

# If this is an xterm set the title to user@host:dir
case "$TERM" in
xterm*|rxvt*)
    PS1="\[\e]0;${debian_chroot:+($debian_chroot)}\u@\h: \w\a\]$PS1"
    ;;
*)
    ;;
esac

# enable color support of ls and also add handy aliases
if [ -x /usr/bin/dircolors ]; then
    test -r ~/.dircolors && eval "$(dircolors -b ~/.dircolors)" || eval "$(dircolors -b)"
    alias ls='ls --color=auto'
    #alias dir='dir --color=auto'
    #alias vdir='vdir --color=auto'

    alias grep='grep --color=auto'
    alias fgrep='fgrep --color=auto'
    alias egrep='egrep --color=auto'
fi

# colored GCC warnings and errors
#export GCC_COLORS='error=01;31:warning=01;35:note=01;36:caret=01;32:locus=01:quote=01'

# some more ls aliases
alias ll='ls -alF'
alias la='ls -A'
alias l='ls -CF'

# Add an "alert" alias for long running commands.  Use like so:
#   sleep 10; alert
alias alert='notify-send --urgency=low -i "$([ $? = 0 ] && echo terminal || echo error)" "$(history|tail -n1|sed -e '\''s/^\s*[0-9]\+\s*//;s/[;&|]\s*alert$//'\'')"'

# Alias definitions.
# You may want to put all your additions into a separate file like
# ~/.bash_aliases, instead of adding them here directly.
# See /usr/share/doc/bash-doc/examples in the bash-doc package.

if [ -f ~/.bash_aliases ]; then
    . ~/.bash_aliases
fi

# enable programmable completion features (you don't need to enable
# this, if it's already enabled in /etc/bash.bashrc and /etc/profile
# sources /etc/bash.bashrc).
if ! shopt -oq posix; then
  if [ -f /usr/share/bash-completion/bash_completion ]; then
    . /usr/share/bash-completion/bash_completion
  elif [ -f /etc/bash_completion ]; then
    . /etc/bash_completion
  fi
fi
export JAVA_HOME=/home/new/jdk1.8.0_191
export HADOOP_HOME=/home/new/hadoop-3.3.6
export PATH=$PATH:$HADOOP_HOME/bin
export PATH=$PATH:$HADOOP_HOME/sbin
export HADOOP_MAPRED_HOME=$HADOOP_HOME
export HADOOP_COMMON_HOME=$HADOOP_HOME
export HADOOP_HDFS_HOME=$HADOOP_HOME
export YARN_HOME=$HADOOP_HOME
export HADOOP_COMMON_LIB_NATIVE_DIR=$HADOOP_HOME/lib/native
export HADOOP_OPTS="-Djava.library.path=$HADOOP_HOME/lib:$HADOOP_COMMON_LIB_NATIVE_DIR"
export JAVA_LIBRARY_PATH=$HADOOP_HOME/lib/native:$JAVA_LIBRARY_PATH
2.使设置生效,输入以下命令。
new@new-VirtualBox:/root$ source ~/.bashrc
3.使用hadoop version命令测试是否安装成功。

6.4 修改Hadoop配置文件
1.修改hadoop-env.sh文件
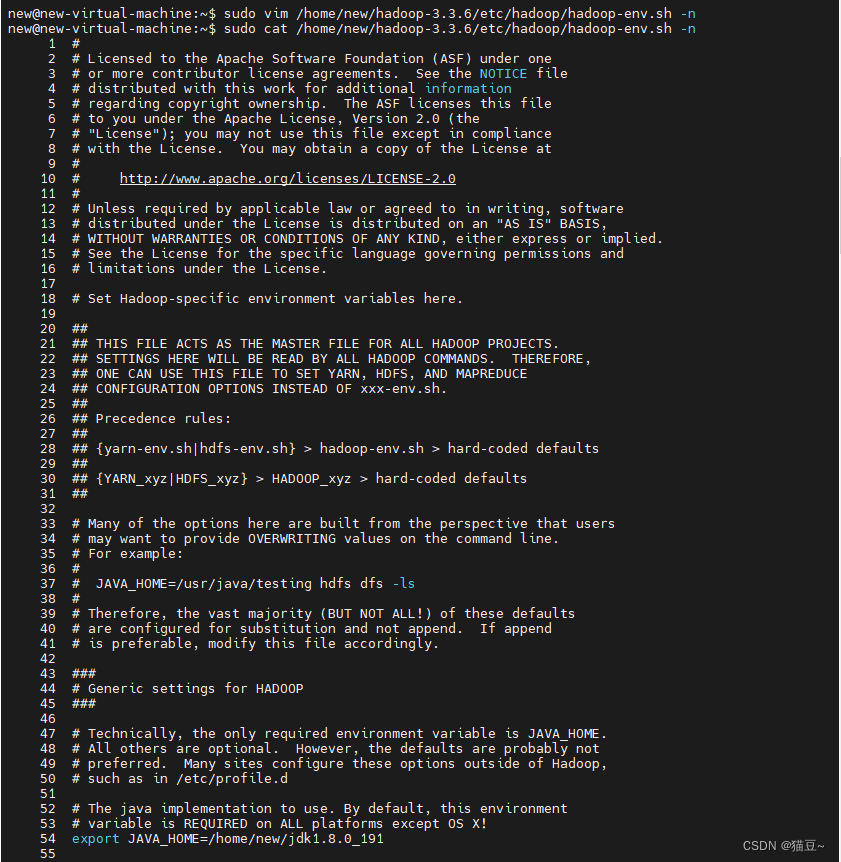
更改第54行代码,如图所示。
export JAVA_HOME=/home/new/jdk1.8.0_191
2.修改core-site.xml文件
new@new-virtual-machine:~$ sudo vim /home/new/hadoop-3.3.6/etc/hadoop/core-site.xml
new@new-virtual-machine:~$ sudo cat /home/new/hadoop-3.3.6/etc/hadoop/core-site.xml
<?xml version="1.0" encoding="UTF-8"?>
<?xml-stylesheet type="text/xsl" href="configuration.xsl"?>
<!--
  Licensed under the Apache License, Version 2.0 (the "License");
  you may not use this file except in compliance with the License.
  You may obtain a copy of the License at

    http://www.apache.org/licenses/LICENSE-2.0

  Unless required by applicable law or agreed to in writing, software
  distributed under the License is distributed on an "AS IS" BASIS,
  WITHOUT WARRANTIES OR CONDITIONS OF ANY KIND, either express or implied.
  See the License for the specific language governing permissions and
  limitations under the License. See accompanying LICENSE file.
-->

<!-- Put site-specific property overrides in this file. -->

<configuration>
        <property>
                <name>fs.defaultFS</name>
                <value>hdfs://192.168.100.10:9000</value>
        </property>
        <property>
                <name>hadoop.tmp.dir</name>
                <value>/home/new/hadoop-3.3.6/dataNode_1_dir</value>
        </property>
</configuration>
3.修改yarn-site.xml文件
new@new-virtual-machine:~$ sudo vim /home/new/hadoop-3.3.6/etc/hadoop/yarn-site.xml
new@new-virtual-machine:~$ sudo cat /home/new/hadoop-3.3.6/etc/hadoop/yarn-site.xml
<?xml version="1.0"?>
<!--
  Licensed under the Apache License, Version 2.0 (the "License");
  you may not use this file except in compliance with the License.
  You may obtain a copy of the License at

    http://www.apache.org/licenses/LICENSE-2.0

  Unless required by applicable law or agreed to in writing, software
  distributed under the License is distributed on an "AS IS" BASIS,
  WITHOUT WARRANTIES OR CONDITIONS OF ANY KIND, either express or implied.
  See the License for the specific language governing permissions and
  limitations under the License. See accompanying LICENSE file.
-->
<configuration>
        <property>
                <name>yarn.resourcemanager.hostname</name>
                <value>192.168.100.10</value>
        </property>
        <property>
                <name>yarn.nodemanager.aux-services</name>
                <value>mapreduce_shuffle</value>
        </property>
</configuration>
4.修改mapred-site.xml文件
new@new-virtual-machine:~$ sudo vim /home/new/hadoop-3.3.6/etc/hadoop/mapred-site.xml
new@new-virtual-machine:~$ sudo cat /home/new/hadoop-3.3.6/etc/hadoop/mapred-site.xml
<?xml version="1.0"?>
<?xml-stylesheet type="text/xsl" href="configuration.xsl"?>
<!--
  Licensed under the Apache License, Version 2.0 (the "License");
  you may not use this file except in compliance with the License.
  You may obtain a copy of the License at

    http://www.apache.org/licenses/LICENSE-2.0

  Unless required by applicable law or agreed to in writing, software
  distributed under the License is distributed on an "AS IS" BASIS,
  WITHOUT WARRANTIES OR CONDITIONS OF ANY KIND, either express or implied.
  See the License for the specific language governing permissions and
  limitations under the License. See accompanying LICENSE file.
-->

<!-- Put site-specific property overrides in this file. -->

<configuration>
        <property>
                <name>mapreduce.framework.name</name>
                <value>yarn</value>
        </property>
</configuration>
5.修改hdfs-site.xml
new@new-virtual-machine:~$ sudo vim /home/new/hadoop-3.3.6/etc/hadoop/hdfs-site.xml
new@new-virtual-machine:~$ sudo cat /home/new/hadoop-3.3.6/etc/hadoop/hdfs-site.xml
<?xml version="1.0" encoding="UTF-8"?>
<?xml-stylesheet type="text/xsl" href="configuration.xsl"?>
<!--
  Licensed under the Apache License, Version 2.0 (the "License");
  you may not use this file except in compliance with the License.
  You may obtain a copy of the License at

    http://www.apache.org/licenses/LICENSE-2.0

  Unless required by applicable law or agreed to in writing, software
  distributed under the License is distributed on an "AS IS" BASIS,
  WITHOUT WARRANTIES OR CONDITIONS OF ANY KIND, either express or implied.
  See the License for the specific language governing permissions and
  limitations under the License. See accompanying LICENSE file.
-->

<!-- Put site-specific property overrides in this file. -->

<configuration>
        <property>
                <name>dfs.replication</name>
                <value>1</value>
        </property>
        <property>
                <name>dfs.namenode.name.dir</name>
                <value>file:///home/new/hadoop-3.3.6/hadoop_data/hdfs/namenode</value>
        </property>
        <property>
                <name>dfs.datanode.data.dir</name>
                <value>file:///home/new/hadoop-3.3.6/hadoop_data/hdfs/datanode</value>
        </property>
        <property>
                <name>dfs.http.address</name>
                <value>192.168.100.10:50070</value>
        </property>
</configuration>
6.修改/etc/profile 文件
new@new-virtual-machine:~$ sudo vim /etc/profile
new@new-virtual-machine:~$ sudo cat /etc/profile
# /etc/profile: system-wide .profile file for the Bourne shell (sh(1))
# and Bourne compatible shells (bash(1), ksh(1), ash(1), ...).

if [ "${PS1-}" ]; then
  if [ "${BASH-}" ] && [ "$BASH" != "/bin/sh" ]; then
    # The file bash.bashrc already sets the default PS1.
    # PS1='\h:\w\$ '
    if [ -f /etc/bash.bashrc ]; then
      . /etc/bash.bashrc
    fi
  else
    if [ "`id -u`" -eq 0 ]; then
      PS1='# '
    else
      PS1='$ '
    fi
  fi
fi

if [ -d /etc/profile.d ]; then
  for i in /etc/profile.d/*.sh; do
    if [ -r $i ]; then
      . $i
    fi
  done
  unset i
fi
export JAVA_HOME=/home/new/jdk1.8.0_191
export HADOOP_HOME=/home/new/hadoop-3.3.6
export JRE_HOME=${JAVA_HOME}/jre
export CLASSPATH=.:${JAVA_HOME}/lib:${JRE_HOME}/lib
export PATH=${JAVA_HOME}/bin:$PATH:$HADOOP_HOME/bin:$HADOOP_HOME/sbin
7.创建并格式化文件系统
Hdfs-site.xml 文件指定了 NameNode 和 DataNode 的数据存储目录,但是这两个目录并没有被创建。
创建 NameNode 数据存储目录
new@new-virtual-machine:~$ sudo mkdir -p /home/new/hadoop-3.3.6/hadoop_data/hdfs/namenode
创建 DataNode 数据存储目录
new@new-virtual-machine:~$ sudo mkdir -p /home/new/hadoop-3.3.6/hadoop_data/hdfs/datanode
创建 Hadoop 运行时产生文件的存储目录
new@new-virtual-machine:~$ sudo mkdir -p /home/new/hadoop-3.3.6/dataNode_1_dir/datanode
如果 NameNode 数据存储目录已经有数据,那么可以将 HDFS
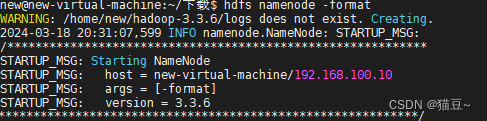
new@new-virtual-machine:~$ hdfs namenode -format
格式化执行结果如下图所示。
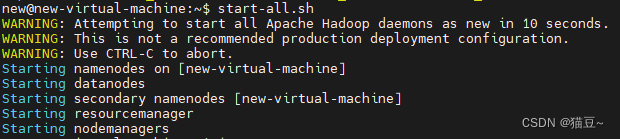
8.启动 Hadoop
new@new-virtual-machine:~$ start-all.sh
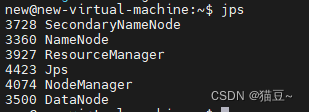
9.通过 jps 命令验证一下是否开启 hadoop 全部的守护进程
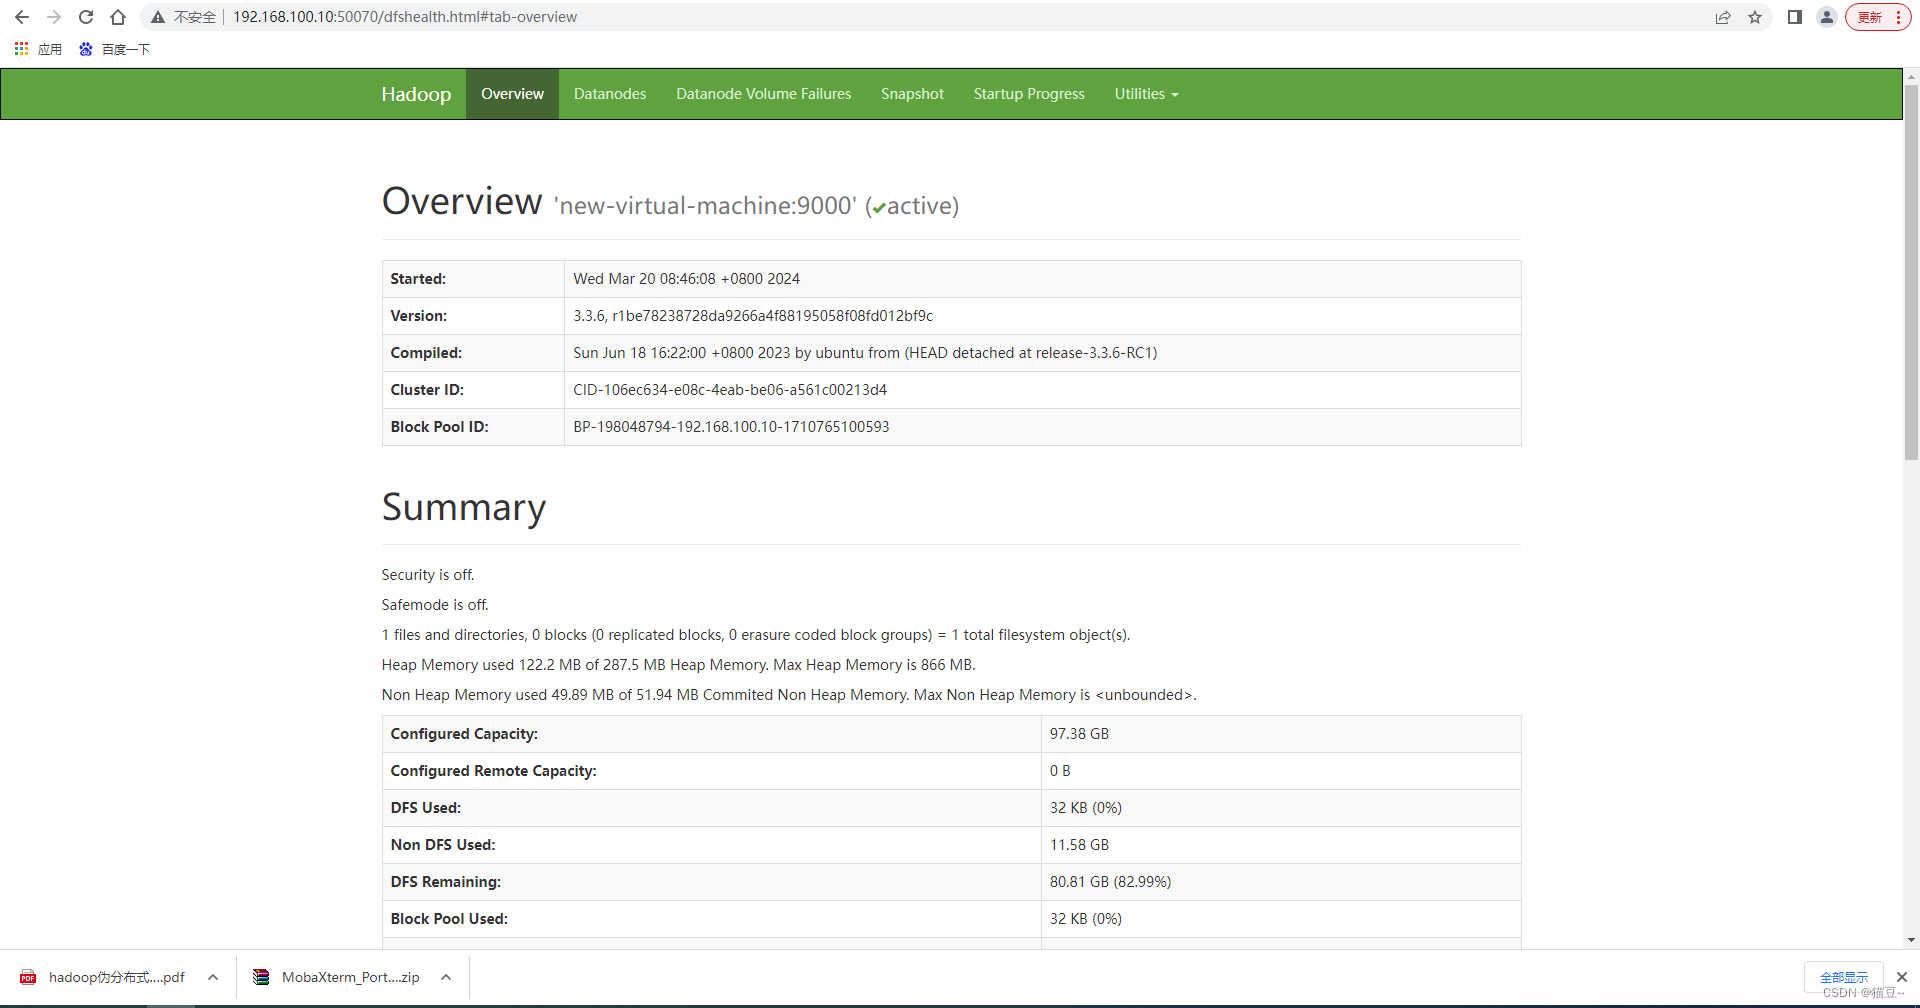
10.查看 HDFS Web 页面,在浏览器中输入“192.168.100.10:50070”。
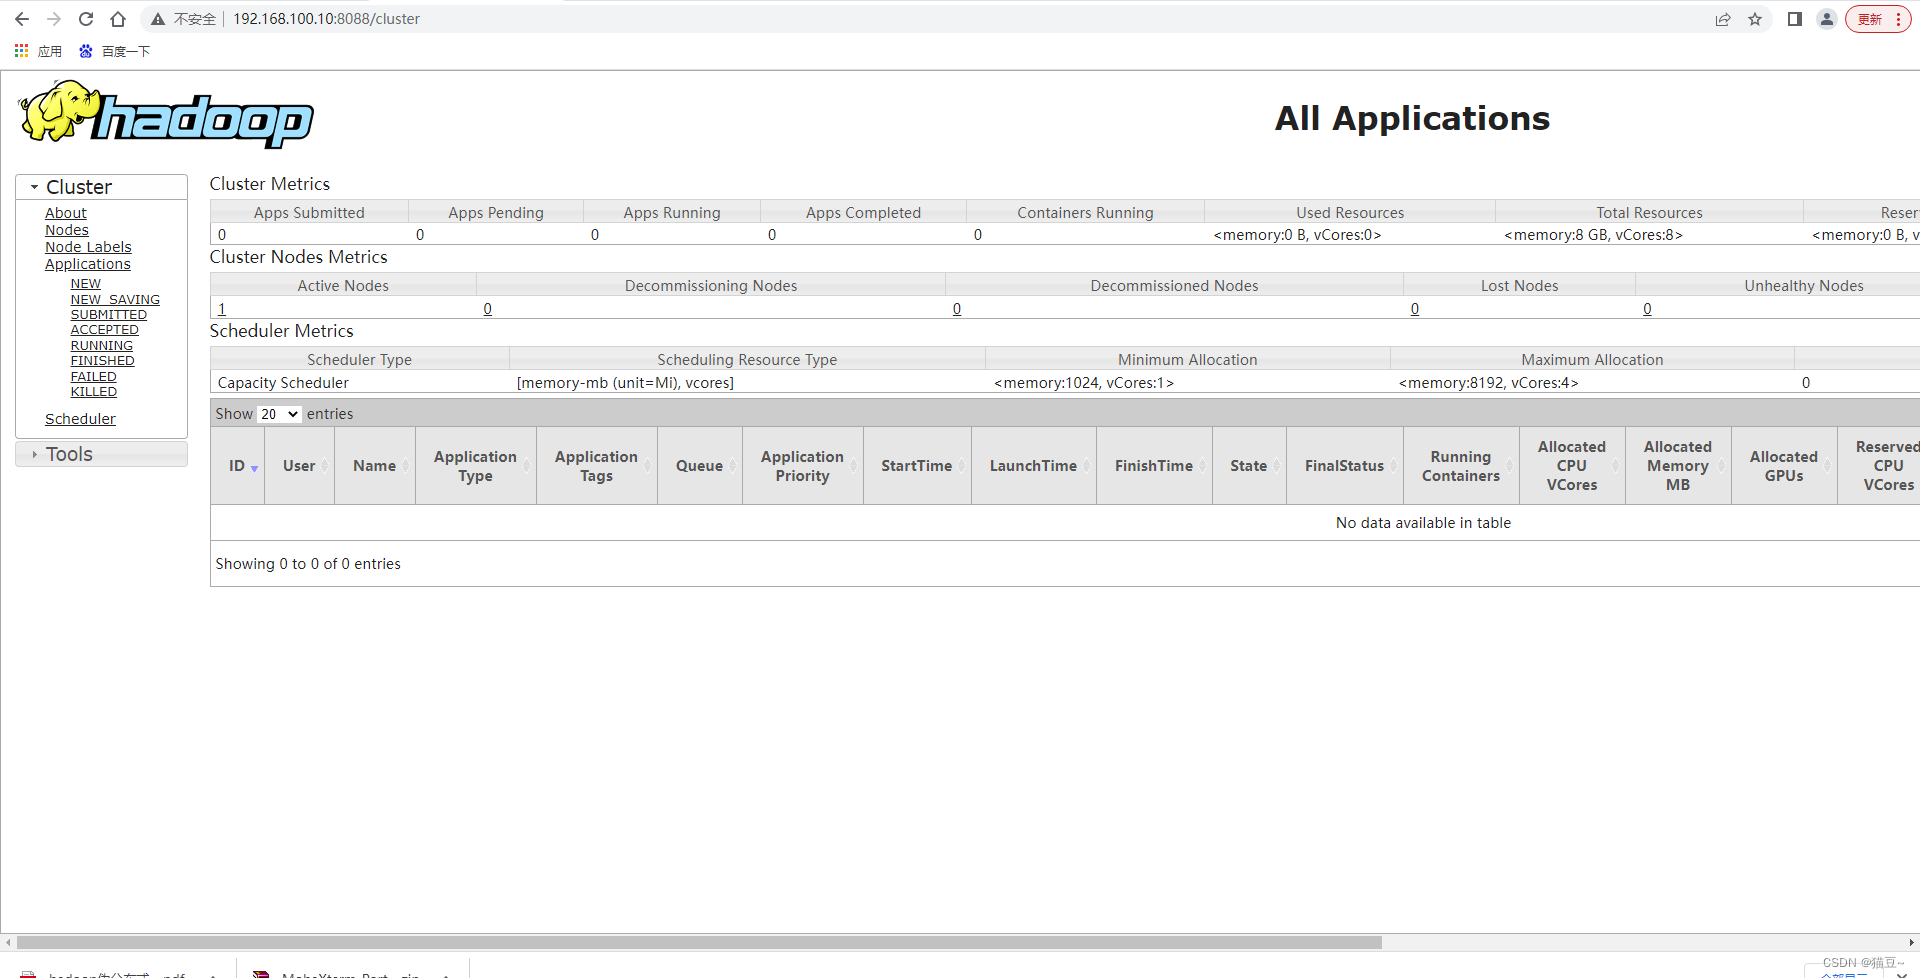
11.查看 YARN Web 页面,在浏览器中输入“192.168.100.10:8088”。


 489
489


 被折叠的 条评论
为什么被折叠?
被折叠的 条评论
为什么被折叠?
 到【灌水乐园】发言


