


vue.js Ajax(vue-resource)
vue要实现异步加载需要使用到vue-resource库,而在vue.js 2.0版本推荐使用axios来完成ajax请求
<script src="https://cdn.staticfile.org/vue-resource/1.5.1/vue-resource.min.js"></script>
Get请求
window.onload = function(){
    var vm = new Vue({
        el:'#box',
        data:{
            msg:'Hello World!',
        },
        methods:{
            get:function(){
                //发送get请求
                this.$http.get('/try/ajax/ajax_info.txt').then(function(res){
                    document.write(res.body);
                },function(){
                    console.log('请求失败处理');
                });
            }
        }
    });
}
post请求
post发送到数据到后端,需要第三个参数{ emulateJSON : ture }
emulateJSON的作用:如果web服务器无法处理编码为application/json的请求,你可以启用emulateJSON选项
window.onload = function(){
    var vm = new Vue({
        el:'#box',
        data:{
            msg:'Hello World!',
        },
        methods:{
            post:function(){
                //发送 post 请求
                this.$http.post('/try/ajax/demo_test_post.php',{name:"菜鸟教程",url:"http://www.runoob.com"},{emulateJSON:true}).then(function(res){
                    document.write(res.body);
                },function(res){
                    console.log(res.status);
                });
            }
        }
    });
}
demo_test_post.php代码如下:
<?php
$name = isset($_POST['name']) ? htmlspecialchars($_POST['name']) : '';
$city = isset($_POST['url']) ? htmlspecialchars($_POST['url']) : '';
echo '网站名: ' . $name;
echo "\n";
echo 'URL 地址: ' .$city;
?>
你也可以使用全局对象方式Vue.http或者在一个Vue实例的内部使用this.$http来发起请求
// 基于全局Vue对象使用http
Vue.http.get('/someUrl', [options]).then(successCallback, errorCallback);
Vue.http.post('/someUrl', [body], [options]).then(successCallback, errorCallback);

// 在一个Vue实例内使用$http
this.$http.get('/someUrl', [options]).then(successCallback, errorCallback);
this.$http.post('/someUrl', [body], [options]).then(successCallback, errorCallback);
一.axios的二次封装
ajax的二次封装的目的是:方便统一管理 下载:npm i axios
1.配置拦截器
在 src 目录下新建 utils 文件夹,该文件夹下创建 request.js 文件
request.js文件
1.首先创建axios对象
2.添加请求拦截器(前端给后端的参数)
3.添加响应拦截器(后端给前端的数据)
import axios from 'axios'

// 创建 axios 对象
const instance = axios.create({
    baseURL: 'http://testapi.xuexiluxian.cn/api', // 根路径
    timeout: 2000 // 网络延时
})

// 添加请求拦截器 => 前端给后端的参数【还没到后端响应】
instance.interceptors.request.use(function (config) {
    // 在发送请求之前做些什么
    return config;
}, function (error) {
    // 对请求错误做些什么
    return Promise.reject(error);
});

// 添加响应拦截器 => 后端给前端的数据【后端返回给前端的东西】
instance.interceptors.response.use(function (response) {
    // 对响应数据做点什么
    return response;
}, function (error) {
    // 对响应错误做点什么
    return Promise.reject(error);
});

// 最终返回的对象
export default instance
2.配置拦截器
在需要发请求的组件中,导入request.js,之后发送请求即可
App.vue 组件
1.在需要使用的组件中导入 request
2.直接发送即可
<template>
  <div id="app">前端杂货铺</div>
</template>

<script>
import request from "./utils/request";
export default {
  name: "App",
  data() {
    return {};
  },
  created() {
  	// get 请求
    request({
      url: "/course/category/getSecondCategorys",
    }).then((res) => {
      console.log(res);
    });

	// post 请求
    request({
      url: "/course/mostNew",
      method: "post",
      data: {
        pageNum: 1,
        pageSize: 5,
      },
    }).then((res) => {
      console.log(res);
    });
  }
}
</script>

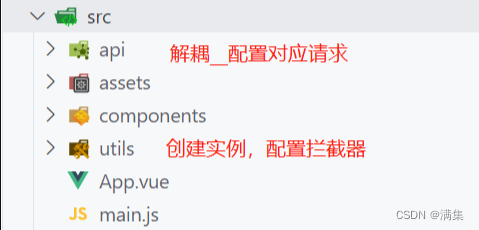
文件结构如下:


 3619
3619


 被折叠的 条评论
为什么被折叠?
被折叠的 条评论
为什么被折叠?
 到【灌水乐园】发言


