


pom文件的导入中
<parent>
        <groupId>org.springframework.boot</groupId>
        <artifactId>spring-boot-starter-parent</artifactId>
        <version>2.6.6</version>
        <relativePath/> <!-- lookup parent from repository -->
    </parent>
引入父工程

 <dependencies>

        <dependency>
            <groupId>org.springframework.boot</groupId>
            <artifactId>spring-boot-starter</artifactId>
        </dependency>

        <dependency>
            <groupId>org.springframework.boot</groupId>
            <artifactId>spring-boot-starter-test</artifactId>
            <scope>test</scope>
        </dependency>

        <dependency>
            <groupId>org.springframework.boot</groupId>
            <artifactId>spring-boot-starter-web</artifactId>
            <scope>compile</scope>
        </dependency>

        <dependency>
            <groupId>com.baomidou</groupId>
            <artifactId>mybatis-plus-boot-starter</artifactId>
            <version>3.4.2</version>
        </dependency>

        <dependency>
            <groupId>org.projectlombok</groupId>
            <artifactId>lombok</artifactId>
            <version>1.18.20</version>
        </dependency>

        <dependency>
            <groupId>com.alibaba</groupId>
            <artifactId>fastjson</artifactId>
            <version>1.2.76</version>
        </dependency>

        <dependency>
            <groupId>commons-lang</groupId>
            <artifactId>commons-lang</artifactId>
            <version>2.6</version>
        </dependency>

        <dependency>
            <groupId>mysql</groupId>
            <artifactId>mysql-connector-java</artifactId>
            <scope>runtime</scope>
        </dependency>

        <dependency>
            <groupId>com.alibaba</groupId>
            <artifactId>druid-spring-boot-starter</artifactId>
            <version>1.1.23</version>
        </dependency>

    </dependencies>

    <build>
    <plugins>
        <plugin>
            <groupId>org.springframework.boot</groupId>
            <artifactId>spring-boot-maven-plugin</artifactId>
            <version>2.6.6</version>
        </plugin>
    </plugins>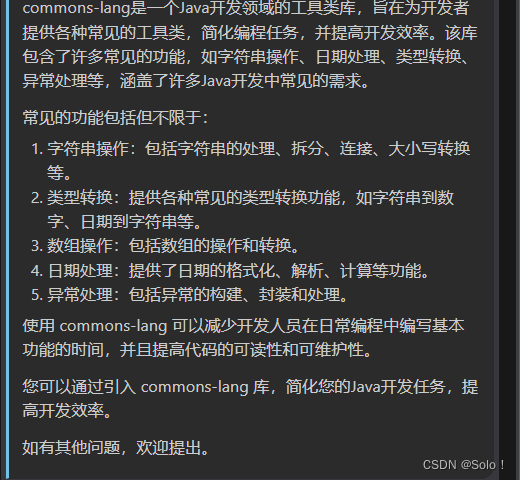
</build>- 依赖配置(<dependencies>标签内的内容)包含了项目的各种依赖库。这些依赖包括Spring Boot starter、MyBatis Plus、Lombok、FastJson、Commons Lang、MySQL连接器以及Druid Spring Boot starter等。
- 构建插件配置(<build>标签内的内容)包含了用于构建项目的插件配置,这里使用了spring-boot-maven-plugin插件,版本为2.6.6。
有转换为json格式的fastjson
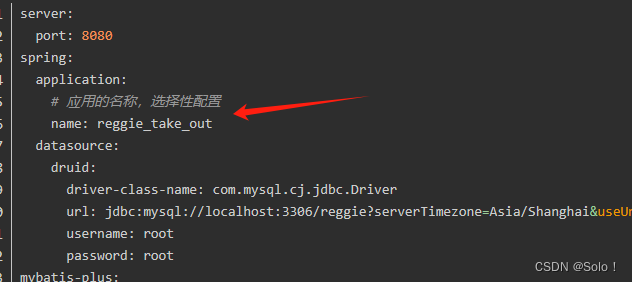
在application文件中如果要设置应用的名称的话
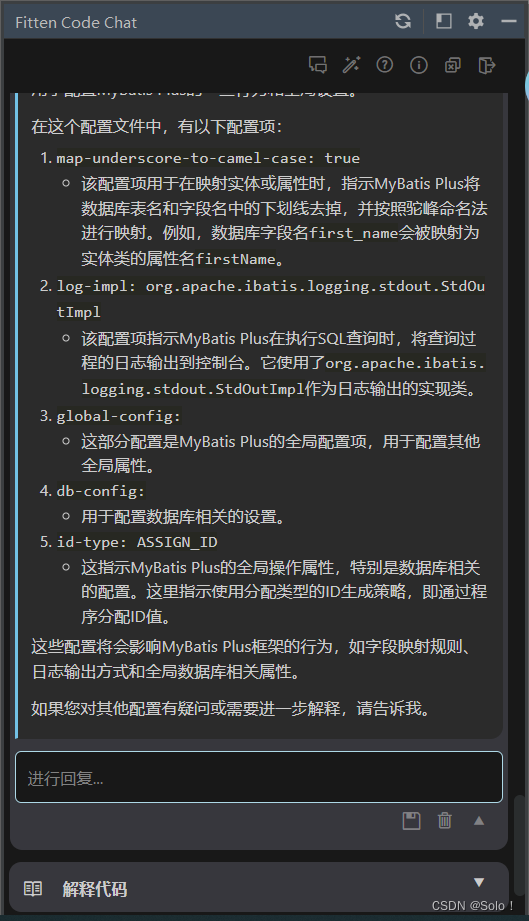
驼峰命名法
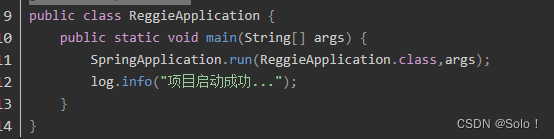
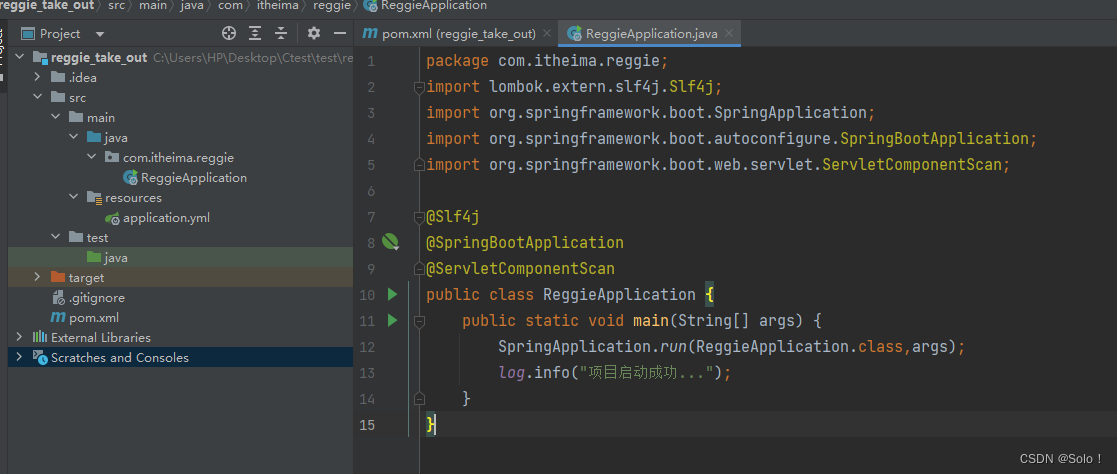
编写启动类的时候
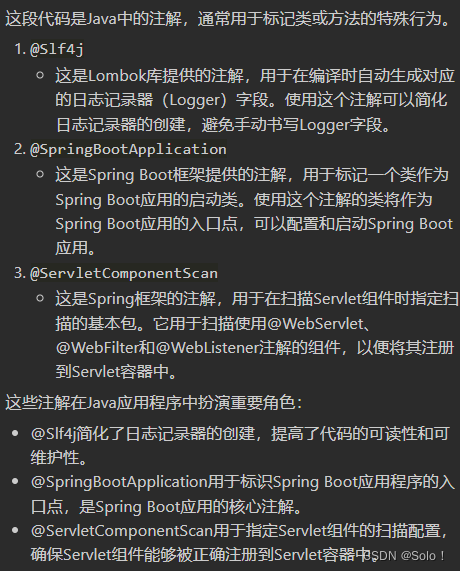
在代码编写的时候由于有@slf4j可以直接用log去打印日志
错误::
yal要放到resourse下
如果直接放到resourse文件夹下的话 去访问页面会报一个 whitelabel error page 404的错误
解决方法
导入前端文件 在这里前端文件的位置应该是 resource目录下的static和template文件夹下的文件;所以如果要使用这种方式,直接创建一个static目录就行,然后把这些前端资源放在这个static目录下就行;
如果你不想把前端文件放在这两个默认的文件夹下,那么就可以自己定义mvc的支持,这里我们使用的就是这方式;(多学习一种定义的方法,以后自定义映射的时候可以使用)
创建一个config包
创建一个webmvcconfig 让他去继承webconfigurationsupport类
重写快捷键ctrl+o
package com.itheima.reggie.config;

import lombok.extern.slf4j.Slf4j;
import org.springframework.context.annotation.Configuration;
import org.springframework.web.servlet.config.annotation.ResourceHandlerRegistry;
import org.springframework.web.servlet.config.annotation.WebMvcConfigurationSupport;

@Slf4j
@Configuration
public class WebMvcConfig extends WebMvcConfigurationSupport {

    // 静态资源映射
    @Override
    protected void addResourceHandlers(ResourceHandlerRegistry registry) {
        log.info("开始静态资源映射。。。");
        registry.addResourceHandler("/backend/**").addResourceLocations("classpath:/backend/");
        registry.addResourceHandler("/font/**").addResourceLocations("classpath:/font/");
    }
}
配置类要在启动类同包或者子包下面
还是打不开的话可以clean一下target缓存(maven)
记得在启动程序加上@ServletComponentScan这个注解,否则这个配置类不会生效;
后台登录代码的开发
登录功能发送请求 先到服务端的controller-service-mapper-sql数据库交互
dao层可以分为repository和mapepr层
用代码生成器自动生成的实体类中时间是date类型 会导致走默认序列化器返回给前端的时间就是一串毫秒值 注意要改成localdatetime
创建一个entity包
创建一个employee实体类
创建controller和service serviceimpl mapper
我们使用mybatis-plus提供的自动生成mapper
使用快捷键 Ctrl + F3 就可以看见mybatis-plus 帮我们定义的mapper接口
mapper
package com.itheima.reggie.mapper;

import com.baomidou.mybatisplus.core.mapper.BaseMapper;
import com.itheima.reggie.entity.Employee;
import org.apache.ibatis.annotations.Mapper;

@Mapper
public interface EmployeeMapper extends BaseMapper<Employee> {
}
继承basemapper《employee》就可以把基本的增删改查继承过来
像这个mapper注解 也可以直接在启动类那边写一个mapperscan省得写一堆mapper
service
package com.itheima.reggie.service;
import com.baomidou.mybatisplus.extension.service.IService;
import com.itheima.reggie.entity.Employee;

public interface EmployeeService extends IService<Employee> {

}
继承mybatis plus的iservice
接口serviceimpl继承serviceimpl
package com.itheima.reggie.service.impl;

import com.baomidou.mybatisplus.extension.service.impl.ServiceImpl;
import com.itheima.reggie.entity.Employee;
import com.itheima.reggie.mapper.EmployeeMapper;
import org.springframework.stereotype.Service;


@Service //这两个泛型一个是实体类对应的mapper,一个是实体类
public class EmployeeServiceImpl extends ServiceImpl<EmployeeMapper,Employee> implements EmployeeService {

}
注意这里的@service不能丢 要不会报500错误
controller
封装返回的结果类
创建一个新的包,common,用来存放共同使用的类,把这个返回结果类放入这个公共包;
一个泛型类其内部的普通方法不需要再声明泛型方法 但若是static方法 他不是类的一部分 所以需要声明为u泛型方法
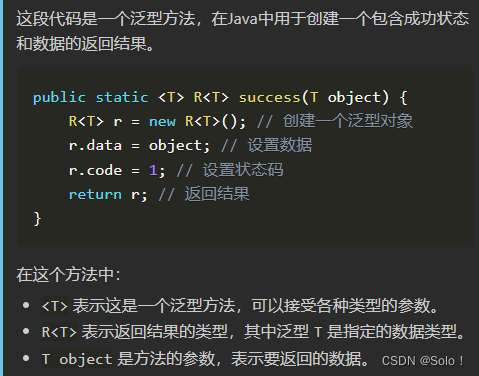
这里前面还有个《t》只是为了声明一下这是一个泛型 因为是static方法 所以前面要加《t》表示是属于对象t的静态方法
极大概率不会发生改变的类 可以不用spring去解耦 直接new更好 因为spring也会消耗一定的性能虽然不多
这里的msg用于返回错误的信息
package com.itheima.reggie.common;

import lombok.Data;
import java.util.HashMap;
import java.util.Map;

@Data
public class R<T> {

    private Integer code; //编码:1成功,0和其它数字为失败

    private String msg; //错误信息

    private T data; //数据

    private Map map = new HashMap(); //动态数据

    public static <T> R<T> success(T object) {
        R<T> r = new R<T>();
        r.data = object;
        r.code = 1;
        return r;
    }

    public static <T> R<T> error(String msg) {
        R r = new R();
        r.msg = msg;
        r.code = 0;
        return r;
    }

    public R<T> add(String key, Object value) {
        this.map.put(key, value);
        return this;
    }

}
创建登录方法
这里login先写postmapping
因为前端使用post发送的
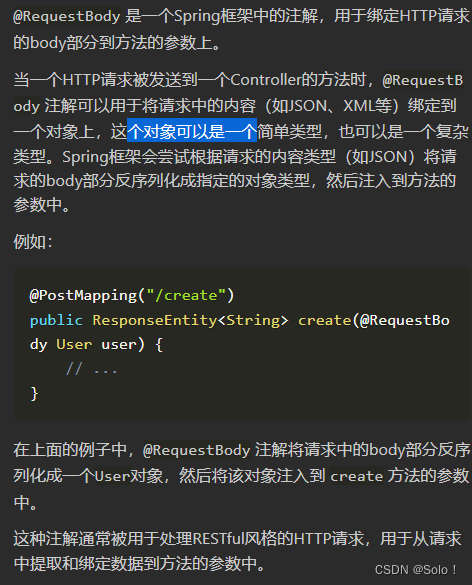
@requstbody是接收传过来的json数据 这里前面的接收一个request对象的数据? //登陆成功后,我们需要从请求中获取员工的id,并且把这个id存到session中,这样我们想要获取登陆对象的时候就可以随时获取
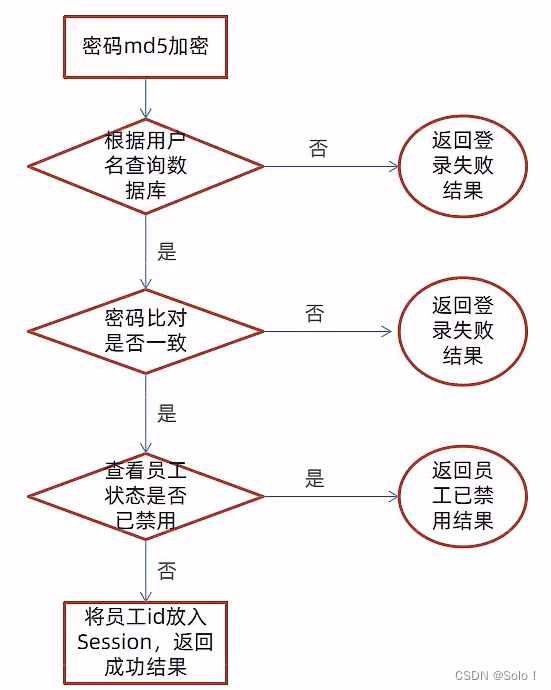
先处理业务逻辑,然后再编码!!!
- 将页面提交的密码password进行md5加密处理
- 根据页面提交的用户名username查询数据库
- 如果没有查询到则返回登录失败结果
- 密码比对,如果不一致则返回登录失败结果
- 查看员工状态,如果为已禁用状态,则返回员工已禁用结果
- 登录成功,将员工id存入Session并返回登录成功结果
这里数据库里面有一个status 表示是否禁用0禁用1可用
存id是为了权限验证 防止通过网页直接访问管理页面跳过登录
service层中写方法 controller层调用方法
登录逻辑通常不是在service层实现的 而是在一个专门处理用户认证的组件中实现 比如控制器 controller层或者一个独立的身份验证服务中 authentica service中
employee::getusername就相当于创建一个employee对象 并调用其getusername方法
package com.itheima.reggie.controller;
import com.baomidou.mybatisplus.core.conditions.query.LambdaQueryWrapper;
import com.itheima.reggie.common.R;
import com.itheima.reggie.entity.Employee;
import com.itheima.reggie.service.EmployeeService;
import lombok.extern.slf4j.Slf4j;
import org.springframework.beans.factory.annotation.Autowired;
import org.springframework.util.DigestUtils;
import org.springframework.web.bind.annotation.PostMapping;
import org.springframework.web.bind.annotation.RequestBody;
import org.springframework.web.bind.annotation.RequestMapping;
import org.springframework.web.bind.annotation.RestController;
import javax.servlet.http.HttpServletRequest;
import java.nio.charset.StandardCharsets;
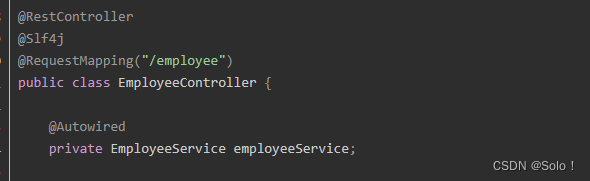
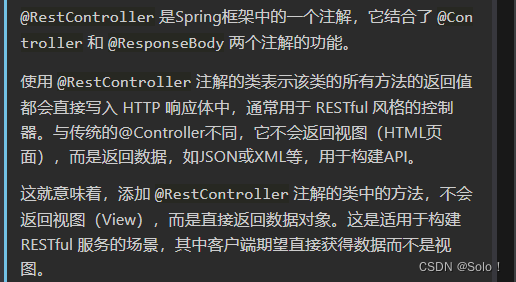
@RestController
@Slf4j
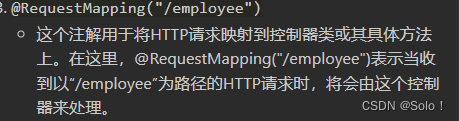
@RequestMapping("/employee")
public class EmployeeController {
@Autowired
private EmployeeService employeeService;
@PostMapping("/login") //使用restful风格开发
public R<Employee> login(HttpServletRequest request, @RequestBody Employee employee){//接收前端的json数据,这个json数据是在请求体中的
//这里为什么还有接收一个request对象的数据?
//登陆成功后,我们需要从请求中获取员工的id,并且把这个id存到session中,这样我们想要获取登陆对象的时候就可以随时获取
//1、将页面提交的密码password进行md5加密处理
String password = employee.getPassword();//从前端用户登录拿到的用户密码
password = DigestUtils.md5DigestAsHex(password.getBytes());//对用户密码进行加密
//2、根据页面提交的用户名username查询数据库
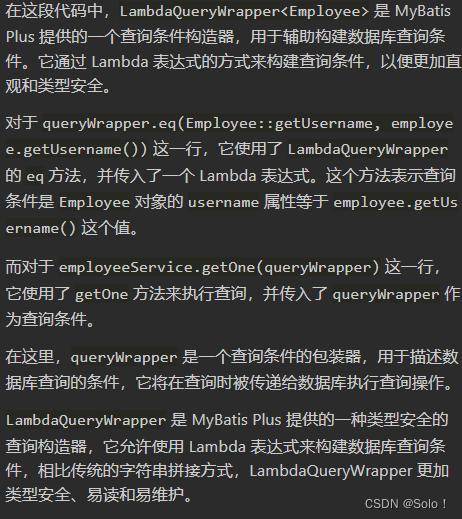
LambdaQueryWrapper<Employee> queryWrapper = new LambdaQueryWrapper<>();
queryWrapper.eq(Employee::getUsername,employee.getUsername());
//在设计数据库的时候我们对username使用了唯一索引,所以这里可以使用getOne方法
Employee emp = employeeService.getOne(queryWrapper);//这里的切入Wrapper是什么?
//3、如果没有查询到则返回登录失败结果
if (emp == null ){
return R.error("用户不存在");
}
//4、密码比对,如果不一致则返回登录失败结果
if (!emp.getPassword().equals(password)){
//emp.getPassword()用户存在后从数据库查询到的密码(加密状态的) password是前端用户自己输入的密码(已经加密处理)
return R.error("密码不正确");
}
//5、查看员工状态,如果为已禁用状态,则返回员工已禁用结果
if (emp.getStatus() == 0){
return R.error("账号已禁用");
}
//6、登录成功,将员工id存入Session并返回登录成功结果
request.getSession().setAttribute("employee",emp.getId());
//把从数据库中查询到的用户返回出去
return R.success(emp);
}
}
网页清除缓存的快捷键是ctrl+shift+del
这里我们为了debug调试 (前端在登录那边设置了十秒的时间)我们将十秒改成1000秒重新启动还是不行 有10s的错误 是因为浏览器有缓存需要去清除一下缓存
功能的测试
使用debug的形式启动项目
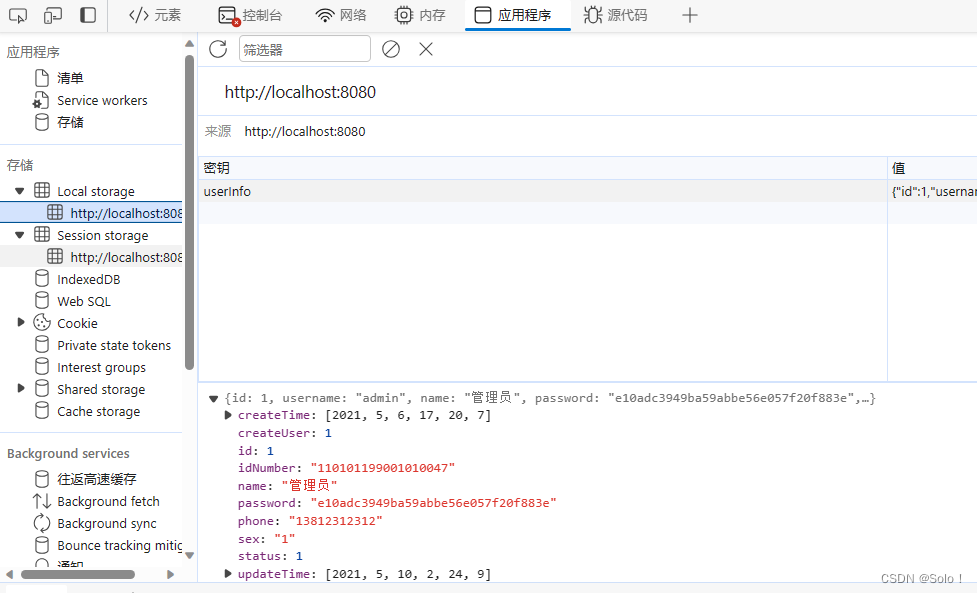
 运行成功后:(这个密码是123456),数据存在了浏览器中:这个代码是吧返回的数据保持在浏览器中:
localStorage.setItem('userInfo',JSON.stringify(res.data))
在浏览器我们可以看见,key为userInfo,value为我们返回的数据;
后台系统退出功能
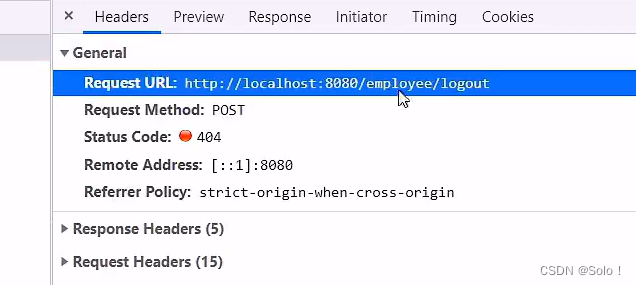
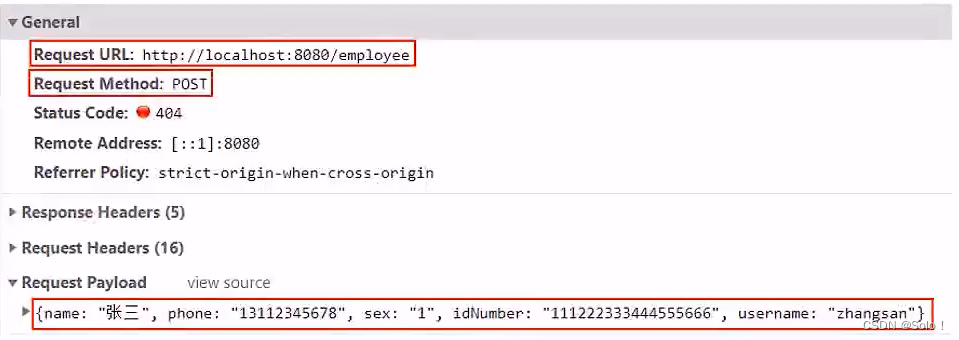
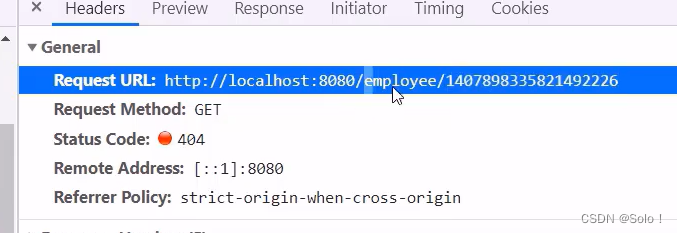
前端给退出登录按钮提供了一个请求 请求地址为/employee/logout
请求方式为post 我们只需要在controller中创建对应的处理方法即可
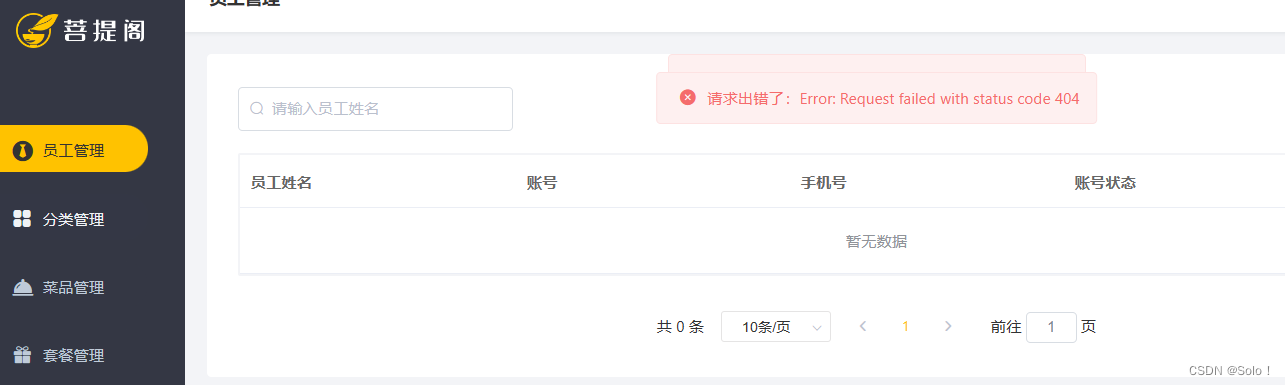
后端还没处理 就是404
后端代码处理:
①在controller中创建对应的处理方法来接受前端的请求,请求方式为post;
②清理session中的用户id cookie有个key就是jseeeioinid 就是要清除这个
session是基于cookie实现的
③返回结果(前端页面会进行跳转到登录页面)
前端代码,也要把浏览器中的数据给清除;
logout() {
logoutApi().then((res)=>{
if(res.code === 1){
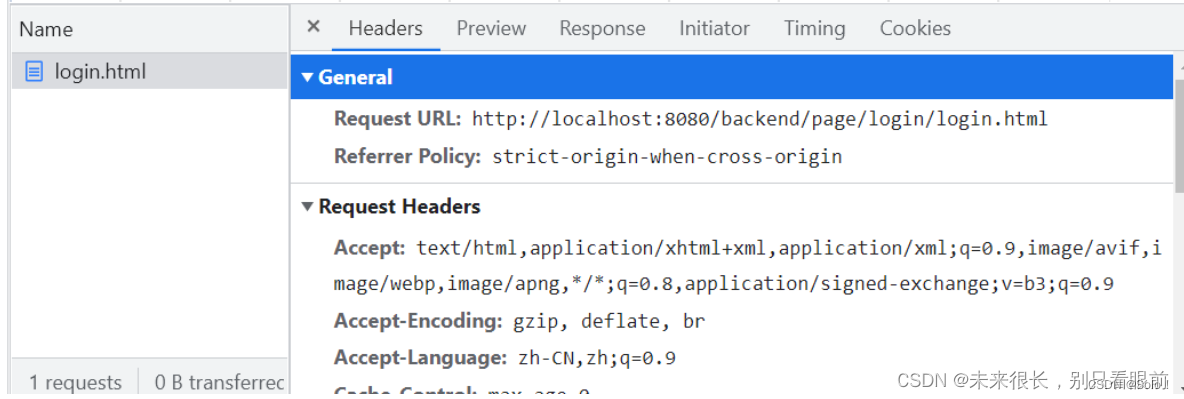
LocalStorage . removeItem( 'userInfo')
window. location.href = '/backend/ page/ login/ login. html
}
})
 /**
     * 退出功能
     * ①在controller中创建对应的处理方法来接受前端的请求,请求方式为post;
     * ②清理session中的用户id
     * ③返回结果(前端页面会进行跳转到登录页面)
     * @return
     */
    @PostMapping("/logout")
    public R<String> logout(HttpServletRequest request){
        //清理session中的用户id
        request.getSession().removeAttribute("employee");
        return R.success("退出成功");
    }
跳转页面是前端写的 后端实现登出之后会自动跳转到前端
功能测试:先登陆,然后退出即可;看浏览器中的数据是否会被清除;
员工管理业务开发
完善登陆功能
问题分析:前面的登陆存在一个问题,如果用户不进行登陆,直接访问系统的首页,照样可以正常访问,这种设计是不合理的,我们希望看到的效果是只有完成了登陆后才可以访问系统中的页面,如果没有登陆则跳转到登陆页面;
那么如何实现?
答案就是使用过滤器或者是拦截器,在拦截器或者是过滤器中判断用户是否已经完成了登陆,如果没有登陆则跳转到登陆页面;
代码实现:这里使用的是过滤器;
完善登录功能
过滤器是门口的保安,拦截器是公司里巡逻的保安 过滤器拦截的范围更广
①创建自定义过滤器LongCheckFilter
package com.itheima.reggie.filter;
import lombok.extern.slf4j.Slf4j;
import javax.servlet.*;
import javax.servlet.annotation.WebFilter;
import javax.servlet.http.HttpServletRequest;
import javax.servlet.http.HttpServletResponse;
import java.io.IOException;
//过滤器的名字 过滤器的拦截的路径
@WebFilter(filterName = "loginCheckFilter",urlPatterns = "/*")
@Slf4j
public class LoginCheckFilter implements Filter {
@Override
public void doFilter(ServletRequest servletRequest, ServletResponse servletResponse, FilterChain filterChain) throws IOException, ServletException {
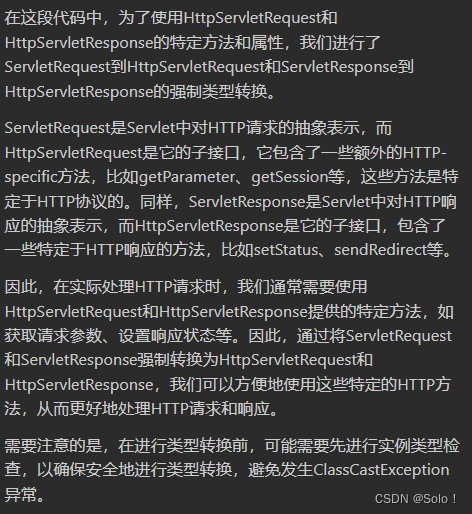
HttpServletRequest httpServletRequest = (HttpServletRequest) servletRequest;
HttpServletResponse httpServletResponse = (HttpServletResponse) servletResponse;
log.info("拦截到请求:{}",httpServletRequest.getRequestURI());
filterChain.doFilter(httpServletRequest,httpServletResponse);
}
}
HttpServletRequest httpServletRequest = (HttpServletRequest) servletRequest;
log.info("拦截到请求:{}",httpServletRequest.getRequestURI());因为servletrequest是httpservletrequest的父接口 你要用实现类肯定得强转
注意这边是uri 不是url uri是url去掉路径前面的一部分
拦截器那边 log。info是使用了一个占位符{} 而不是使用+“”+“”的方式了
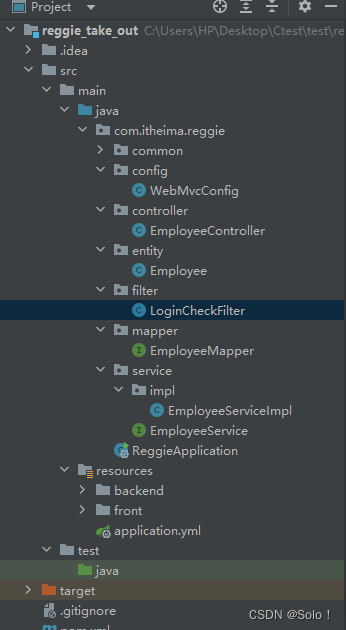
②在启动类加上注解@ServletComponentScan(扫描过滤器)
然后先测试一下过滤器能不能生效,具体的逻辑等下再书写;发送请求,看后台能不能打印拦截的信息:
package com.itheima.reggie;
import lombok.extern.slf4j.Slf4j;
import org.springframework.boot.SpringApplication;
import org.springframework.boot.autoconfigure.SpringBootApplication;
import org.springframework.boot.web.servlet.ServletComponentScan;

@Slf4j
@SpringBootApplication
@ServletComponentScan
public class ReggieApplication {
    public static void main(String[] args) {
        SpringApplication.run(ReggieApplication.class,args);
        log.info("项目启动成功...");
    }
}
这边测试的时候 拦截到了最上面的图标 如果拦截不到图标的话 可能是有缓存 按ctrl+f5
就可以了
filter包的位置要和启动类放到 同一级的目录下面
 ③完善过滤器的处理逻辑
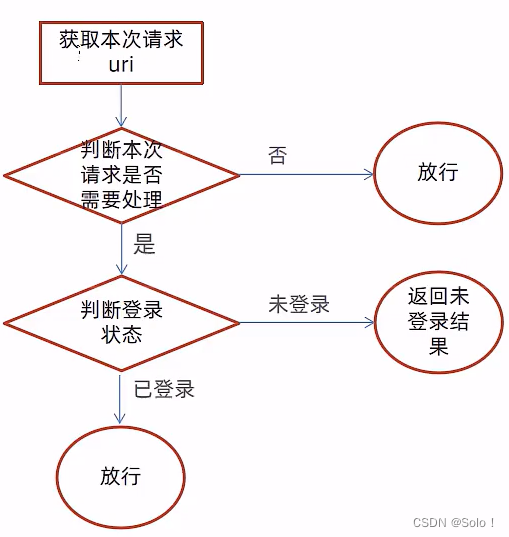
过滤器具体的处理逻辑如下:
- 获取本次请求的URI
- 判断本次请求是否需要处理
- 如果不需要处理,则直接放行
- 判断登录状态,如果已登录,则直接放行
- 如果未登录则返回未登录结果
package com.itheima.reggie.filter;

import com.alibaba.fastjson.JSON;
import com.itheima.reggie.common.R;
import lombok.extern.slf4j.Slf4j;
import org.springframework.util.AntPathMatcher;

import javax.servlet.*;
import javax.servlet.annotation.WebFilter;
import javax.servlet.http.HttpServletRequest;
import javax.servlet.http.HttpServletResponse;
import java.io.IOException;


@WebFilter(filterName = "LoginCheckFilter",urlPatterns = "/*")
@Slf4j
public class LoginCheckFilter implements Filter {

    //路径匹配器,支持通配符
    public static final AntPathMatcher PATH_MATCHER = new AntPathMatcher();

    @Override
    public void doFilter(ServletRequest servletRequest, ServletResponse servletResponse, FilterChain filterChain) throws IOException, ServletException {

        //对请求和响应进行强转,我们需要的是带http的
        HttpServletRequest request = (HttpServletRequest) servletRequest;
        HttpServletResponse response = (HttpServletResponse) servletResponse;

        //1、获取本次请求的URI
        String requestURL = request.getRequestURI();
        //定义不需要处理的请求路径  比如静态资源(静态页面我们不需要拦截,因为此时的静态页面是没有数据的)
        String[] urls = new String[]{
                "/employee/login",
                "/employee/logout",
                "/backend/**",
                "/front/**"
        };

        //做调试用的
        //log.info("拦截到请求:{}",requestURL);

        //2、判断本次请求是否需要处理
        boolean check = check(urls, requestURL);
        //3、如果不需要处理,则直接放行
        if(check){
            //log.info("本次请求{}不需要处理",requestURL);
            filterChain.doFilter(request,response);
            return;
        }
        //4、判断登录状态,如果已登录,则直接放行
        if(request.getSession().getAttribute("employee") != null){
            //log.info("用户已登录,用户id为:{}",request.getSession().getAttribute("employee"));
            filterChain.doFilter(request,response);
            return;
        }
        //log.info("用户未登录");
        //5、如果未登录则返回未登录结果,通过输出流方式向客户端页面响应数据,具体响应什么数据,看前端的需求,然后前端会根据登陆状态做页面跳转
        response.getWriter().write(JSON.toJSONString(R.error("NOTLOGIN")));
        return;

    }

    /**
     * 路径匹配,检查本次请求是否需要放行
     * @param urls
     * @param requestURI
     * @return
     */
    public boolean check(String[] urls,String requestURI){
        for (String url : urls) {
            //把浏览器发过来的请求和我们定义的不拦截的url做比较,匹配则放行
            boolean match = PATH_MATCHER.match(url, requestURI);
            if(match){
                return true;
            }
        }
        return false;
    }
}
功能测试: 发起几个请求看看后台的输出,和能不能访问到资源里面的数据,和能不能跳转,注意,上面的后台日志代码已经被注释,需要在后台看到日志的话,需要把注释去掉;
前端的js也可以进行调试 f12的soures
新增员工

数据模型:
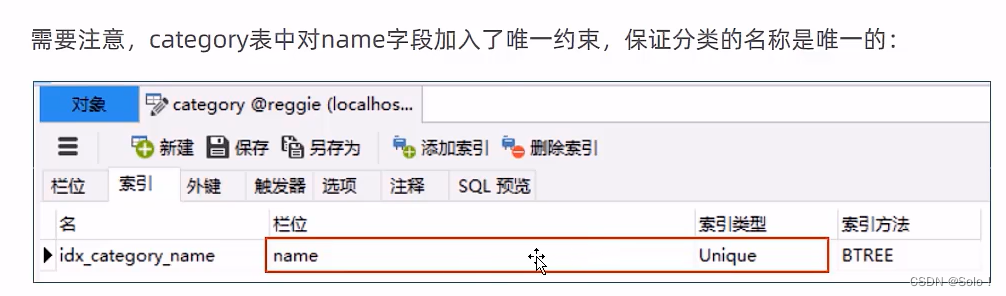
新增员工,其实就是将我们的新增页面录入的员工数据插入到employee表;注意:employee表中对username字段加入了唯一的约束,因为username是员工的登陆账号,必须是唯一的!
代码开发:
在开发代码之前,需要梳理一下整个程序的执行过程:
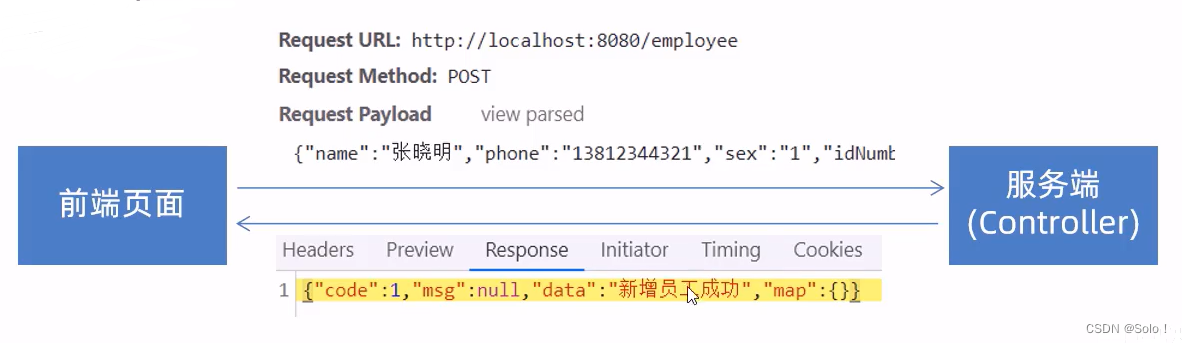
- 页面发送ajax请求,将新增员工页面中输入的数据以json的形式提交到服务端
- 服务端Controller接收页面提交的数据并调用Service将数据进行保存
- Service调用Mapper操作数据库,保存数据
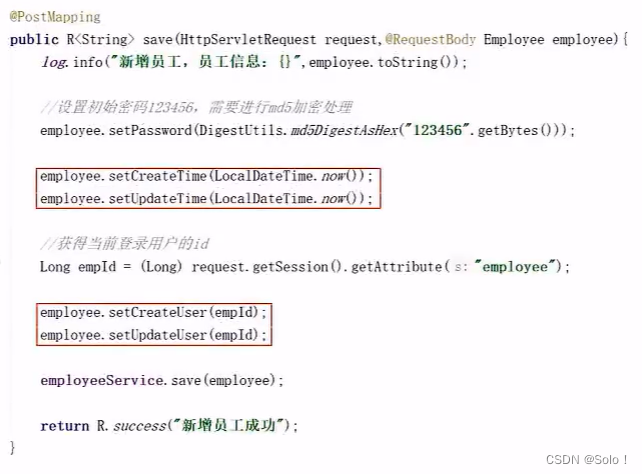
    /**
     * 新增员工
     * @param employee
     * @return
     */
    @PostMapping()//因为请求就是 /employee 在类上已经写了,所以咱俩不用再写了
    public R<String> save(HttpServletRequest request,@RequestBody Employee employee){

        //对新增的员工设置初始化密码123456,需要进行md5加密处理,后续员工可以直接修改密码
        employee.setPassword(DigestUtils.md5DigestAsHex("123456".getBytes()));

        employee.setCreateTime(LocalDateTime.now());
        employee.setUpdateTime(LocalDateTime.now());

        //获得当前登录用户的id
        Long empId = (Long) request.getSession().getAttribute("employee");

        employee.setCreateUser(empId); //创建人的id,就是当前用户的id(在进行添加操作的id)
        employee.setUpdateUser(empId);//最后的更新人是谁
        //mybatis提供的新增方法
        employeeService.save(employee);

        return R.success("新增员工成功");
    }
 功能测试:登陆之后,点击添加,然后确认,然后去数据库看一下新增数据成功没,新增成功,那就表示代码可以执行; 注意:但是因为我们把username设置为唯一索引,所以下次再新增用户的时候,就会出现异常,这个异常是MySQL数据库抛出来的;
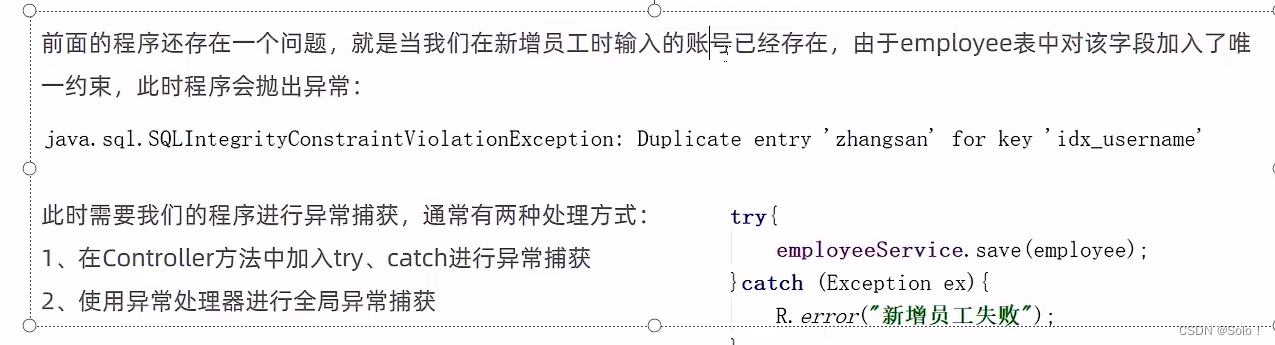
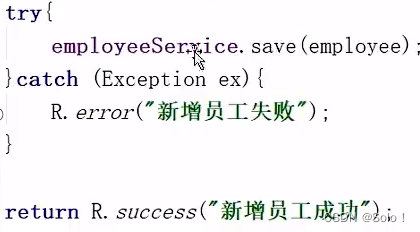
上面的程序不好,不好在 我写一个save 可以这么保存,但是未来越来越多的代码 都会面临这样的问题,那就会写很多的try和catch。所以,我现在利用全局异常捕获这个异常。
1.2.1 全局异常捕获
这个全局异常捕获写在common包下;
package com.itheima.reggie.common;
import lombok.extern.slf4j.Slf4j;
import org.springframework.stereotype.Controller;
import org.springframework.web.bind.annotation.ControllerAdvice;
import org.springframework.web.bind.annotation.ExceptionHandler;
import org.springframework.web.bind.annotation.ResponseBody;
import org.springframework.web.bind.annotation.RestController;
import java.sql.SQLIntegrityConstraintViolationException;

/**
 * 全局异常处理
 */
@ControllerAdvice(annotations = {RestController.class, Controller.class}) //表示拦截哪些类型的controller注解
@ResponseBody
@Slf4j
public class GlobalExceptionHandler {

    /**
     * 处理SQLIntegrityConstraintViolationException异常的方法
     * @return
     */
    @ExceptionHandler(SQLIntegrityConstraintViolationException.class)
    public R<String> exceptionHandle(SQLIntegrityConstraintViolationException exception){
        log.error(exception.getMessage()); //报错记得打日志
        if (exception.getMessage().contains("Duplicate entry")){
            //获取已经存在的用户名,这里是从报错的异常信息中获取的
            String[] split = exception.getMessage().split(" ");
            String msg = split[2] + "这个用户名已经存在";
            return R.error(msg);
        }
        return R.error("未知错误");
    }
}
respondbody是因为会写一个方法返回json数据 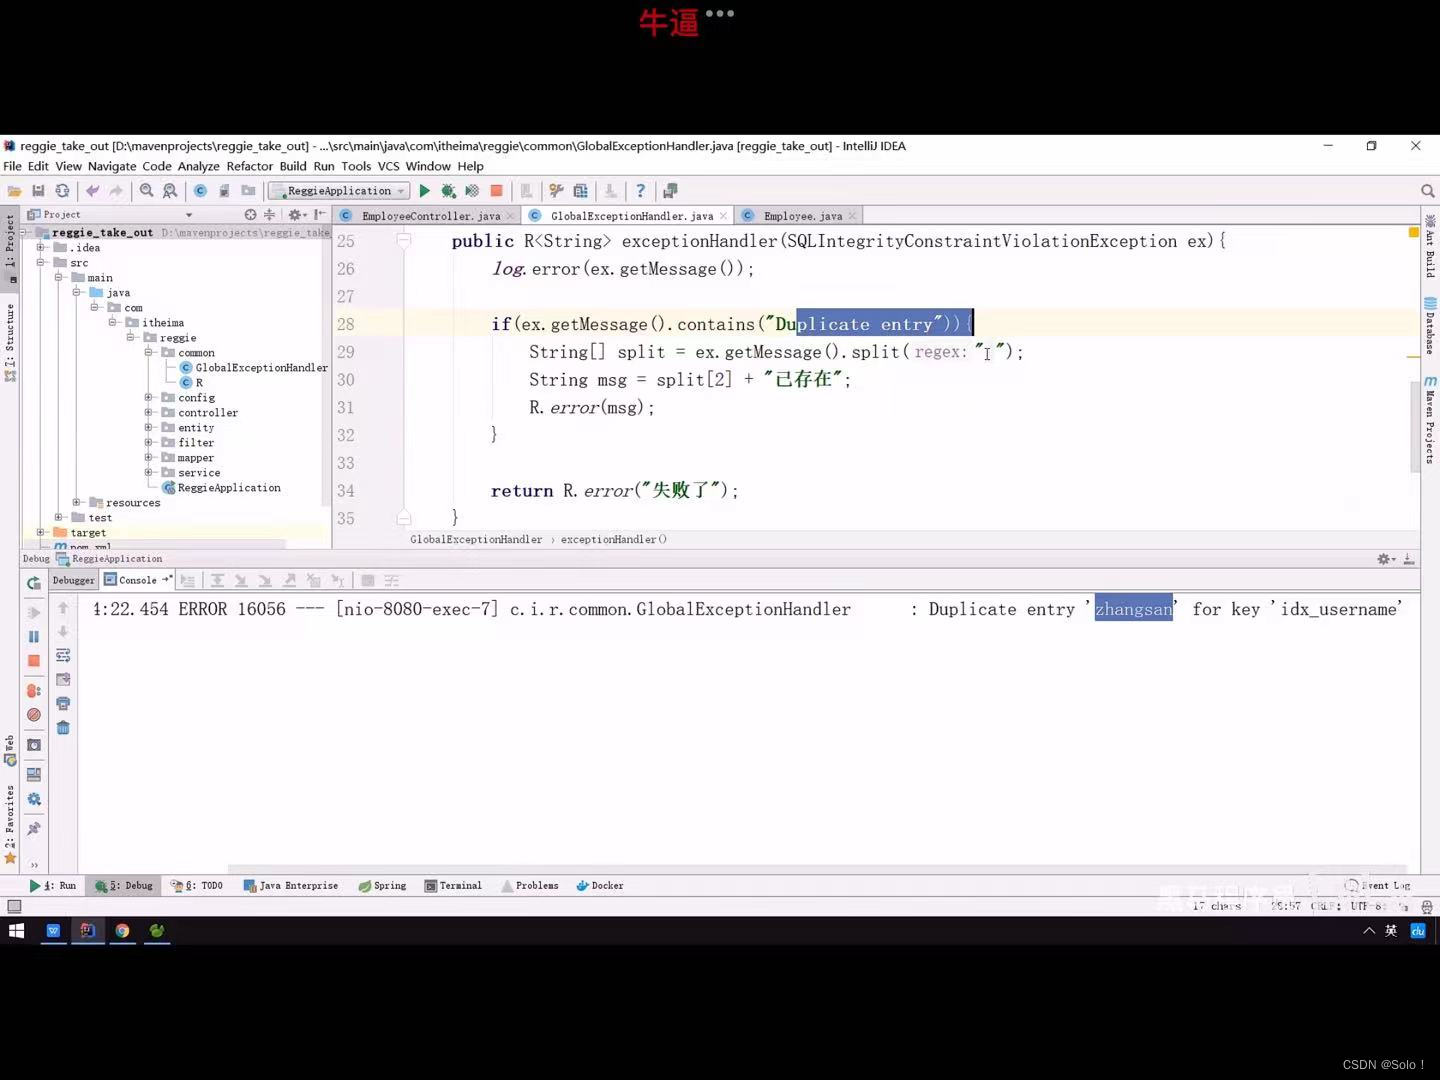
功能测试:登陆后,添加一个一个已经存在账号名,看前端页面提示的是什么信息,以及看后台是否输出了报错日志;


- 根据产品原型明确业务需求
- 重点分析数据的流转过程和数据格式
- 通过debug断点调试跟踪程序执行过程
1.3 员工信息分页查询
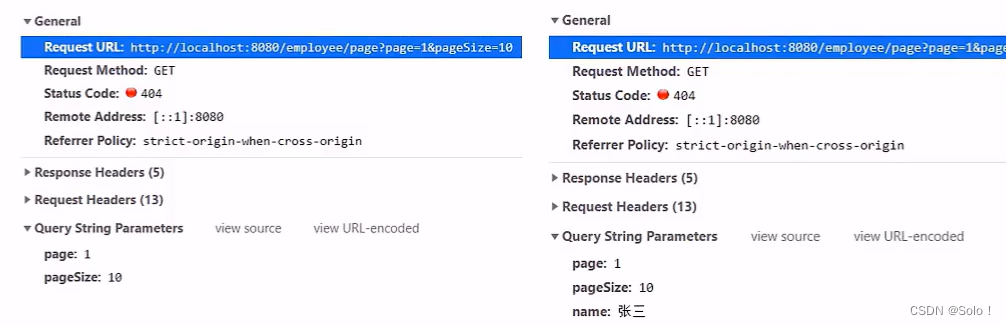
需求分析:系统中的员工比较多的时候,如果在一个页面中全部展示出来会显得比较乱,不便于查看,所以一般都系统中都会以分页的方式来展示列表数据。

分页上面还有一个搜索框可以搜索姓名 根据输入的员工姓名去进行分页查询
流程分析:
在开发代码之前,需要梳理一下整个程序的执行过程:
- 页面发送ajax请求,将分页查询参数(page、 pageSize、 name)提交到服务端
- 服务端Controller接收页面提交的数据并调用Service查询数据
- Service调用Mapper操作数据库,查询分页数据
- Controller将查询到的分页数据响应给页面
- 页面接收到分页数据并通过ElementUl的Table组件展示到页面上
f12 -netword-header
先创建一个一个mybatidplusconfig去配置mp的分页插件
//配置mybatis-plus的分页插件
package com.itheima.reggie.config;
import com.baomidou.mybatisplus.extension.plugins.MybatisPlusInterceptor;
import com.baomidou.mybatisplus.extension.plugins.inner.PaginationInnerInterceptor;
import org.springframework.context.annotation.Bean;
import org.springframework.context.annotation.Configuration;
/**
 * 配置mybatis-plus提供的分页插件拦截器
 */
@Configuration
public class MybatisPlusConfig {

    @Bean
    public MybatisPlusInterceptor mybatisPlusInterceptor(){
        MybatisPlusInterceptor mybatisPlusInterceptor = new MybatisPlusInterceptor();
        mybatisPlusInterceptor.addInnerInterceptor(new PaginationInnerInterceptor());
        return mybatisPlusInterceptor;
    }
}
分页操作就是在拦截器里面执行的 所以先new一个拦截器 在new一个分页插件
在controller中 返回的是R《page》 这个是mbp提供的一个泛型 可以返回一个页面的数据
  /**
     * 员工信息分页
     * @param page  当前页数
     * @param pageSize 当前页最多存放数据条数,就是这一页查几条数据
     * @param name 根据name查询员工的信息
     * @return
     */
    @GetMapping("/page")
    public R<Page> page(int page,int pageSize,String name){
    //这里之所以是返回page对象(mybatis-plus的page对象),是因为前端需要这些分页的数据(比如当前页,总页数)
        //在编写前先测试一下前端传过来的分页数据有没有被我们接受到
        //log.info("page = {},pageSize = {},name = {}" ,page,pageSize,name);

        //构造分页构造器  就是page对象
        Page pageInfo = new Page(page,pageSize);

        //构造条件构造器  就是动态的封装前端传过来的过滤条件  记得加泛型
        LambdaQueryWrapper<Employee> queryWrapper = new LambdaQueryWrapper();
        //根据条件查询  注意这里的条件是不为空
        queryWrapper.like(StringUtils.isNotEmpty(name),Employee::getName,name);
        //添加一个排序条件
        queryWrapper.orderByDesc(Employee::getUpdateTime);
        //执行查询  这里不用封装了mybatis-plus帮我们做好了
        employeeService.page(pageInfo,queryWrapper);

        return R.success(pageInfo);
    }
这边有一个网站叫做bejson 可以将数据格式化成json数据格式
功能测试:
分页的三个时机:
①用户登录成功时,分页查询一次
②用户使用条件查询的时候分页一次
③跳转页面的时候分页查询一次
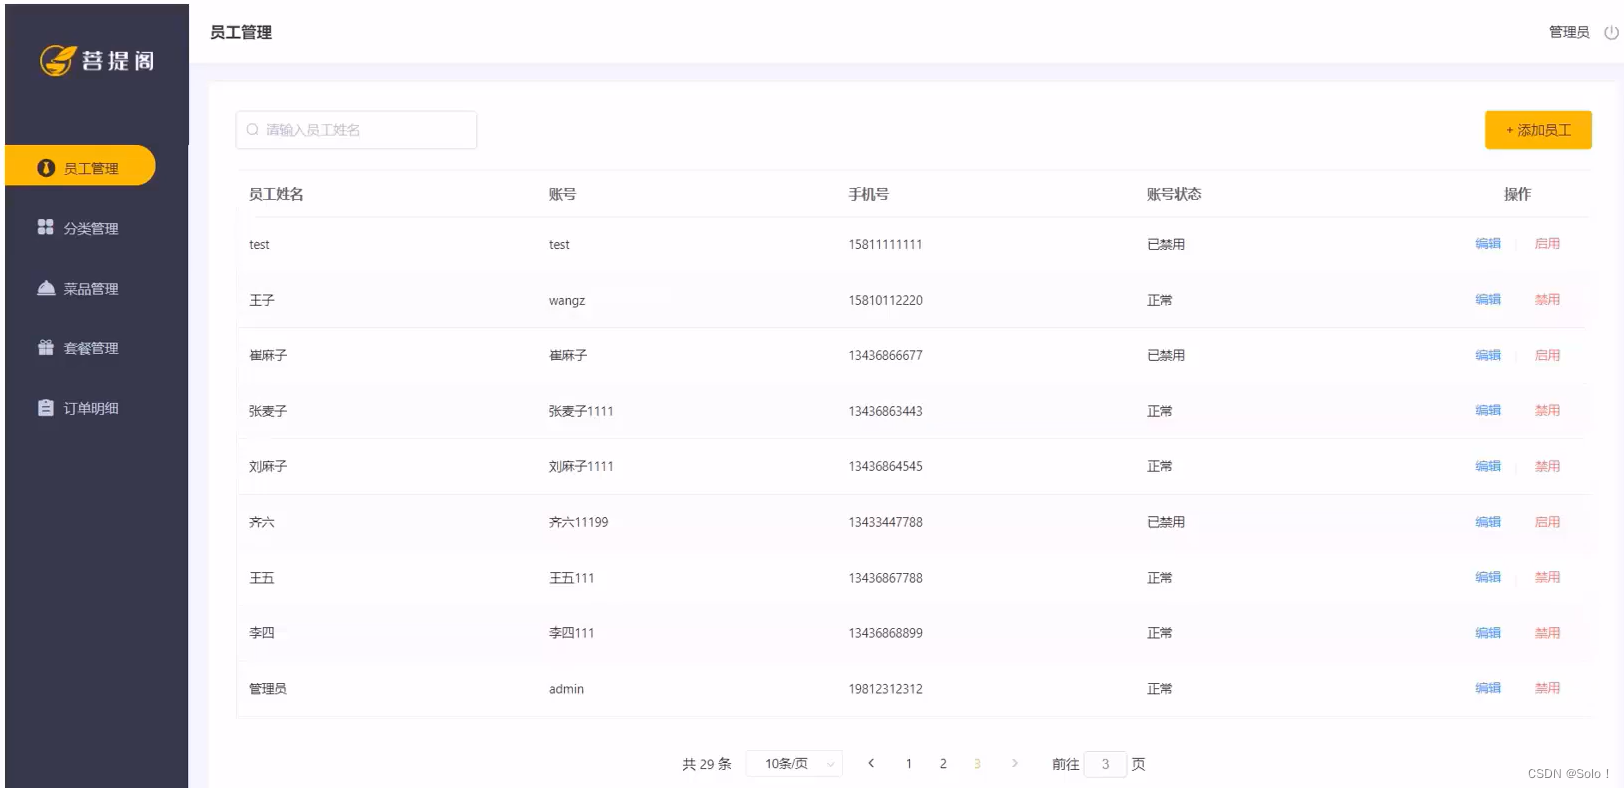
1.4 启用/禁用员工账号
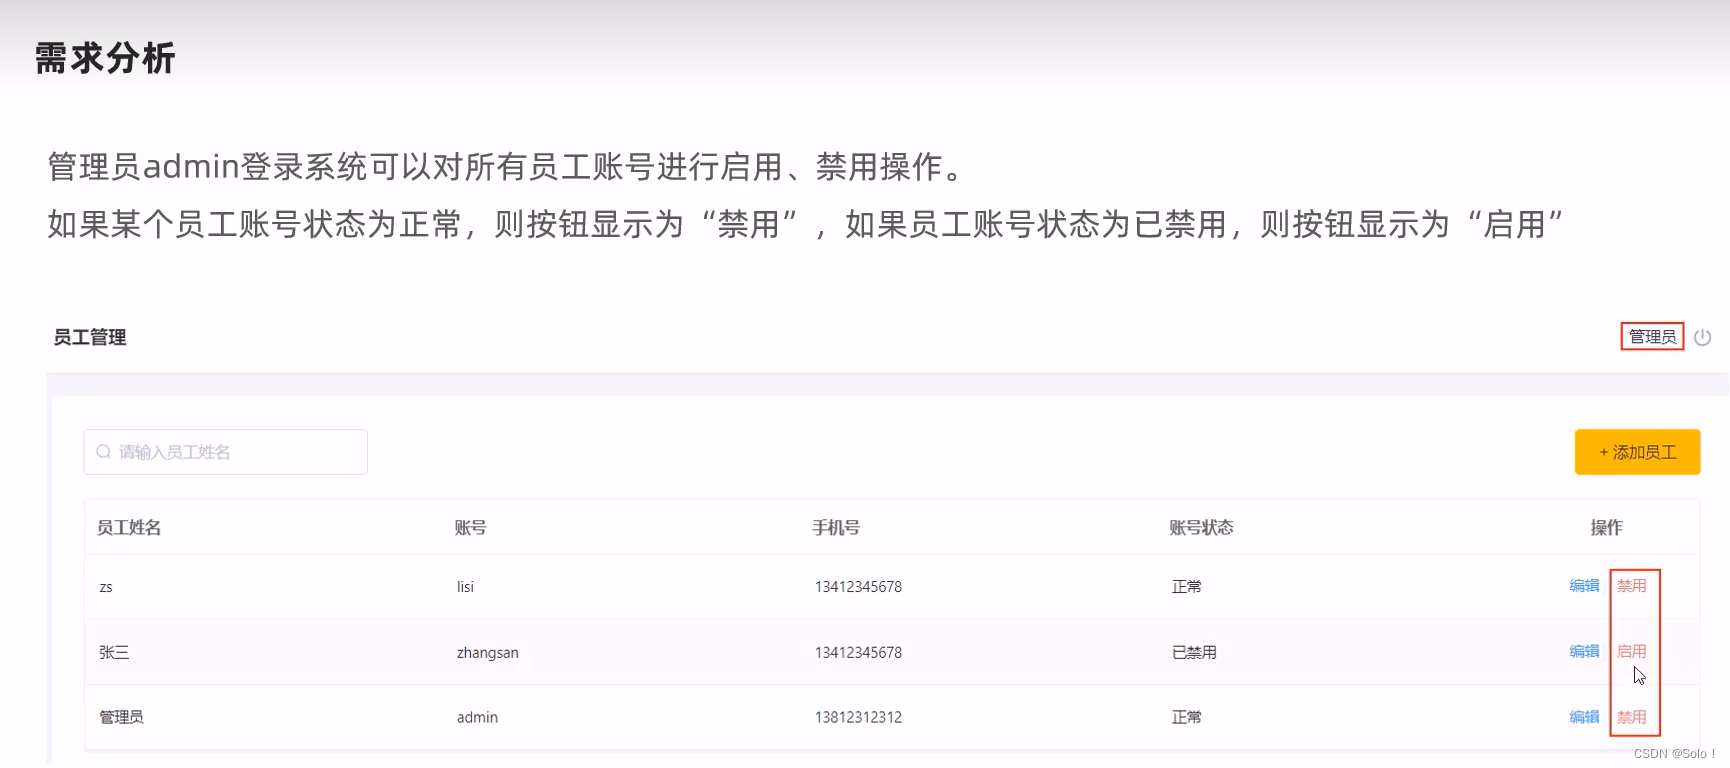
需求分析:
在员工管理列表页面中,可以对某个员工账号进行启用或者是禁用操作。账号禁用的员工不能登陆系统,启用后的员工可以正常登陆;
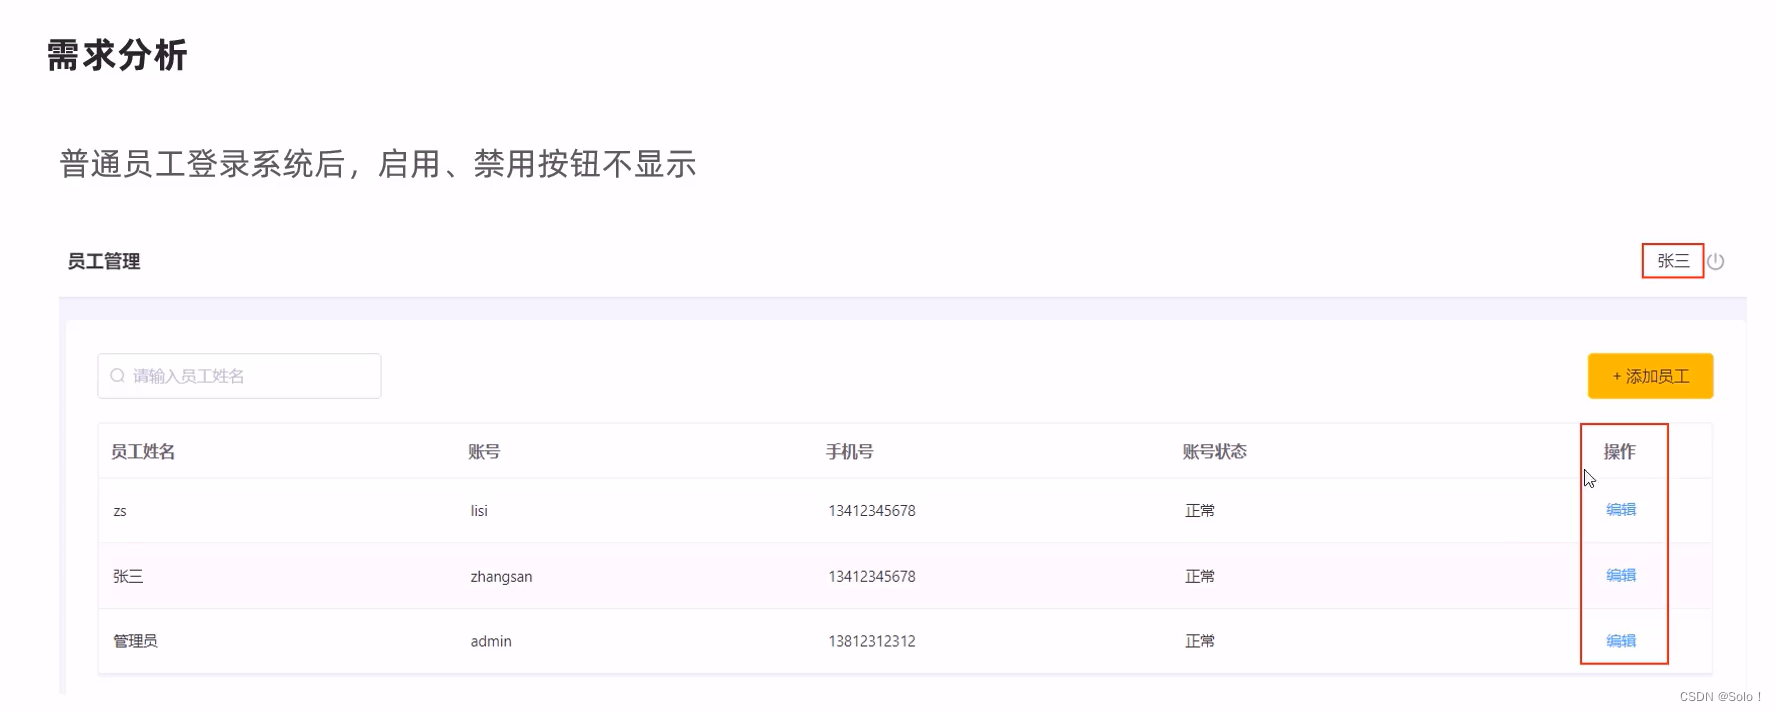
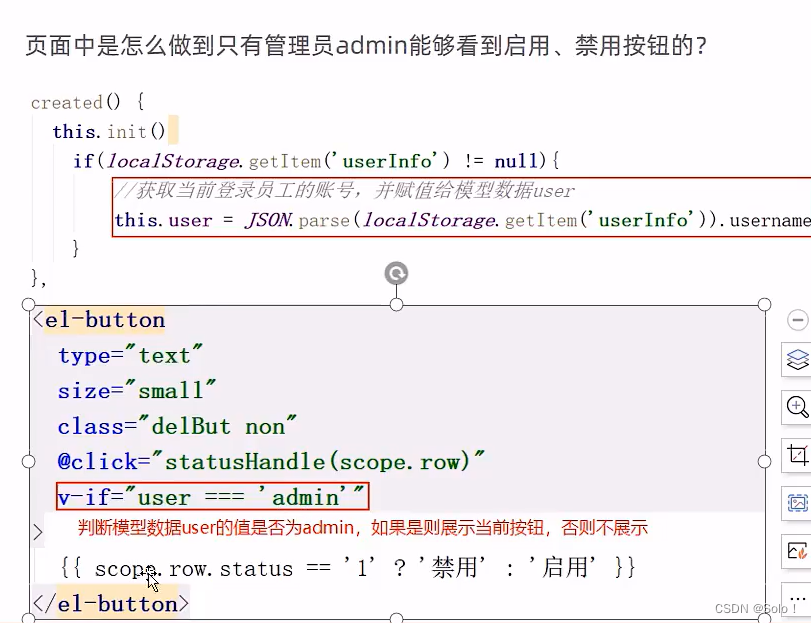
需要注意的是:只有管理员(admin用户)才可以对其他普通用户进行启用操作,禁用操作,所以普通用户登录系统后启用,禁用按钮不显示;
并且如果某个员工账号的状态为正常,则按钮显示为’‘禁用’,如果员工账号状态为已禁用,则按钮显示为“启用”。
普通员工登录系统后,启用,禁用按钮不显示
代码开发:
 注意:这里修改状态码要反着来,因为正常的用户你只能把它设置为禁用;已经禁用的账号你只能把它设置为正常
流程分析:
在开发代码之前,需要梳理一下整个程序的执行过程:
- 页面发送ajax请求,将参数(id、status)提交到服务端
- 服务端Controller接收页面提交的数据并调用Service更新数据
- Service调 用Mapper操作数据库
注意:启用,禁用的员工账号,本质上就是一个更新操作,也就是对status状态字段进行修改操作;
在controller中创建update方法,此方法是一个通用的修改员工信息的方法,因为status也是employee中的一个属性而已;这里使用了动态SQL的功能,根据具体的数据修改对应的字段信息;
/**
* 根据id修改员工信息
* @param employee
* @return
*/
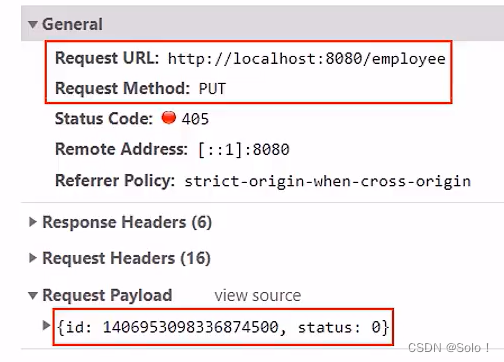
@PutMapping
public R<String> update(HttpServletRequest request,@RequestBody Employee employee){
log.info(employee.toString());
Long empId = (Long)request.getSession().getAttribute("employee");
employee.setUpdateTime(LocalDateTime.now());
employee.setUpdateUser(empId);
employeeService.updateById(employee);
return R.success("员工信息修改成功");
}
这边更新完时间之后 需要去获取更新的人 就是当前的用户 所以在上面去写 httpservletrequest requset 去获取session 紧接着去调用 request。getsession
功能测试:测试的时候我们发现出现了问题,就是我们修改员工的状态,提示信息显示修改成功,但是我们去数据库查验证的时候,发现员工的状态码压根就没有变化,这是为什么呢?
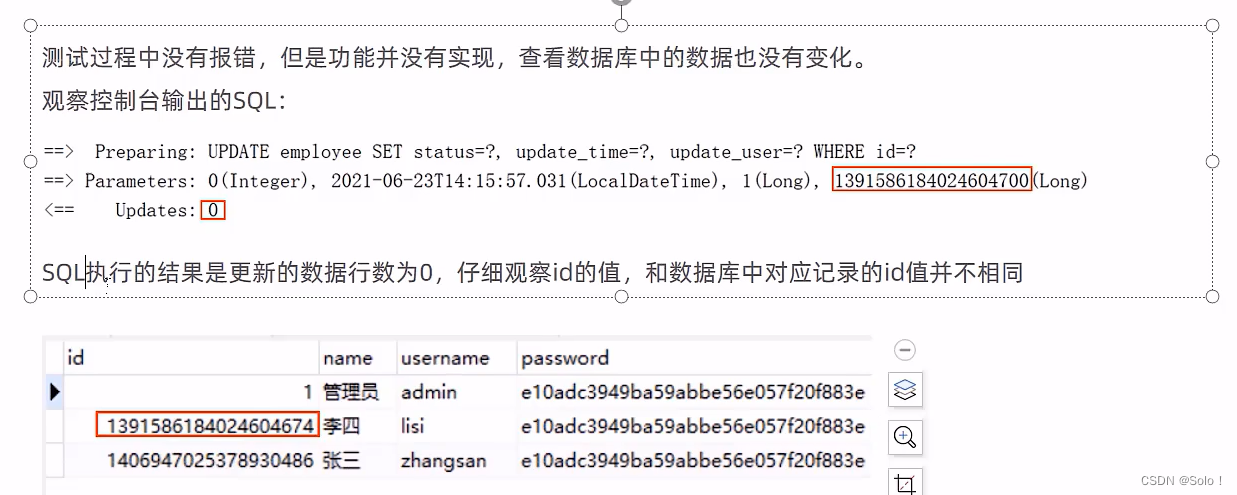
仔细观察id后,我们会发现后台的SQL语句使用的id和数据库中的id是不一样的!
原因是:mybatis-plus对id使用了雪花算法,所以存入数据库中的id是19为长度,但是前端的js只能保证数据的前16位的数据的精度,对我们id后面三位数据进行了四舍五入,所以就出现了精度丢失;就会出现前度传过来的id和数据里面的id不匹配,就没办法正确的修改到我们想要的数据;
当然另一种解决bug的方法是:关闭mybatis-plus的雪花算法来处理ID,我们使用自增ID的策略来往数据库添加id就行;
id存储为字符串就不存在这个问题 id改为varchar(32)自增方式改为ASSING_UUID即可
问题的原因式js对long型数据进行处理时丢失精度 导致提交的id和数据库中的id不一致
如何解决这一个问题 我们可以在 服务端给页面响应json数据时进行处理,将long型数据统一装换为string字符串
1.4.1 使用自定义消息转换器
代码bug修复:
思路:既然js对long型的数据会进行精度丢失,那么我们就对数据进行转型,我们可以在服务端(Java端)给页面响应json格式的数据时进行处理,将long型的数据统一转换为string字符串;
代码实现步骤:
- 提供对象转换器JacksonObjectMapper,基于Jackson进行Java对象到json数据的转换(资料中已经提供,直接复制到项目中使用)
- 在WebMvcConfig配置类中扩展Spring mvc的
消息转换器,在此消息转换器中使用提供的对象转换器进行Java对象到json数据的转换 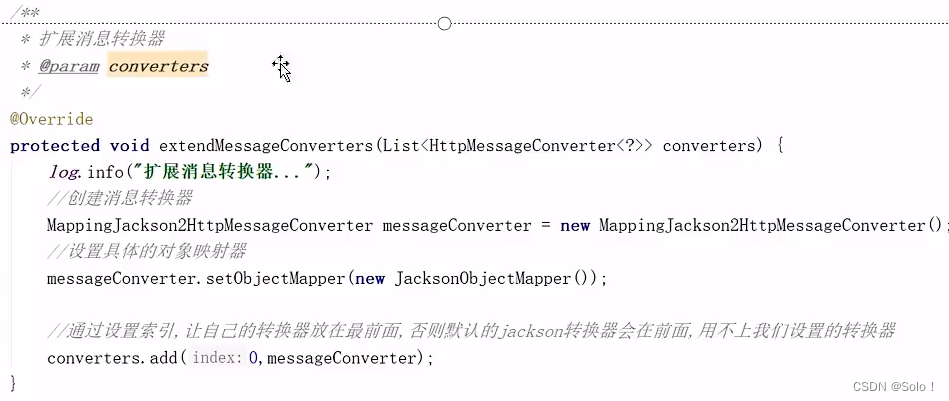
步骤一:自定义消息转换类
package com.itheima.reggie.common;

import com.fasterxml.jackson.databind.DeserializationFeature;
import com.fasterxml.jackson.databind.ObjectMapper;
import com.fasterxml.jackson.databind.module.SimpleModule;
import com.fasterxml.jackson.databind.ser.std.ToStringSerializer;
import com.fasterxml.jackson.datatype.jsr310.deser.LocalDateDeserializer;
import com.fasterxml.jackson.datatype.jsr310.deser.LocalDateTimeDeserializer;
import com.fasterxml.jackson.datatype.jsr310.deser.LocalTimeDeserializer;
import com.fasterxml.jackson.datatype.jsr310.ser.LocalDateSerializer;
import com.fasterxml.jackson.datatype.jsr310.ser.LocalDateTimeSerializer;
import com.fasterxml.jackson.datatype.jsr310.ser.LocalTimeSerializer;
import java.math.BigInteger;
import java.time.LocalDate;
import java.time.LocalDateTime;
import java.time.LocalTime;
import java.time.format.DateTimeFormatter;
import static com.fasterxml.jackson.databind.DeserializationFeature.FAIL_ON_UNKNOWN_PROPERTIES;

/**
 * 对象映射器:基于jackson将Java对象转为json,或者将json转为Java对象
 * 将JSON解析为Java对象的过程称为 [从JSON反序列化Java对象]
 * 从Java对象生成JSON的过程称为 [序列化Java对象到JSON]
 */
public class JacksonObjectMapper extends ObjectMapper {

    public static final String DEFAULT_DATE_FORMAT = "yyyy-MM-dd";
    public static final String DEFAULT_DATE_TIME_FORMAT = "yyyy-MM-dd HH:mm:ss";
    public static final String DEFAULT_TIME_FORMAT = "HH:mm:ss";

    public JacksonObjectMapper() {
        super();
        //收到未知属性时不报异常
        this.configure(FAIL_ON_UNKNOWN_PROPERTIES, false);

        //反序列化时,属性不存在的兼容处理
        this.getDeserializationConfig().withoutFeatures(DeserializationFeature.FAIL_ON_UNKNOWN_PROPERTIES);


        SimpleModule simpleModule = new SimpleModule()
                .addDeserializer(LocalDateTime.class, new LocalDateTimeDeserializer(DateTimeFormatter.ofPattern(DEFAULT_DATE_TIME_FORMAT)))
                .addDeserializer(LocalDate.class, new LocalDateDeserializer(DateTimeFormatter.ofPattern(DEFAULT_DATE_FORMAT)))
                .addDeserializer(LocalTime.class, new LocalTimeDeserializer(DateTimeFormatter.ofPattern(DEFAULT_TIME_FORMAT)))

                .addSerializer(BigInteger.class, ToStringSerializer.instance)
                .addSerializer(Long.class, ToStringSerializer.instance)
                .addSerializer(LocalDateTime.class, new LocalDateTimeSerializer(DateTimeFormatter.ofPattern(DEFAULT_DATE_TIME_FORMAT)))
                .addSerializer(LocalDate.class, new LocalDateSerializer(DateTimeFormatter.ofPattern(DEFAULT_DATE_FORMAT)))
                .addSerializer(LocalTime.class, new LocalTimeSerializer(DateTimeFormatter.ofPattern(DEFAULT_TIME_FORMAT)));

        //注册功能模块 例如,可以添加自定义序列化器和反序列化器
        this.registerModule(simpleModule);
    }
}
这个代码中 可以把时间和数据形式进行一个转化 long转换成字符串
步骤二:在前面的webMvcConfig 配置类中扩展spring mvc 的消息转换器,在此消息转换器中使用spring提供的对象转换器进行Java对象到json数据的转换;
这里是相当于自定义一个消息转换器 然后优先使用 不适用mvc自带的
     /**
     * 扩展mvc框架的消息转换器
     * @param converters
     */
    @Override
    protected void extendMessageConverters(List<HttpMessageConverter<?>> converters) {
        //log.info("扩展消息转换器...");
        //创建消息转换器对象
        MappingJackson2HttpMessageConverter messageConverter = new MappingJackson2HttpMessageConverter();
        //设置对象转换器,底层使用Jackson将Java对象转为json
        messageConverter.setObjectMapper(new JacksonObjectMapper());
        //将上面的消息转换器对象追加到mvc框架的转换器集合中
        //转换器是有优先级顺序的,这里我们把自己定义的消息转换器设置为第一优先级,所以会优先使用我们的转换器来进行相关数据进行转换,如果我们的转换器没有匹配到相应的数据来转换,那么就会去寻找第二个优先级的转换器,以此类推
        converters.add(0,messageConverter);
    }
然后启动程序,使用f12查看服务器响应到浏览器的用户id是不是变成了字符串,和数据库中是否相对应;
发现对应,即消息转换器配置成功;
然后再去测试 启用与禁用 员工账号这个功能,发现操作更新成功,并且数据库修改成功;
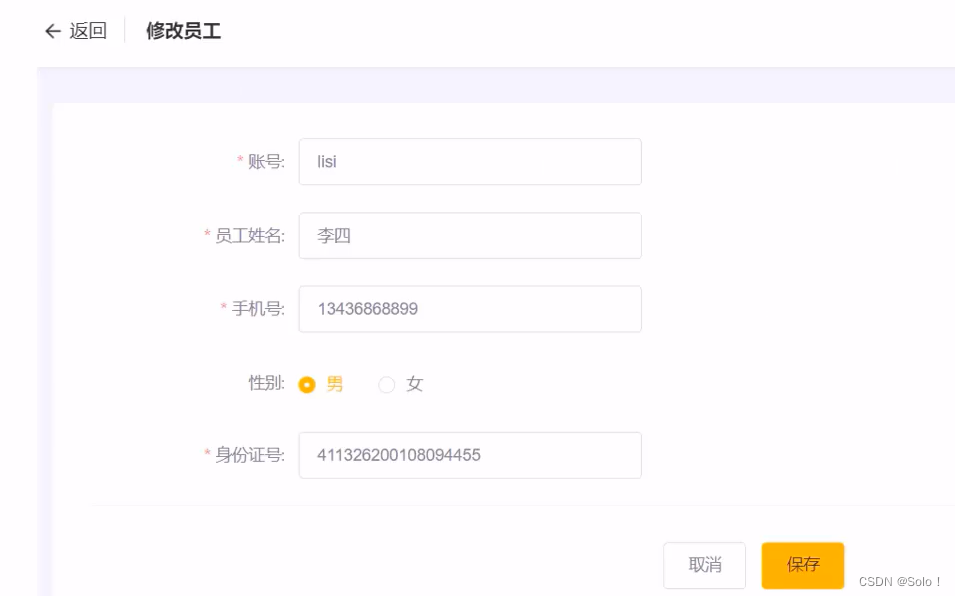
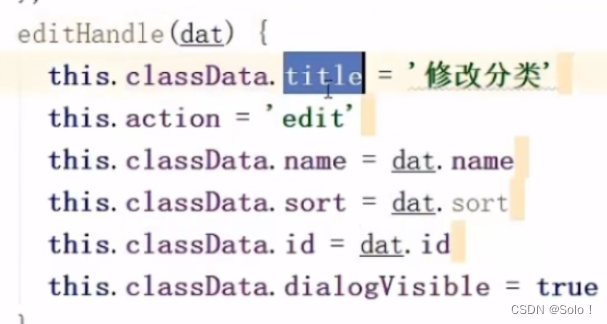
1.5 编辑员工信息
需求分析:
在员工管理列表页面点击编辑按钮,跳转到编辑页面,在编辑页面回显员工信息并进行修改,最后点击保存按钮完成编辑操作
在开发代码之前需要梳理一下操作过程和对应的程序的执行流程:
- 点击编辑按钮时,页面跳转到add.html, 并在url中携带参数[员Iid]
- 在add.html页面获取url中的参数[员工id]
- 发送ajax请求,请求服务端,同时提交员工id参数
- 服务端接收请求,根据员工id查询员工信息,将员工信息以json形式响应给页面
- 页面接收服务端响应的json数据,通过VUE的数据绑定进行员工信息回显
- 点击保存按钮,发送ajax请求,将页面中的员工信息以json方式提交给服务端
- 服务端接收员工信息,并进行处理,完成后给页面响应
- 页面接收到服务端响应信息后进行相应处理
注意: add.html页 面为公共页面,新增员工和编辑员工都是在此页面操作
数据回显后端代码:其实主要逻辑在前端。。。。。
/**
     * 根据前端传过来的员工id查询数据库进行数据会显给前端
     * @param id
     * @return
     */
    @GetMapping("/{id}")
    public R<Employee> getById(@PathVariable Long id){
        Employee employee = employeeService.getById(id);
        if (employee != null){
            return R.success(employee) ;
        }
        return R.error("没有查询到该员工信息");

    }
这边的id是在 路径上进行传的 路径使用的时 rest风格 所以要用@pathvariable这个注解接收一下
修改回显数据后,点击保存,会发送一个update的请求给后端,前面我们已经写了这个update的controller,所以只需要在前端跳转发请求就行;这样就实现了方法的复用,减少了代码量;
功能测试:自己测试编辑,看能不能数据回显,可不可以修改成功,修改后数据库的数据有没有跟着变化;
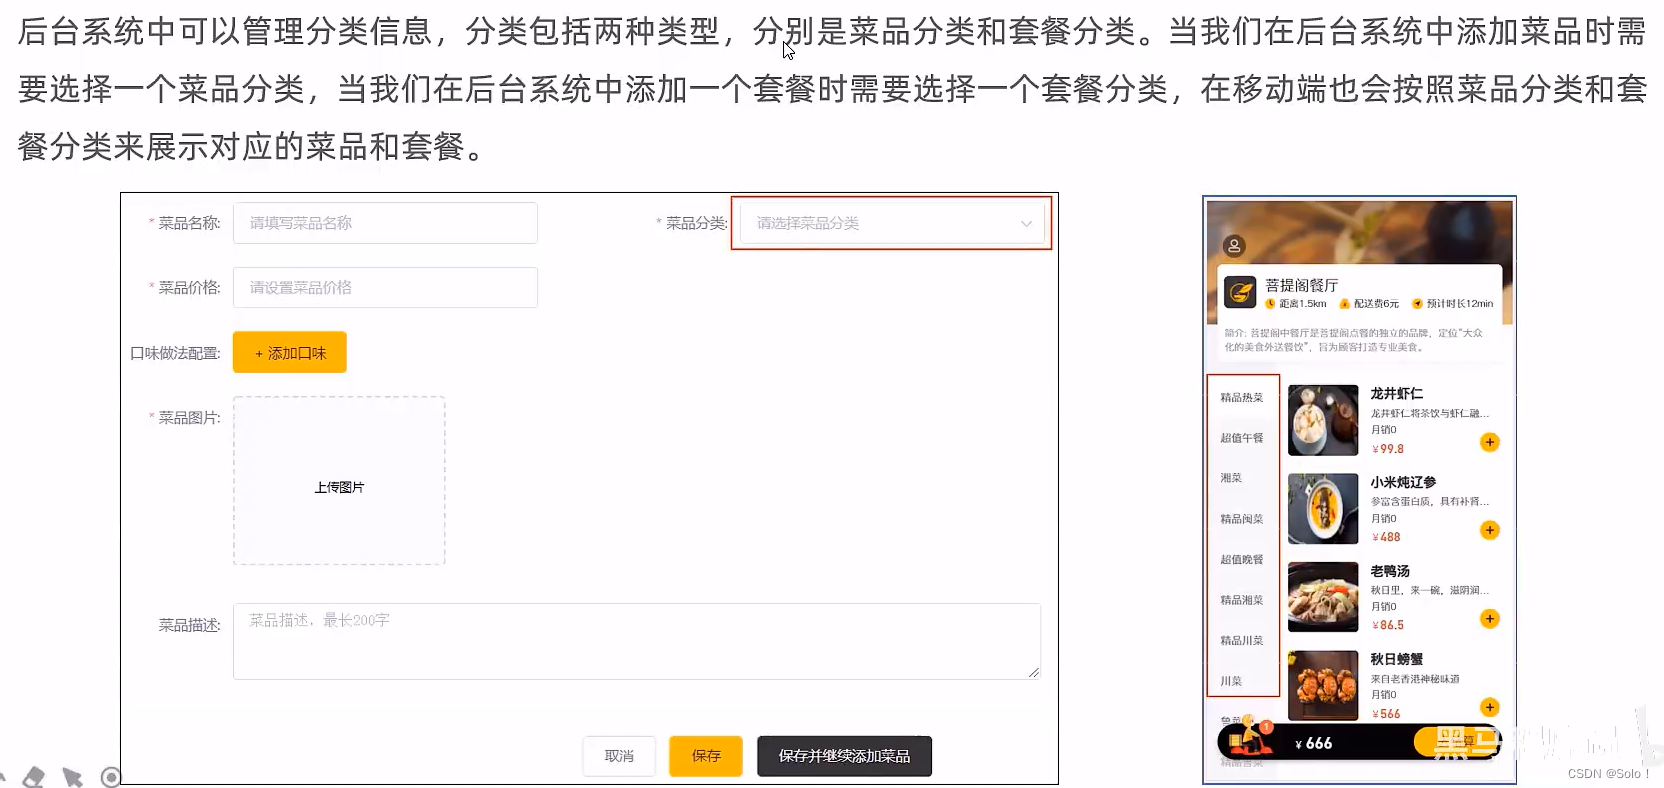
2. 菜品分类管理
2.1 公共字段填充(这里有重点)
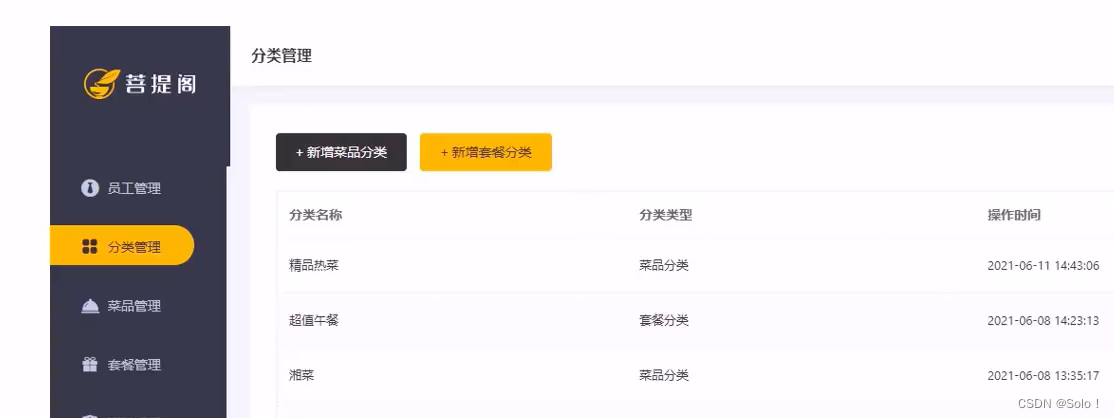
问题分析:
前面我们已经完成了后台系统的员工管理功能开发,在新增员工时需要设置创建时间、创建人、修改时间、修改人等字段,在编辑员工时需要设置修改时间和修改人等字段。这些字段属于公共字段,也就是很多表中都有这些字段,如下:
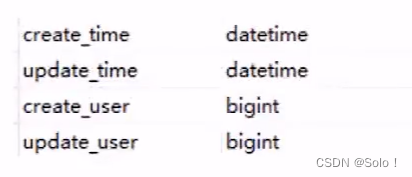
能不能对于这些公共字段在某个地方统一处理,来简化开发呢?
答案就是使用
Mybatis Plus提供的公共字段自动填充功能。
MybatisPlus公共字段自动填充,也就是在插入或者更新的时候为指定字段赋予指定的值,使用它的好处就是可以统一对这些字段进行处理,避免了重复代码。
实现步骤:
- 在实体类的属性上加入
@TableField注解,指定自动填充的策略 - 按照框架要求编写元数据对象处理器, 在此类中统一 为公共字段赋值, 此类需要实现
MetaObjectHandler接口
//把相关的注解加在需要mybatis-plus自动帮我们填充的字段上面
package com.itheima.reggie.entity;
import com.baomidou.mybatisplus.annotation.FieldFill;
import com.baomidou.mybatisplus.annotation.TableField;
import lombok.Data;
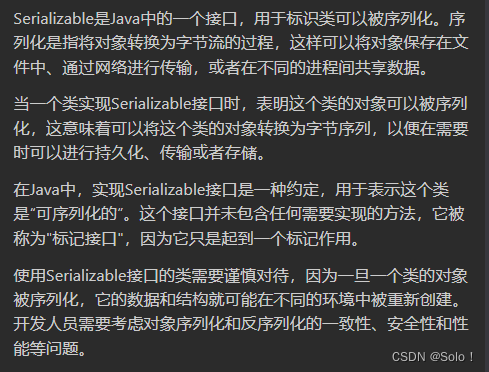
import java.io.Serializable;
import java.time.LocalDateTime;
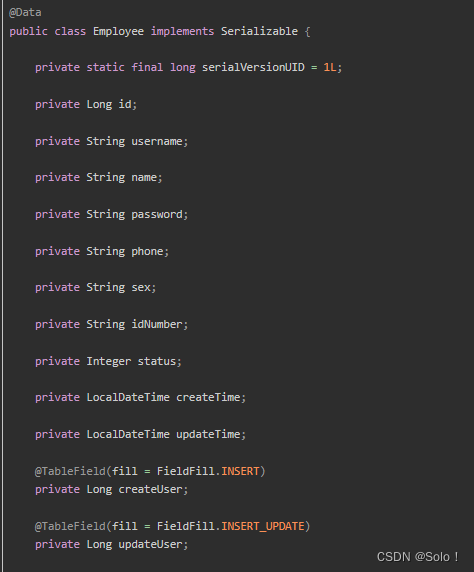
@Data
public class Employee implements Serializable {
private static final long serialVersionUID = 1L;
private Long id;
private String username;
private String name;
private String password;
private String phone;
private String sex;
private String idNumber;
private Integer status;
@TableField(fill = FieldFill.INSERT) //插入时填充字段
private LocalDateTime createTime;
@TableField(fill = FieldFill.INSERT_UPDATE) //插入和更新时填充字段
private LocalDateTime updateTime;
@TableField(fill = FieldFill.INSERT) //插入时填充字段
private Long createUser;
@TableField(fill = FieldFill.INSERT_UPDATE) //插入和更新时填充字段
private Long updateUser;
}
common下创建MyMetaObjecthandler然后设置一个处理类:在此类中为公共字段赋值,需要实现 接口;
package com.itheima.reggie.common;

import com.baomidou.mybatisplus.core.handlers.MetaObjectHandler;
import lombok.extern.slf4j.Slf4j;
import org.apache.ibatis.reflection.MetaObject;
import org.springframework.stereotype.Component;

import java.time.LocalDateTime;

/**
 * 自定义元数据对象处理器
 */
@Slf4j
@Component   //注意:这个要记得交给spring容器管理,不然这个功能就没发用。。。。
//那么怎么确定你要添加的功能是不是要交给容器管理呢?就是你直接写了一个工具类或者是功能类,需要对数据库的数据或者是数据库数据的结果产生影响的时候,你明明写了这样一个类,但是功能却没有生效,那么这个时候就要首先考虑是不是容器没有托管这个类
public class MyMetaObjecthandler implements MetaObjectHandler {

    /**
     * 插入操作,自动填充
     * @param metaObject
     */
    @Override
    public void insertFill(MetaObject metaObject) {
        metaObject.setValue("createTime", LocalDateTime.now());
        metaObject.setValue("updateTime",LocalDateTime.now());

        metaObject.setValue("createUser", 1l);  //这里的id是不能直接获取的,所以这里先写死,后面教你怎么动态获取员工id
        metaObject.setValue("updateUser",1l);
    }

    /**
     * 更新操作,自动填充
     * @param metaObject
     */
    @Override
    public void updateFill(MetaObject metaObject) {
        metaObject.setValue("updateTime",LocalDateTime.now());
        metaObject.setValue("updateUser",1l);
    }
}
功能完善:
前面我们已经完成了公共字段自动填充功能的代码开发,但是还有一个问题没有解决,就是我们在自动填充createUser和updateUser时设置的用户id是固定值,现在我们需要改造成动态获取当前登录用户的id。
有的同学可能想到,用户登录成功后我们将用户id存入了HttpSession中,现在我从HttpSession中获取不就行了?
注意,我们在MyMetaObjectHandler类中是不能获得HttpSession对象的,所以我们需要通过其他方式来获取登录用户id。
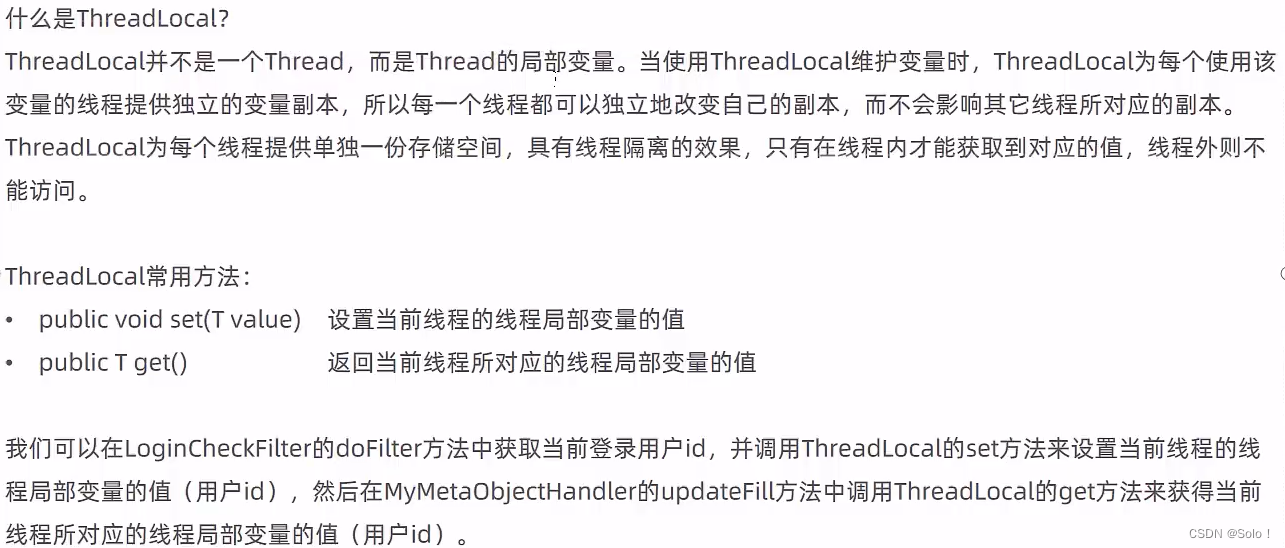
可以使用ThreadLocal来解决此问题,它是JDK中提供的一个类。
直接注入httpservletsession不可以 因为metaobjecthander不是一个spring bean

实现步骤:
- 编写
BaseContext工具类,基于ThreadLocal封装的工具类 - 在
LoginCheckFilter的doFilter方法中调用BaseContext来设置当前登录用户的id - 在
MyMetaObjectHandler的方法中调用BaseContext获取登录用户的id
然后为了动态的获取员工的id,这里我们使用了threadLocal这个局部变量来获取和存储员工id;
创建一个工具类来设置和获取threadLocal中的员工id, 注意:要先把数据设置进threadLocal中,才能获取到
package com.itheima.reggie.common;

/**
 *  基于ThreadLocal封装工具类,用户保存和获取当前登录用户id
 */
public class BaseContext {
    //用来存储用户id
    private static ThreadLocal<Long> threadLocal = new ThreadLocal<>();

    /**
     * 设置值
     * @param id
     */
    public static void setCurrentId(Long id){
        threadLocal.set(id);
    }

    /**
     * 获取值
     * @return
     */
    public static Long getCurrentId(){
        return threadLocal.get();
    }
}
在前面我们写的LongCheckFilter这个过滤器中,把这个地方的代码加上添加和保存id的代码
//4、判断登录状态,如果已登录,则直接放行
        if(request.getSession().getAttribute("employee") != null){
            //log.info("用户已登录,用户id为:{}",request.getSession().getAttribute("employee"));
            //把用户id存储到本地的threadLocal
            Long emId = (Long) request.getSession().getAttribute("employee");
            BaseContext.setCurrentId(emId);

            filterChain.doFilter(request,response);
            return;
        }
把处理器中的静态id改为动态获取:
metaObject.setValue("createUser", BaseContext.getCurrentId());
metaObject.setValue("updateUser",BaseContext.getCurrentId());
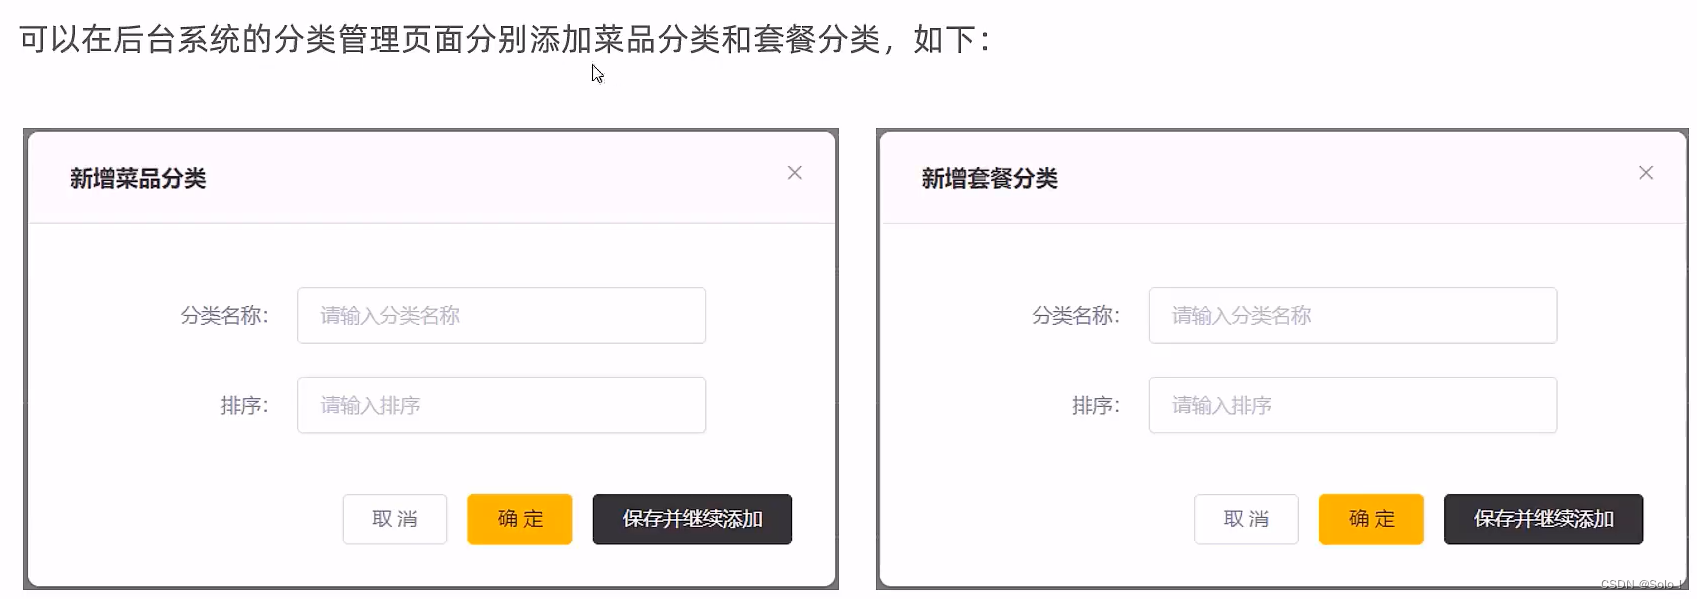
2.2 新增分类
需求分析:
实体类
package com.itheima.reggie.entity;

import com.baomidou.mybatisplus.annotation.FieldFill;
import com.baomidou.mybatisplus.annotation.IdType;
import com.baomidou.mybatisplus.annotation.TableField;
import com.baomidou.mybatisplus.annotation.TableId;
import lombok.Data;
import lombok.Getter;
import lombok.Setter;
import java.io.Serializable;
import java.time.LocalDateTime;

/**
 * 分类
 */
@Data
public class Category implements Serializable {

    private static final long serialVersionUID = 1L;

    private Long id;


    //类型 1 菜品分类 2 套餐分类
    private Integer type;


    //分类名称
    private String name;


    //顺序
    private Integer sort;


    //创建时间
    @TableField(fill = FieldFill.INSERT)
    private LocalDateTime createTime;


    //更新时间
    @TableField(fill = FieldFill.INSERT_UPDATE)
    private LocalDateTime updateTime;


    //创建人
    @TableField(fill = FieldFill.INSERT)
    private Long createUser;


    //修改人
    @TableField(fill = FieldFill.INSERT_UPDATE)
    private Long updateUser;


    //是否删除
    // private Integer isDeleted;

}
在开发业务功能前,先将需要用到的类和接口基本结构创建好:
- 实体类Category (直接从课程资料中导入即可)
- Mapper接口CategoryMapper
- 业务层接口CategoryService
- 业务层实现类CategoryServicelmpl
- 控制层CategoryController
创建mapper:
package com.itheima.reggie.mapper;

import com.baomidou.mybatisplus.core.mapper.BaseMapper;
import com.itheima.reggie.entity.Category;
import org.apache.ibatis.annotations.Mapper;

@Mapper
public interface CategoryMapper extends BaseMapper<Category> {
}
创建service:
package com.itheima.reggie.service;

import com.baomidou.mybatisplus.extension.service.IService;
import com.itheima.reggie.entity.Category;

public interface CategoryService extends IService<Category> {
}
package com.itheima.reggie.service.impl;

import com.baomidou.mybatisplus.extension.service.impl.ServiceImpl;
import com.itheima.reggie.entity.Category;
import com.itheima.reggie.mapper.CategoryMapper;
import com.itheima.reggie.service.CategoryService;
import org.springframework.stereotype.Service;


@Service
public class CategoryServiceImpl extends ServiceImpl<CategoryMapper, Category> implements CategoryService {

}
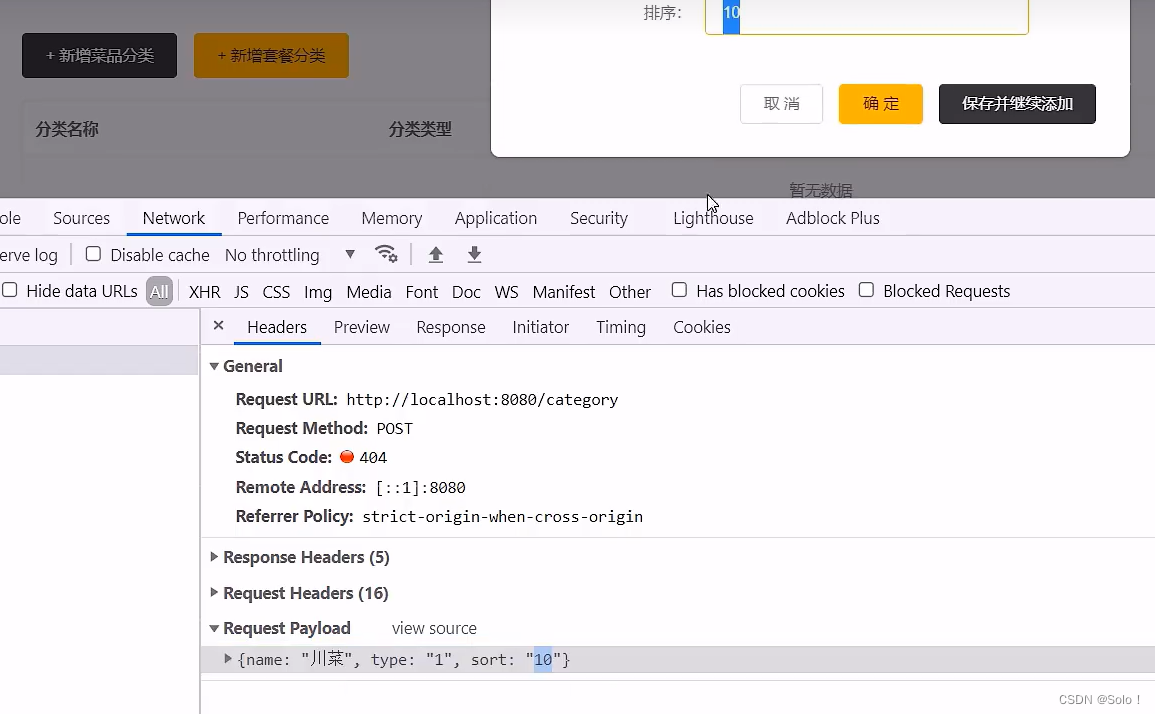
编写controller
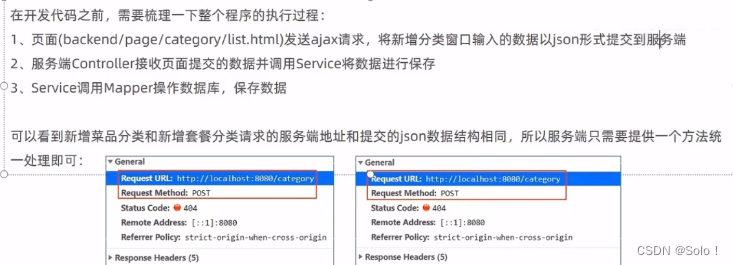
我们发现新增菜品分类的请求地址是:http://localhost:8080/category
提交的数据格式为:{name: "湘菜", type: "1", sort: "1"}
/**
     * 新增套餐分类
     * @param category
     * @return
     */
    @PostMapping
    public R<String> save(@RequestBody Category category){
        log.info("{category}" ,category);
        categoryService.save(category);
        return R.success("新增分类成功");
    }
功能测试:登录后,点击添加新增菜品分类,看是否成功,数据库的数据是否变化;
2.3 菜品类的分页
代码开发:
   /**
     * 分页查询
     * @param page
     * @param pageSize
     * @return
     */
    @GetMapping("/page")
    public R<Page> page(int page,int pageSize){

        //创建一个分页构造器
        Page<Category> categoryPage = new Page<>(page,pageSize);
        //创建一个条件构造器  用来排序用的  注意这个条件构造器一定要使用泛型,否则使用条件查询这个方法的时候会报错
        LambdaQueryWrapper<Category> queryWrapper = new LambdaQueryWrapper();
        //添加排序条件 ,根据sort字段进行排序
        queryWrapper.orderByAsc(Category::getSort);
        categoryService.page(categoryPage,queryWrapper);
        return R.success(categoryPage);
    }
2.4 删除分类(这里有注意点)
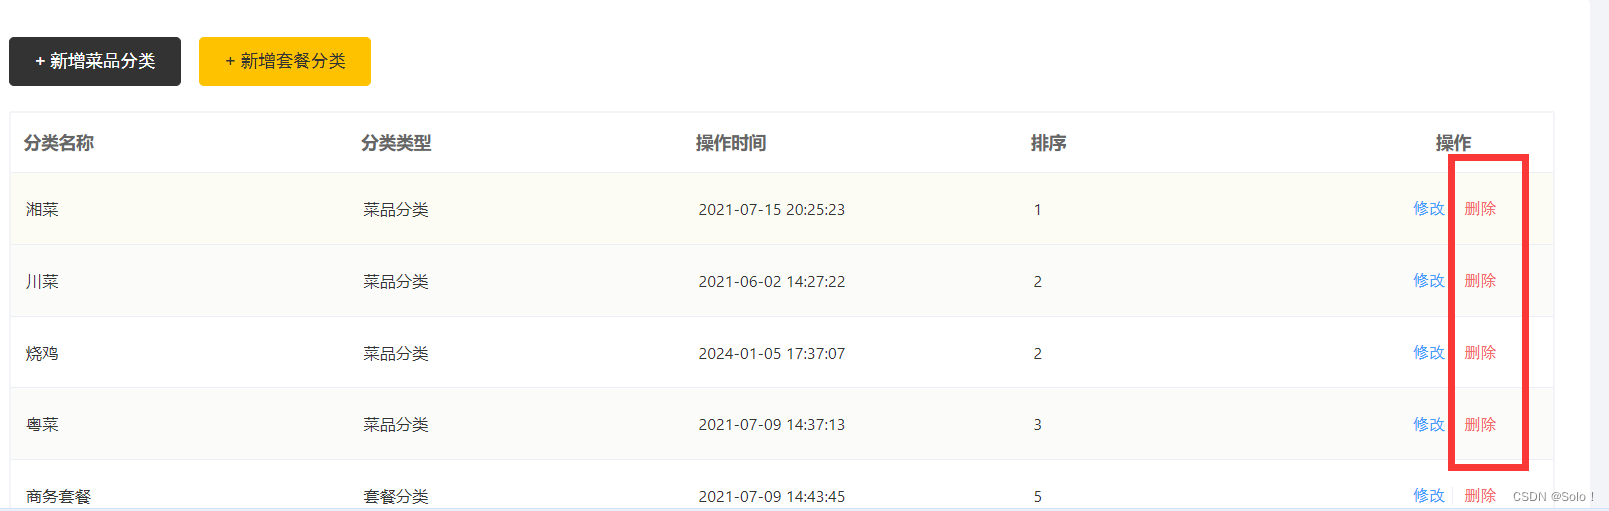
代码实现: 注意这里的删除功能是不完整的,因为可能需要删除的数据是与其他表关联的,所以删除之前要先判断该条数据是否与其他表中的数据关联;
rest风格是/xx/id而不是?id
用pathvariable是因为url用了占位符(“/{id}”)所以加@path variable而deletemapping不要用占位符
    /**
     * 根据id来删除分类的数据
     * @param id
     * @return
     */
    @DeleteMapping()
    public R<String> delete(@RequestParam("ids") Long ids){ //注意这里前端传过来的数据是ids
        categoryService.removeById(ids);
        return R.success("分类信息删除成功");
    }
功能完善:
前面我们已经实现了根据id删除分类的功能,但是并没有检查删除的分类是否关联了菜品或者套餐,所以我们需要进行功能完善。
要完善分类删除功能,需要先准备基础的类和接口:
- 实体类
Dish和Setmeal Mapper接口DishMapper和SetmealMapperService接口DishService和SetmealServiceService实现类DishServicelmpl和SetmealServicelmpl
package com.itheima.reggie.entity;

import com.baomidou.mybatisplus.annotation.FieldFill;
import com.baomidou.mybatisplus.annotation.IdType;
import com.baomidou.mybatisplus.annotation.TableField;
import com.baomidou.mybatisplus.annotation.TableId;
import lombok.Data;
import java.io.Serializable;
import java.math.BigDecimal;
import java.time.LocalDateTime;

/**
 * 套餐
 */
@Data
public class Setmeal implements Serializable {

    private static final long serialVersionUID = 1L;

    private Long id;


    //分类id
    private Long categoryId;


    //套餐名称
    private String name;


    //套餐价格
    private BigDecimal price;


    //状态 0:停用 1:启用
    private Integer status;


    //编码
    private String code;


    //描述信息
    private String description;


    //图片
    private String image;


    @TableField(fill = FieldFill.INSERT)
    private LocalDateTime createTime;


    @TableField(fill = FieldFill.INSERT_UPDATE)
    private LocalDateTime updateTime;


    @TableField(fill = FieldFill.INSERT)
    private Long createUser;


    @TableField(fill = FieldFill.INSERT_UPDATE)
    private Long updateUser;


    //是否删除
    private Integer isDeleted;
}
package com.itheima.reggie.entity;

import com.baomidou.mybatisplus.annotation.FieldFill;
import com.baomidou.mybatisplus.annotation.IdType;
import com.baomidou.mybatisplus.annotation.TableField;
import com.baomidou.mybatisplus.annotation.TableId;
import lombok.Data;
import java.io.Serializable;
import java.math.BigDecimal;
import java.time.LocalDateTime;

/**
 菜品
 */
@Data
public class Dish implements Serializable {

    private static final long serialVersionUID = 1L;

    private Long id;


    //菜品名称
    private String name;


    //菜品分类id
    private Long categoryId;


    //菜品价格
    private BigDecimal price;


    //商品码
    private String code;


    //图片
    private String image;


    //描述信息
    private String description;


    //0 停售 1 起售
    private Integer status;


    //顺序
    private Integer sort;


    @TableField(fill = FieldFill.INSERT)
    private LocalDateTime createTime;


    @TableField(fill = FieldFill.INSERT_UPDATE)
    private LocalDateTime updateTime;


    @TableField(fill = FieldFill.INSERT)
    private Long createUser;


    @TableField(fill = FieldFill.INSERT_UPDATE)
    private Long updateUser;


    //是否删除
    private Integer isDeleted;

}
创建对应的mapper:
package com.itheima.reggie.mapper;
import com.baomidou.mybatisplus.core.mapper.BaseMapper;
import com.itheima.reggie.entity.Dish;
import org.apache.ibatis.annotations.Mapper;

/**
 */
@Mapper
public interface DishMapper extends BaseMapper<Dish> {

}
package com.itheima.reggie.mapper;
import com.baomidou.mybatisplus.core.mapper.BaseMapper;
import com.itheima.reggie.entity.Setmeal;
import org.apache.ibatis.annotations.Mapper;
/**
 */
@Mapper
public interface SetmealMapper extends BaseMapper<Setmeal> {
}
创建service:
package com.itheima.reggie.service;

import com.baomidou.mybatisplus.extension.service.IService;
import com.itheima.reggie.entity.Dish;


public interface DishService extends IService<Dish> {
}
package com.itheima.reggie.service;

import com.baomidou.mybatisplus.extension.service.IService;
import com.itheima.reggie.entity.Setmeal;

public interface SetmealService extends IService<Setmeal> {
}
package com.itheima.reggie.service.impl;

import com.baomidou.mybatisplus.extension.service.impl.ServiceImpl;
import com.itheima.reggie.entity.Dish;
import com.itheima.reggie.mapper.DishMapper;
import com.itheima.reggie.service.DishService;
import lombok.extern.slf4j.Slf4j;
import org.springframework.stereotype.Service;

@Service
@Slf4j
public class DishServiceImpl extends ServiceImpl<DishMapper, Dish> implements DishService {
}
package com.itheima.reggie.service.impl;

import com.baomidou.mybatisplus.extension.service.impl.ServiceImpl;
import com.itheima.reggie.entity.Setmeal;
import com.itheima.reggie.mapper.SetmealMapper;
import com.itheima.reggie.service.SetmealService;
import lombok.extern.slf4j.Slf4j;
import org.springframework.stereotype.Service;


@Service
@Slf4j
public class SetmealServiceImpl extends ServiceImpl<SetmealMapper, Setmeal> implements SetmealService {
}
添加自定义的service方法:(就是我们需要的业务mybatis没有提供,所以就需要自己另外在service创建新的方法,并且在相关的业务中实现)
//在CategoryService中定义自己需要的方法,直接写就行
void remove(Long id);
在CategoryService实现类中重写该方法:
自定义异常类,因为这里需要抛异常了:
.
package com.itheima.reggie.common;

/**
 * 自定义业务异常类
 */
public class CustomException extends RuntimeException {
    public CustomException(String message){
        super(message);
    }
}
//然后在外面前面写的GlobalExceptionHandler全局异常捕获器中添加该异常,这样就可以把相关的异常信息显示给前端操作的人员看见

/**
     * 处理自定义的异常,为了让前端展示我们的异常信息,这里需要把异常进行全局捕获,然后返回给前端
     * @param exception
     * @return
     */
    @ExceptionHandler(CustomException.class)
    public R<String> exceptionHandle(CustomException exception){
        log.error(exception.getMessage()); //报错记得打日志
        //这里拿到的message是业务类抛出的异常信息,我们把它显示到前端
        return R.error(exception.getMessage());
    }
/**
     * 根据id删除 分类,删除之前需要进行判断是否有关联数据
     * @param id
     */
    @Override
    public void remove(Long id) {
        LambdaQueryWrapper<Dish> dishLambdaQueryWrapper = new LambdaQueryWrapper<>();
        //添加查询条件
        dishLambdaQueryWrapper.eq(Dish::getCategoryId,id);
        //注意:这里使用count方法的时候一定要传入条件查询的对象,否则计数会出现问题,计算出来的是全部的数据的条数
        int count = dishService.count(dishLambdaQueryWrapper);

        //查询当前分类是否关联了菜品,如果已经管理,直接抛出一个业务异常
        if (count > 0){
            //已经关联了菜品,抛出一个业务异常
            throw new CustomException("当前分类项关联了菜品,不能删除");
        }

        //查询当前分类是否关联了套餐,如果已经管理,直接抛出一个业务异常
        LambdaQueryWrapper<Setmeal> setmealLambdaQueryWrapper = new LambdaQueryWrapper<>();
        setmealLambdaQueryWrapper.eq(Setmeal::getCategoryId,id);
        //注意:这里使用count方法的时候一定要传入条件查询的对象,否则计数会出现问题,计算出来的是全部的数据的条数
        int setmealCount = setmealService.count(setmealLambdaQueryWrapper);
        if (setmealCount > 0){
            //已经关联了套餐,抛出一个业务异常
            throw new CustomException("当前分类项关联了套餐,不能删除");
        }
        //正常删除
        super.removeById(id);

    }
然后在controller调用刚刚实现的方法就行:把之前的remove方法给删除就行,重新调用我们自己实现的方法;
    /**
     * 根据id来删除分类的数据
     * @param id
     * @return
     */
    @DeleteMapping
    public R<String> delete(@RequestParam("ids") Long id){ //注意这里前端传过来的数据是ids

        categoryService.remove(id);
        return R.success("分类信息删除成功");

    }
测试:自己添加测试数据测试就行;记得一定要测试一下删除有相关联的数据,看会不会删除和在前端提示异常信息;
2.5 修改分类
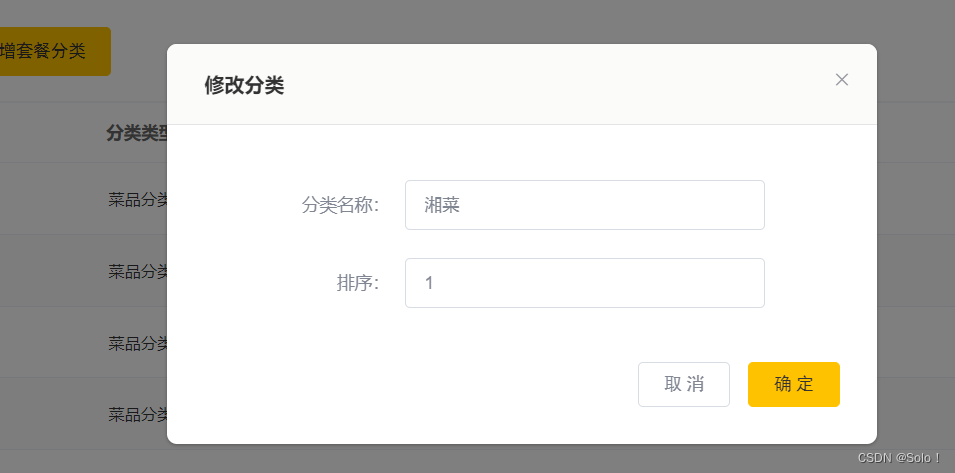
这里的编辑的数据回显,前端已经帮我们做好了,所以我们就不需要去数据库查询了,这样可以减少对数据库的操作;
    /**
     * 根据id修改分类
     * @param category
     * @return
     */
    @PutMapping
    public R<String> update(@RequestBody Category category){
        categoryService.updateById(category);
        return R.success("修改分类信息成功");
    }
记得在对应的实体类加上公共字段的值设置:前面我们配置了这个,所以这里只需要加注解就行
    //创建时间
    @TableField(fill = FieldFill.INSERT)
    private LocalDateTime createTime;

    //更新时间
    @TableField(fill = FieldFill.INSERT_UPDATE)
    private LocalDateTime updateTime;

    //创建人
    @TableField(fill = FieldFill.INSERT)
    private Long createUser;

    //修改人
    @TableField(fill = FieldFill.INSERT_UPDATE)
    private Long updateUser;
1. 菜品管理的业务功能
1.1 文件的上传和下载🙇♂️
整体介绍:
文件上传,也称为upload,是指将本地图片、视频、音频等文件上传到服务器上,可以供其他用户浏览或下载的过程。
文件上传在项目中应用非常广泛,我们经常发微博、发微信朋友圈都用到了文件.上传功能。
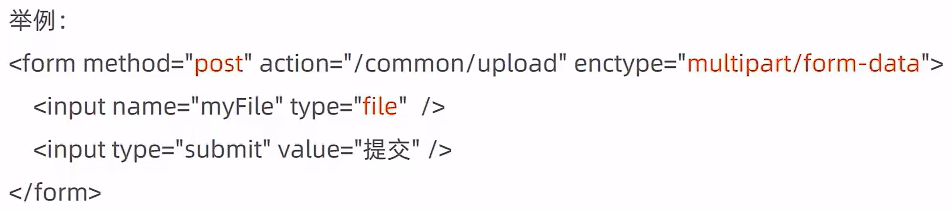
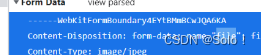
文件上传时,对页面的form表单有如下要求:
method=" post"——采用post方式提交数据enctype="multipart/form-data"——采用multipart格式上传文件type="file"——使用input的file控件上传
服务端要接收客户端页面上传的文件,通常都会使用Apache的两个组件:
commons-fileuploladcommons-io
Spring框架在spring-web包中对文件上传进行了封装,大大简化了服务端代码,我们只需要在Controller的方法中声明一个MultipartFile类型的参数即可接收.上传的文件,例如:
/**
     *
     * @param file
     * @return
     */
    @PostMapping("/upload")
    public R<String> upload(MultipartFile file){
        System.out.println("file = " + file);
        return null;
    }
CommonController.java
package com.itheima.reggie.controller;

import com.itheima.reggie.common.R;
import lombok.extern.slf4j.Slf4j;
import org.springframework.beans.factory.annotation.Autowired;
import org.springframework.web.bind.annotation.PostMapping;
import org.springframework.web.bind.annotation.RequestMapping;
import org.springframework.web.bind.annotation.RestController;
import org.springframework.web.multipart.MultipartFile;

import java.io.File;
import java.io.IOException;

/**
 * 文件上传和下载
 */
@RestController
@Slf4j
@RequestMapping("/common")
public class CommonController {

    @PostMapping("/upload")
    public R<String> upload(MultipartFile file){
        log.info(file.toString());
//file是一个临时文件 需要转存到指定的位置,否则本次的请求完成后 临时的文件会被删除

        try {
            file.transferTo(new File("F:\\Two or three things on the table\\hello.jpg"));
        } catch (IOException e) {
            throw new RuntimeException(e);
        }
        return null;
    }
}
上传图片那边的话 必须登录才可以上传 不然的话会被拦截器拦截 除了这个方法还可以在logincheckfilter中写一个不需要处理的请求路径
file是一个临时文件 需要转存到指定的位置,否则本次的请求完成后 临时的文件会被删除
try里面的代码就是将临时文件转存到指定的位置
这个路径的位置 不能写太死 可以在spplication中配置动态路径
文件名也不能写死
reggie:
  path: E:\reggie\
package com.itheima.reggie.controller;

import com.itheima.reggie.common.R;
import org.springframework.beans.factory.annotation.Value;
import org.springframework.web.bind.annotation.GetMapping;
import org.springframework.web.bind.annotation.PostMapping;
import org.springframework.web.bind.annotation.RequestMapping;
import org.springframework.web.bind.annotation.RestController;
import org.springframework.web.multipart.MultipartFile;

import javax.servlet.ServletOutputStream;
import javax.servlet.http.HttpServletResponse;
import java.io.*;
import java.util.UUID;

/**
 * 文件上传和下载
 */
@RestController
@RequestMapping("/common")
public class CommonController {

    @Value("${reggie.path}")
    private String basePath;

    /**
     * 文件的上传
     * @param file
     * @return
     */
    @PostMapping("/upload")
    public R<String> upload(MultipartFile file){
        //这个file是一个临时文件,需要转存到指定位置,否则本次请求完成后临时文件会删除

        //拿到文件的原始名
        String originalFilename = file.getOriginalFilename();
        //拿到文件的后缀名 比如 .png  .jpg
        String suffix = originalFilename.substring(originalFilename.lastIndexOf("."));
        //使用uuid生成的作为文件名的一部分,这样可以防止文件名相同造成的文件覆盖
        String fileName = UUID.randomUUID().toString() + suffix;

        //创建一个目录对象,看传文件的时候,接收文件的目录存不存在
        File dir = new File(basePath);
        if (!dir.exists()){
            //文件目录不存在,直接创建一个目录
            dir.mkdirs();
        }

        try {
            //把前端传过来的文件进行转存
            file.transferTo(new File(basePath + fileName));
        }catch (IOException e){
            e.printStackTrace();
        }

        return R.success(fileName);
    }


    @GetMapping("/download")
    public void download(String name, HttpServletResponse response){
        try {
            //输入流,通过输入流读取文件内容  这里的name是前台用户需要下载的文件的文件名
            //new File(basePath + name) 是为了从存储图片的地方获取用户需要的图片对象
            FileInputStream fileInputStream = new FileInputStream(new File(basePath + name));
            //输出流,通过输出流将文件写回浏览器
            ServletOutputStream outputStream = response.getOutputStream();

            //设置写回去的文件类型
            response.setContentType("image/jpeg");

            //定义缓存区,准备读写文件
            int len  = 0 ;
            byte[] buff = new byte[1024];
            while ((len = fileInputStream.read(buff)) != -1){
                outputStream.write(buff,0,len);
                outputStream.flush();
            }
            //关流
            outputStream.close();
            fileInputStream.close();

        }catch (Exception e){
            e.printStackTrace();
        }
    }
}
LoginCheckFilter.java
package com.itheima.reggie.filter;

import com.alibaba.fastjson.JSON;
import com.itheima.reggie.common.BaseContext;
import com.itheima.reggie.common.R;
import lombok.extern.slf4j.Slf4j;
import org.springframework.util.AntPathMatcher;

import javax.servlet.*;
import javax.servlet.annotation.WebFilter;
import javax.servlet.http.HttpServletRequest;
import javax.servlet.http.HttpServletResponse;
import java.io.IOException;

@WebFilter(filterName = "loginCheckFilter",urlPatterns = "/*")
@Slf4j
public class LoginCheckFilter implements Filter {
    //路径匹配器,支持通配符
    public static final AntPathMatcher PATH_MATCHER = new AntPathMatcher();
    @Override
    public void doFilter(ServletRequest servletRequest, ServletResponse servletResponse, FilterChain filterChain) throws IOException, ServletException {
        HttpServletRequest  httpServletRequest = (HttpServletRequest) servletRequest;
        HttpServletResponse httpServletResponse = (HttpServletResponse) servletResponse;
        // 1. 获取本次请求的URI
        String requestURI = httpServletRequest.getRequestURI();

        //定义不需要处理的请求路径  比如静态资源(静态页面我们不需要拦截,因为此时的静态页面是没有数据的)
        String[] urls = new String[]{
                "/employee/login",
                "/employee/logout",
                "/backend/**",
                "/front/**",
                "/common/**"
        };
        //做调试用的
        //log.info("拦截到请求:{}",requestURI);


        // 2. 判断本次请求是否需要处理
        boolean check = check(urls, requestURI);


        // 3. 如果不需要处理,则直接放行
        if(check)
        {
            filterChain.doFilter(httpServletRequest,httpServletResponse);
            return;
        }


        // 4. 判断登录状态,如果已登录,则直接放行
        if (httpServletRequest.getSession().getAttribute("employee")!=null)
        {
            //log.info("用户已登录,用户id为:{}",httpServletRequest.getSession().getAttribute("employee"));
            Long empId = (Long) httpServletRequest.getSession().getAttribute("employee");
            BaseContext.setCurrentId(empId);
            filterChain.doFilter(httpServletRequest,httpServletResponse);
            return;
        }


        // 5. 如果未登录则返回未登录结果
        httpServletResponse.getWriter().write(JSON.toJSONString(R.error("NOTLOGIN")));
        return;


    }

    public boolean check(String[] urls,String requestURI){
        for (String url : urls) {
            //把浏览器发过来的请求和我们定义的不拦截的url做比较,匹配则放行
            boolean match = PATH_MATCHER.match(url, requestURI);
            if(match){
                return true;
            }
        }
        return false;
    }
}
文件下载
文件下载,也称为download,是指将文件从服务器传输到本地计算机的过程。
通过浏览器进行文件下载,通常有两种表现形式:
- 以
附件形式下载,弹出保存对话框,将文件保存到指定磁盘目录 直接在浏览器中打开
通过浏览器进行文件下载,本质上就是服务端将文件以流的形式写回浏览器的过程。
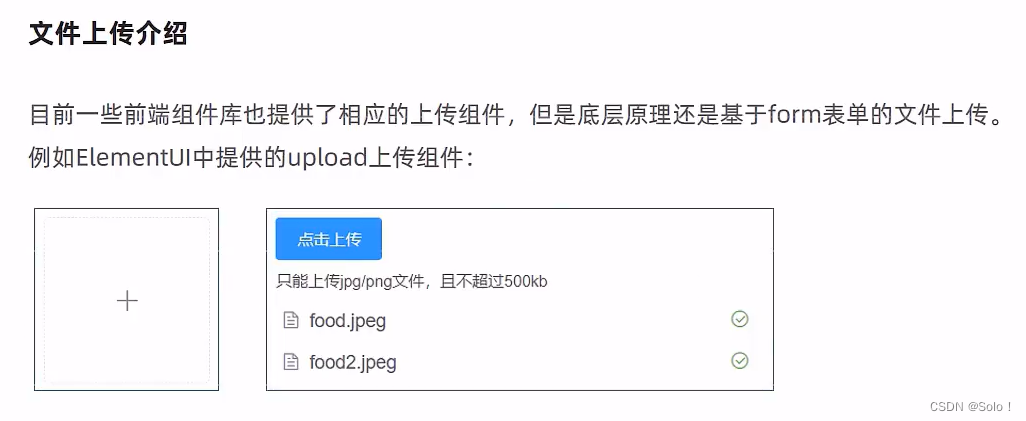
文件上传,页面端可以使用ElementUl提供的.上传组件。
可以直接使用资料中提供的上传页面,位置:资料/文件.上传下载页面/upload.html
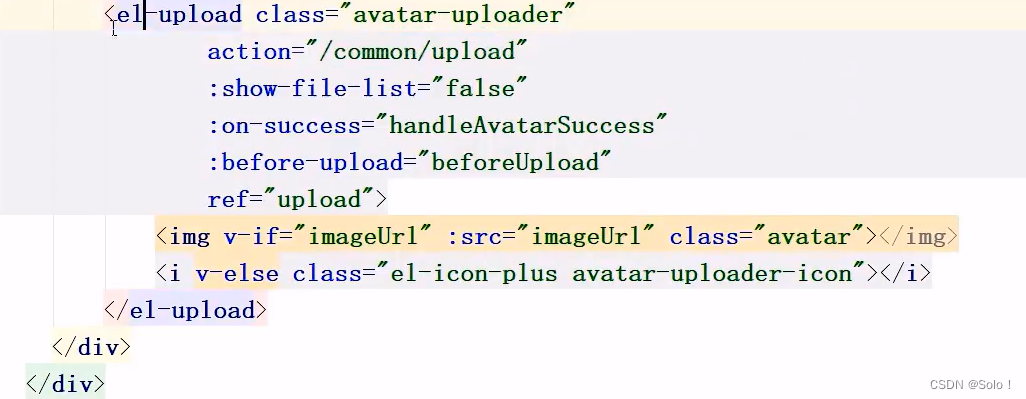
upload.html
<!DOCTYPE html>
<html lang="en">
<head>
  <meta charset="UTF-8">
  <meta http-equiv="X-UA-Compatible" content="IE=edge">
  <meta name="viewport" content="width=device-width, initial-scale=1.0">
  <title>文件上传</title>
  <!-- 引入样式 -->
  <link rel="stylesheet" href="../../plugins/element-ui/index.css" />
  <link rel="stylesheet" href="../../styles/common.css" />
  <link rel="stylesheet" href="../../styles/page.css" />
</head>
<body>
   <div class="addBrand-container" id="food-add-app">
    <div class="container">
        <el-upload class="avatar-uploader"
                action="/common/upload"
                :show-file-list="false"
                :on-success="handleAvatarSuccess"
                :before-upload="beforeUpload"
                ref="upload">
            <img v-if="imageUrl" :src="imageUrl" class="avatar"></img>
            <i v-else class="el-icon-plus avatar-uploader-icon"></i>
        </el-upload>
    </div>
  </div>
    <!-- 开发环境版本,包含了有帮助的命令行警告 -->
    <script src="../../plugins/vue/vue.js"></script>
    <!-- 引入组件库 -->
    <script src="../../plugins/element-ui/index.js"></script>
    <!-- 引入axios -->
    <script src="../../plugins/axios/axios.min.js"></script>
    <script src="../../js/index.js"></script>
    <script>
      new Vue({
        el: '#food-add-app',
        data() {
          return {
            imageUrl: ''
          }
        },
        methods: {
          handleAvatarSuccess (response, file, fileList) {
              this.imageUrl = `/common/download?name=${response.data}`
          },
          beforeUpload (file) {
            if(file){
              const suffix = file.name.split('.')[1]
              const size = file.size / 1024 / 1024 < 2
              if(['png','jpeg','jpg'].indexOf(suffix) < 0){
                this.$message.error('上传图片只支持 png、jpeg、jpg 格式!')
                this.$refs.upload.clearFiles()
                return false
              }
              if(!size){
                this.$message.error('上传文件大小不能超过 2MB!')
                return false
              }
              return file
            }
          }
        }
      })
    </script>
</body>
</html>
文件下载代码实现
文件下载,页面端可以使用<img>标签展示下载的图片<img v-if = "imageUrl" :src="imageUrl" class="avatar"></img>
注意:这里上传的文件的文件名要和这个地方的一样,接收文件的参数的名不能随便定义,要和下面的name的值一致;
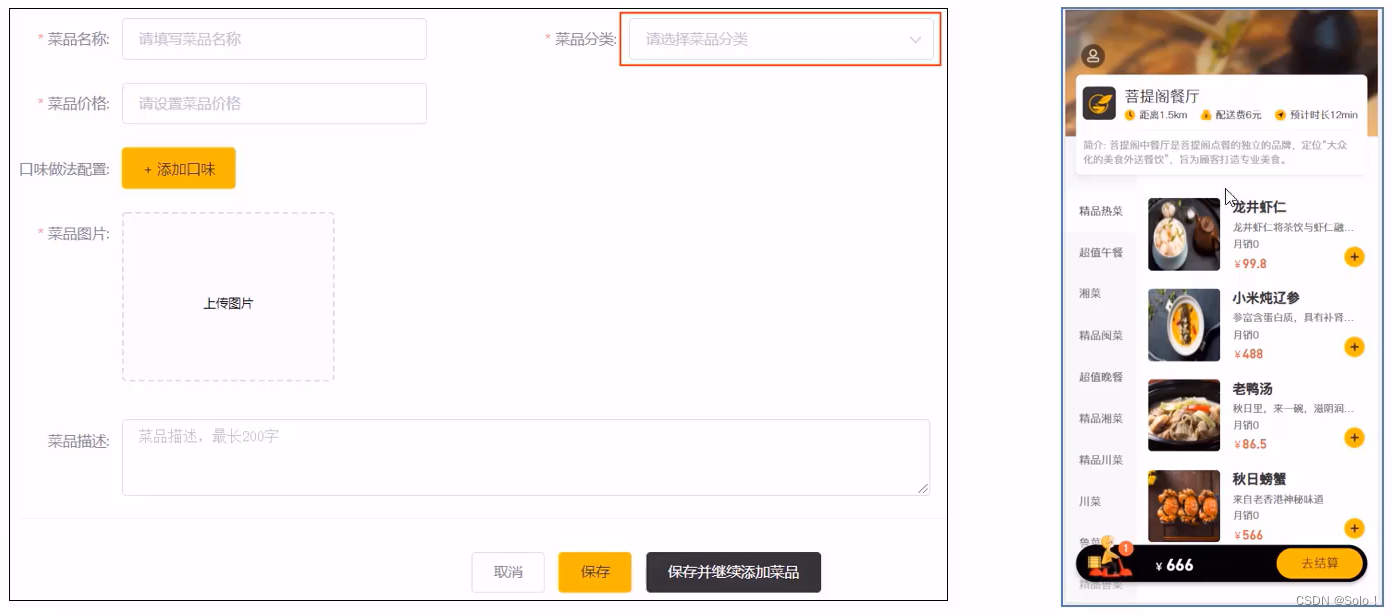
1.2 新增菜品
需求分析:
后台系统中可以管理菜品信息,通过新增功能来添加一个新的菜品,在添加菜品时需要选择当前菜品所属的菜品分类,并且需要上传菜品图片,在移动端会按照菜品分类来展示对应的菜品信息。
数据模型:
新增菜品,其实就是将新增页面录入的菜品信息插入到dish表,如果添加了口味做法,还需要向dish_ flavor表插入数据。所以在新增菜品时,涉及到两个表:
dish菜品表dish_ flavor菜品口味表

代码开发:
在开发业务功能前,先将需要用到的类和接口基本结构创建好:
- 实体类
DishFlavor(直接从课程资料中导入即可,Dish实体前面课程中已经导入过了) - Mapper接口
DishFlavorMapper - 业务层接口
DishFlavorService - 业务层实现类
DishFlavorServicelmpl - 控制层
DishController
创建相关的mapper和service层:
package com.itheima.reggie.mapper;

import com.baomidou.mybatisplus.core.mapper.BaseMapper;
import com.itheima.reggie.entity.DishFlavor;
import org.apache.ibatis.annotations.Mapper;

@Mapper
public interface DishFlavorMapper extends BaseMapper<DishFlavor> {
}
package com.itheima.reggie.service;

import com.baomidou.mybatisplus.extension.service.IService;
import com.itheima.reggie.entity.DishFlavor;

public interface DishFlavorService extends IService<DishFlavor>  {
}
package com.itheima.reggie.service.impl;

import com.baomidou.mybatisplus.extension.service.impl.ServiceImpl;
import com.itheima.reggie.entity.DishFlavor;
import com.itheima.reggie.mapper.DishFlavorMapper;
import com.itheima.reggie.service.DishFlavorService;
import org.springframework.stereotype.Service;

@Service
public class DishFlavorServiceImpl extends ServiceImpl<DishFlavorMapper, DishFlavor> implements DishFlavorService {
}
编写controller:
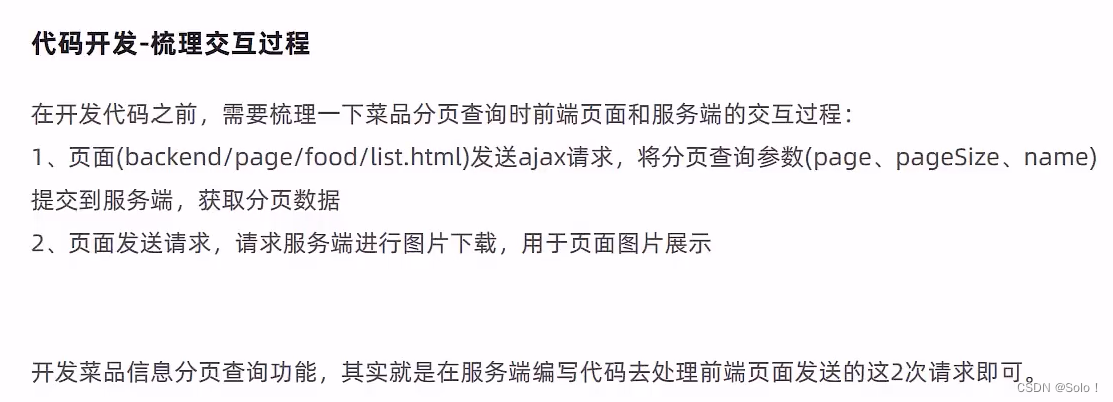
在开发代码之前,需要梳理-下新增菜品时前端页面和服务端的交互过程:
- 页面(
backend/page/food/add.html)发送ajax请求,请求服务端获取菜品分类数据并展示到下拉框中 - 页面发送请求进行图片上传,请求服务端将图片保存到服务器
- 页面发送请求进行图片下载,将上传的图片进行回显
- 点击保存按钮,发送ajax请求,将菜品相关数据以json形式提交到服务端
开发新增菜品功能,其实就是在服务端编写代码去处理前端页面发送的这4次请求即可
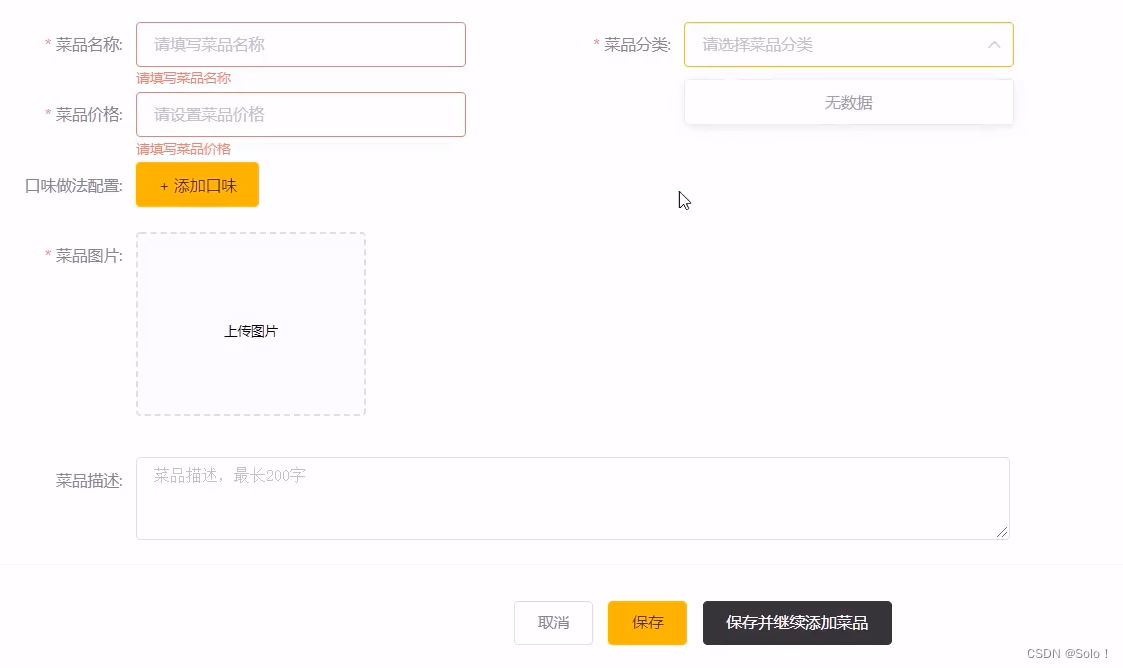
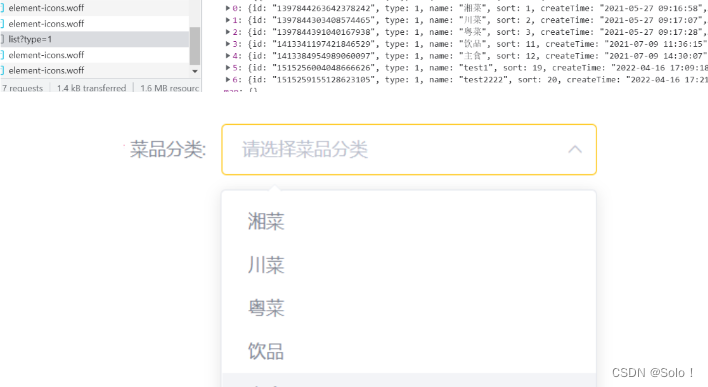
先获取和返回菜品分类列表; 前端主要的代码;
// 获取菜品分类列表
const getCategoryList = (params) => {
  return $axios({
    url: '/category/list',
    method: 'get',
    params
  })
}

if (res.code === 1) {
     this.dishList = res.data   //这里就相当于把所有的category对象的数据赋值给dishList
   }

这是菜品分类和数据双向绑定的前端代码:  我们返回的是一个集合,
</el-form-item>
          <el-form-item
            label="菜品分类:"
            prop="categoryId"
          >
            <el-select
              v-model="ruleForm.categoryId"
              placeholder="请选择菜品分类"
            >
              <el-option v-for="(item,index) in dishList" :key="index" :label="item.name" :value="item.id" />
            </el-select>
          </el-form-item>
这个的返回值和参数值 值得多思考一下; 这里之所以返回list集合,是因为这个要展示的数据是引用类型的数据集,集合可以存放任意类型的数据;
categorycontroller中的代码(下拉框代码的开发)
 /**
     * 根据条件查询分类数据
     * @param category
     * @return
     */
    @GetMapping("/list")
    //这个接口接收到参数其实就是一个前端传过来的type,这里之所以使用Category这个类来接受前端的数据,是为了以后方便
    //因为这个Category类里面包含了type这个数据,返回的数据多了,你自己用啥取啥就行
    private R<List<Category>> list(Category category){
        //条件构造器
        LambdaQueryWrapper<Category> queryWrapper = new LambdaQueryWrapper();
        //添加查询条件
        queryWrapper.eq(category.getType() != null,Category::getType,category.getType());
        //添加排序条件  使用两个排序条件,如果sort相同的情况下就使用更新时间进行排序
        queryWrapper.orderByAsc(Category::getSort).orderByDesc(Category::getUpdateTime);
        List<Category> list = categoryService.list(queryWrapper);

        return R.success(list);
    }
1.3 接收页面提交的数据🙇♂️(涉及两张表)
点击保存按钮的时候,把前端的json数据提交到后台,后台接收数据,对数据进行处理;要与两张表打交道,一个是dish一个是dish_flavor表;
先用前端页面向后端发一次请求,看看前端具体的请求是什么,我们好写controller;然后再看前端提交携带的参数是什么,我们好选择用什么类型的数据来接收!!!
这里传过来的参数比较复杂,所以这里有两种方式进行封装。
- 第一:创建与这些数据对应的实体类(dto)
dto全称为data transfer object即数据传输对象 一般用于展示层与服务层之间的数据传输
用于封装页面提交的数据
- 第二:使用map来接收;
创建一个dto的包 创建dto的类
package com.itheima.reggie.dto;
import com.itheima.reggie.entity.Dish;
import com.itheima.reggie.entity.DishFlavor;
import lombok.Data;
import java.util.ArrayList;
import java.util.List;
@Data
public class DishDto extends Dish {
private List<DishFlavor> flavors = new ArrayList<>();
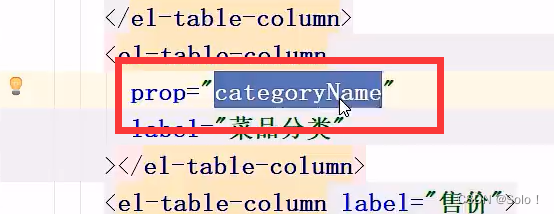
private String categoryName;
private Integer copies;
}
DTO,全称为Data Transfer Object, 即数据传输对象,一般用于展示层与服务层之间的数据传输。
这里我们选择使用第一种方式;
package com.itheima.reggie.dto;

import com.itheima.reggie.entity.Dish;
import com.itheima.reggie.entity.DishFlavor;
import lombok.Data;
import java.util.ArrayList;
import java.util.List;

@Data
public class DishDto extends Dish {

    private List<DishFlavor> flavors = new ArrayList<>();

    private String categoryName;  //后面要用的

    private Integer copies;  //后面要用的
}
前端关键代码:
<el-button
  type="primary"
  @click="submitForm('ruleForm')"
>
  保存
</el-button>

let params = {...this.ruleForm}
// params.flavors = this.dishFlavors
params.status = this.ruleForm ? 1 : 0
params.price *= 100   //存到数据库的时候是以分为单位,所以这里x100
params.categoryId = this.ruleForm.categoryId
params.flavors = this.dishFlavors.map(obj => ({ ...obj, value: JSON.stringify(obj.value) }))


if (this.actionType == 'add') {
     delete params.id
     addDish(params).then(res => {
     if (res.code === 1) {
     this.$message.success('菜品添加成功!')
     if (!st) {
     this.goBack()
      } else {   ....


// 新增接口
const addDish = (params) => {
  return $axios({
    url: '/dish',
    method: 'post',
    data: { ...params }
  })
}
后端代码:
在DishService中新增一个方法:
//新增菜品,同时插入菜品对应的口味数据,需要同时操作两张表:dish  dish_flavor
void saveWithFlavor(DishDto dishDto);
相关的实现:
@Autowired
private DishFlavorService dishFlavorService;
/**
 * 新增菜品同时保存对应的口味数据
 * @param dishDto
 */
@Override
@Transactional //涉及到对多张表的数据进行操作,需要加事务,需要事务生效,需要在启动类加上事务注解生效
public void saveWithFlavor(DishDto dishDto) {
    //保存菜品的基本信息到菜品表dish中
    this.save(dishDto);
    Long dishId = dishDto.getId();

    //为了把dishId  set进flavors表中
    //拿到菜品口味
    List<DishFlavor> flavors = dishDto.getFlavors();
    //这里对集合进行赋值 可以使用循环或者是stream流
    flavors = flavors.stream().map((item) ->{
        //拿到的这个item就是这个DishFlavor集合
        item.setDishId(dishId);
        return item; //记得把数据返回去
    }).collect(Collectors.toList()); //把返回的集合搜集起来,用来被接收

    //把菜品口味的数据到口味表 dish_flavor  注意dish_flavor只是封装了name value 并没有封装dishId(从前端传过来的数据发现的,然而数据库又需要这个数据)
    dishFlavorService.saveBatch(dishDto.getFlavors()); //这个方法是批量保存
}
在启动类开启事务: 加上这个注解就行 @EnableTransactionManagement
controller 层的代码:8888888888888888888888888888888888888888888888888888888888888888888888888888888888888888888888888888888
package com.itheima.reggie.controller;

import com.itheima.reggie.common.R;
import com.itheima.reggie.dto.DishDto;
import com.itheima.reggie.service.DishService;
import lombok.extern.slf4j.Slf4j;
import org.springframework.beans.factory.annotation.Autowired;
import org.springframework.web.bind.annotation.PostMapping;
import org.springframework.web.bind.annotation.RequestBody;
import org.springframework.web.bind.annotation.RequestMapping;
import org.springframework.web.bind.annotation.RestController;

@RestController
@RequestMapping("/dish")
@Slf4j
public class DishController {

    @Autowired
    private DishService dishService;

    /**
     * 新增菜品
     * @param dishDto
     * @return
     */
    @PostMapping
    public R<String> save(@RequestBody DishDto dishDto){ //前端提交的是json数据的话,我们在后端就要使用这个注解来接收参数,否则接收到的数据全是null
        dishService.saveWithFlavor(dishDto);
        return R.success("新增菜品成功");
    }
}
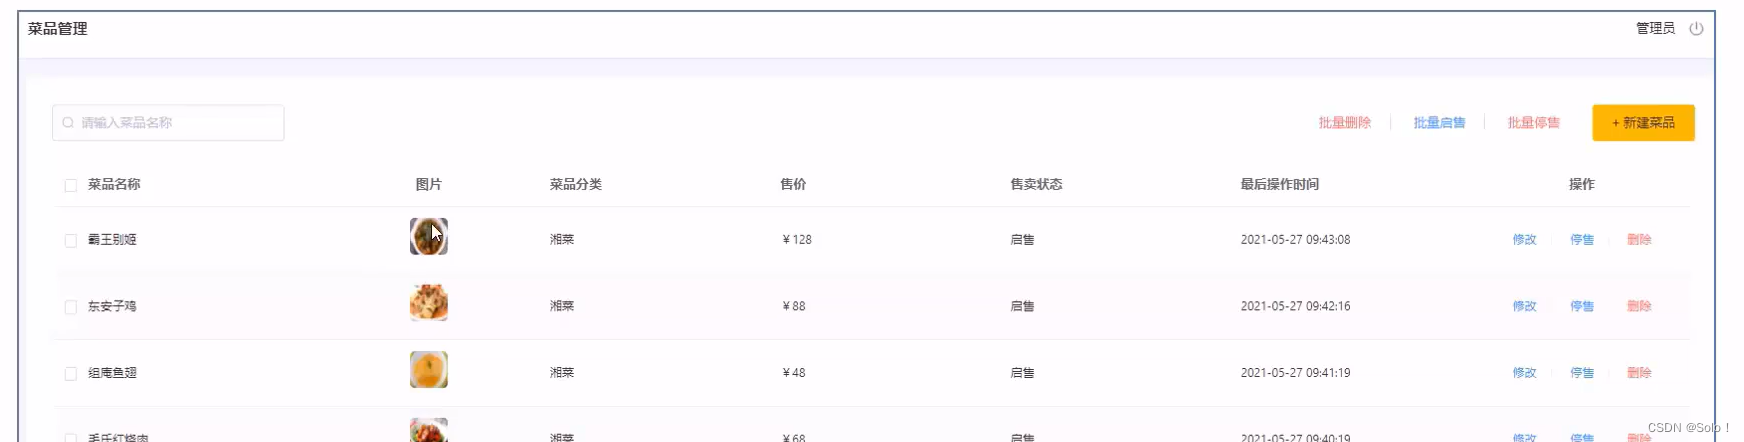
1.4 菜品信息分页查询
需求分析:
系统中的菜品数据很多的时候,如果在一个页面中全部展示出来会显得比较乱,不便于查看,所以一般的系统中都会以分页的方式来展示列表数据。
图片下载的请求前面已经写好了,前端也写好了相关的请求,所以第二步的图片下载和展示就不需要我们管了;
代码编写:
controller层的代码:不过这里是有bug的,后面会改善;
/**
* 菜品信息分页查询
* @param page
* @param pageSize
* @param name
* @return
*/
@GetMapping("/page")
public R<Page> page(int page,int pageSize,String name){
//构造一个分页构造器对象
Page<Dish> dishPage = new Page<>(page,pageSize);
//构造一个条件构造器
LambdaQueryWrapper<Dish> queryWrapper = new LambdaQueryWrapper<>();
//添加过滤条件 注意判断是否为空 使用对name的模糊查询
queryWrapper.like(name != null,Dish::getName,name);
//添加排序条件 根据更新时间降序排
queryWrapper.orderByDesc(Dish::getUpdateTime);
//去数据库处理分页 和 查询
dishService.page(dishPage,queryWrapper);
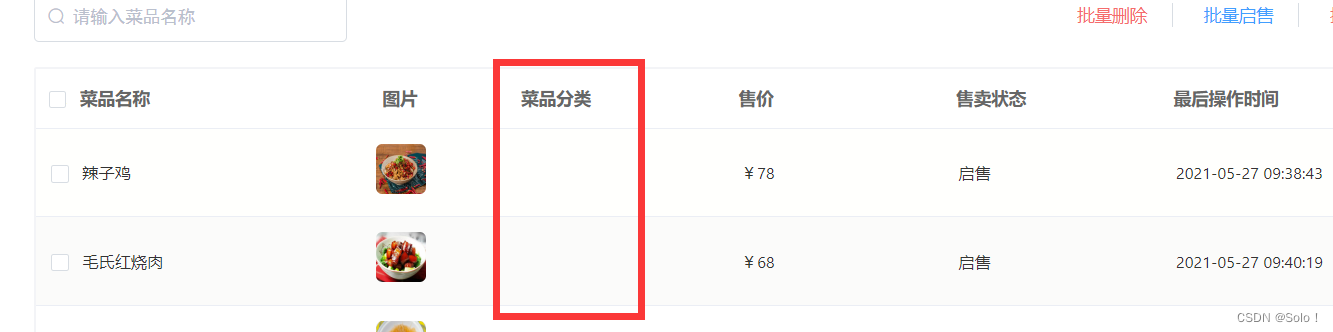
//因为上面处理的数据没有分类的id,这样直接返回R.success(dishPage)虽然不会报错,但是前端展示的时候这个菜品分类这一数据就为空
return R.success(dishPage);
}
功能完善:引入了DishDto
package com.itheima.reggie.dto;

import com.itheima.reggie.entity.Dish;
import com.itheima.reggie.entity.DishFlavor;
import lombok.Data;
import java.util.ArrayList;
import java.util.List;

@Data
public class DishDto extends Dish {

    private List<DishFlavor> flavors = new ArrayList<>();

    private String categoryName;

    private Integer copies; //后面用的
}
/**
* 菜品信息分页查询
* @param page
* @param pageSize
* @param name
* @return
*/
@GetMapping("/page")
public R<Page> page(int page,int pageSize,String name){
//构造一个分页构造器对象
Page<Dish> dishPage = new Page<>(page,pageSize);
Page<DishDto> dishDtoPage = new Page<>(page,pageSize);
//上面对dish泛型的数据已经赋值了,这里对DishDto我们可以把之前的数据拷贝过来进行赋值
//构造一个条件构造器
LambdaQueryWrapper<Dish> queryWrapper = new LambdaQueryWrapper<>();
//添加过滤条件 注意判断是否为空 使用对name的模糊查询
queryWrapper.like(name != null,Dish::getName,name);
//添加排序条件 根据更新时间降序排
queryWrapper.orderByDesc(Dish::getUpdateTime);
//去数据库处理分页 和 查询
dishService.page(dishPage,queryWrapper);
//获取到dish的所有数据 records属性是分页插件中表示分页中所有的数据的一个集合
List<Dish> records = dishPage.getRecords();
List<DishDto> list = records.stream().map((item) ->{
//对实体类DishDto进行categoryName的设值
DishDto dishDto = new DishDto();
//这里的item相当于Dish 对dishDto进行除categoryName属性的拷贝
BeanUtils.copyProperties(item,dishDto);
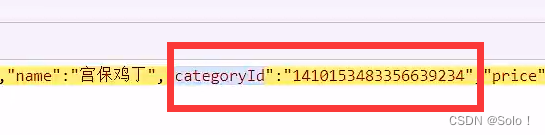
//获取分类的id
Long categoryId = item.getCategoryId();
//通过分类id获取分类对象
Category category = categoryService.getById(categoryId);
if ( category != null){
//设置实体类DishDto的categoryName属性值
String categoryName = category.getName();
dishDto.setCategoryName(categoryName);
}
return dishDto;
}).collect(Collectors.toList());
//对象拷贝 使用框架自带的工具类,第三个参数是不拷贝到属性
BeanUtils.copyProperties(dishPage,dishDtoPage,"records");
dishDtoPage.setRecords(list);
//因为上面处理的数据没有分类的id,这样直接返回R.success(dishPage)虽然不会报错,但是前端展示的时候这个菜品分类这一数据就为空
//所以进行了上面的一系列操作
return R.success(dishDtoPage);
}
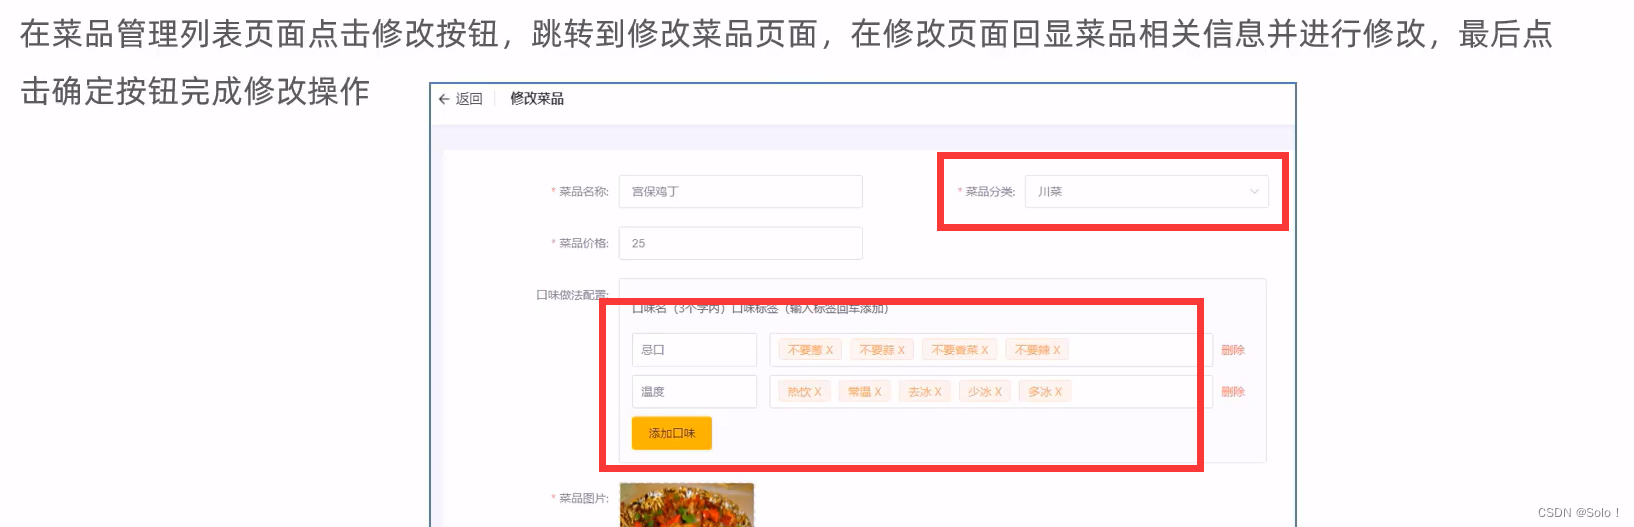
1.5 修改菜品🙇♂️(回显和保存修改都是两张表)
需求分析:
代码开发:
在开发代码之前,需要梳理一下修改菜品时前端页面(add.html) 和服务端的交互过程:
- 页面发送ajax请求,请求服务端获取分类数据,用于菜品分类下拉框中数据展示
- 页面发送ajax请求,请求服务端,根据id查询当前菜品信息,用于菜品信息回显
- 页面发送请求,请求服务端进行图片下载,用于页图片回显
- 点击保存按钮,页面发送ajax请求,将修改后的菜品相关数据以json形式提交到服务端开发修改菜品功能,其实就是在服务端编写代码去处理前端页面发送的这4次请求即可。
第一次交互的后端代码已经完成了;菜品分类的信息前面做新增菜品的时候就已经完成了,这里前端发一个相关接口的请求就行;
第三次交互,图片的下载前面也已经写了,所以前端直接发生请求就行;
1.5.1 菜品信息的回显
在service添加自己要实现的方法:
//根据id来查询菜品信息和对应的口味信息
DishDto getByIdWithFlavor(Long id);
方法的 实现:
	@Autowired
    private DishFlavorService dishFlavorService;
/**
 * 根据id来查询菜品信息和对应的口味信息
 * @param id
 * @return
 */
@Override
public DishDto getByIdWithFlavor(Long id) {
    //查询菜品的基本信息  从dish表查询
    Dish dish = this.getById(id);

    //查询当前菜品对应的口味信息,从dish_flavor查询  条件查询
    LambdaQueryWrapper<DishFlavor> queryWrapper = new LambdaQueryWrapper<>();
    queryWrapper.eq(DishFlavor::getDishId,dish.getId());
    List<DishFlavor> flavors = dishFlavorService.list(queryWrapper);

    //然后把查询出来的flavors数据set进行 DishDto对象
    DishDto dishDto = new DishDto();
    //把dish表中的基本信息copy到dishDto对象,因为才创建的dishDto里面的属性全是空
    BeanUtils.copyProperties(dish,dishDto);
    dishDto.setFlavors(flavors);

    return dishDto;
}
controller 层的编写:
/**
 * 根据id来查询菜品信息和对应的口味信息
 * @param id
 * @return
 */
@GetMapping("/{id}")
public R<DishDto> get(@PathVariable Long id){  //这里返回什么数据是要看前端需要什么数据,不能直接想当然的就返回Dish对象
    DishDto dishDto = dishService.getByIdWithFlavor(id);
    return R.success(dishDto);
}
1.5.2 保存修改🙇♂️
保存修改设计两张表的数据的修改:
DishService中添加自己实现的方法:
//更新菜品信息同时还更新对应的口味信息
void updateWithFlavor(DishDto dishDto);
相关的实现
   @Override
    @Transactional
    public void updateWithFlavor(DishDto dishDto) {
        //更新dish表的基本信息  因为这里的dishDto是dish的子类
        this.updateById(dishDto);

        //更新口味信息---》先清理再重新插入口味信息
        //清理当前菜品对应口味数据---dish_flavor表的delete操作
        LambdaQueryWrapper<DishFlavor> queryWrapper = new LambdaQueryWrapper();
        queryWrapper.eq(DishFlavor::getDishId,dishDto.getId());
        dishFlavorService.remove(queryWrapper);

        //添加当前提交过来的口味数据---dish_flavor表的insert操作
        List<DishFlavor> flavors = dishDto.getFlavors();

        //下面这段流的代码我注释,然后测试,发现一次是报dishId没有默认值(先测),两次可以得到结果(后测,重新编译过,清除缓存过),相隔半个小时
        //因为这里拿到的flavorsz只有name和value(这是在设计数据封装的问题),不过debug测试的时候发现有时候可以拿到全部数据,有时候又不可以...  所以还是加上吧。。。。。
        flavors = flavors.stream().map((item) -> {
            item.setDishId(dishDto.getId());
            return item;
        }).collect(Collectors.toList());

        dishFlavorService.saveBatch(flavors);

    }
1.6 需要自己单独实现的功能
1.6.1 菜品启售和停售
前端发过来的请求(使用的是post方式):
http://localhost:8080/dish/status/1?ids=1516568538387079169
后端接受的请求:
@PostMapping("/status/{status}")
public R<String> status(@PathVariable("status") Integer status,Long ids){
    log.info("status:{}",status);
    log.info("ids:{}",ids);
    return null;
}
接收到前端参数后,开始补全controller层代码:在DishController中添加下面的接口代码;
/**
 * 对菜品进行停售或者是起售
 * @return
 */
@PostMapping("/status/{status}")
public R<String> status(@PathVariable("status") Integer status,Long ids){
    log.info("status:{}",status);
    log.info("ids:{}",ids);
    Dish dish = dishService.getById(ids);
    if (dish != null){
        dish.setStatus(status);
        dishService.updateById(dish);
        return R.success("开始启售");
    }
    return R.error("售卖状态设置异常");
}
1.6.2 菜品批量启售和批量停售
把上面对单个菜品的售卖状态的方法进行修改;
/**
 * 对菜品批量或者是单个 进行停售或者是起售
 * @return
 */
@PostMapping("/status/{status}")
//这个参数这里一定记得加注解才能获取到参数,否则这里非常容易出问题
public R<String> status(@PathVariable("status") Integer status,@RequestParam List<Long> ids){
    //log.info("status:{}",status);
    //log.info("ids:{}",ids);
    LambdaQueryWrapper<Dish> queryWrapper = new LambdaQueryWrapper();
    queryWrapper.in(ids !=null,Dish::getId,ids);
    //根据数据进行批量查询
    List<Dish> list = dishService.list(queryWrapper);

    for (Dish dish : list) {
        if (dish != null){
            dish.setStatus(status);
            dishService.updateById(dish);
        }
    }
    return R.success("售卖状态修改成功");
}
注意:controller层的代码是不可以直接写业务的,建议把它抽离到service层,controller调用一下service的方法就行;下面的批量删除功能是抽离的,controller没有写业务代码;
1.6.3 菜品的批量删除
前端发来的请求:

在DishController中添加接口:
在DishFlavor实体类中,在private Integer isDeleted;字段上加上@TableLogic注解,表示删除是逻辑删除,由mybatis-plus提供的;
/**
 * 套餐批量删除和单个删除
 * @return
 */
@DeleteMapping
public R<String> delete(@RequestParam("ids") List<Long> ids){
        //删除菜品  这里的删除是逻辑删除
        dishService.deleteByIds(ids);
        //删除菜品对应的口味  也是逻辑删除
        LambdaQueryWrapper<DishFlavor> queryWrapper = new LambdaQueryWrapper<>();
        queryWrapper.in(DishFlavor::getDishId,ids);
        dishFlavorService.remove(queryWrapper);
        return R.success("菜品删除成功");
}
DishServicez中添加相关的方法:
//根据传过来的id批量或者是单个的删除菜品
void deleteByIds(List<Long> ids);
在实现类实现该方法:
/**
 *套餐批量删除和单个删除
 * @param ids
 */
@Override
@Transactional
public void deleteByIds(List<Long> ids) {

    //构造条件查询器
    LambdaQueryWrapper<Dish> queryWrapper = new LambdaQueryWrapper<>();
    //先查询该菜品是否在售卖,如果是则抛出业务异常
    queryWrapper.in(ids!=null,Dish::getId,ids);
    List<Dish> list = this.list(queryWrapper);
    for (Dish dish : list) {
        Integer status = dish.getStatus();
        //如果不是在售卖,则可以删除
        if (status == 0){
            this.removeById(dish.getId());
        }else {
            //此时应该回滚,因为可能前面的删除了,但是后面的是正在售卖
            throw new CustomException("删除菜品中有正在售卖菜品,无法全部删除");
        }
    }

}
功能测试:单个删除,批量删除,批量删除中有启售的…
测试成功!
1.6.4 菜品删除逻辑优化
上面写的菜品的删除功能有点小简单,下面完善一下相关的逻辑;
相关的service的注入,这里就不列举出来了,代码中使用了哪个service,你就autowire就行;
下面的代码可能会有点冗余,这里我就不进行抽离了;
    /**
     * 菜品批量删除和单个删除
     * 1.判断要删除的菜品在不在售卖的套餐中,如果在那不能删除
     * 2.要先判断要删除的菜品是否在售卖,如果在售卖也不能删除
     * @return
     */

    //遇到一个小问题,添加菜品后,然后再添加套餐,但是套餐可选择添加的菜品选项是没有刚刚添加的菜品的?
    //原因:redis存储的数据没有过期,不知道为什么redis没有重新刷新缓存
    // (与DishController中的@GetMapping("/list")中的缓存设置有关,目前不知道咋配置刷新缓存。。。。。
    // 解决方案,把redis中的数据手动的重新加载一遍,或者是等待缓存过期后再添加相关的套餐,或者改造成使用spring catch
    @DeleteMapping
    public R<String> delete(@RequestParam("ids") List<Long> ids){
        //根据菜品id在stemeal_dish表中查出哪些套餐包含该菜品
        LambdaQueryWrapper<SetmealDish> setmealDishLambdaQueryWrapper = new LambdaQueryWrapper<>();
        setmealDishLambdaQueryWrapper.in(SetmealDish::getDishId,ids);
        List<SetmealDish> SetmealDishList = setmealDishService.list(setmealDishLambdaQueryWrapper);
        //如果菜品没有关联套餐,直接删除就行  其实下面这个逻辑可以抽离出来,这里我就不抽离了
        if (SetmealDishList.size() == 0){
            //这个deleteByIds中已经做了菜品起售不能删除的判断力
            dishService.deleteByIds(ids);
            LambdaQueryWrapper<DishFlavor> queryWrapper = new LambdaQueryWrapper<>();
            queryWrapper.in(DishFlavor::getDishId,ids);
            dishFlavorService.remove(queryWrapper);
            return R.success("菜品删除成功");
        }

        //如果菜品有关联套餐,并且该套餐正在售卖,那么不能删除
        //得到与删除菜品关联的套餐id
        ArrayList<Long> Setmeal_idList = new ArrayList<>();
        for (SetmealDish setmealDish : SetmealDishList) {
            Long setmealId = setmealDish.getSetmealId();
            Setmeal_idList.add(setmealId);
        }
        //查询出与删除菜品相关联的套餐
        LambdaQueryWrapper<Setmeal> setmealLambdaQueryWrapper = new LambdaQueryWrapper<>();
        setmealLambdaQueryWrapper.in(Setmeal::getId,Setmeal_idList);
        List<Setmeal> setmealList = setmealService.list(setmealLambdaQueryWrapper);
        //对拿到的所有套餐进行遍历,然后拿到套餐的售卖状态,如果有套餐正在售卖那么删除失败
        for (Setmeal setmeal : setmealList) {
            Integer status = setmeal.getStatus();
            if (status == 1){
                return R.error("删除的菜品中有关联在售套餐,删除失败!");
            }
        }

        //要删除的菜品关联的套餐没有在售,可以删除
        //这下面的代码并不一定会执行,因为如果前面的for循环中出现status == 1,那么下面的代码就不会再执行
        dishService.deleteByIds(ids);
        LambdaQueryWrapper<DishFlavor> queryWrapper = new LambdaQueryWrapper<>();
        queryWrapper.in(DishFlavor::getDishId,ids);
        dishFlavorService.remove(queryWrapper);
        return R.success("菜品删除成功");
    }
套餐管理业务开发


 4万+
4万+

 被折叠的 条评论
为什么被折叠?
被折叠的 条评论
为什么被折叠?
 到【灌水乐园】发言


