


设计模式 - 组合模式与访问者模式
说明:文章内容都是来源于b站河北王校长书籍-《贯穿设计模式》,感兴趣朋友可以了解一下
前置文章:
桥接模式-适配器模式
六大原则
介绍
组合模式通常是与访问者模式一起使用,在处理树形结构数据时会,会展现出独特的奇效。组合模式注重树形结构数据的包装,访问者模式注重对不同层次数据的操作(添加、删除等)。除此之外,两者还有一个很大的相似点:两者的UML类图有部分的重叠,具体的可以看接下来的内容。
本期将实现从建表开始到控制层的完整流程,所有代码均为本人验证过且正确的代码,一起来学习吧。
技术栈
- springboot
- mybatis-plus
- redis
- 自动生成代码教学
实战内容
随着应用的广泛普及,用户数量越来越多,需要展示给用户的商品类型也越来越多,商品的类目层级越来越深。业务部门需要经常对类目进行调整,增加商品。由于商品层级为树形结构,因此通过组合模式与访问者模式结合的方式来实现。
准备
第一步:首先需要建表
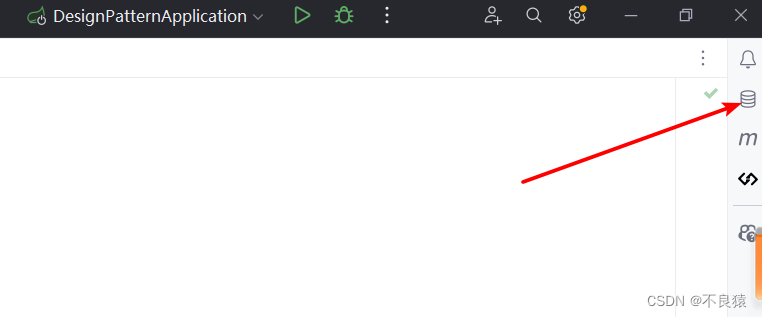
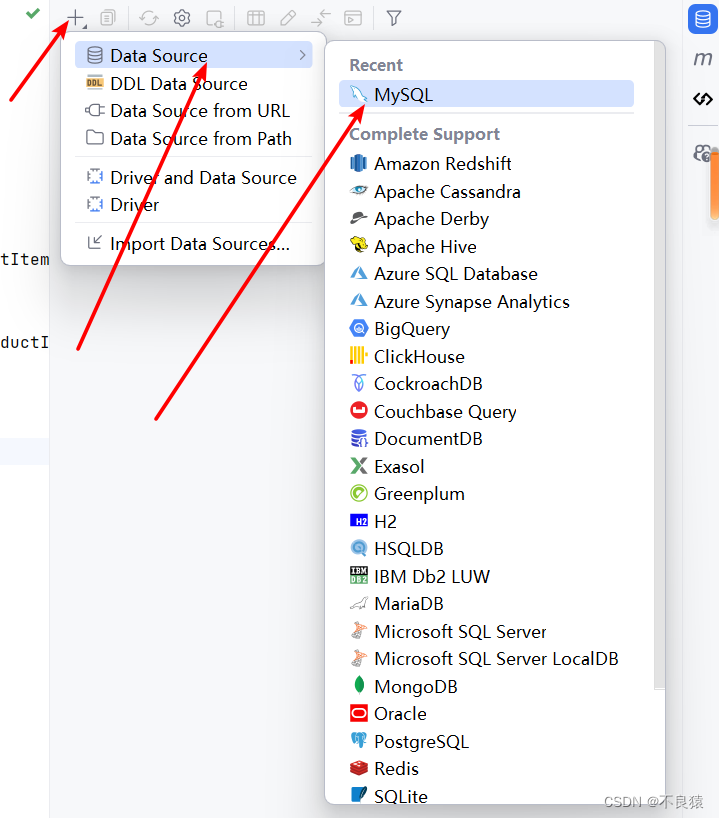
首先,通过idea自带的数据库服务,连接到自己本地的数据库
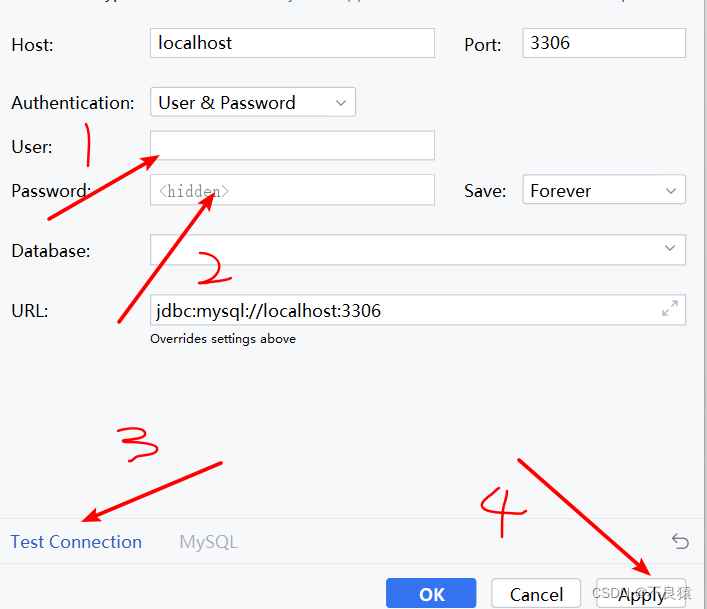
连接成功后,可以在idea上直接运行下面的SQL语句,执行建表语句,即可成功建表。
SET NAMES utf8mb4;
SET FOREIGN_KEY_CHECKS = 0;

-- ----------------------------
-- Table structure for product_item
-- ----------------------------
DROP TABLE IF EXISTS `product_item`;
CREATE TABLE `product_item`  (
  `id` int NOT NULL AUTO_INCREMENT COMMENT '主键',
  `name` varchar(8) CHARACTER SET utf8mb4 COLLATE utf8mb4_0900_ai_ci NOT NULL COMMENT '商品名称',
  `pid` int NOT NULL COMMENT '商品父ID',
  PRIMARY KEY (`id`) USING BTREE
) ENGINE = InnoDB CHARACTER SET = utf8mb4 COLLATE = utf8mb4_0900_ai_ci COMMENT = '商品类目表' ROW_FORMAT = Dynamic;

SET FOREIGN_KEY_CHECKS = 1;
第二步:通过mybatis-plus自动生成代码
通过 mybatis-plus 可以自动生成增删改查等代码,具体操作如下:
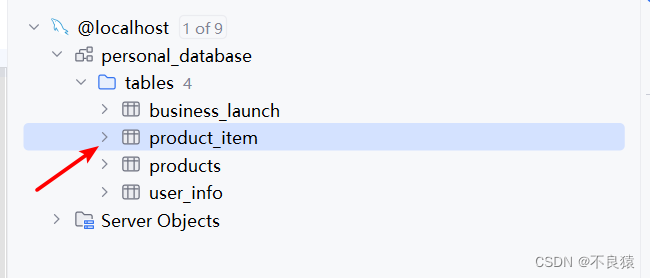
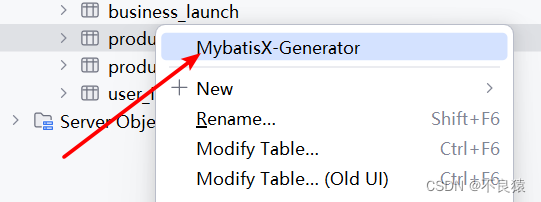
首先在idea上找到已经建好的表,然后右键选择mybatisX-Generator
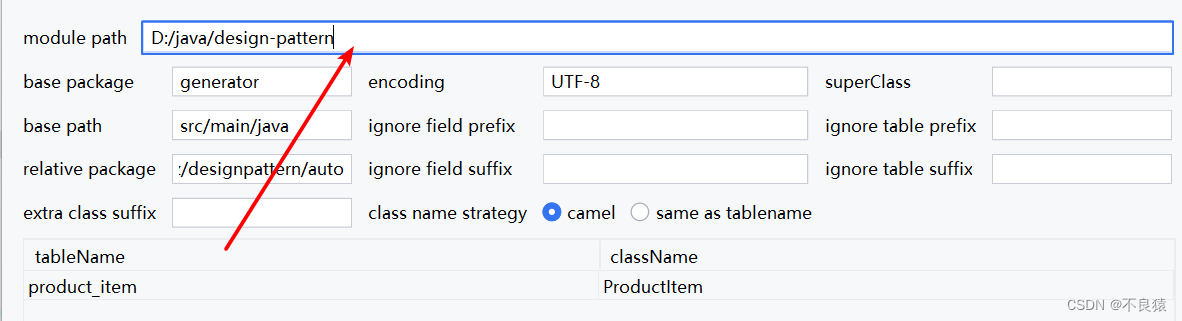
module path 选择你当前项目即可,生成的代码在generator目录下
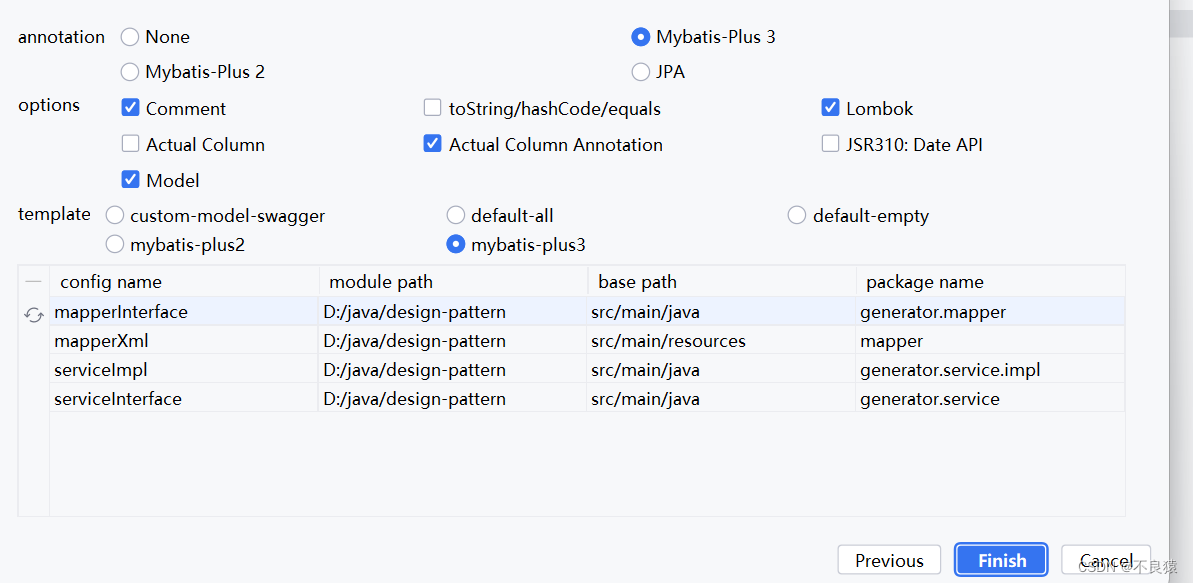
然后点击下一步,选择图中的即可,点击finish即可完成自动生成代码
打开generator目录即可看到代码:
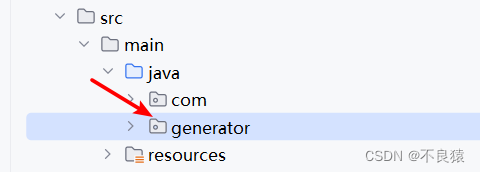
将代码放到你自己项目中对应的地方即可。
redis 准备
项目中需要对商品类目进行缓存,以降低数据库压力,因此要引入redis
第一步:引入依赖
<dependency>
    <groupId>org.springframework.boot</groupId>
    <artifactId>spring-boot-starter-data-redis</artifactId>
</dependency>
第二步:增加redis相关配置
spring:
  redis:
    host: localhost
    port: 6379
第三步:增加RedisConfig配置类
package com.hitsz.designpattern.conf;

import com.fasterxml.jackson.annotation.JsonAutoDetect;
import com.fasterxml.jackson.annotation.PropertyAccessor;
import com.fasterxml.jackson.databind.ObjectMapper;
import org.springframework.context.annotation.Bean;
import org.springframework.context.annotation.Configuration;
import org.springframework.data.redis.connection.RedisConnectionFactory;
import org.springframework.data.redis.core.RedisTemplate;
import org.springframework.data.redis.serializer.Jackson2JsonRedisSerializer;
import org.springframework.data.redis.serializer.StringRedisSerializer;

@Configuration
public class RedisConfig {

    @Bean
    public RedisTemplate<String, Object> redisTemplate(RedisConnectionFactory redisConnectionFactory){
        RedisTemplate<String, Object> redisTemplate = new RedisTemplate<>();
        // 设置链接
        redisTemplate.setConnectionFactory(redisConnectionFactory);
        // 设置自定义序列化方式
        setSerializeConfig(redisTemplate, redisConnectionFactory);
        return redisTemplate;
    }
    private void setSerializeConfig(RedisTemplate<String, Object> redisTemplate, RedisConnectionFactory redisConnectionFactory){
        // 普通key和hashKey 采用StringRedisSerialize进行序列化
        StringRedisSerializer stringSerializer = new StringRedisSerializer();
        redisTemplate.setKeySerializer(stringSerializer);
        redisTemplate.setHashKeySerializer(stringSerializer);
        // 解决 查询缓存转换异常的问题、
        Jackson2JsonRedisSerializer<?> redisSerializer = new Jackson2JsonRedisSerializer<Object>(Object.class);
        ObjectMapper objectMapper = new ObjectMapper();
        objectMapper.setVisibility(PropertyAccessor.ALL, JsonAutoDetect.Visibility.ANY);
        objectMapper.enableDefaultTyping(ObjectMapper.DefaultTyping.NON_FINAL);
        redisSerializer.setObjectMapper(objectMapper);

        // 普通Value和hash类型的value采用jackson方式进行序列化
        redisTemplate.setValueSerializer(redisSerializer);
        redisTemplate.setHashValueSerializer(redisSerializer);
        redisTemplate.afterPropertiesSet();
    }
}
第四步: 增加Redis工具类
package com.hitsz.designpattern.util;

import org.springframework.beans.factory.annotation.Autowired;
import org.springframework.data.redis.core.RedisTemplate;
import org.springframework.stereotype.Component;

import java.util.concurrent.TimeUnit;

@Component
public class RedisCommonProcessor {

    @Autowired
    private RedisTemplate redisTemplate;

    // 通过key获取value
    public Object get(String key){
        if(key == null){
            throw new UnsupportedOperationException("Redis key could not be null");
        }
        return redisTemplate.opsForValue().get(key);
    }

    // 向redis中存入key: value 数据对
    public void set(String key, Object value){
        redisTemplate.opsForValue().set(key, value);
    }
    // 向redis中存入key:value数据对,并支持过期时间
    public void set(String key, Object value, Long time){
        if(time > 0){
            redisTemplate.opsForValue().set(key, value, time, TimeUnit.SECONDS);
        }else{
            set(key, value);
        }
    }

    // 从redis中删除元素
    public void remove(String key){
        if(key == null){
            throw new UnsupportedOperationException(" key 不能为空");
        }
        redisTemplate.delete(key);
    }
}
组合模式
介绍
链接: 组合模式
组合模式旨在将对象组合成树形结构以表示“部分-整体”的层次结构。类似于二叉树的结构
UML类图

Client:客户端
Component:抽象角色,所有的树形结构的叶子节点和非叶子节点都需要继承该角色
Composite:树枝构建角色,每个构建角色都有下属节点,通过下属节点构建出局部的树形结构
步骤
第一步: 创建抽象component
需要创建一个抽象component组件,其中定义了所有节点都需要具备的行为,这里创建的是AbstractProductItem
package com.hitsz.designpattern.composite;

/**
 * 定义了所有节点都需要具备的行为
 */
public abstract class AbstractProductItem {

    public void addProductItem(AbstractProductItem productItem){
        throw new UnsupportedOperationException();
    }

    public void deleteProductItem(AbstractProductItem productItem){
        throw new UnsupportedOperationException();
    }
}
第二步:创建抽象component的实现类,composite树枝构件
需要继承上一步创建的抽象类,实现里面的抽象方法
package com.hitsz.designpattern.composite;

import lombok.*;

import java.util.ArrayList;
import java.util.Iterator;
import java.util.List;

@Data
@AllArgsConstructor
@ToString
@EqualsAndHashCode
@Builder
public class ProductItemComposite extends AbstractProductItem{

    public int id;
    public String name;
    public int pid;

    public List<AbstractProductItem> children = new ArrayList<>();

    @Override
    public void addProductItem(AbstractProductItem productItem) {
        this.children.add(productItem);
    }

    @Override
    public void deleteProductItem(AbstractProductItem productItem) {
        ProductItemComposite productItemComposite = (ProductItemComposite) productItem;
        Iterator<AbstractProductItem> iterator = children.iterator();
        // 遍历当前节点的孩子节点,直到找到需要删除的那个孩子
        while(iterator.hasNext()){
            ProductItemComposite curProductItem = (ProductItemComposite) iterator.next();
            if(curProductItem.getId() == productItemComposite.getId()){
                iterator.remove();
                break;
            }
        }
    }
}
这里说明一下:类上面使用的注解均为lombok注解,实际开发中使用非常频繁,可以简化代码。
composite中的children属性中保存的是当前商品类目下的所有商品,比如:当前商品类目为教育,那么children中保存的可能是:书籍,文具,书包等等。
第三步:创建持久层和逻辑层
持久层是自动生成的代码,逻辑层代码如下(逻辑层代码实际上由mybatis-plus自动的,但是由于时间久了,我也不记得当时是出于什么原因自己写了一个service,实际上你完全可以使用mybatis-plus自动生成的service代码):
package com.hitsz.designpattern.composite;

import com.baomidou.mybatisplus.core.conditions.query.LambdaQueryWrapper;
import com.hitsz.designpattern.mapper.ProductItemMapper;
import com.hitsz.designpattern.pojo.entity.ProductItem;
import com.hitsz.designpattern.util.RedisCommonProcessor;
import com.hitsz.designpattern.visitor.AddProductItem;
import com.hitsz.designpattern.visitor.DeleteProductItem;
import org.springframework.beans.factory.annotation.Autowired;
import org.springframework.stereotype.Service;
import org.springframework.transaction.annotation.Transactional;

import java.util.ArrayList;
import java.util.List;
import java.util.Map;
import java.util.stream.Collectors;

@Service
@Transactional
public class ProductItemService {

    @Autowired
    private ProductItemMapper productItemMapper;

    @Autowired
    private RedisCommonProcessor redis;

    @Autowired
    private AddProductItem addProductItem;

    @Autowired
    private DeleteProductItem deleteProductItem;

    public ProductItemComposite findAllItems(){
        // 先从redis缓存中查找
        Object cacheItems = redis.get("item");
        if (cacheItems != null) {
            // 缓存中有则直接返回
            return (ProductItemComposite) cacheItems;
        }
        // 缓存中没有则从数据库中查找
        List<ProductItem> productItems = productItemMapper.selectAll();
        ProductItemComposite productItemComposite = generateProductTree(productItems);
        if(productItemComposite == null){
            throw new UnsupportedOperationException("Product items should not be empty in DB");
        }
        // 存入redis
        redis.set("item", productItemComposite);
        return productItemComposite;
    }

    /**
     *  将商品信息组成树状信息
     * @param productItems
     * @return
     */
    private ProductItemComposite generateProductTree(List<ProductItem> productItems) {
        List<ProductItemComposite> productItemComposites = new ArrayList<>(productItems.size());
        productItems.forEach(item -> {
            productItemComposites.add(ProductItemComposite.builder()
                    .id(item.getId())
                    .name(item.getName())
                    .pid(item.getPid())
                    .build());
        });
        // 将所有商品按pid分组,方便树状结构的生成
        Map<Integer, List<ProductItemComposite>> groupingList = productItemComposites.stream()
                .collect(Collectors.groupingBy(ProductItemComposite::getPid));
        // 找出自己的孩子
        productItemComposites.stream().forEach(item -> {
            List<ProductItemComposite> list = groupingList.get(item.getId());
            item.setChildren(list == null ? new ArrayList<>() : list.stream().map(x -> (AbstractProductItem)x).collect(Collectors.toList()));
        });
        ProductItemComposite composite = productItemComposites.size() == 0 ? null : productItemComposites.get(0);
        return composite;
    }
}
第四步:创建控制层
@RestController
@RequestMapping("/product")
public class CompositeController {
	@Autowired
    private ProductItemService productItemService;

    @GetMapping("/all")
    public ProductItemComposite getAllProduct(){
        return productItemService.findAllItems();
    }
}
你可以自己在表里插入数据后,自行测试一下,是否能成功获取到商品信息。
我自己表里的数据如图:

我这里访问的结果是:
{
    "id": 1,
    "name": "商城",
    "pid": 0,
    "children": [
        {
            "id": 2,
            "name": "电脑",
            "pid": 1,
            "children": [
                {
                    "id": 4,
                    "name": "台式电脑",
                    "pid": 2,
                    "children": [
                        {
                            "id": 6,
                            "name": "游戏电脑",
                            "pid": 4,
                            "children": []
                        },
                        {
                            "id": 7,
                            "name": "办公电脑",
                            "pid": 4,
                            "children": []
                        }
                    ]
                },
                {
                    "id": 5,
                    "name": "笔记本电脑",
                    "pid": 2,
                    "children": []
                }
            ]
        },
        {
            "id": 3,
            "name": "书籍",
            "pid": 1,
            "children": [
                {
                    "id": 8,
                    "name": "教育类",
                    "pid": 3,
                    "children": [
                        {
                            "id": 10,
                            "name": "九年业务教育书籍",
                            "pid": 8,
                            "children": []
                        },
                        {
                            "id": 27,
                            "name": "材科基",
                            "pid": 8,
                            "children": []
                        }
                    ]
                },
                {
                    "id": 9,
                    "name": "科普类",
                    "pid": 3,
                    "children": []
                }
            ]
        }
    ]
}
访问者模式
链接:访问者模式
介绍
访问者模式将数据与结构分离,通过访问者模式可以对组合对象进行操作(增加或者减少)。
UML类图
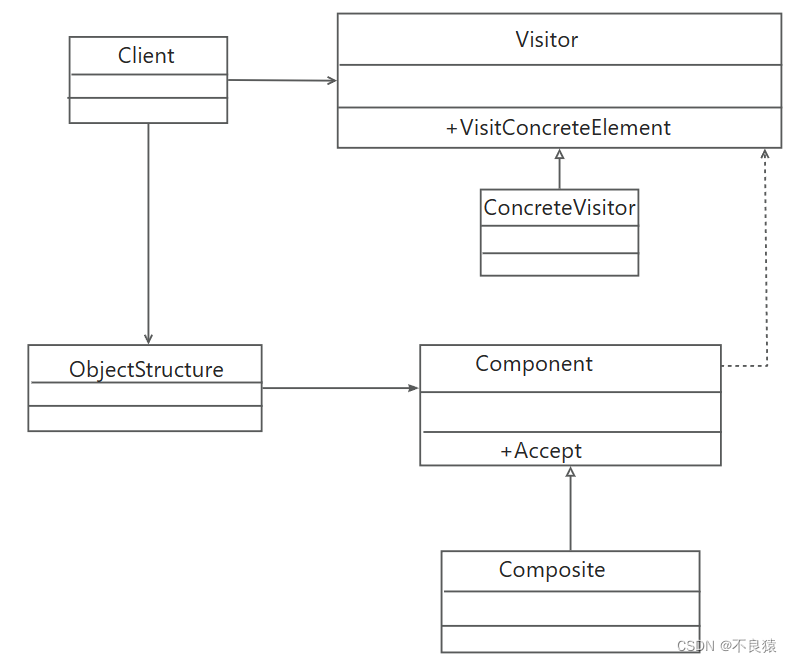
Visitor: 抽象访问者,定义访问者能够访问的数据类型
ConcreteVisitor: 具体访问者,对于具体访问者,需要定义的是商品类目增加的具体访问者和删除的具体访问者。
ObjectStructure:数据提供者,client首先通过ObjectStructure获取数据,然后调用visitor对数据进行访问操作
component:被访问者抽象角色,同“组合模式”中的抽象角色
composite:被访问者具体角色,同组合模式中的树枝角色
步骤
第一步:创建visitor接口
package com.hitsz.designpattern.visitor;

import com.hitsz.designpattern.composite.AbstractProductItem;

// 这里使用泛型,具有良好的扩展性
public interface ItemVisitor<T> {

    T visitor(AbstractProductItem productItem);
}
第二步:创建具体的访问者
删除商品的访问者:
package com.hitsz.designpattern.visitor;

import com.hitsz.designpattern.composite.AbstractProductItem;
import com.hitsz.designpattern.composite.ProductItemComposite;
import com.hitsz.designpattern.util.RedisCommonProcessor;
import org.springframework.beans.factory.annotation.Autowired;
import org.springframework.stereotype.Component;

/**
 * @author badboy
 * @version 1.0
 * Create by 2023/11/19 19:50
 */
@Component
public class DeleteProductItem implements ItemVisitor<AbstractProductItem>{

    @Autowired
    private RedisCommonProcessor redisCommonProcessor;

    @Override
    public AbstractProductItem visitor(AbstractProductItem productItem) {
        // 从Redis中拿出缓存的数据
        ProductItemComposite currentItem = (ProductItemComposite)redisCommonProcessor.get("item");
        // 需要删减的商品
        ProductItemComposite toDeleteItem = (ProductItemComposite) productItem;
        if(toDeleteItem.getId() == currentItem.getId()){
            throw new UnsupportedOperationException("根节点不能删");
        }
        // 如果当前的节点是想要删减的节点的父节点,那么直接删减
        if(toDeleteItem.getPid() == currentItem.getId()){
            currentItem.deleteProductItem(toDeleteItem);
            return currentItem;
        }
        deleteChildItem(toDeleteItem, currentItem);
        return currentItem;
    }

    private void deleteChildItem(ProductItemComposite toDeleteItem, ProductItemComposite currentItem) {
        for(AbstractProductItem productItem : currentItem.getChildren()){
            ProductItemComposite item = (ProductItemComposite) productItem;
            if(item.getId() == toDeleteItem.getPid()){
                item.deleteProductItem(toDeleteItem);
                break;
            }
            deleteChildItem(toDeleteItem, item);
        }
    }
}
添加商品的访问者:
package com.hitsz.designpattern.visitor;

import com.hitsz.designpattern.composite.AbstractProductItem;
import com.hitsz.designpattern.composite.ProductItemComposite;
import com.hitsz.designpattern.util.RedisCommonProcessor;
import org.springframework.beans.factory.annotation.Autowired;
import org.springframework.stereotype.Component;

/**
 * @author badboy
 * @version 1.0
 * Create by 2023/11/19 19:41
 */
@Component
public class AddProductItem implements ItemVisitor<AbstractProductItem>{

    @Autowired
    private RedisCommonProcessor redisCommonProcessor;

    @Override
    public AbstractProductItem visitor(AbstractProductItem productItem) {
        // 从Redis中拿出缓存的数据
        ProductItemComposite currentItem = (ProductItemComposite)redisCommonProcessor.get("item");
        // 需要新增的商品
        ProductItemComposite toAddItem = (ProductItemComposite) productItem;
        // 如果当前的节点是想要新增的节点的父节点,那么直接新增
        if(toAddItem.getPid() == currentItem.getId()){
            currentItem.addProductItem(toAddItem);
            return currentItem;
        }
        addChildItem(toAddItem, currentItem);
        return currentItem;
    }

    private void addChildItem(ProductItemComposite toAddItem, ProductItemComposite currentItem) {
        for(AbstractProductItem productItem : currentItem.getChildren()){
            ProductItemComposite item = (ProductItemComposite) productItem;
            if(item.getId() == toAddItem.getPid()){
                item.addProductItem(toAddItem);
                break;
            }
            addChildItem(toAddItem, item);
        }
    }
}
第三步:创建数据提供者
由于我们是从缓存中拿出数据,所以这里的数据提供者就是RedisCommonProcessor
实战
第一步:创建逻辑层
代码仍然在productItemService中,重复代码不再显示
 public ProductItemComposite addItems(ProductItem productItem){
        // 更新数据库
        productItemMapper.addItem(productItem.getName(), productItem.getPid());
        // 访问树形结构并添加item
        ProductItemComposite toAddItem = ProductItemComposite.builder()
                .id(productItemMapper.selectOne(new LambdaQueryWrapper<ProductItem>()
                .eq(ProductItem::getName, productItem.getName())
                .eq(ProductItem::getPid, productItem.getPid())).getId())
                .name(productItem.getName())
                .pid(productItem.getPid())
                .children(new ArrayList<>())
                .build();
        AbstractProductItem updateItems = addProductItem.visitor(toAddItem);
        // 更新redis缓存
        redis.set("item", updateItems);
        return (ProductItemComposite) updateItems;
    }

    public ProductItemComposite deleteItems(ProductItem productItem){
        // 更新数据库
        productItemMapper.deleteItem(productItem.getId());
        // 访问树形结构并删除item
        ProductItemComposite toDeleteItem = ProductItemComposite.builder()
                .id(productItem.getId())
                .name(productItem.getName())
                .pid(productItem.getPid())
                .build();
        AbstractProductItem updateItem = deleteProductItem.visitor(toDeleteItem);
        // 更新缓存
        redis.set("item", updateItem);
        return (ProductItemComposite) updateItem;
    }
第二步:在控制层添加增加商品,减少商品接口
同样,相同代码不再重复
@PostMapping("/add")
    public ProductItemComposite addItem(@RequestBody ProductItem item){
        return productItemService.addItems(item);
    }

    @PostMapping("/delete")
    public ProductItemComposite deleteItem(@RequestBody ProductItem item){
        return productItemService.deleteItems(item);
    }
以上代码完成后,可自行进行测试,通过 Apifox或者postman进行测试即可,


 被折叠的 条评论
为什么被折叠?
被折叠的 条评论
为什么被折叠?
 到【灌水乐园】发言


