


一、RESTFul编程风格
1.RESTFul是什么
RESTFul是WEB服务接口的一种设计风格。 RESTFul定义了一组约束条件和规范,可以让WEB服务接口更加简洁、易于理解、易于扩展、安全可靠。
RESTFul对一个WEB服务接口都规定了哪些东西?
对请求的URL格式有约束和规范
对HTTP的请求方式有约束和规范
对请求和响应的数据格式有约束和规范
对HTTP状态码有约束和规范
等 ......
REST对请求方式的约束是这样的:
查询必须发送GET请求
新增必须发送POST请求
修改必须发送PUT请求
删除必须发送DELETE请求
REST对URL的约束是这样的:
传统的URL:get请求,/springmvc/getUserById?id=1
REST风格的URL:get请求,/springmvc/user/1
传统的URL:get请求,/springmvc/deleteUserById?id=1
REST风格的URL:delete请求, /springmvc/user/1
RESTFul对URL的约束和规范的核心是:通过采用**不同的请求方式**+ **URL**来确定WEB服务中的资源。
RESTful 的英文全称是 Representational State Transfer(表述性状态转移)。简称REST。
表述性(Representational)是:URI + 请求方式。
状态(State)是:服务器端的数据。
转移(Transfer)是:变化。
表述性状态转移是指:通过 URI + 请求方式 来控制服务器端数据的变化。
2.RESTFul风格与传统方式对比
传统的 URL 与 RESTful URL 的区别是传统的 URL 是基于方法名进行资源访问和操作,而 RESTful URL 是基于资源的结构和状态进行操作的。下面是一张表格,展示两者之间的具体区别:
| 传统的 URL | RESTful URL |
|---|---|
| GET /getUserById?id=1 | GET /user/1 |
| GET /getAllUser | GET /user |
| POST /addUser | POST /user |
| POST /modifyUser | PUT /user |
| GET /deleteUserById?id=1 | DELETE /user/1 |
从上表中我们可以看出,传统的URL是基于动作的,而 RESTful URL 是基于资源和状态的,因此 RESTful URL 更加清晰和易于理解,这也是 REST 架构风格被广泛使用的主要原因之一。
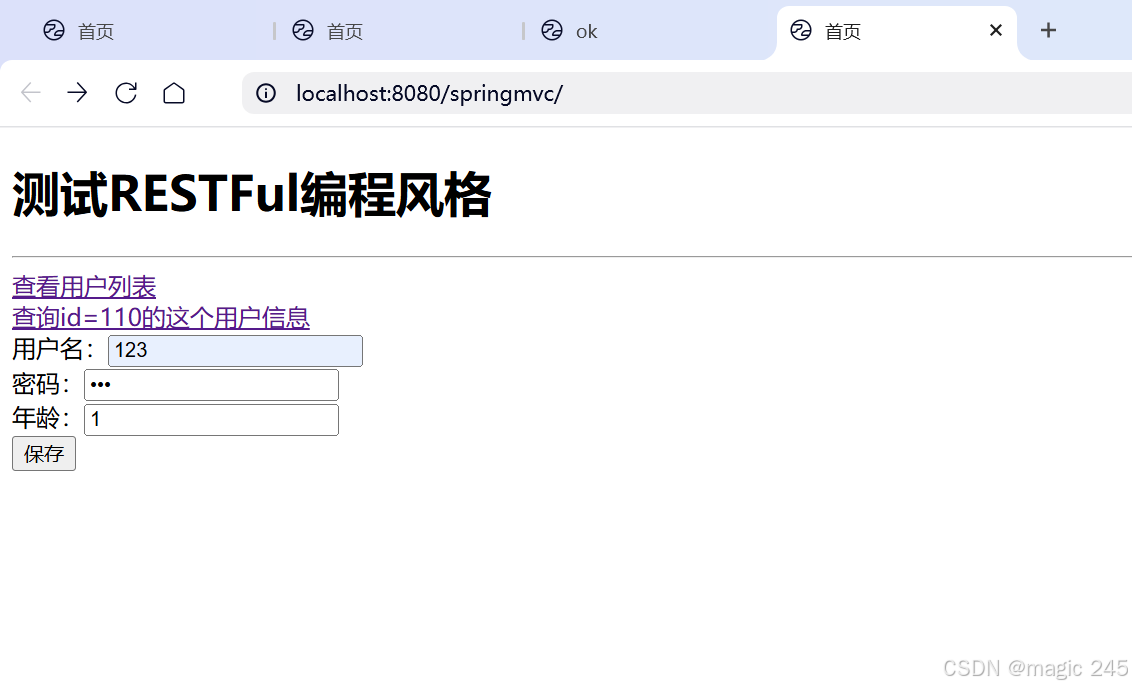
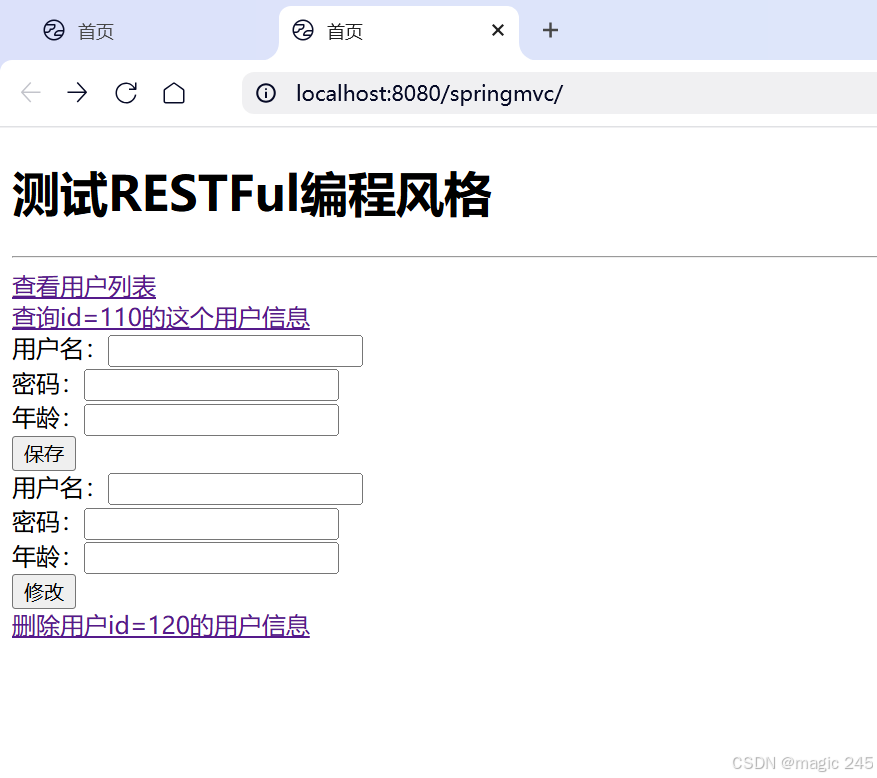
3.RESTFul方式演示查询
RESTFul规范中规定,如果要查询数据,需要发送GET请求。
根据id查询和查询所有
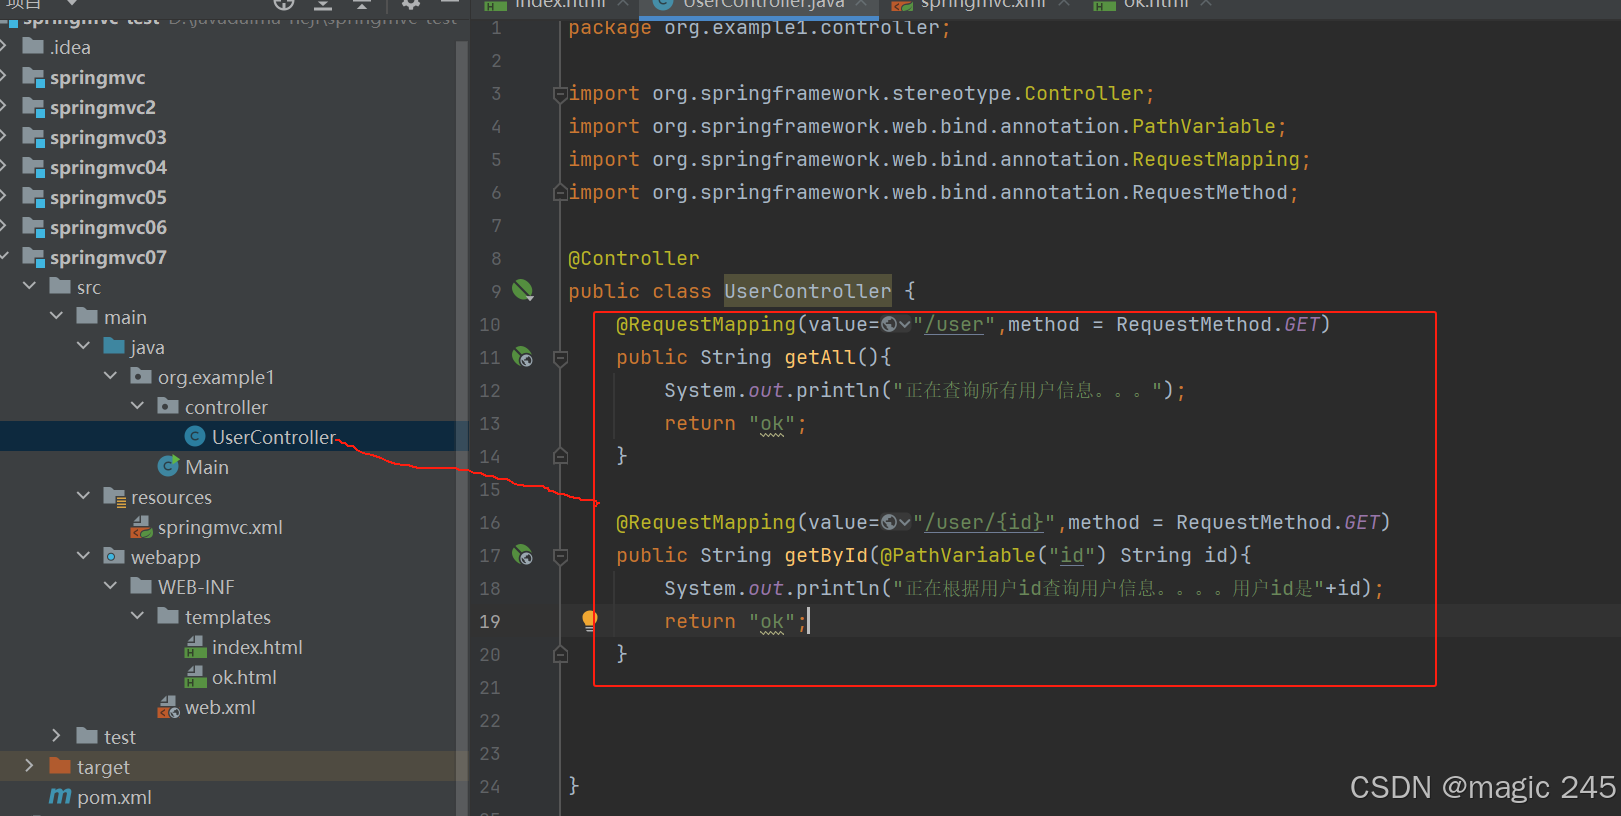
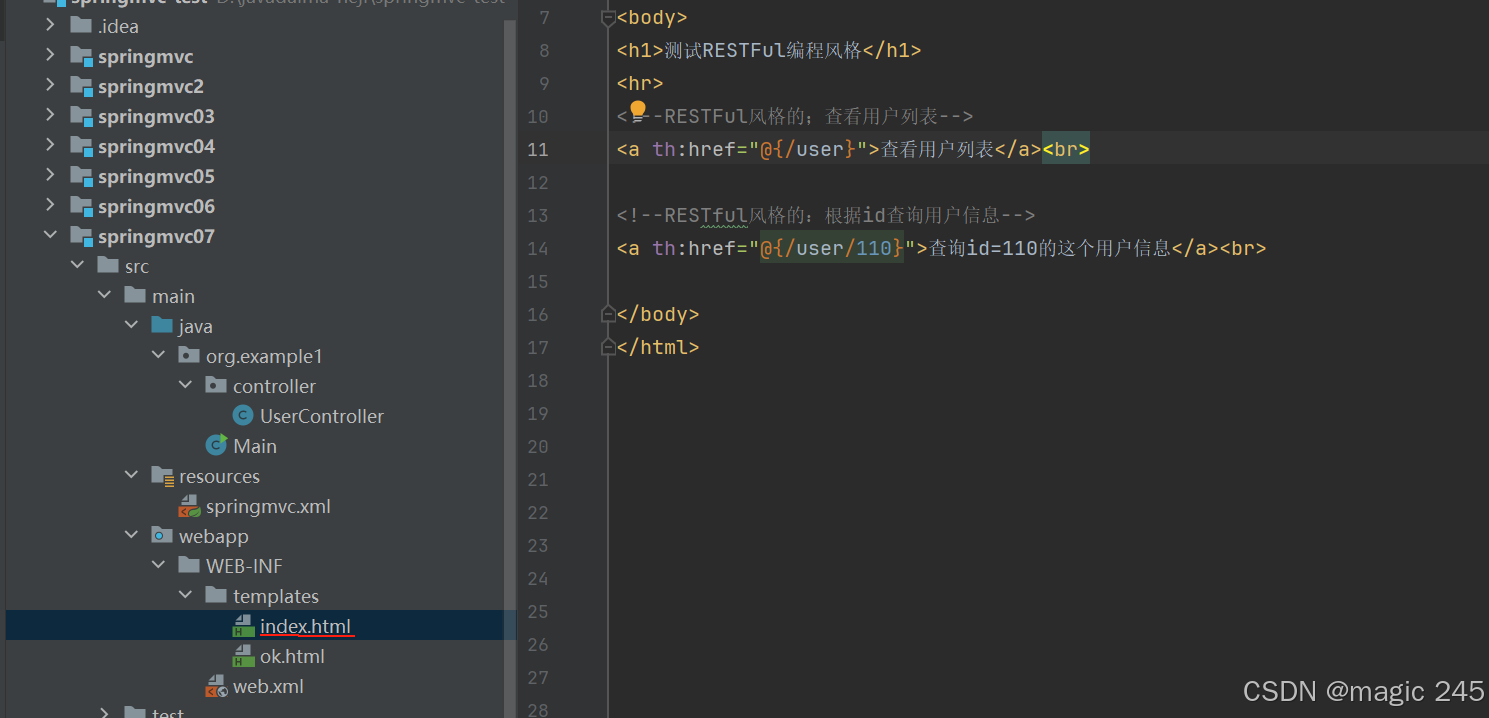

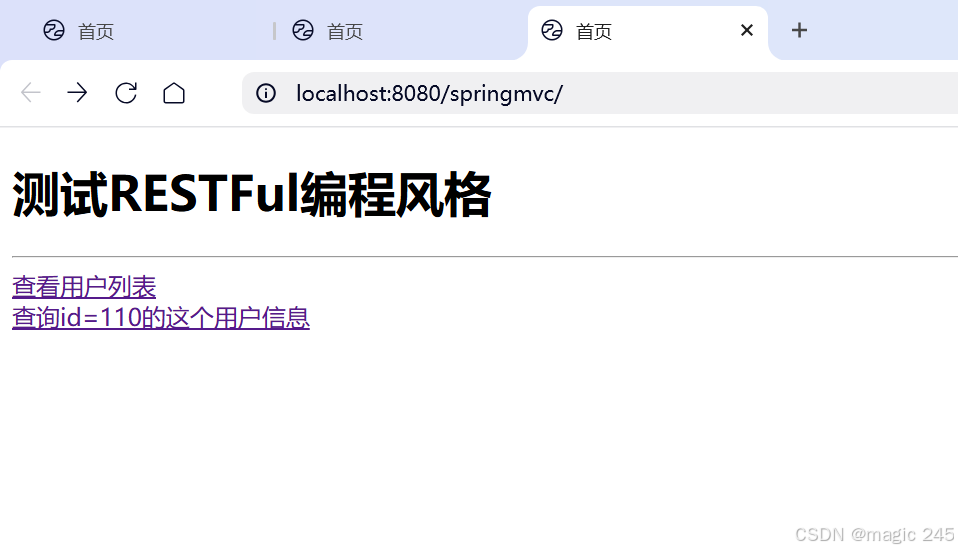
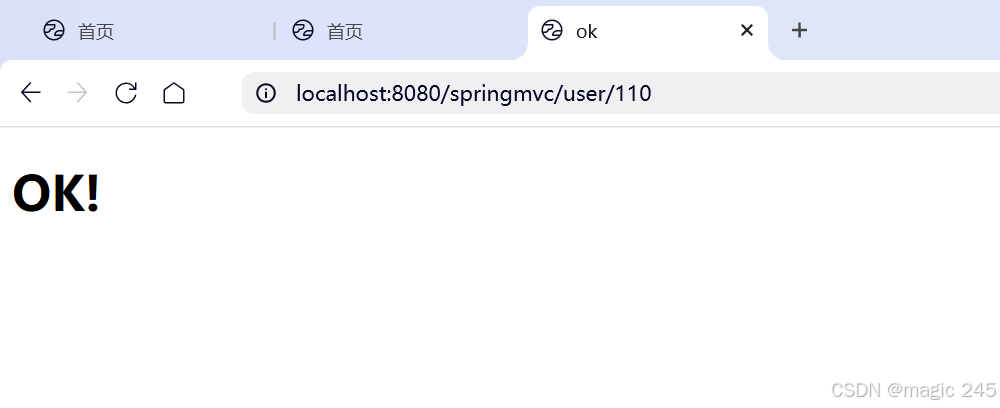
测试:
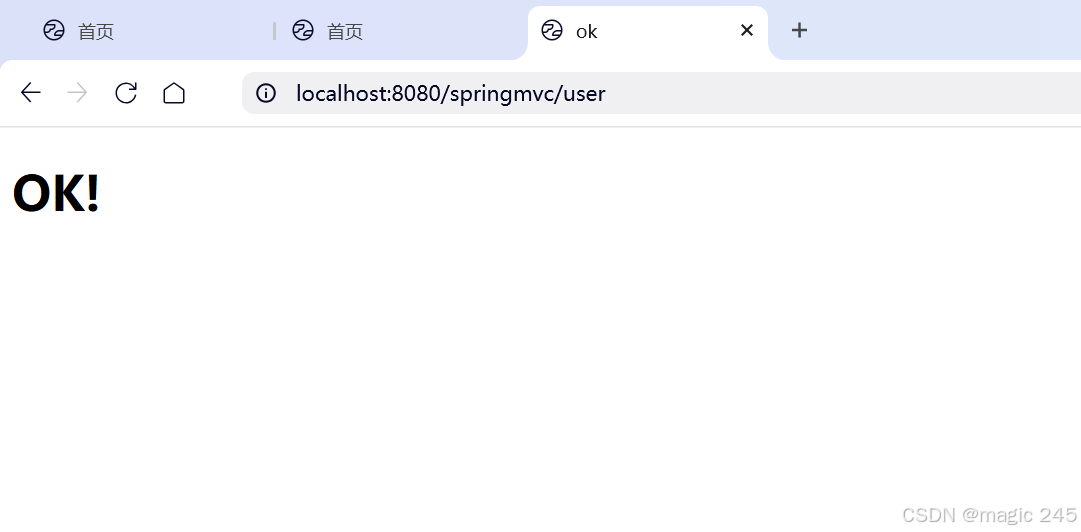
4.RESTFul方式演示增加
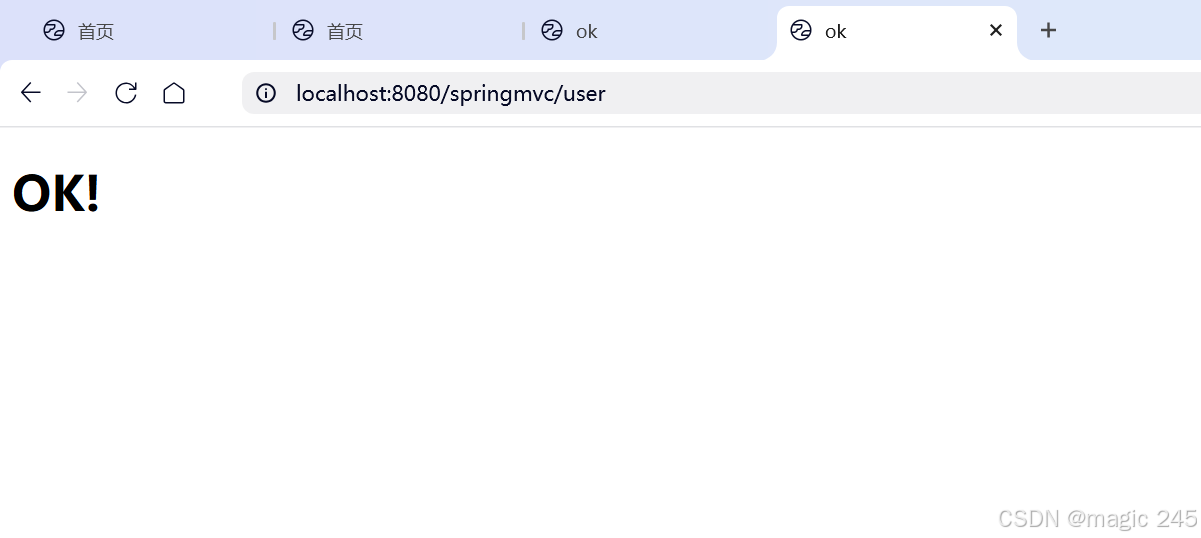
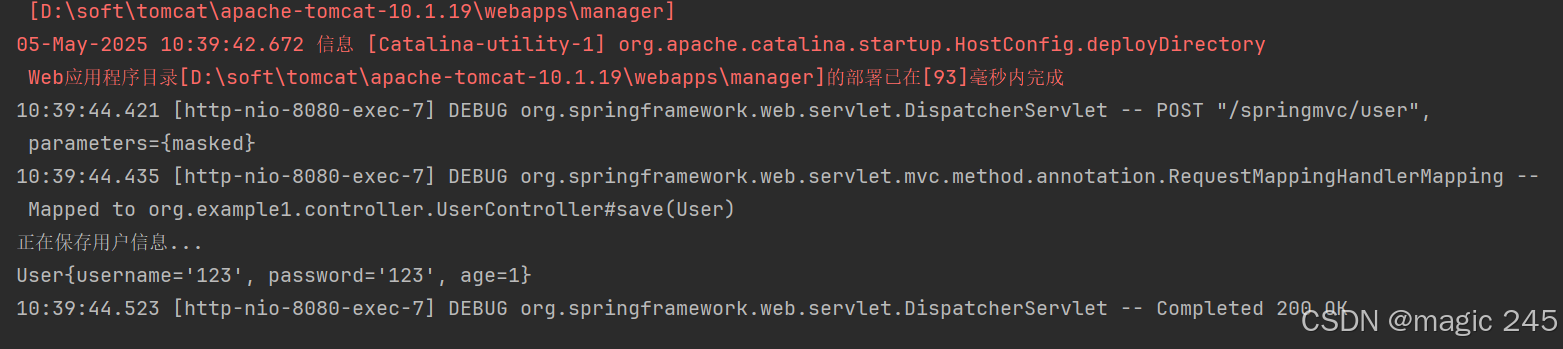
RESTFul规范中规定,如果要进行保存操作,需要发送POST请求。
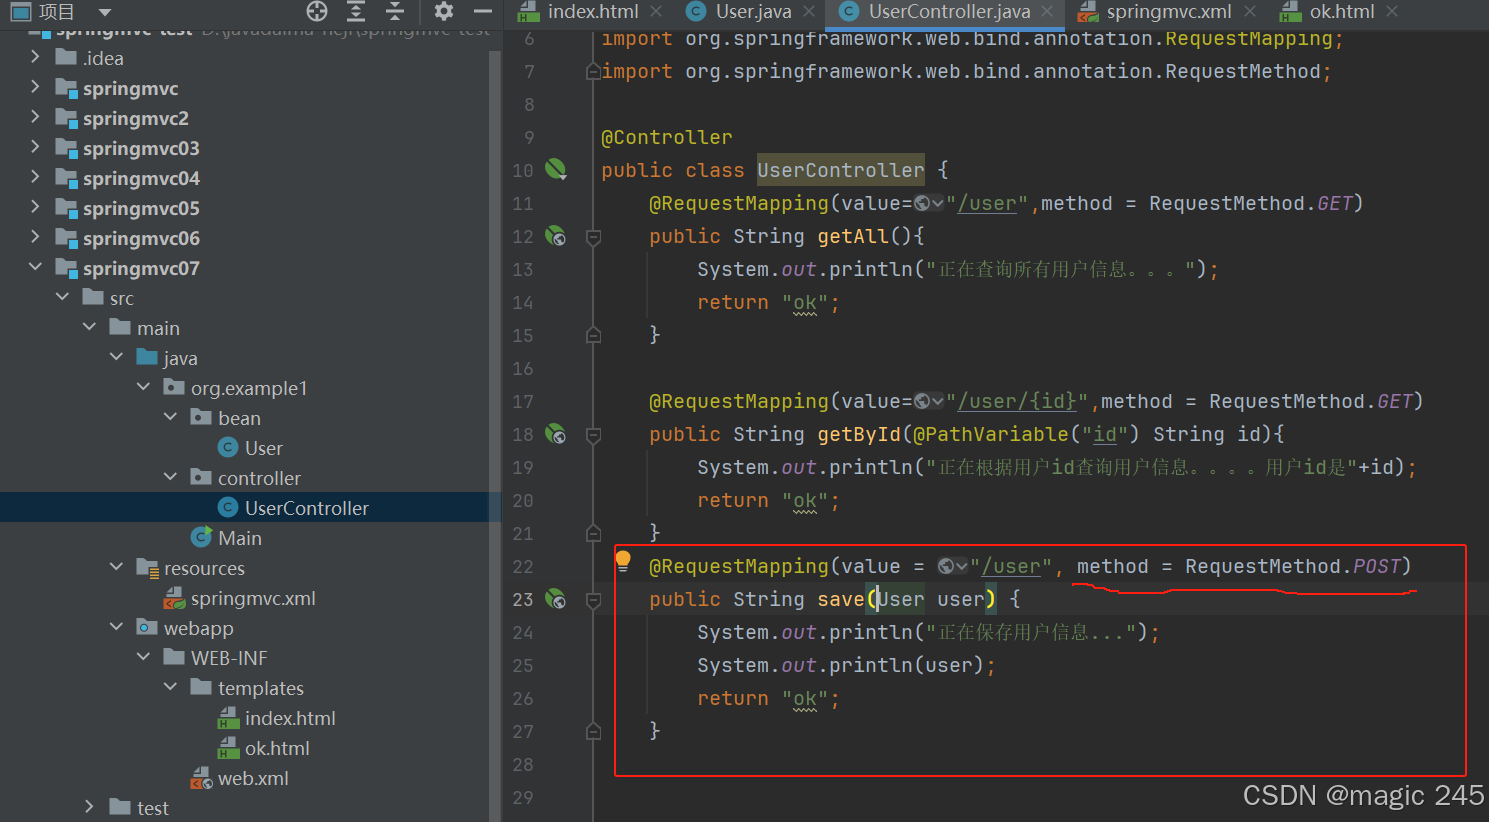
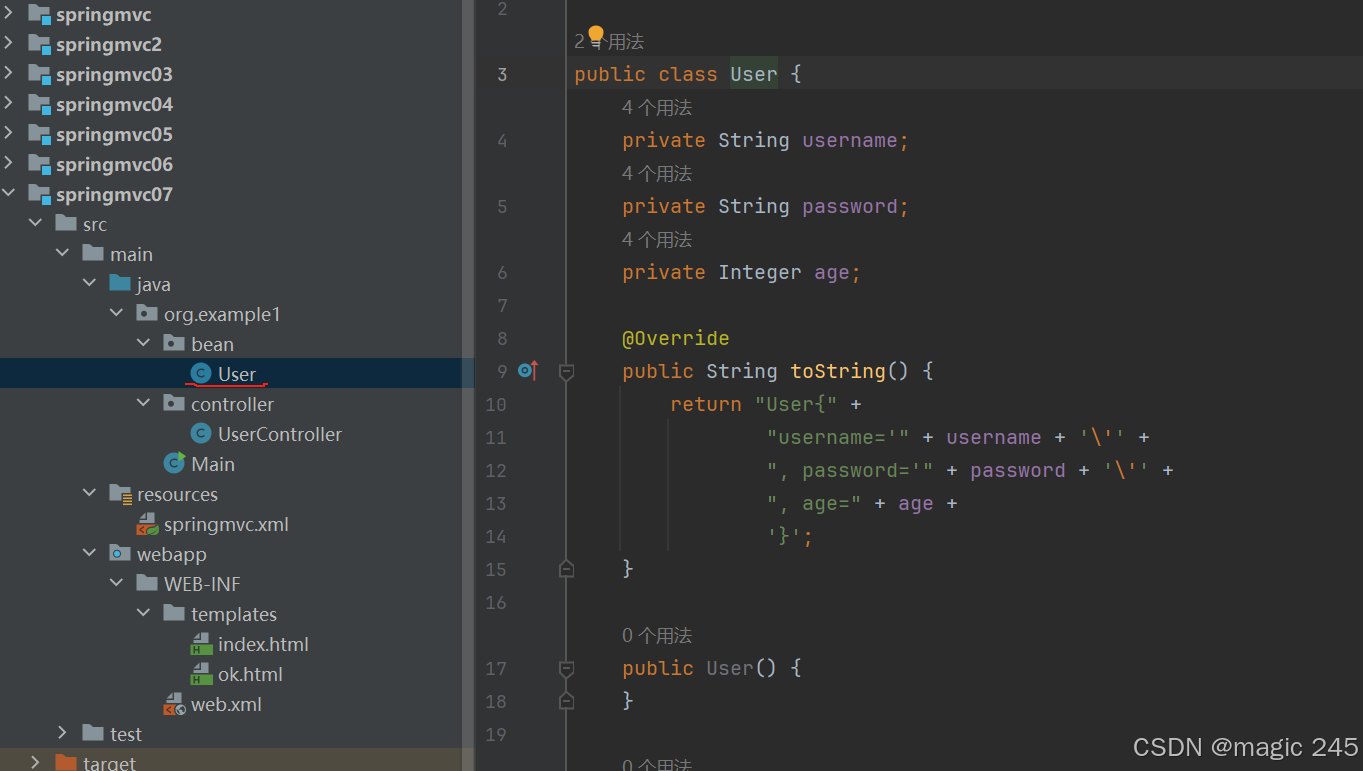
新增一个用户类
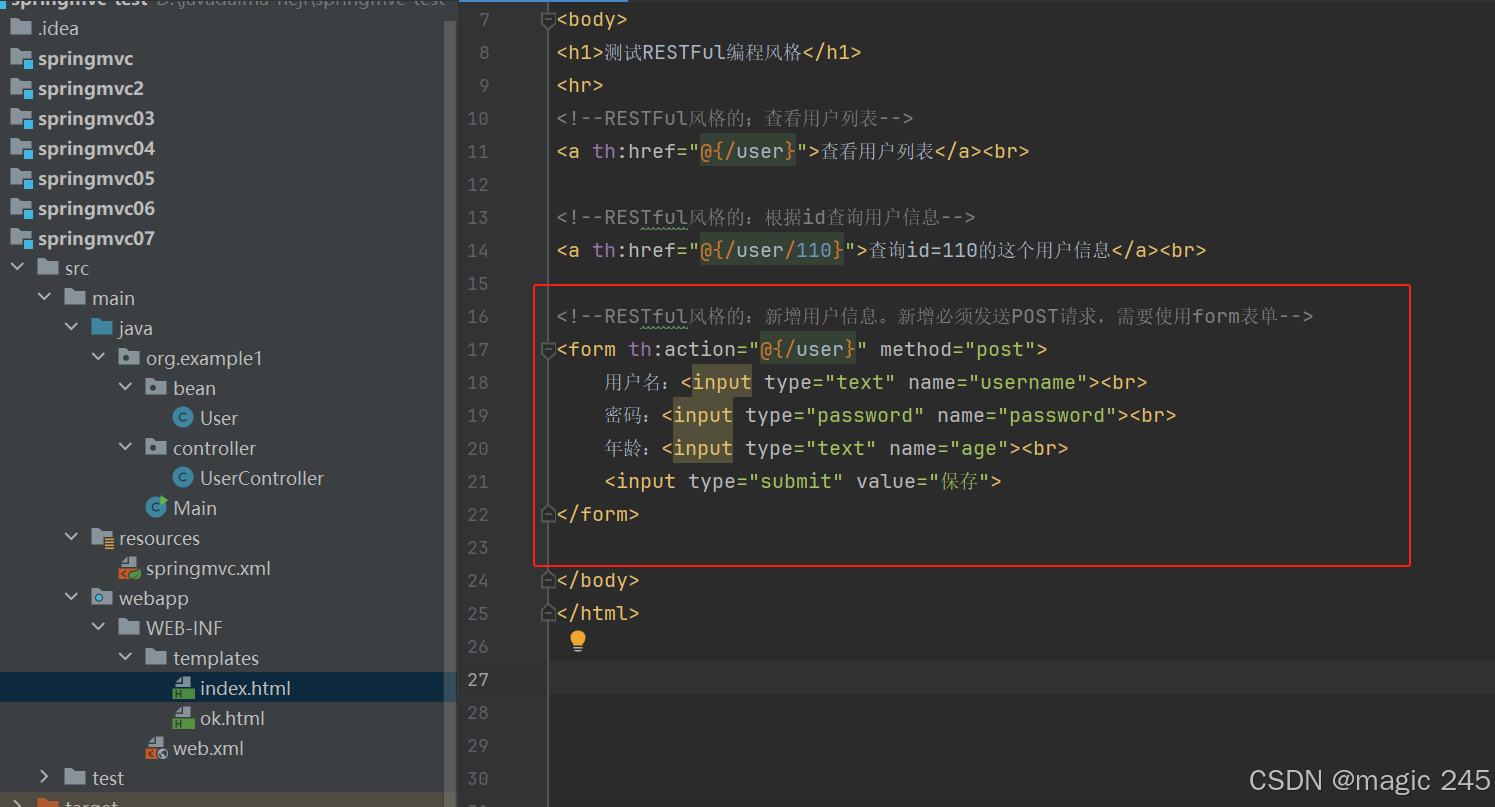
新增表单
测试:
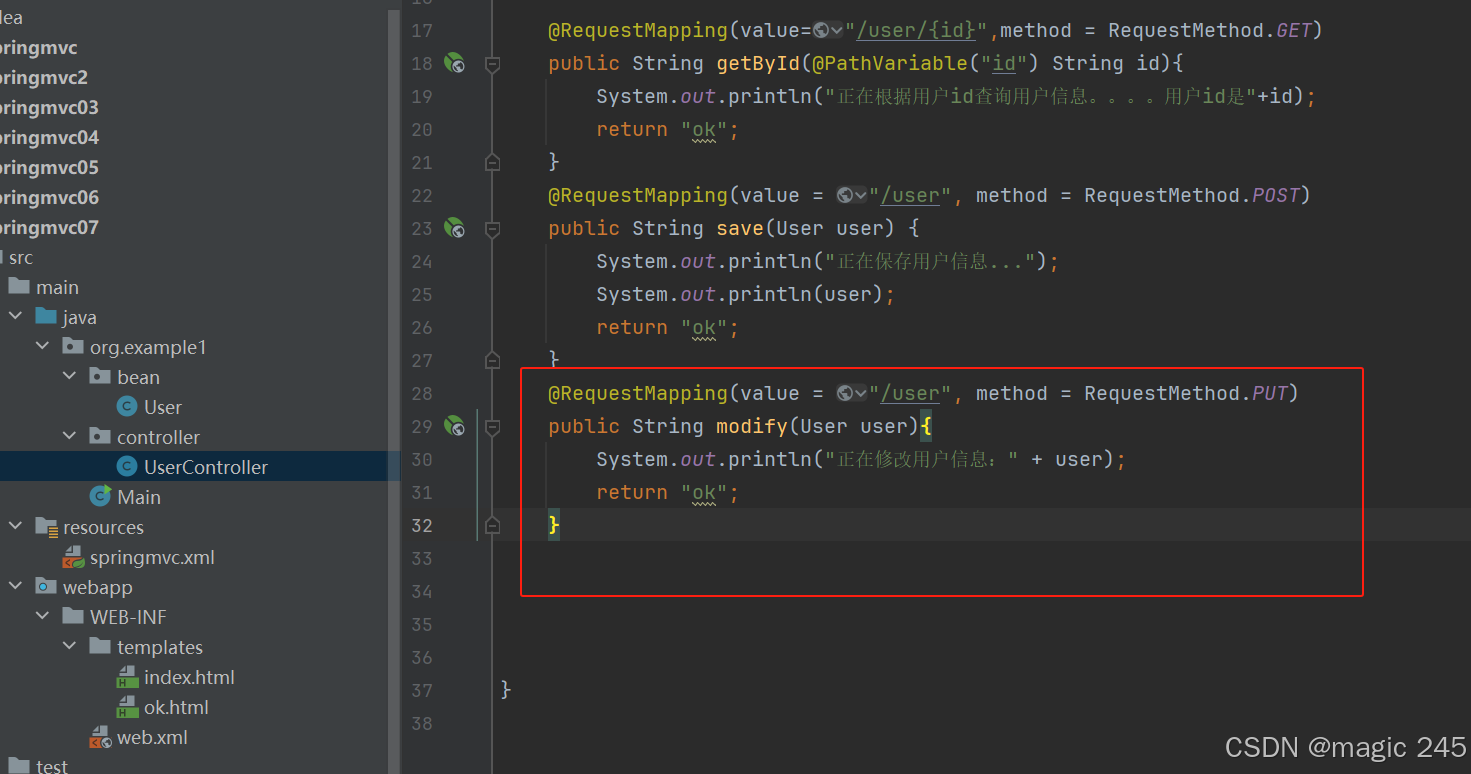
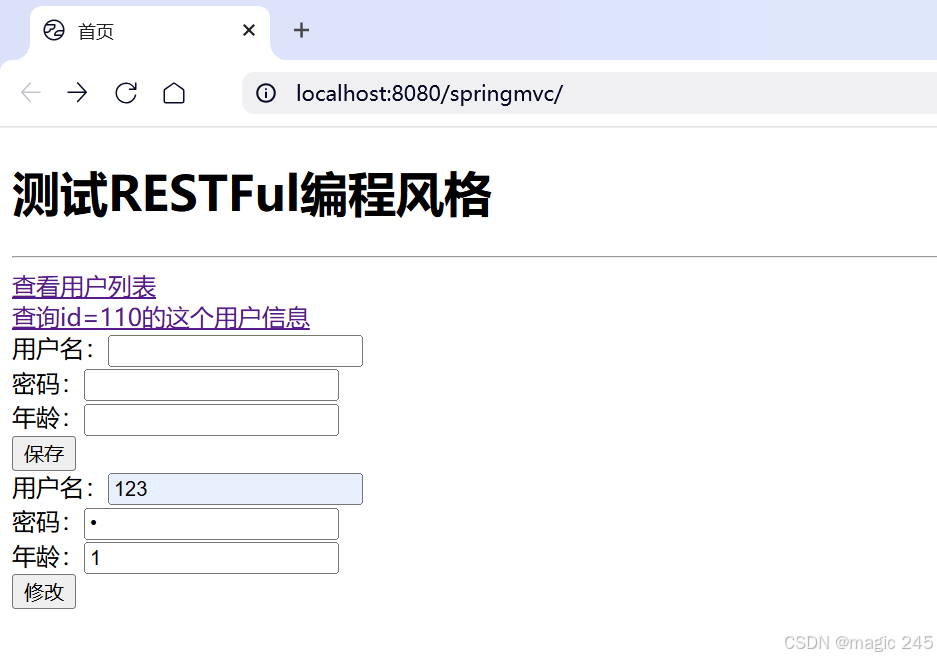
5.RESTFul方式演示修改
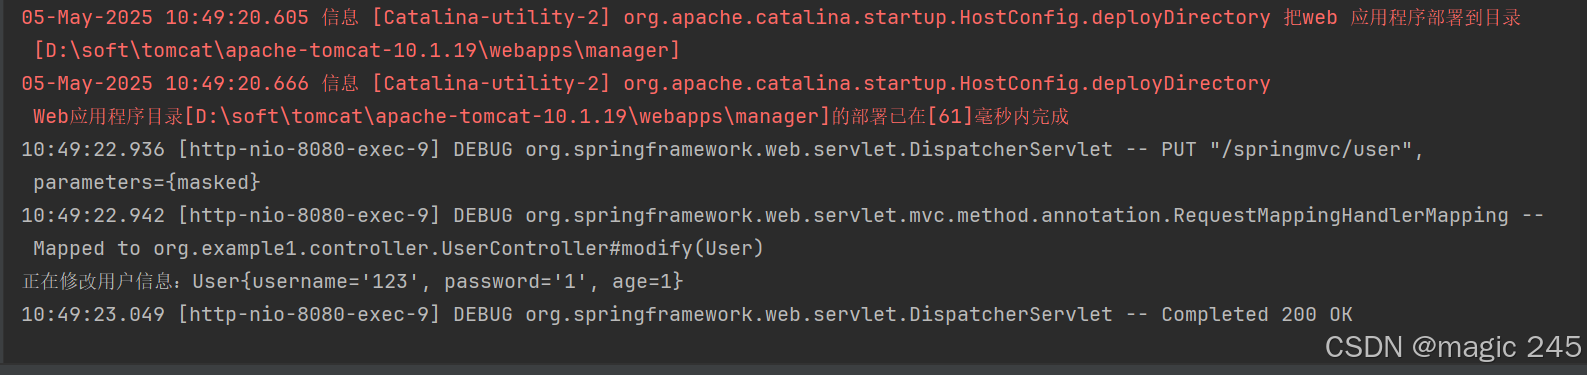
RESTful编程风格中要求,修改的时候,必须提交PUT请求,怎么提交PUT请求呢?
    第一步:要想发送PUT请求,首先你必须是一个POST请求。(POST请求是大前提)
    第二步:在POST请求的表单中添加隐藏域:
        <!--隐藏域-->
        <input type="hidden" name="_method" value="put">
        强调:name必须是 _method,value必须是put/PUT。
        如果你要发送delete请求的话,value写delete即可。
    第三步:添加一个过滤器
        <!--添加一个过滤器,这个过滤器是springmvc提前写好的,直接用就行了,这个过滤器可以帮助你将请求POST转换成PUT请求/DELETE请求-->
        <filter>
            <filter-name>hiddenHttpMethodFilter</filter-name>
            <filter-class>org.springframework.web.filter.HiddenHttpMethodFilter</filter-class>
        </filter>
        <filter-mapping>
            <filter-name>hiddenHttpMethodFilter</filter-name>
            <url-pattern>/*</url-pattern>
        </filter-mapping>
RESTFul规范中规定,如果要进行保存操作,需要发送PUT请求。
如何发送PUT请求?
第一步:首先你必须是一个POST请求。
第二步:在发送POST请求的时候,提交这样的数据:**_method=PUT**
第三步:在web.xml文件配置SpringMVC提供的过滤器:HiddenHttpMethodFilter
实践一下:
在web.xml配置
<!--隐藏的HTTP请求方式过滤器-->
<filter>
    <filter-name>hiddenHttpMethodFilter</filter-name>
    <filter-class>org.springframework.web.filter.HiddenHttpMethodFilter</filter-class>
</filter>
<filter-mapping>
    <filter-name>hiddenHttpMethodFilter</filter-name>
    <url-pattern>/*</url-pattern>
</filter-mapping>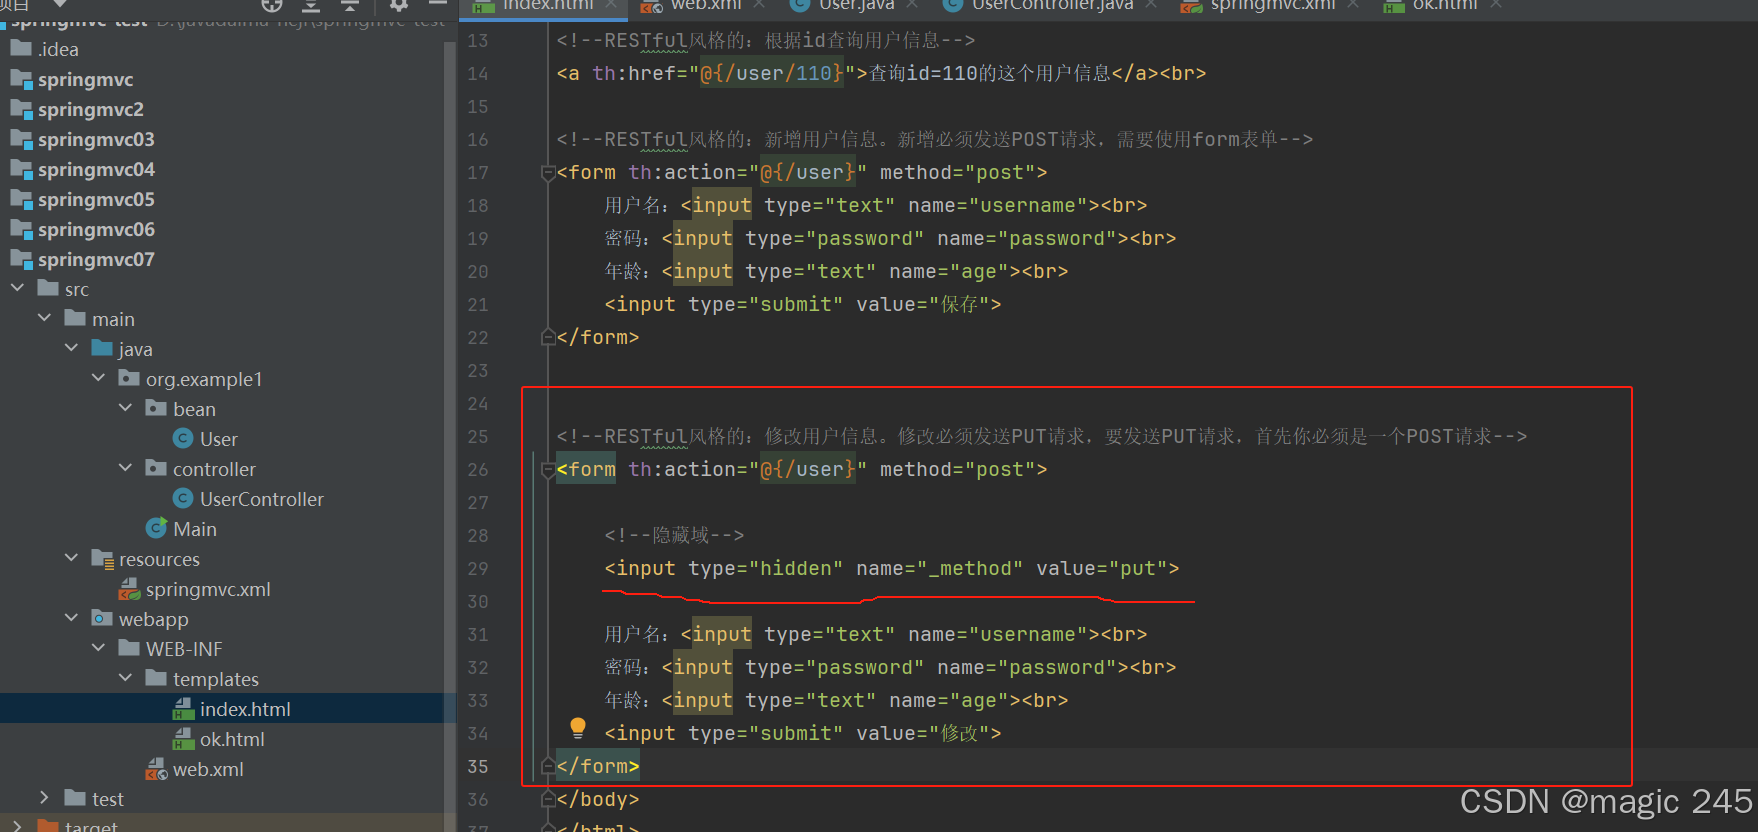
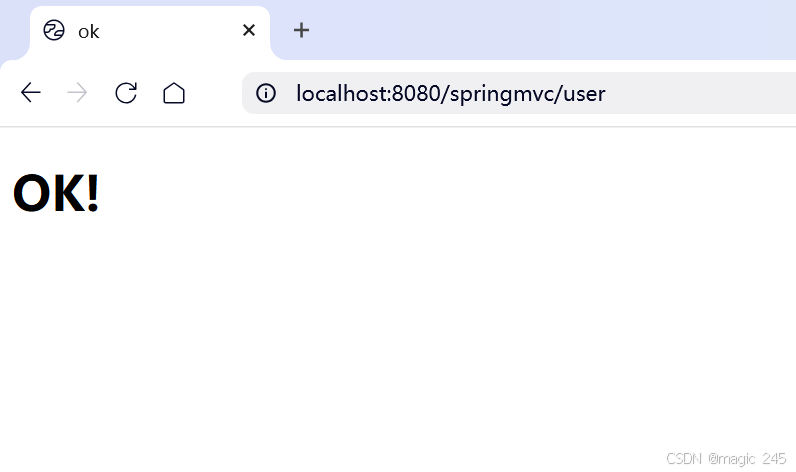
测试:
6.HiddenHttpMethodFilter
HiddenHttpMethodFilter是Spring MVC框架提供的,专门用于RESTFul编程风格。 实现原理可以通过源码查看:
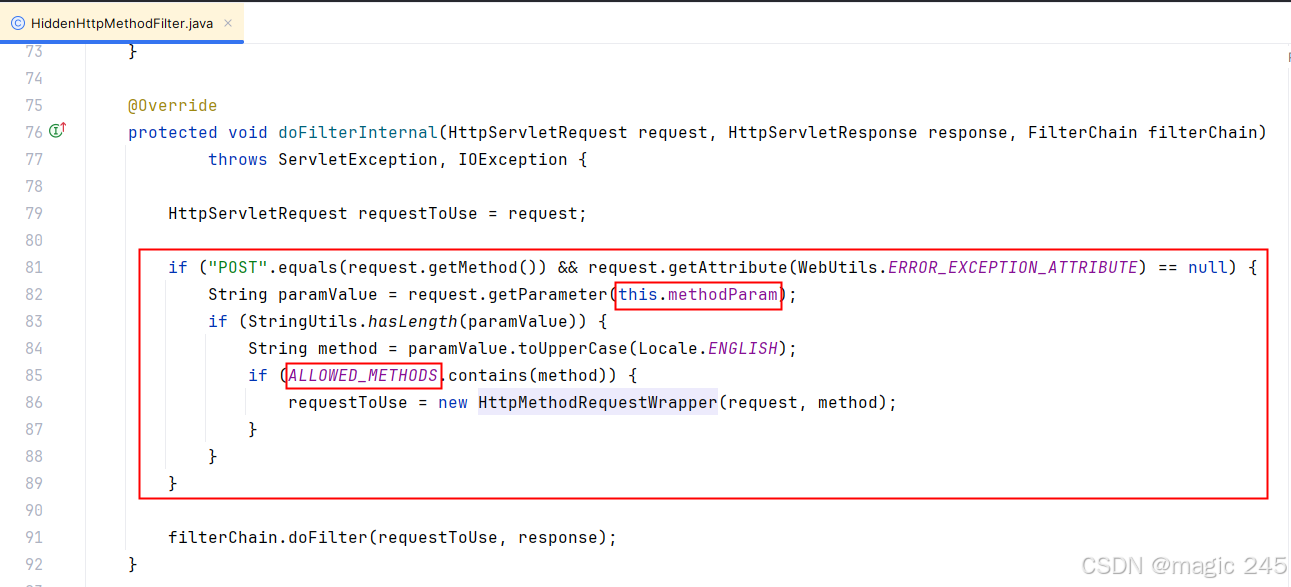


通过源码可以看到,if语句中,首先判断是否为POST请求,如果是POST请求,调用request.getParameter(this.methodParam)。
可以看到this.methodParam是_method,这样就要求我们在提交请求方式的时候必须采用这个格式:_method=put。获取到请求方式之后,调用了toUpperCase转换成大写了。因此前端页面中小写的put或者大写的PUT都是可以的。if语句中嵌套的if语句说的是,只有请求方式是 PUT,DELETE,PATCH的时候会创建HttpMethodRequestWrapper对象。而HttpMethodRequestWrapper对象的构造方法是这样的:
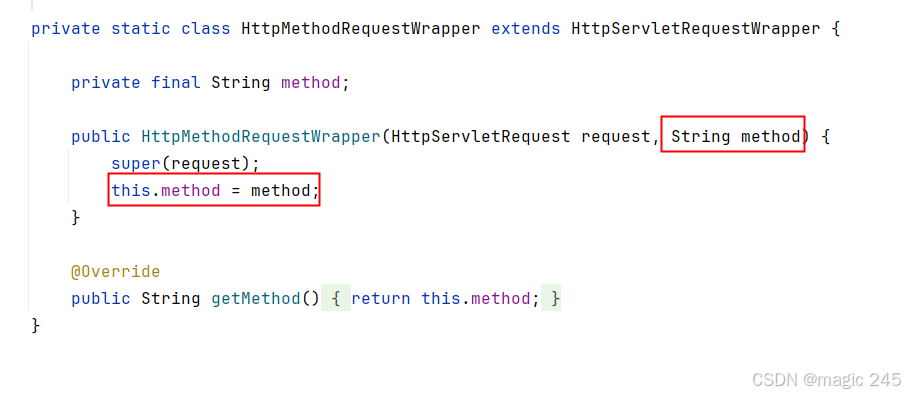
这样method就从POST变成了:PUT/DELETE/PATCH。
重点注意事项:CharacterEncodingFilter和HiddenHttpMethodFilter的顺序 细心的同学应该注意到了,在HiddenHttpMethodFilter源码中有这样一行代码:
![]()
大家是否还记得,字符编码过滤器执行之前不能调用 request.getParameter方法,如果提前调用了,乱码问题就无法解决了。因为request.setCharacterEncoding()方法的执行必须在所有request.getParameter()方法之前执行。因此这两个过滤器就有先后顺序的要求,在web.xml文件中,应该先配置CharacterEncodingFilter,然后再配置HiddenHttpMethodFilter。
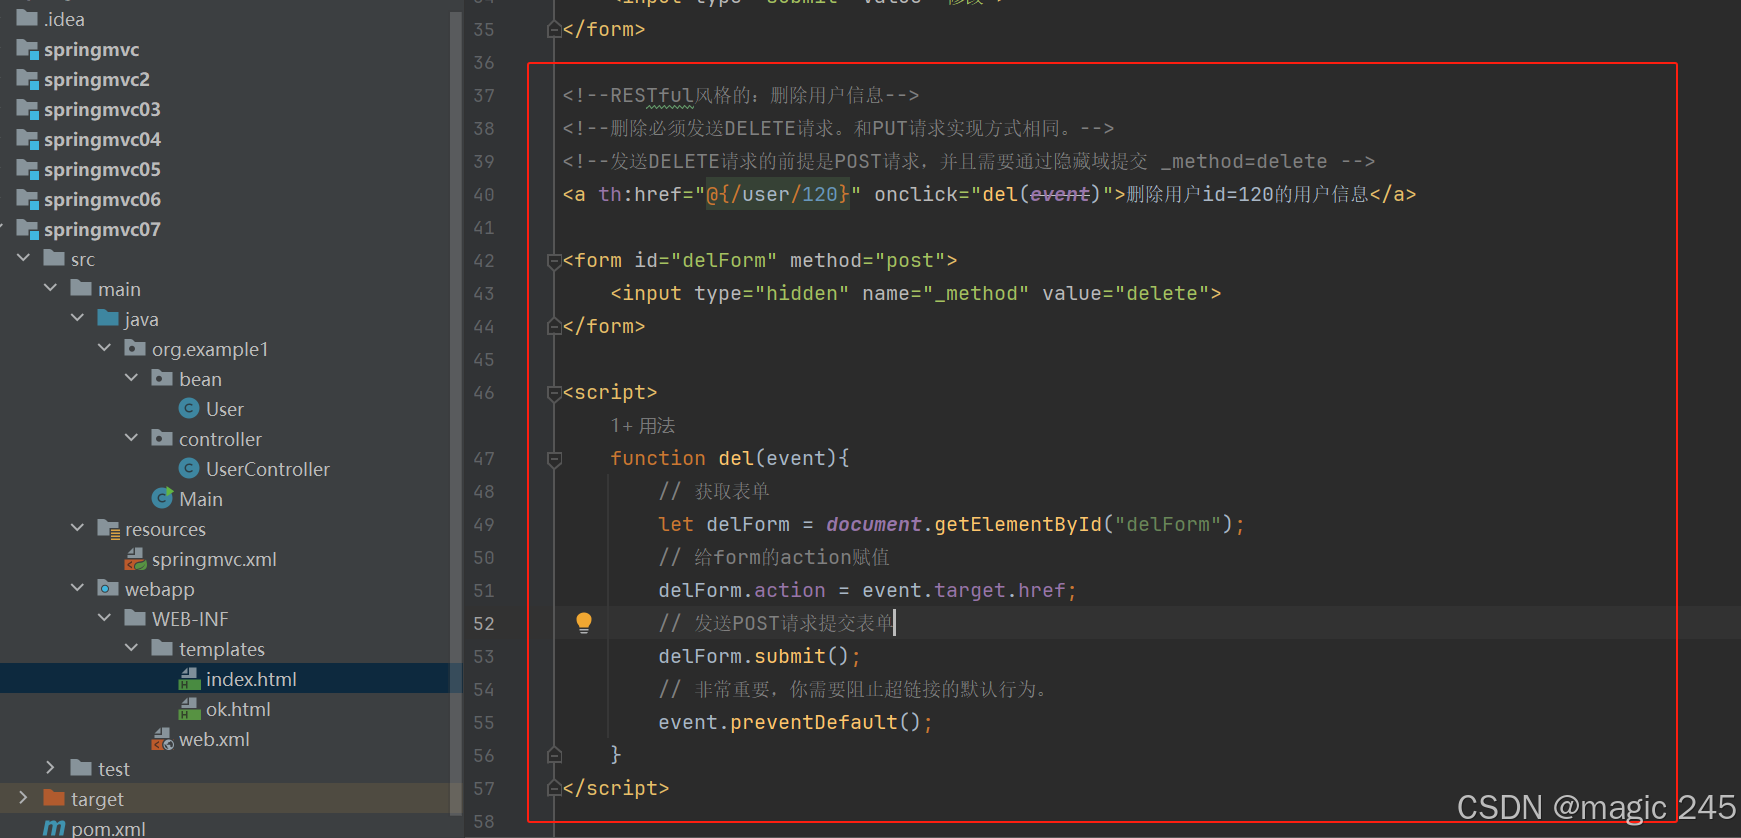
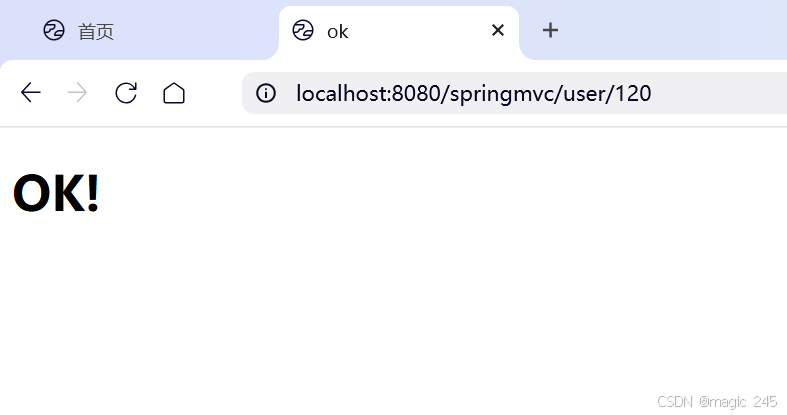
7.RESTFul方式演示删除
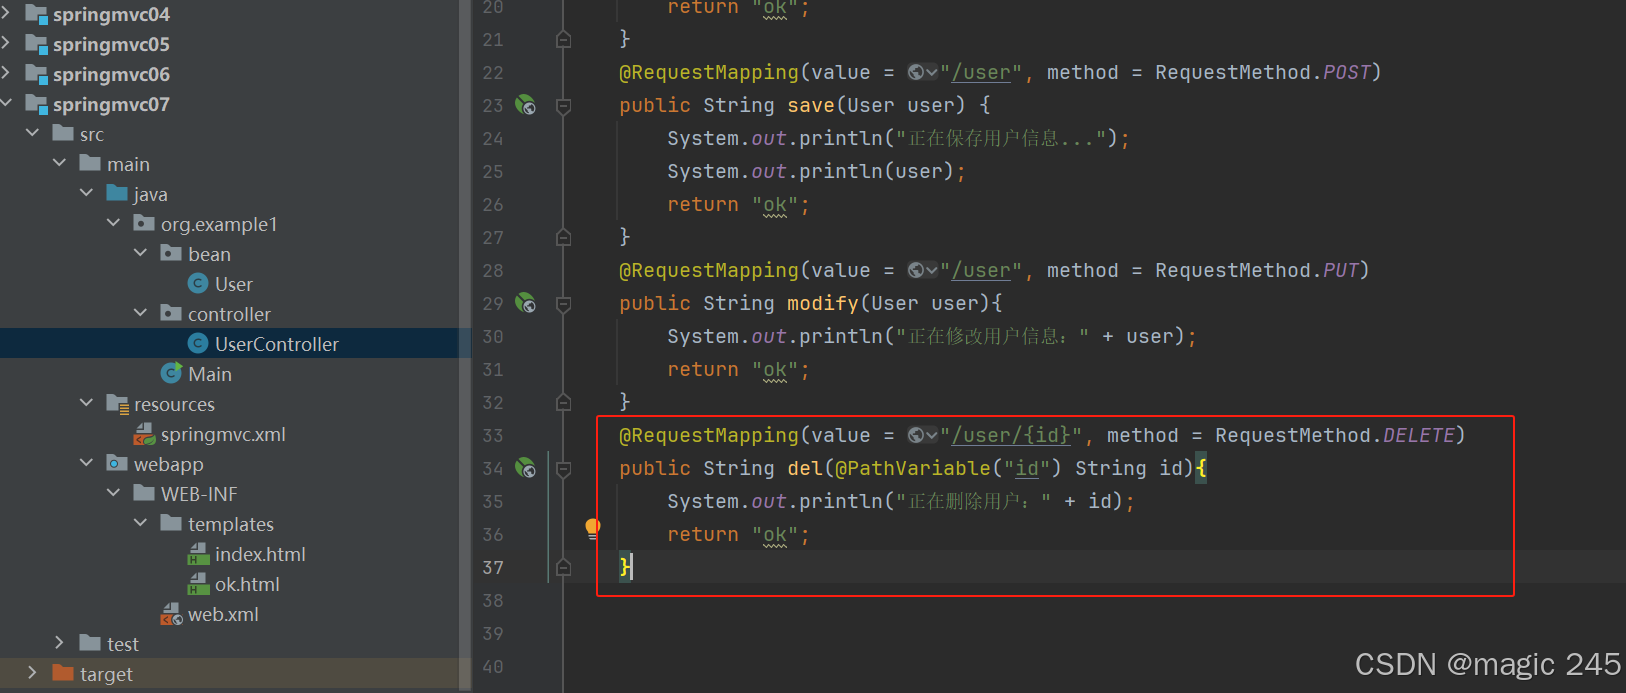
测试:
二、使用RESTFul实现用户管理系统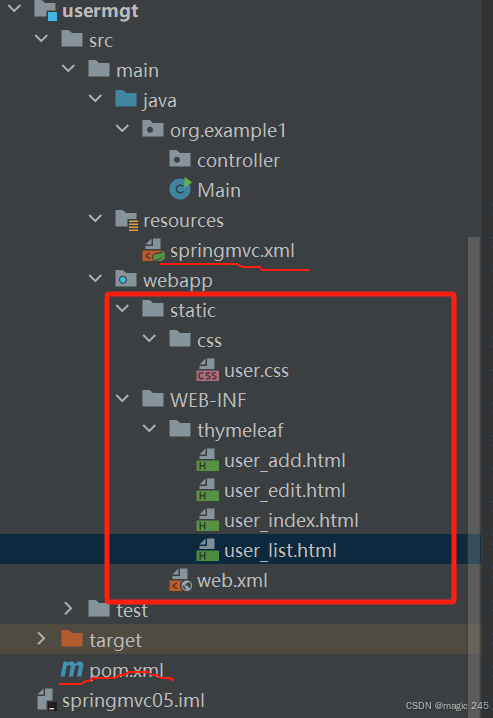
1.·静态页面准备
文件包括:user.css、user_index.html、user_list.html、user_add.html、user_edit.html。代码如下:
user.css
.header {
  background-color: #f2f2f2;
  padding: 20px;
  text-align: center;
}

ul {
  list-style-type: none;
  margin: 0;
  padding: 0;
  overflow: hidden;
  background-color: #333;
}

li {
  float: left;
}

li a {
  display: block;
  color: white;
  text-align: center;
  padding: 14px 16px;
  text-decoration: none;
}

li a:hover:not(.active) {
  background-color: #111;
}

.active {
  background-color: #4CAF50;
}

form {
  width: 50%;
  margin: 0 auto;
  padding: 20px;
  border: 1px solid #ddd;
  border-radius: 4px;
}

label {
  display: block;
  margin-bottom: 8px;
}

input[type="text"], input[type="email"], select {
  width: 100%;
  padding: 6px 10px;
  margin: 8px 0;
  box-sizing: border-box;
  border: 1px solid #555;
  border-radius: 4px;
  font-size: 16px;
}

button[type="submit"] {
  padding: 10px;
  background-color: #4CAF50;
  color: #fff;
  border: none;
  border-radius: 4px;
  cursor: pointer;
}

button[type="submit"]:hover {
  background-color: #3e8e41;
}

table {
  border-collapse: collapse;
  width: 100%;
}

th, td {
  border: 1px solid #ddd;
  padding: 8px;
  text-align: left;
}

th {
  background-color: #f2f2f2;
}

tr:nth-child(even) {
  background-color: #f2f2f2;
}

.header {
  background-color: #f2f2f2;
  padding: 20px;
  text-align: center;
}

a {
  text-decoration: none;
  color: #333;
}

.add-button {
  margin-bottom: 20px;
  padding: 10px;
  background-color: #4CAF50;
  color: #fff;
  border: none;
  border-radius: 4px;
  cursor: pointer;
}

.add-button:hover {
  background-color: #3e8e41;
}
user_index.html
<!DOCTYPE html>
<html lang="en">
<head>
  <meta charset="UTF-8">
  <title>用户管理系统</title>
  <link rel="stylesheet" href="user.css" type="text/css"></link>
</head>
<body>
  <div class="header">
    <h1>用户管理系统</h1>
  </div>
  <ul>
    <li><a class="active" href="user_list.html">用户列表</a></li>
  </ul>
</body>
</html>
user_list.html
<!DOCTYPE html>
<html lang="en">
<head>
  <meta charset="UTF-8">
  <title>用户列表</title>
  <link rel="stylesheet" href="user.css" type="text/css"></link>
</head>
<body>
  <div class="header">
    <h1>用户列表</h1>
  </div>
  <div class="add-button-wrapper">
    <a class="add-button" href="user_add.html">新增用户</a>
  </div>
  <table>
    <thead>
      <tr>
        <th>编号</th>
        <th>用户名</th>
        <th>性别</th>
        <th>邮箱</th>
        <th>操作</th>
      </tr>
    </thead>
	<tbody>
      <tr>
        <td>1</td>
        <td>张三</td>
        <td>男</td>
        <td>zhangsan@powernode.com</td>
        <td>
          修改
          删除
        </td>
      </tr>
      <tr>
        <td>2</td>
        <td>李四</td>
        <td>女</td>
        <td>lisi@powernode.com</td>
        <td>
          修改
          删除
        </td>
      </tr>
    </tbody>
  </table>
</body>
</html>
user_add.html
<!DOCTYPE html>
<html lang="en">
<head>
  <meta charset="UTF-8">
  <title>新增用户</title>
  <link rel="stylesheet" href="user.css" type="text/css"></link>
</head>
<body>
  <h1>新增用户</h1>
  <form>
    <label>用户名:</label>
    <input type="text" name="username" required>

    <label>性别:</label>
    <select name="gender" required>
      <option value="">-- 请选择 --</option>
      <option value="1">男</option>
      <option value="0">女</option>
    </select>

    <label>邮箱:</label>
    <input type="email" name="email" required>

	<button type="submit">保存</button>
  </form>
</body>
</html>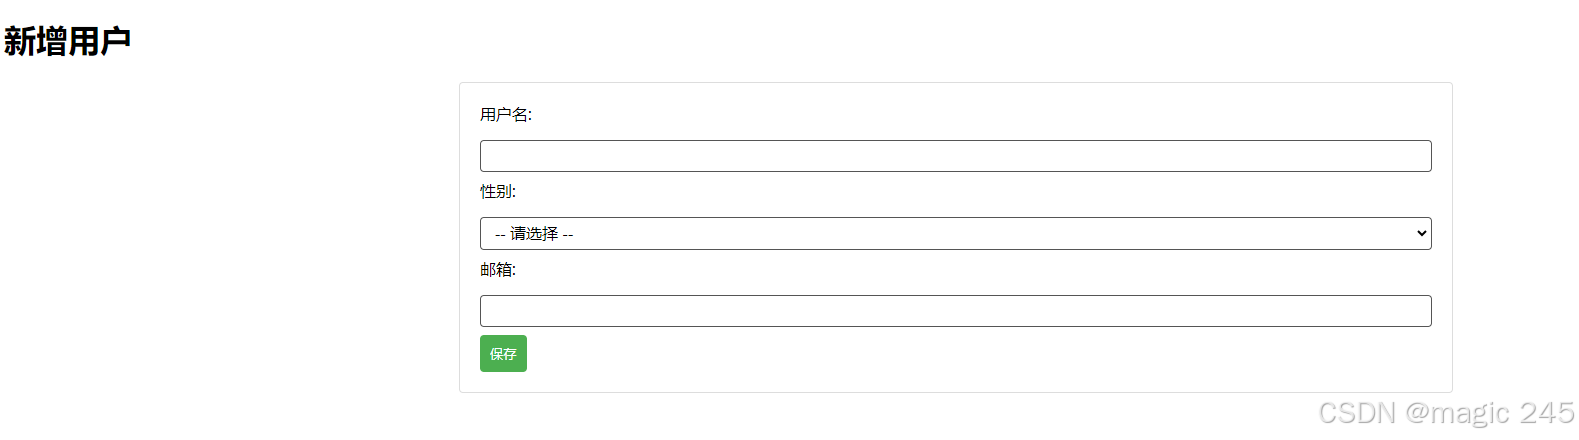
user_edit.html
<!DOCTYPE html>
<html lang="en">
<head>
  <meta charset="UTF-8">
  <title>修改用户</title>
  <link rel="stylesheet" href="user.css" type="text/css"></link>
</head>
<body>
  <h1>修改用户</h1>
  <form>
    <label>用户名:</label>
    <input type="text" name="username" value="张三" required>

    <label>性别:</label>
    <select name="gender" required>
      <option value="">-- 请选择 --</option>
      <option value="1" selected>男</option>
      <option value="0">女</option>
    </select>

    <label>邮箱:</label>
    <input type="email" name="email" value="zhangsan@powernode.com" required>

    <button type="submit">修改</button>
  </form>
</body>
</html>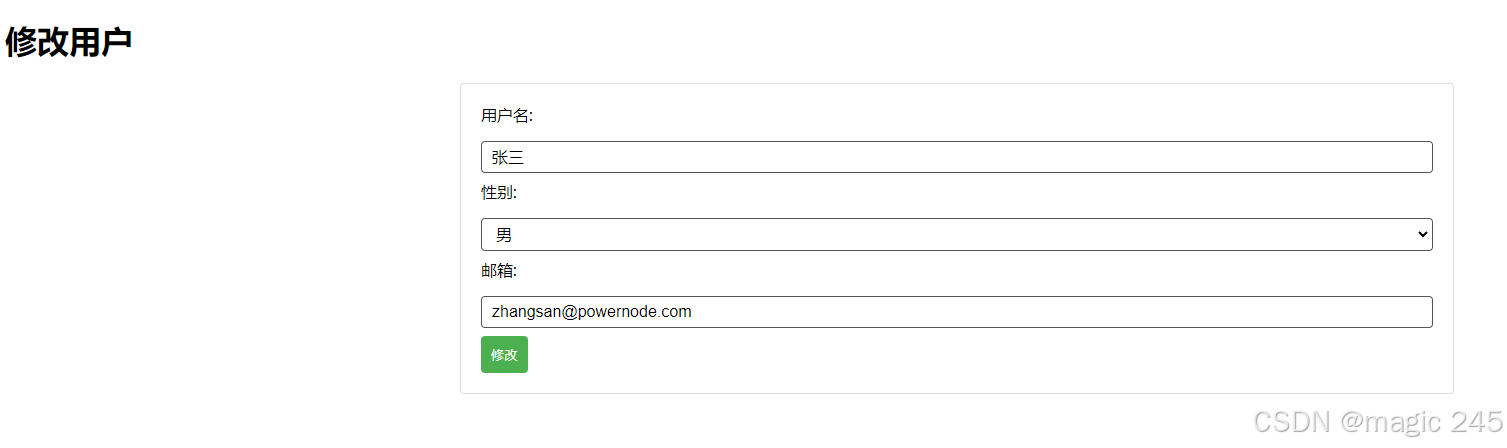
代码有两处需要修改:
部署,启动服务器,测试:

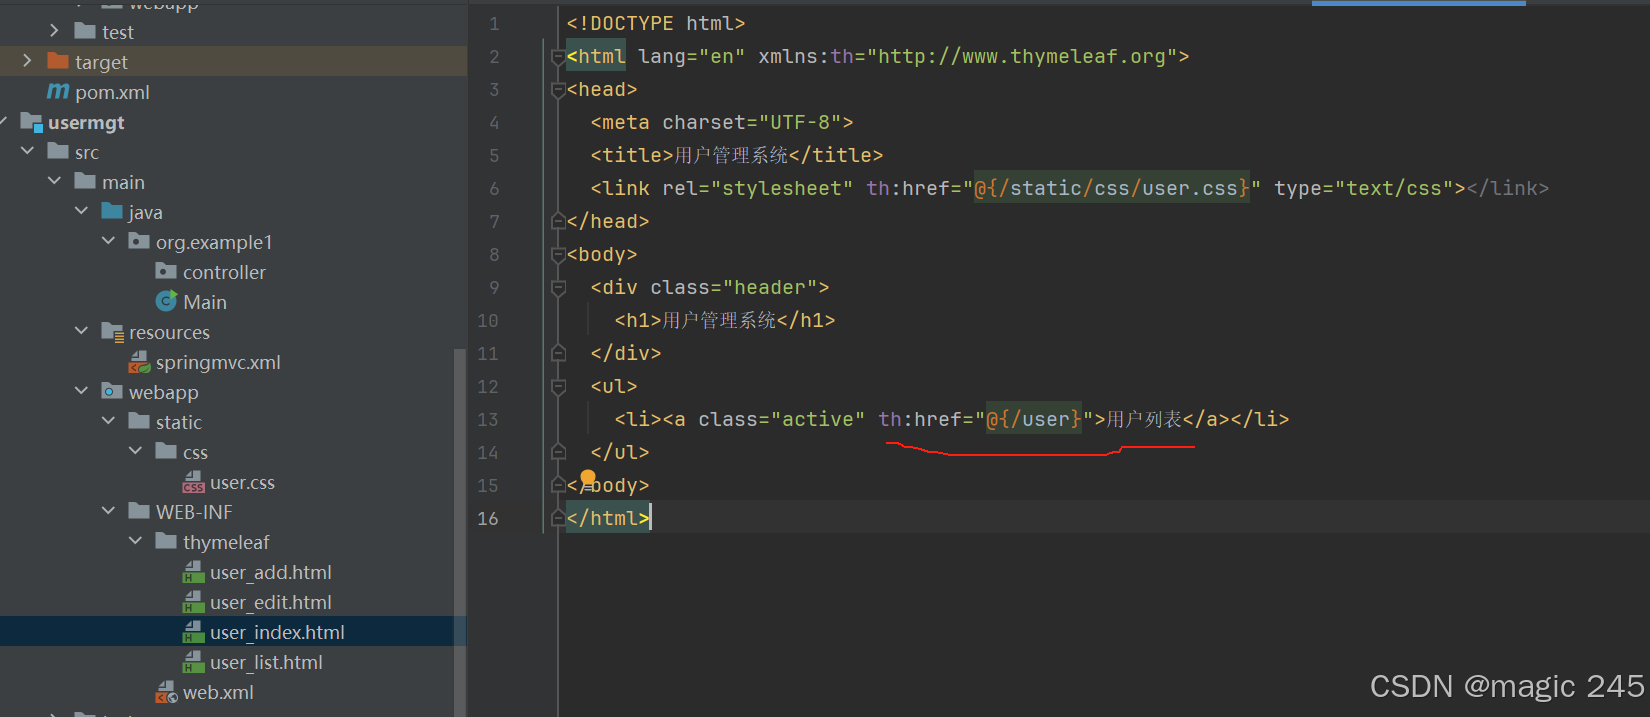
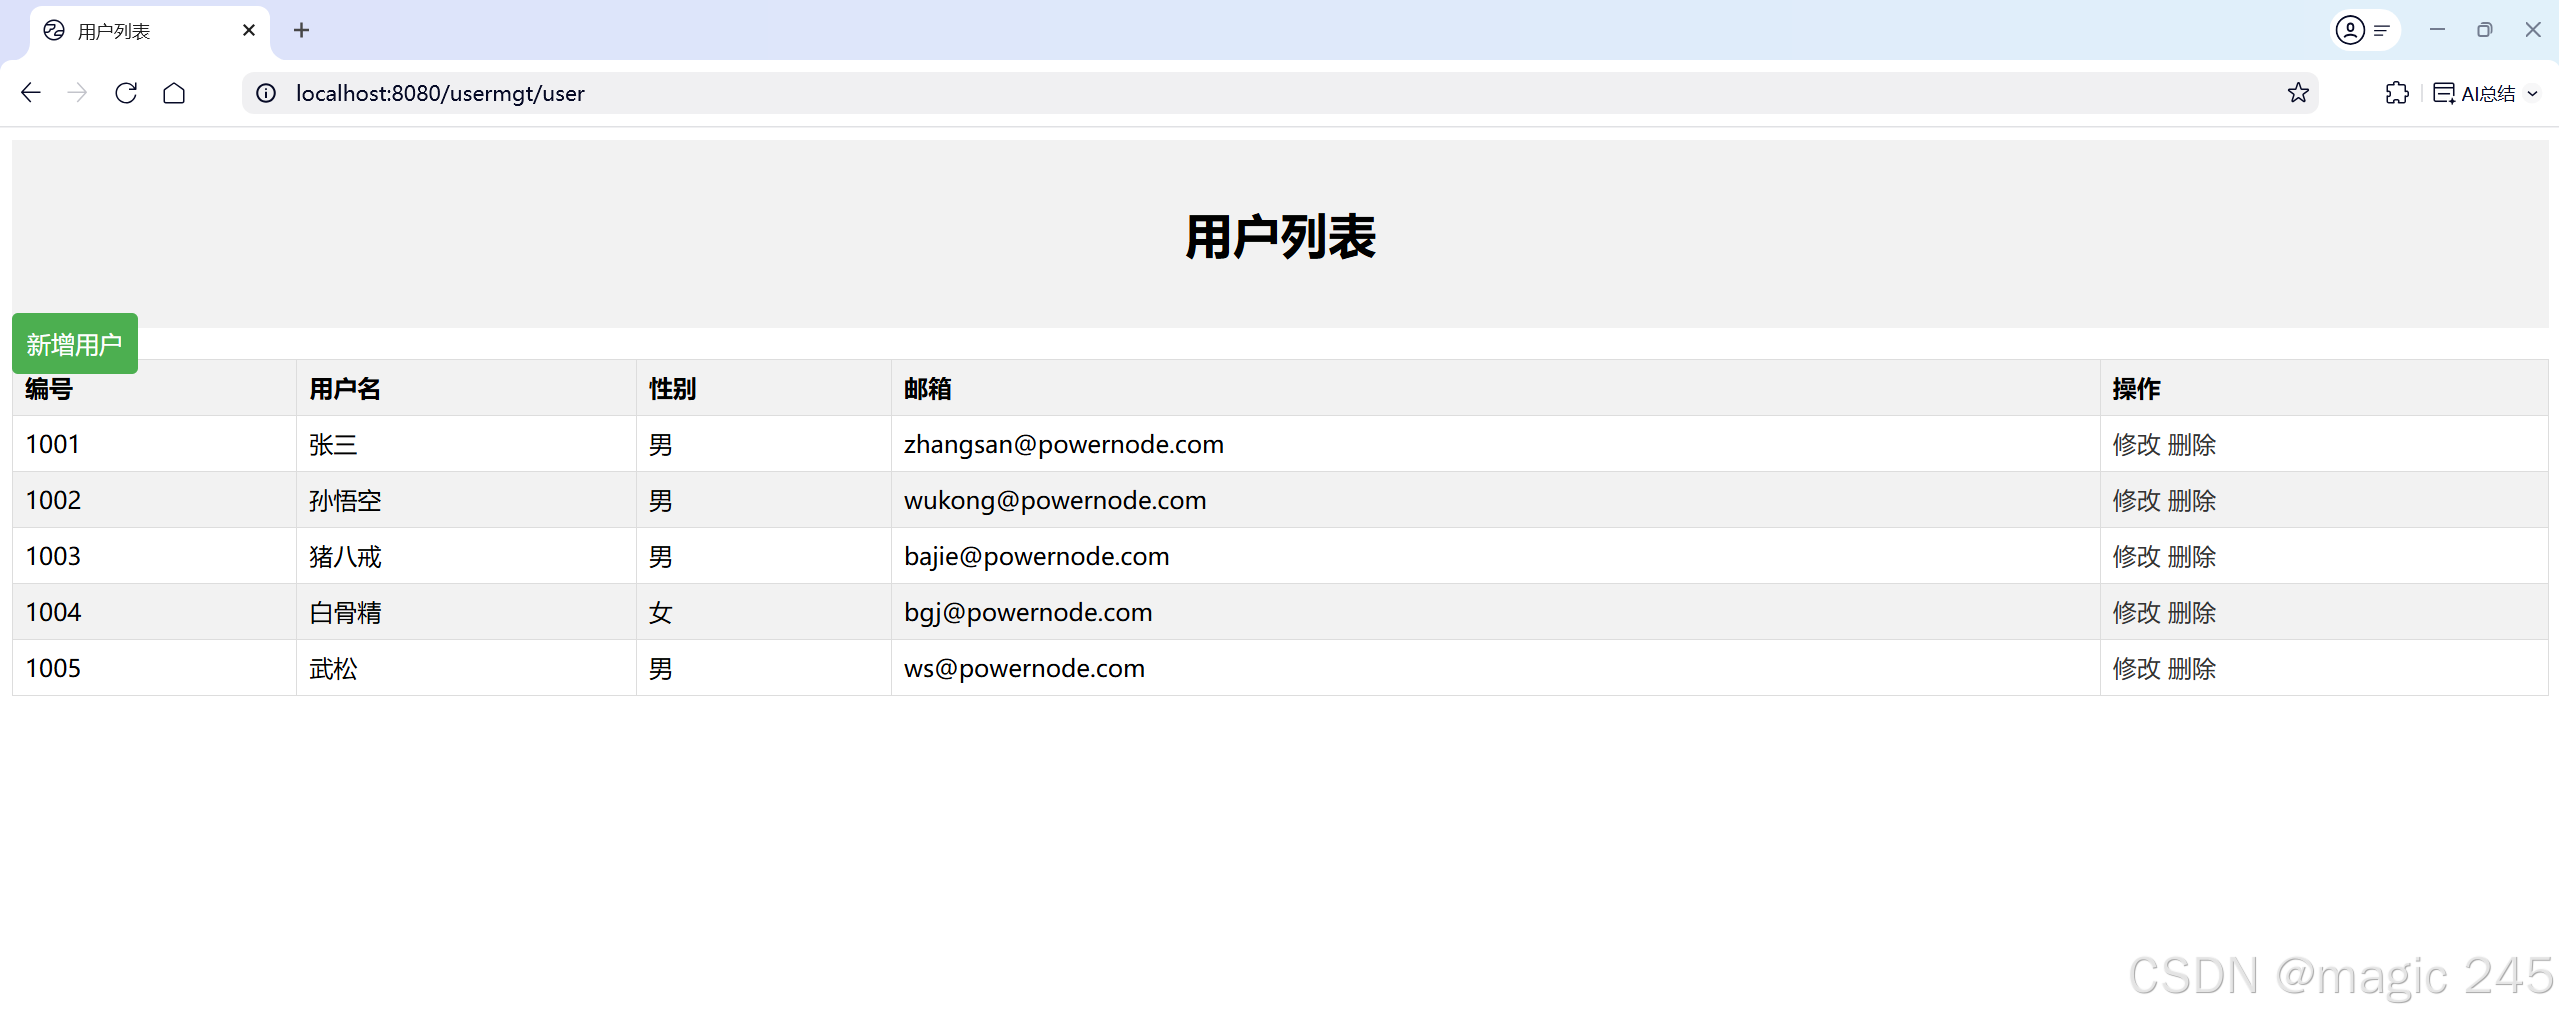
2.实现用户列表
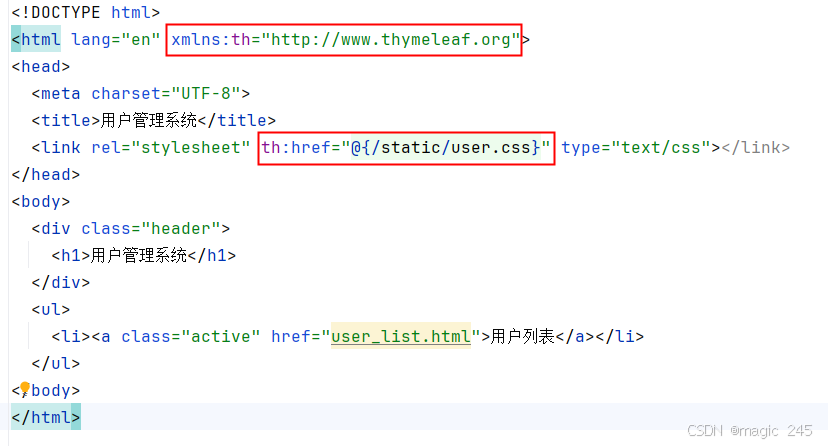
修改user_index.html中的超链接:
编写bean:User
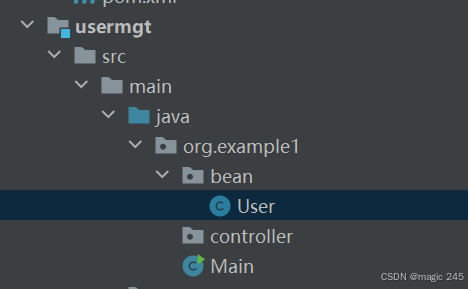
package org.example1.bean;


public class User {
    /**
     * 用户编号
     */
    private Long id;
    /**
     * 用户名
     */
    private String username;
    /**
     * 性别
     * 1表示男
     * 0表示女
     */
    private Integer sex;
    /**
     * 邮箱
     */
    private String email;

    public User() {
    }

    public User(Long id, String username, Integer sex, String email) {
        this.id = id;
        this.username = username;
        this.sex = sex;
        this.email = email;
    }

    @Override
    public String toString() {
        return "User{" +
                "id=" + id +
                ", username='" + username + '\'' +
                ", sex=" + sex +
                ", email='" + email + '\'' +
                '}';
    }

    public Long getId() {
        return id;
    }

    public void setId(Long id) {
        this.id = id;
    }

    public String getUsername() {
        return username;
    }

    public void setUsername(String username) {
        this.username = username;
    }

    public Integer getSex() {
        return sex;
    }

    public void setSex(Integer sex) {
        this.sex = sex;
    }

    public String getEmail() {
        return email;
    }

    public void setEmail(String email) {
        this.email = email;
    }
}
编写UserDao,提供selectAll方法:
package org.example1.dao;


import org.example1.bean.User;
import org.springframework.stereotype.Repository;

import java.util.ArrayList;
import java.util.List;


@Repository
public class UserDao {

    private static List<User> users = new ArrayList<>();

    static {
        // 类加载是初始化数据
        // 创建User对象
        User user1 = new User(1001L,"张三", 1, "zhangsan@powernode.com");
        User user2 = new User(1002L,"孙悟空", 1, "wukong@powernode.com");
        User user3 = new User(1003L,"猪八戒", 1, "bajie@powernode.com");
        User user4 = new User(1004L,"白骨精", 0, "bgj@powernode.com");
        User user5 = new User(1005L,"武松", 1, "ws@powernode.com");
        // 将User对象存储到List集合中
        users.add(user1);
        users.add(user2);
        users.add(user3);
        users.add(user4);
        users.add(user5);
    }

    /**
     * 查询所有的用户信息
     * @return 用户列表List集合
     */
    public List<User> selectAll(){
        return users;
    }


}
编写控制器UserController:
package org.example1.controller;


import org.example1.bean.User;
import org.example1.dao.UserDao;
import org.springframework.beans.factory.annotation.Autowired;
import org.springframework.stereotype.Controller;
import org.springframework.ui.Model;

import org.springframework.web.bind.annotation.RequestMapping;
import org.springframework.web.bind.annotation.RequestMethod;

import java.util.List;


@Controller
public class UserController {

    @Autowired
    private UserDao userDao;

    @RequestMapping(value = "/user", method = RequestMethod.GET)
    public String list(Model model){
        // 查询数据库,获取用户列表List集合
        List<User> users = userDao.selectAll();
        // 将用户列表存储到request域当中
        model.addAttribute("users", users);
        // 转发到视图
        return "user_list";
    }


}
将user_list.html拷贝到thymeleaf目录下,并进行代码修改,显示用户列表:
<!DOCTYPE html>
<html lang="en" xmlns:th="http://www.thymeleaf.org">
<head>
<meta charset="UTF-8">
<title>用户列表</title>
<link rel="stylesheet" th:href="@{/static/user.css}" type="text/css"></link>
</head>
<body>
<div class="header">
<h1>用户列表</h1>
</div>
<div class="add-button-wrapper">
<a class="add-button" href="user_add.html">新增用户</a>
</div>
<table>
<thead>
<tr>
<th>编号</th>
<th>用户名</th>
<th>性别</th>
<th>邮箱</th>
<th>操作</th>
</tr>
</thead>
<tbody>
<tr th:each="user : ${users}">
<td th:text="${user.id}"></td>
<td th:text="${user.name}"></td>
<td th:text="${user.gender == 1 ? '男' : '女'}"></td>
<td th:text="${user.email}"></td>
<td>
<a href="">修改</a>
<a href="">删除</a>
</td>
</tr>
</tbody>
</table>
</body>
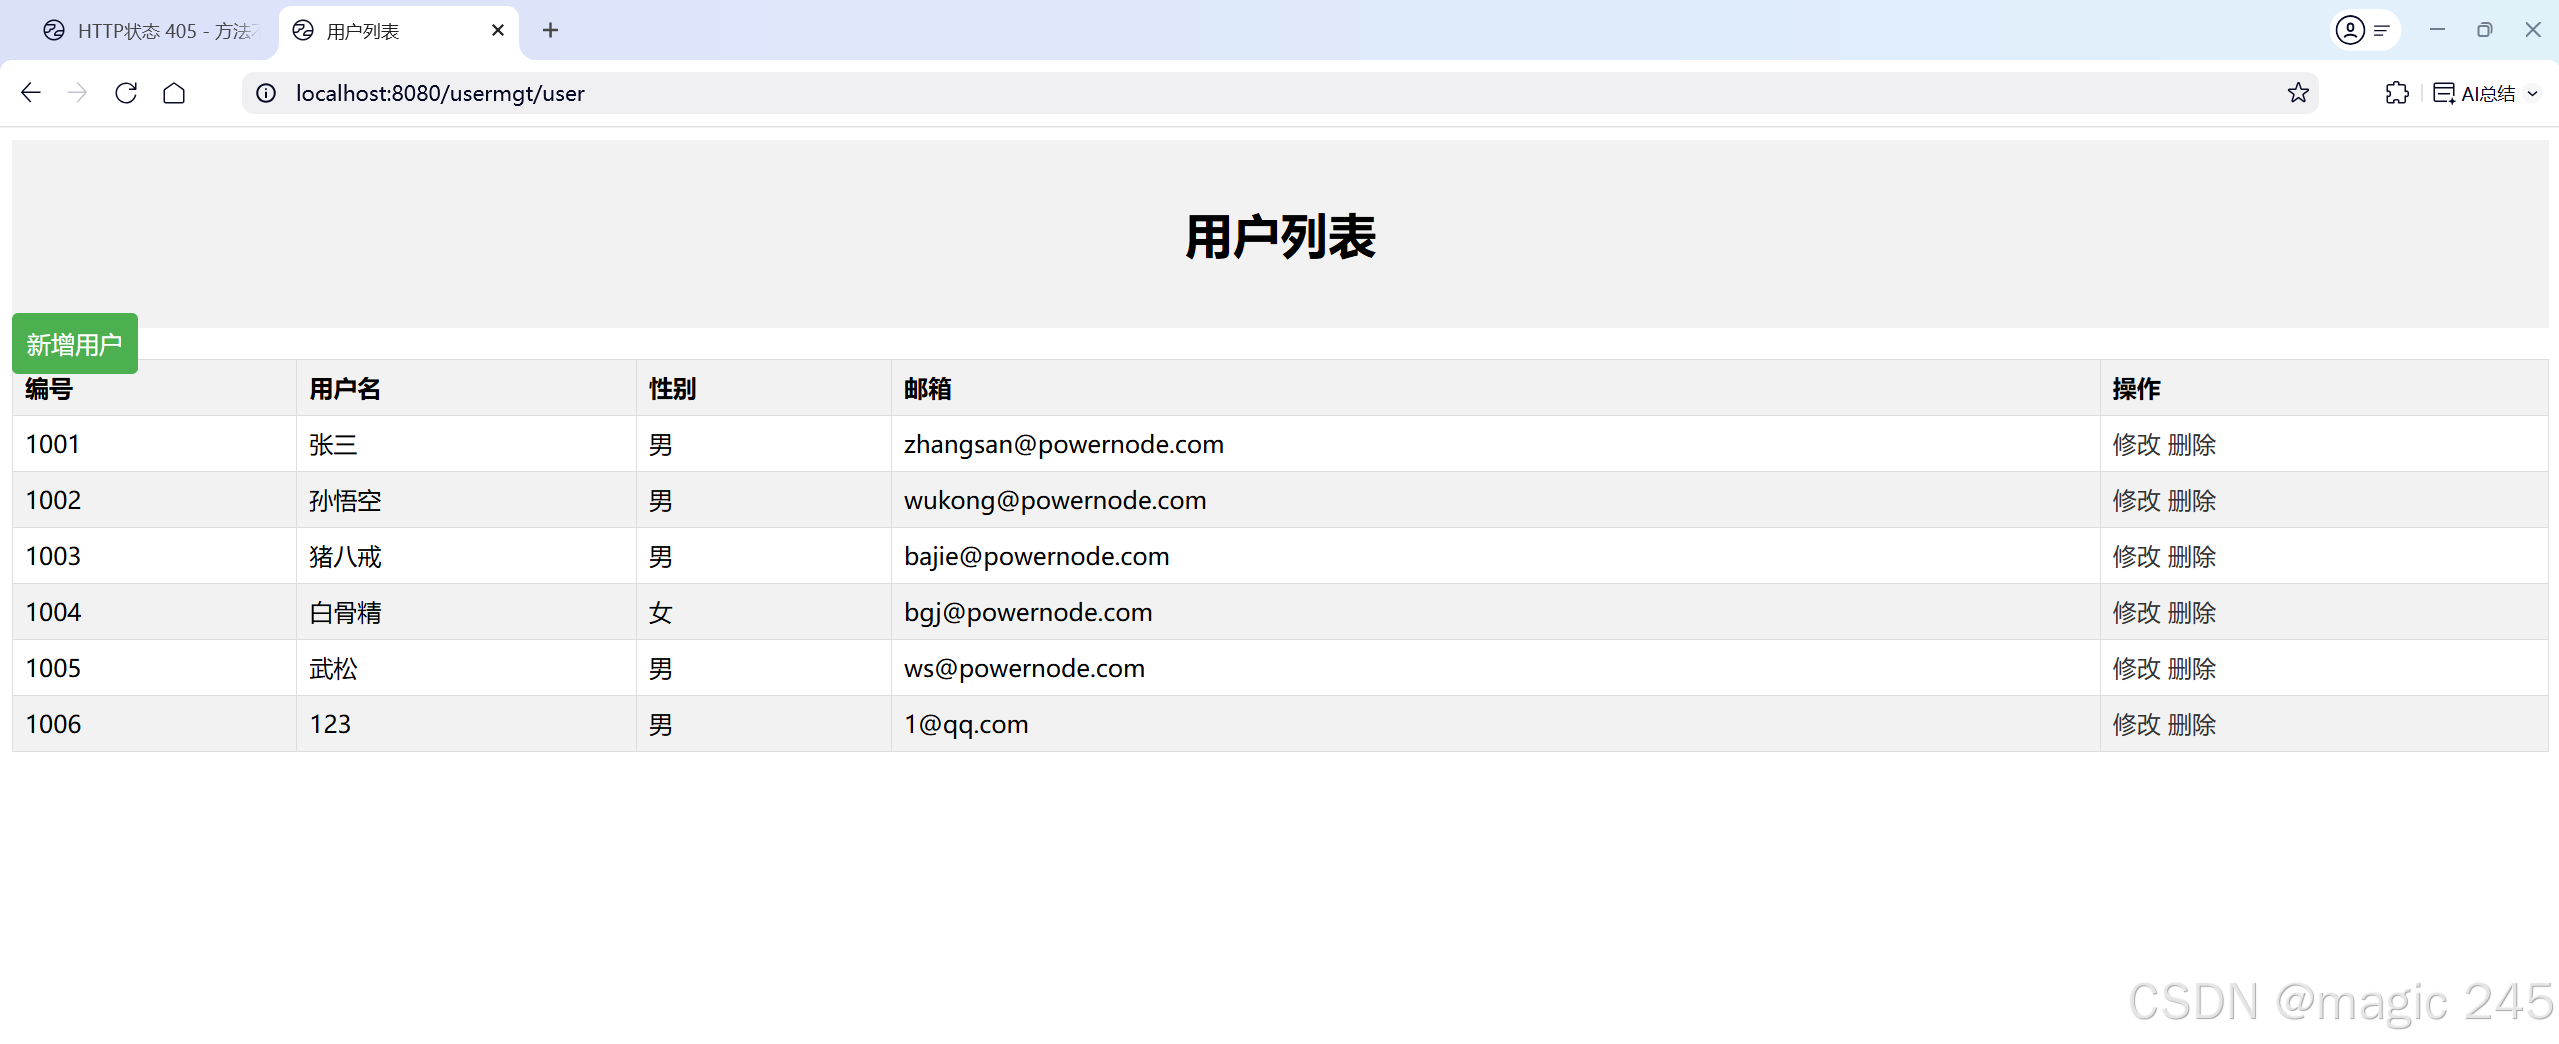
</html>测试结果:
3.实现新增功能
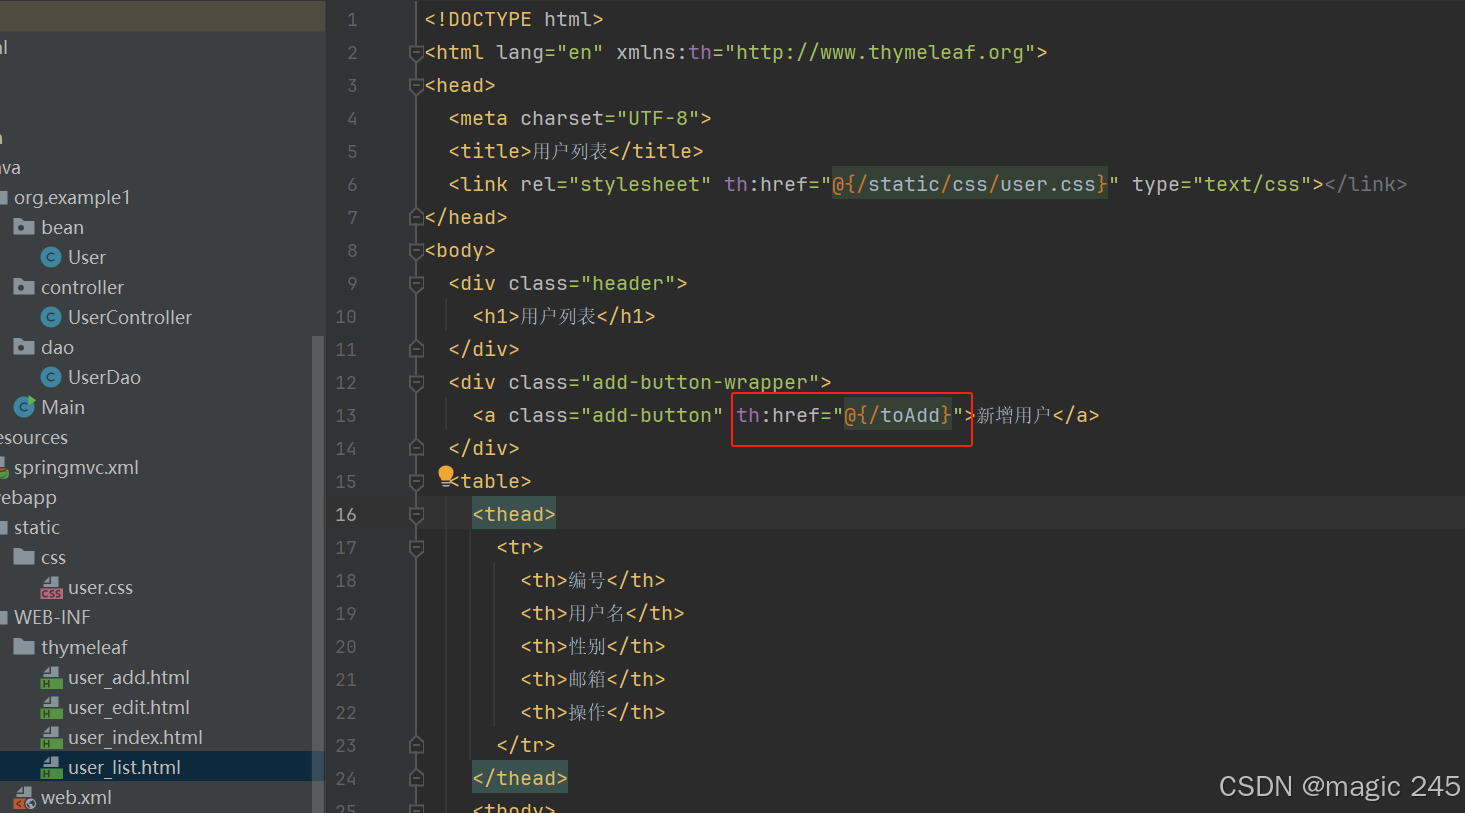
跳转到新增页面
在用户列表页面,修改新增用户的超链接:
将user_add.html拷贝到thymeleaf目录下,并进行代码修改如下:
<!DOCTYPE html>
<html lang="en" xmlns:th="http:www.thymeleaf.org">
<head>
  <meta charset="UTF-8">
  <title>新增用户</title>
  <link rel="stylesheet" th:href="@{/static/user.css}" type="text/css"></link>
</head>
<body>
  <h1>新增用户</h1>
  <form>
    <label>用户名:</label>
    <input type="text" name="username" required>

    <label>性别:</label>
    <select name="gender" required>
      <option value="">-- 请选择 --</option>
      <option value="1">男</option>
      <option value="0">女</option>
    </select>

    <label>邮箱:</label>
    <input type="email" name="email" required>

	<button type="submit">保存</button>
  </form>
</body>
</html>在springmvc.xml文件中配置视图控制器映射:
<mvc:view-controller path="/toSave" view-name="user_add"/>启动服务器测试:

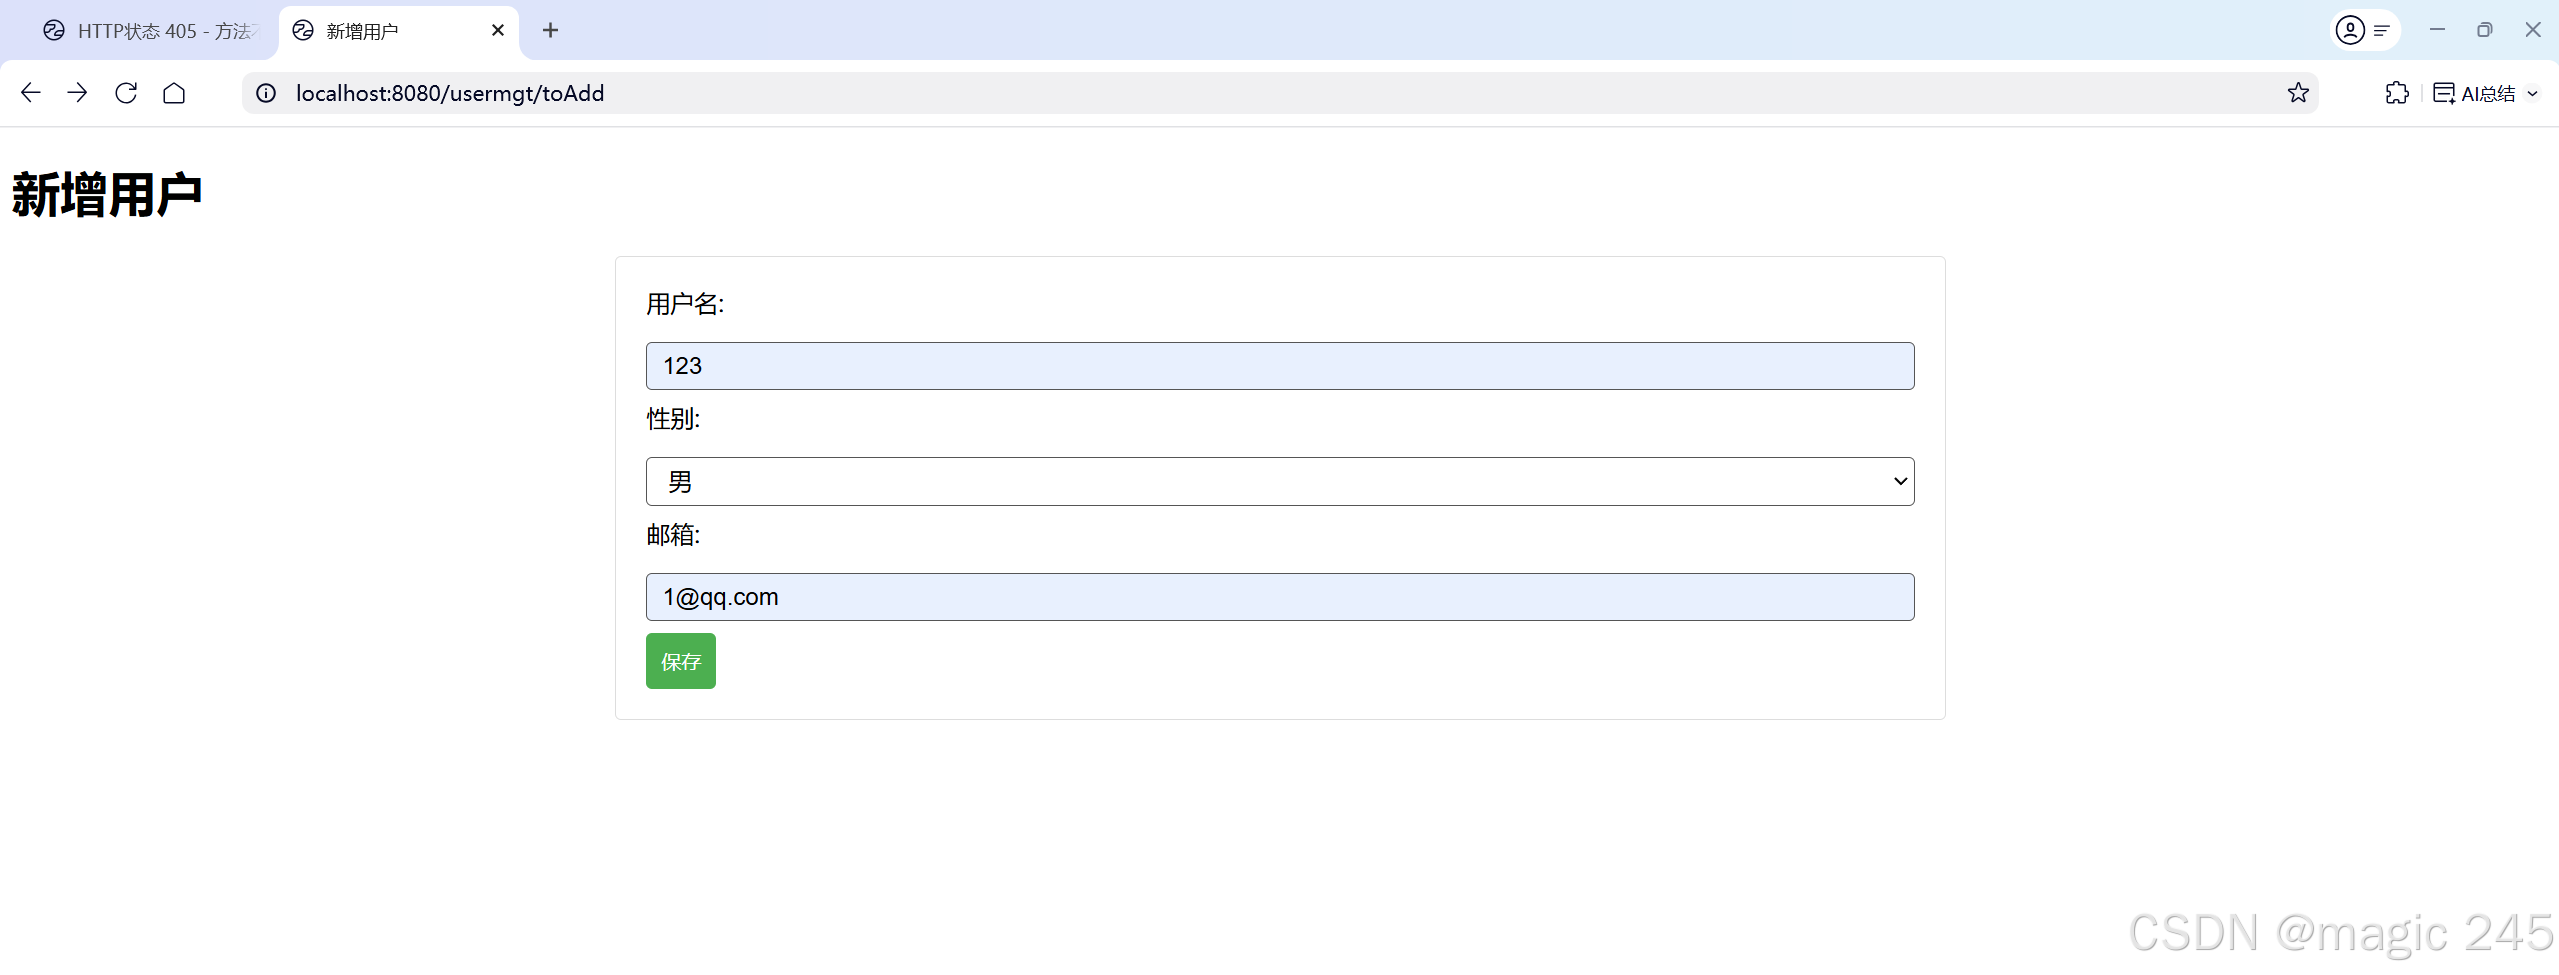
实现新增功能
前端页面发送POST请求,提交表单,user_add.html代码如下:
<!DOCTYPE html>
<html lang="en" xmlns:th="http:www.thymeleaf.org">
<head>
  <meta charset="UTF-8">
  <title>新增用户</title>
  <link rel="stylesheet" th:href="@{/static/user.css}" type="text/css"></link>
</head>
<body>
  <h1>新增用户</h1>
  <form th:action="@{/user}" method="post">
    <label>用户名:</label>
    <input type="text" name="name" required>

    <label>性别:</label>
    <select name="gender" required>
      <option value="">-- 请选择 --</option>
      <option value="1">男</option>
      <option value="0">女</option>
    </select>

    <label>邮箱:</label>
    <input type="email" name="email" required>

	<button type="submit">保存</button>
  </form>
</body>
</html>
编写控制器UserController:
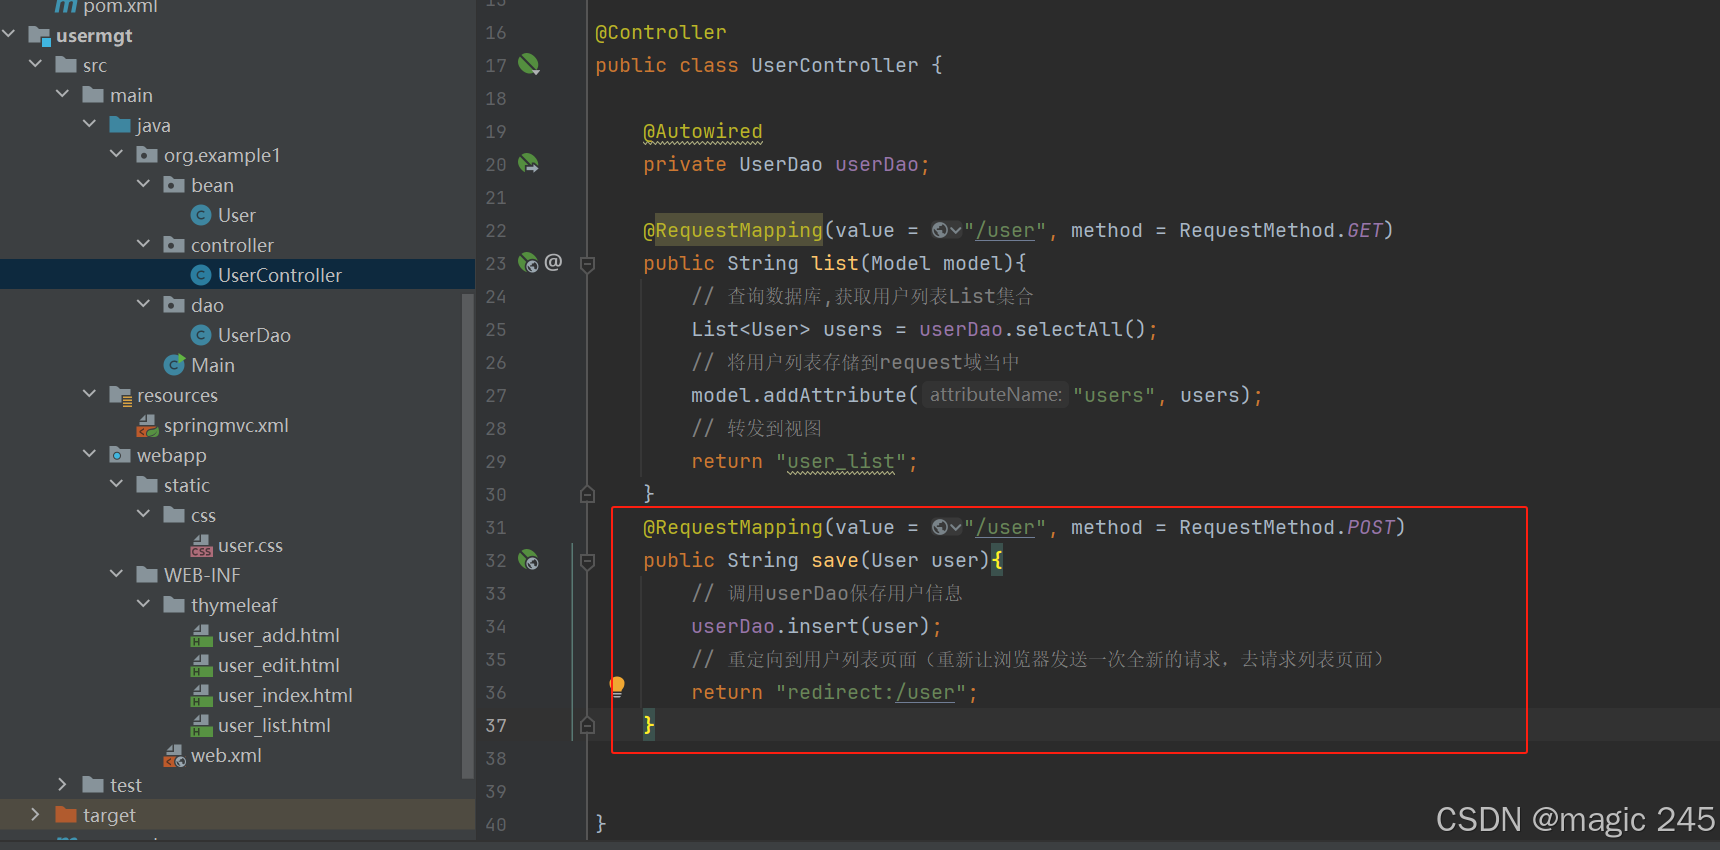
注意:保存成功后,采用重定向的方式跳转到用户列表。
编写UserDao:
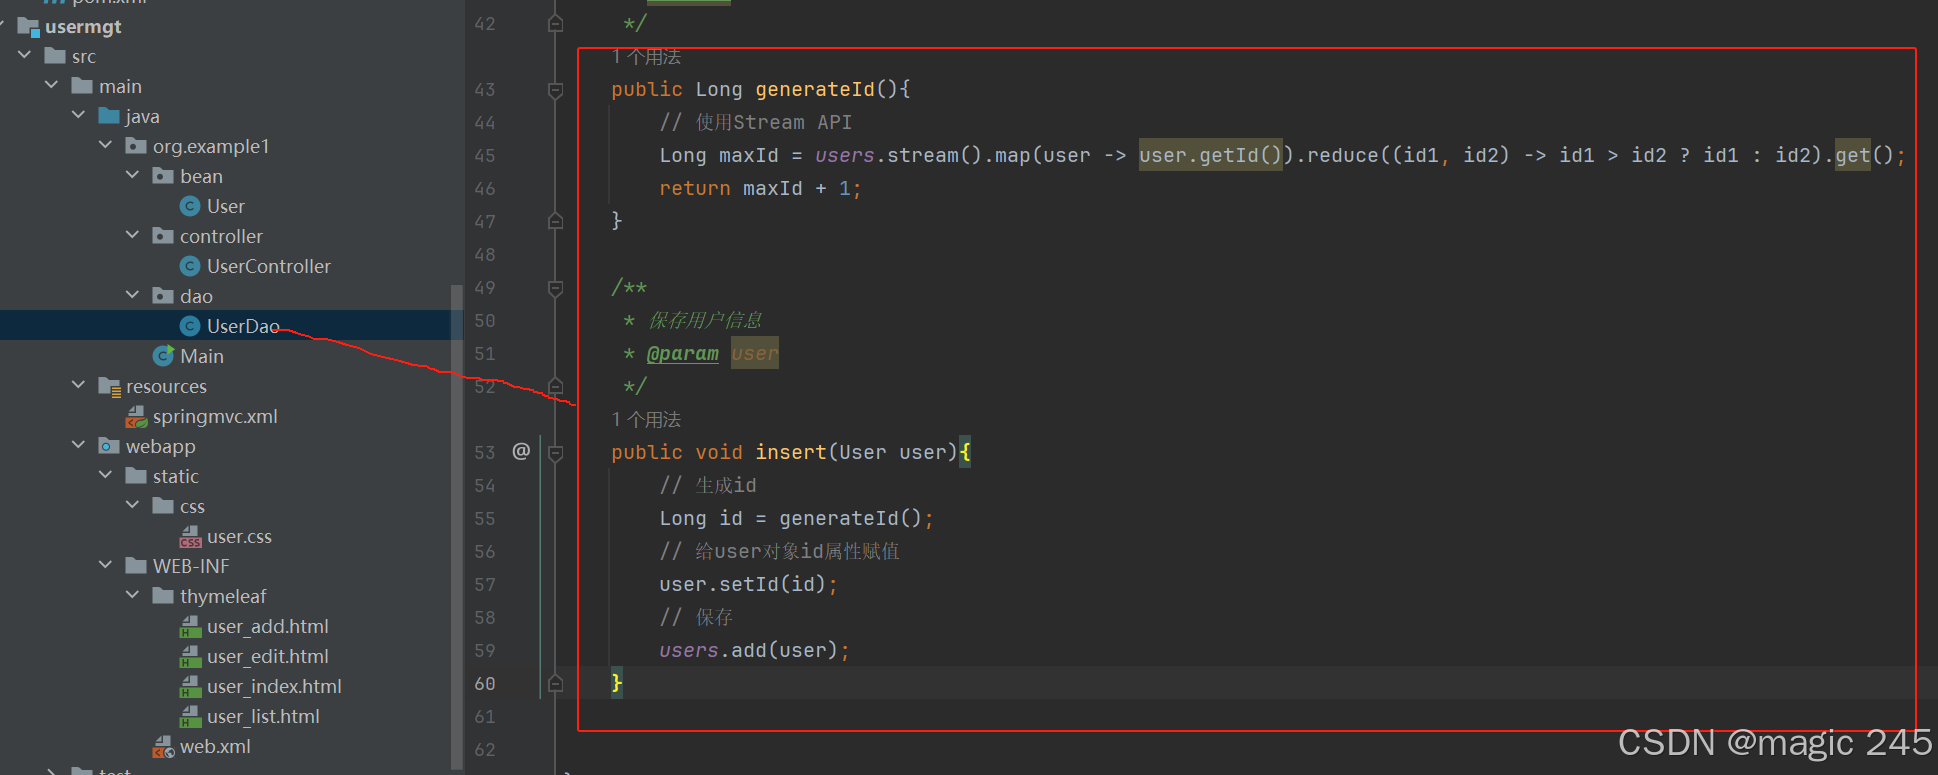
注意:单独写了一个方法生成id,内部使用了Stream API,不会这块内容的可以看老杜最新发布的2024版JavaSE。
4.跳转到修改页面
修改user_list.html中修改超链接:
<a th:href="@{'/user/' + ${user.id}}">修改</a>编写Controller:
@GetMapping("/user/{id}")
public String toUpdate(@PathVariable("id") Long id, Model model){
    // 根据id查询用户信息
    User user = userDao.selectById(id);
    // 将对象存储到request域
    model.addAttribute("user", user);
    // 跳转视图
    return "user_edit";
}
编写UserDao:
public User selectById(Long id){
    return users.stream().filter(user -> user.getId().equals(id)).findFirst().get();
}
将user_edit.html拷贝thymeleaf目录下,并修改代码如下:
<!DOCTYPE html>
<html lang="en" xmlns:th="http://www.thymeleaf.org">
<head>
<meta charset="UTF-8">
<title>修改用户</title>
<link rel="stylesheet" th:href="@{/static/user.css}" type="text/css"></link>
</head>
<body>
<h1>修改用户</h1>
<form>
<label>用户名:</label>
<input type="text" name="username" th:value="${user.name}" required>
<label>性别:</label>
<select name="gender" required>
<option value="">-- 请选择 --</option>
<option value="1" th:field="${user.gender}">男</option>
<option value="0" th:field="${user.gender}">女</option>
</select>
<label>邮箱:</label>
<input type="email" name="email" th:value="${user.email}" required>
<button type="submit">修改</button>
</form>
</body>
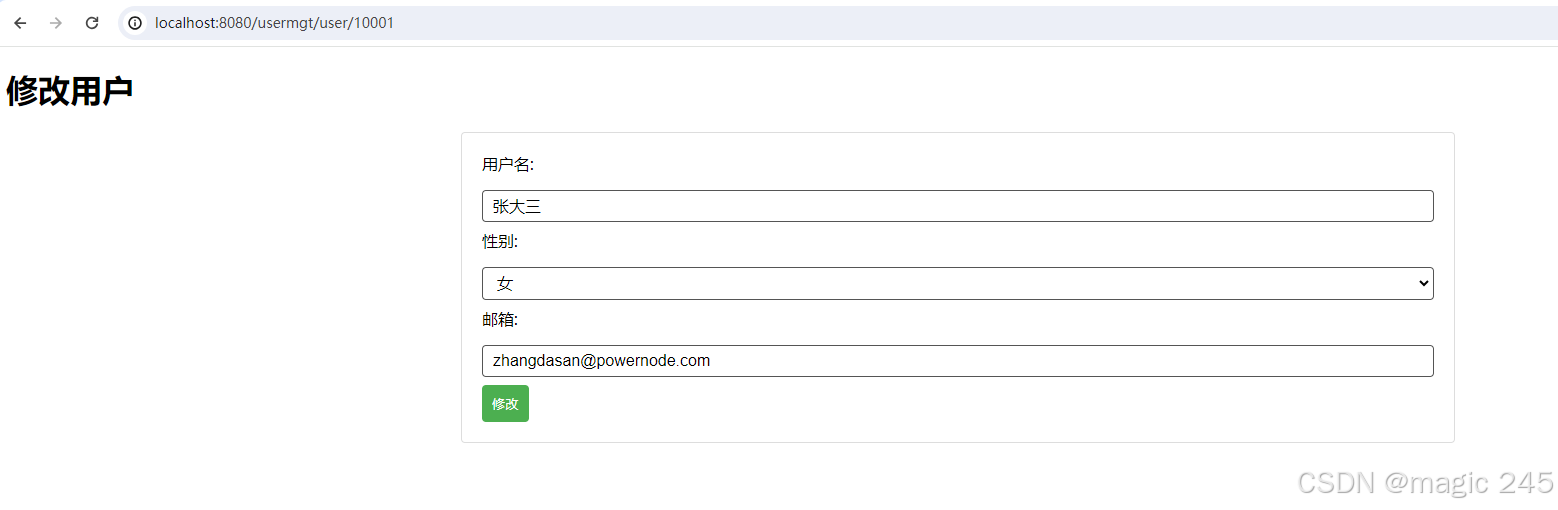
</html>启动服务器测试:

5.实现修改功能
将user_edit.html页面中的form表单修改一下,添加action,添加method,隐藏域的方式提交请求方式put,隐藏域的方式提交id:
<form th:action="@{/user}" method="post">
  <!--隐藏域的方式设置请求方式为put请求-->
  <input type="hidden" name="_method" value="put">
  <!--隐藏域的方式提交id-->
  <input type="hidden" name="id" th:value="${user.id}">

  <label>用户名:</label>
  <input type="text" name="name" th:value="${user.name}" required>

  <label>性别:</label>
  <select name="gender" required>
    <option value="">-- 请选择 --</option>
    <option value="1" th:field="${user.gender}">男</option>
    <option value="0" th:field="${user.gender}">女</option>
  </select>

  <label>邮箱:</label>
  <input type="email" name="email" th:value="${user.email}" required>

  <button type="submit">修改</button>
</form>
编写Controller:
@PutMapping("/user")
public String modify(User user){
    // 更新数据
    userDao.update(user);
    // 重定向
    return "redirect:/user";
}
编写UserDao:
public void update(User user){
for (int i = 0; i < users.size(); i++) {
if(user.getId().equals(users.get(i).getId())){
users.set(i, user);
break;
}
}
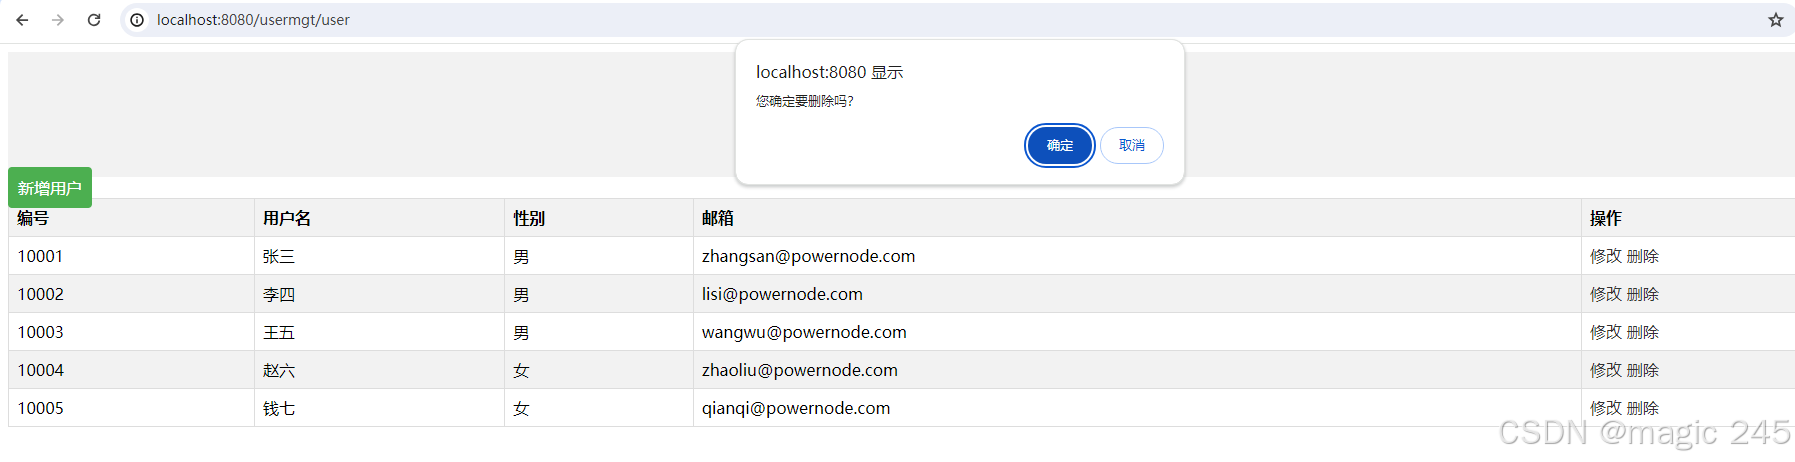
}启动服务器测试:

6.实现删除功能
删除应该发送DELETE请求,要模拟DELETE请求,就需要使用表单方式提交。因此我们点击删除超链接时需要采用表单方式提交。 在user_list.html页面添加form表单,并且点击超链接时应该提交表单,代码如下:
<!DOCTYPE html>
<html lang="en" xmlns:th="http://www.thymeleaf.org">
<head>
  <meta charset="UTF-8">
  <title>用户列表</title>
  <link rel="stylesheet" th:href="@{/static/user.css}" type="text/css"></link>
</head>
<body>
  <div class="header">
    <h1>用户列表</h1>
  </div>
  <div class="add-button-wrapper">
    <a class="add-button" th:href="@{/toSave}">新增用户</a>
  </div>
  <table>
    <thead>
      <tr>
        <th>编号</th>
        <th>用户名</th>
        <th>性别</th>
        <th>邮箱</th>
        <th>操作</th>
      </tr>
    </thead>
	<tbody>

      <tr th:each="user : ${users}">
        <td th:text="${user.id}"></td>
        <td th:text="${user.name}"></td>
        <td th:text="${user.gender == 1 ? '男' : '女'}"></td>
        <td th:text="${user.email}"></td>
        <td>
          <a th:href="@{'/user/' + ${user.id}}">修改</a>
          <!--为删除提供一个鼠标单击事件-->
          <a th:href="@{'/user/' + ${user.id}}" onclick="del(event)">删除</a>
        </td>
      </tr>

    </tbody>
  </table>

  <!--为删除操作准备一个form表单,点击删除时提交form表单-->
  <div style="display: none">
  <form method="post" id="delForm">
    <input type="hidden" name="_method" value="delete"/>
  </form>
  </div>

  <script>
    function del(event){
      // 获取表单
      let delForm = document.getElementById("delForm");
      // 设置表单action
      delForm.action = event.target.href;
      if(window.confirm("您确定要删除吗?")){
        // 提交表单
        delForm.submit();
      }
      // 阻止超链接默认行为
      event.preventDefault();
    }
  </script>
</body>
</html>
编写Controller:
@DeleteMapping("/user/{id}")
public String del(@PathVariable("id") Long id){
    // 删除
    userDao.deleteById(id);
    // 重定向
    return "redirect:/user";
}
编写UserDao:
public void deleteById(Long id){
    for (int i = 0; i < users.size(); i++) {
        if(id.equals(users.get(i).getId())){
            users.remove(i);
            break;
        }
    }
}


 677
677

 被折叠的 条评论
为什么被折叠?
被折叠的 条评论
为什么被折叠?
 到【灌水乐园】发言


