


前言
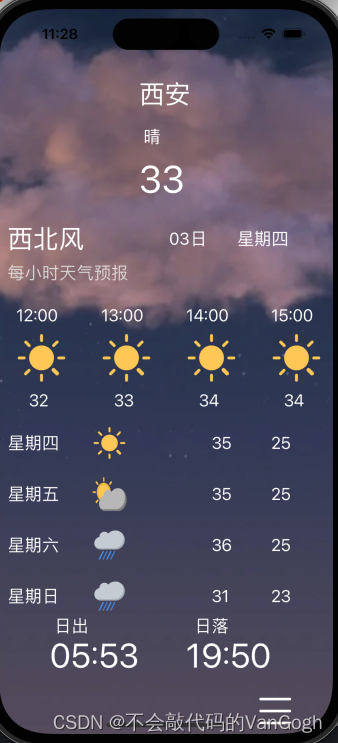
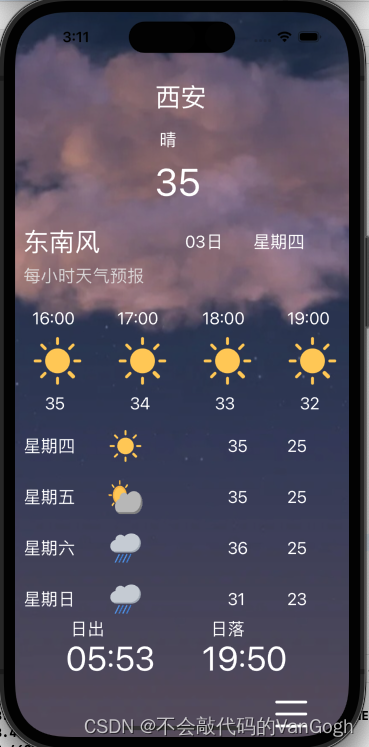
本周学习了iOS中的简单网络请求并且仿写了一个天气预报的demo,对于这个demo前期需要考虑的东西有很多,搭建框架花费了不少时间,下面做个总结吧。
一、简单网络请求
仿写天气预报最重要的就是通过网络请求获取实时数据,因此下面先讲一下如何实现一个简单的网络请求。
第一步:创建请求地址
第二步:创建请求类
第三步:创建会话
第四步:根据会话创建任务
第五步:启动任务
第六步:接收服务器的响应
第七步:接收数据
第八步:解析数据并获取
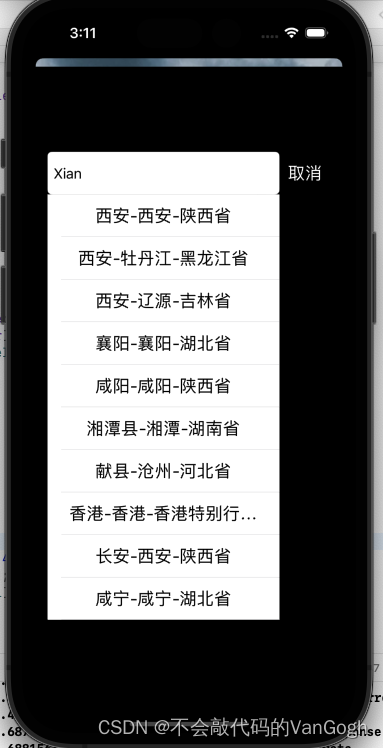
下面以城市的模糊搜索作为例子:
//创建请求地址
NSString* urlString = [NSString stringWithFormat:@"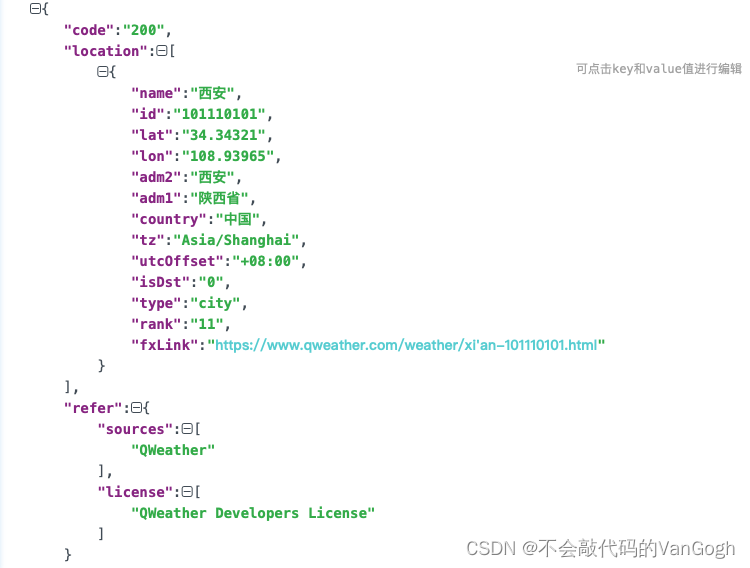
", self.textField.text];
//处理字符
urlString = [urlString stringByAddingPercentEncodingWithAllowedCharacters:[NSCharacterSet URLQueryAllowedCharacterSet]];
//创建URL
NSURL* url = [NSURL URLWithString:urlString];
NSLog(@"urlString为:%@", urlString);
//创建请求类
NSURLRequest* request = [NSURLRequest requestWithURL:url];
//创建会话
NSURLSession* session = [NSURLSession sessionWithConfiguration:[NSURLSessionConfiguration defaultSessionConfiguration] delegate:self delegateQueue:[NSOperationQueue mainQueue]];
NSURLSessionDataTask* dataTask = [session dataTaskWithRequest:request];
[dataTask resume];
}
//接收服务器的响应
-(void)URLSession:(NSURLSession *)session dataTask:(NSURLSessionDataTask *)dataTask didReceiveResponse:(NSURLResponse *)response completionHandler:(void (^)(NSURLSessionResponseDisposition))completionHandler {
NSLog(@"didReceiveResponse");
if (self.data == nil) {
self.data = [[NSMutableData alloc] init];
} else {
self.data.length = 0;
}
//允许接收数据
completionHandler(NSURLSessionResponseAllow);
}
//接收到数据该方法会被调用多次
- (void)URLSession:(NSURLSession *)session dataTask:( NSURLSessionDataTask *)dataTask didReceiveData:( NSData *)data {
NSLog(@"didReceiveData");
[self.data appendData:data];
}
//数据请求完成或者请求错误调用此方法
- (void)URLSession:(NSURLSession *)session task:( NSURLSessionTask *)task didCompleteWithError:( NSError *)error {
NSLog(@"didCompleteWithError");
self.cityArray = [[NSMutableArray alloc] init];
if (error == nil) {
//解析数据
NSDictionary *secondDictionary = [NSJSONSerialization JSONObjectWithData:self.data options:kNilOptions error:nil];
NSLog(@"%@", secondDictionary);
 NSMutableArray *timeArray = [[NSMutableArray alloc] init];
        timeArray = secondDictionary[@"location"];
        for (int i = 0; i < timeArray.count; i++) {
            NSMutableString *str = [NSMutableString stringWithFormat:@"%@-%@-%@", timeArray[i][@"name"], timeArray[i][@"adm2"], timeArray[i][@"adm1"]];
            [self.cityArray addObject: str];
        }
for (int i = 0; i < self.cityArray.count; i++) {
NSLog(@"%@", self.cityArray[i]);
}
NSLog(@"-----------over");
} else {
NSLog(@"error = %@", error);
}
[[NSOperationQueue mainQueue] addOperationWithBlock:^{
[self.tableView reloadData];
}];
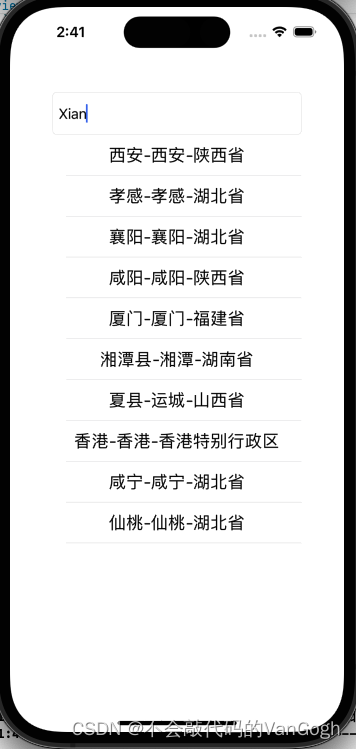
运行结果如下:
由于通过URL访问API获取的数据是JSON格式的,所以要通过[NSJSONSerialization JSONObjectWithData:self.data options:kNilOptions error:nil]将数据解析成Foundation框架下的数组或字典才能访问其中的数据。
下面这段代码根据JSON数据格式的实际情况来定,我的是字典里包含着数组,数组里再包含着字典。
NSMutableArray *timeArray = [[NSMutableArray alloc] init];
timeArray = secondDictionary[@"location"];
for (int i = 0; i < timeArray.count; i++) {
NSMutableString *str = [NSMutableString stringWithFormat:@"%@-%@-%@", timeArray[i][@"name"], timeArray[i][@"adm2"], timeArray[i][@"adm1"]];
[self.cityArray addObject: str];
}
如果要更新 UI 元素、执行与用户交互相关的操作或其他需要在主线程上执行的任务则需要在下面方法的代码块中添加所需代码
 [[NSOperationQueue mainQueue] addOperationWithBlock:^{
}];
二、多界面传值的应用
对于不同的视图控制器之间的数据交互,多界面传值则是必不可少的,
对于以上的几个界面来说主要用到的就是属性传值,协议传值,通知传值。 如果需要将第一个界面的数据传递到第二个界面用到的就是属性传值(前传后)。
如果需要将第二个界面的数据传递到第一个界面用到的就是协议传值(后传前)。
如果需要将第三个界面的数据跨越第二个界面直接传递给第一个界面用到的就是通知传值(后传前)。
下面介绍一下通知传值
通知传值主要分为三个步骤:
1.在发送者界面实现一个方法并发送通知
 [[NSNotificationCenter defaultCenter] postNotificationName:@"notifacation" object:nil userInfo:self.notificationDict];
 //postNotificationName:之后的参数就是这个通知的名字,要和要和接收者中的名字一样,才能让接收者正确接收。
 //object:接收对象。
 //userInfo: 携带的参数,为字典类型的数据
2.在接收者界面注册观察者用来接收通知
[[NSNotificationCenter defaultCenter] addObserver:self selector:@selector(notiReceived:) name:@"notifacation" object:nil];
3.在接收者视图中实现方法来接收传来的数据
- (void)notiReceived:(NSNotification*)sender {
    self.cellArr = sender.userInfo[@"cityNameArr"];
    self.cellWeatherArr = sender.userInfo[@"citiesWeatherArr"];
    self.cellLocationArr = sender.userInfo[@"locationArray"];
    [self.tableView reloadData];
    NSLog(@"%@", self.cellLocationArr);
}
总结
对于仿写天气预报用到最多的两个知识点就是简单网络请求和多界面传值。


 4592
4592

 被折叠的 条评论
为什么被折叠?
被折叠的 条评论
为什么被折叠?
 到【灌水乐园】发言


