


文章目录
前言
今天我要介绍单向链表,单向链表与之前我们学的顺序表作用相同,但与顺序表相比,单向链表使用起来更加灵活,效率更高,是一种非常常见且实用的数据结构.
一、单向链表是什么?
1.顾名思义,单向链表是用单向结构去实现功能
2.链表有很多种,但常用的是单向链表
3.单向链表的存储数据方式是一块一块独立的空间,与顺序表是有区别的
4.单向链表比顺序表更适合实现增删改查的功能
5.单向链表是一种存储结构上非连续、非顺序的存储结构
二、单向链表实现步骤
1.打印链表数据以及实现链表头插
.h文件
#pragma once
#include<stdio.h>
#include<assert.h>
#include<stdlib.h>
typedef int Typen;//类型自定义名字,使数据灵活改变
typedef struct ChainedList
{
	Typen data;//存放的数据
	struct ChainedList* next;//用于存放下一个空间的地址
}CList;
//打印数据
void ChainedListprint(CList* phead);
//头插
void ChainedListPushFront(CList** pphead, Typen x);
.c文件
#define _CRT_SECURE_NO_WARNINGS 1
#include"ChainedList.h"
//打印数据
void ChainedListprint(CList* phead)
{
CList* ps = phead;
while (ps != NULL)
{
printf("%d->", ps->data);
ps = ps->next;
}
printf("NULL\n");
}
//动态申请一个结点
CList* CListBuy(Typen x)
{
CList* p = (CList*)malloc(sizeof(CList));
p->data = x;
p->next = NULL;
return p;
}
//头插
//这里需要注意,传参必须使用双指针
//因为当我们要改变头指针指向的地址时,我们需要用地址的指针
void ChainedListPushFront(CList** pphead, Typen x)
{
assert(pphead);
CList* ps = CListBuy(x);
ps->next = *pphead;
*pphead = ps;
}.c(执行文件)
CList* p = NULL;
ChainedListPushFront(&p, 1);
ChainedListPushFront(&p, 2);
ChainedListPushFront(&p, 3);
ChainedListprint(p);
return 0;
2.实现链表尾插
.h文件
//尾插
void ChainedListPushBack(CList** pphead, Typen x);
.c文件
//动态申请一个结点
CList* CListBuy(Typen x)
{
CList* p = (CList*)malloc(sizeof(CList));
if (p == NULL)
{
perror("malloc:");
return NULL;
}
p->data = x;
p->next = NULL;
return p;
}
//尾插
//形参1需要使用双指针,因为可能出现要改变头指针地址的情况
void ChainedListPushBack(CList** pphead, Typen x)
{
assert(pphead);
CList* ps = CListBuy(x);
// 1、空链表
// 2、非空链表
if (*pphead == NULL)
{
*pphead = ps;
}
else
{
CList* n = *pphead;
while (n->next != NULL)
{
n = n->next;
}
n->next = ps;
}
}
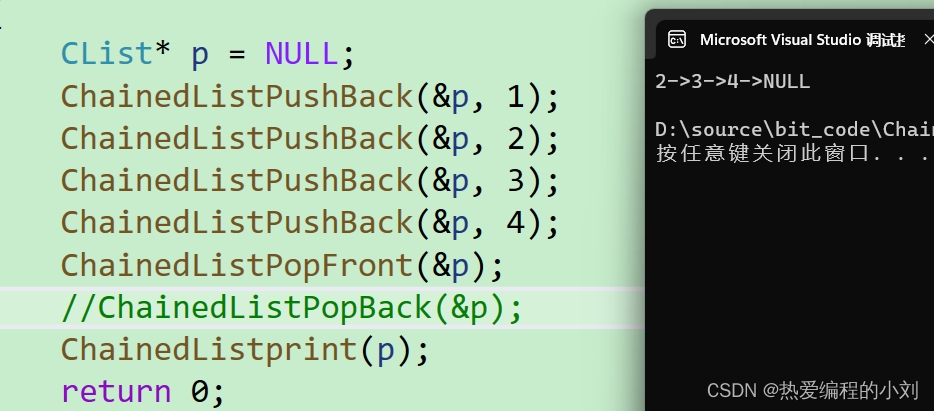
3.实现链表头删尾删
.h文件
//头删
void ChainedListPopFront(CList** pphead);
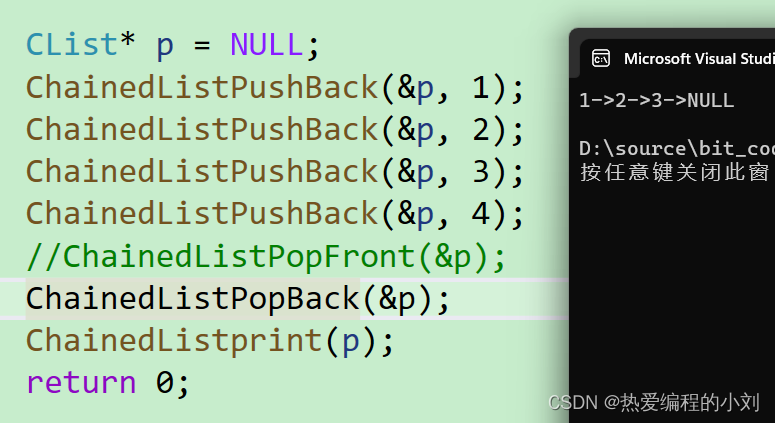
//尾删
void ChainedListPopBack(CList** pphead);.c文件
//头删
void ChainedListPopFront(CList** pphead)
{
assert(*pphead);
CList* ps = *pphead;
*pphead = ps->next;
free(ps);
ps = NULL;
}
//尾删
void ChainedListPopBack(CList** pphead)
{
assert(*pphead);
CList* ps = *pphead;
//两种情况:
// 1.一个结点
// 2.多个结点
if (ps->next == NULL)
{
*pphead = ps;
free(ps);
}
else
{
//找到最后一个结点,next为NULL
while (ps->next->next != NULL)
{
ps = ps->next;
}
free(ps->next);
ps->next = NULL;
}
}
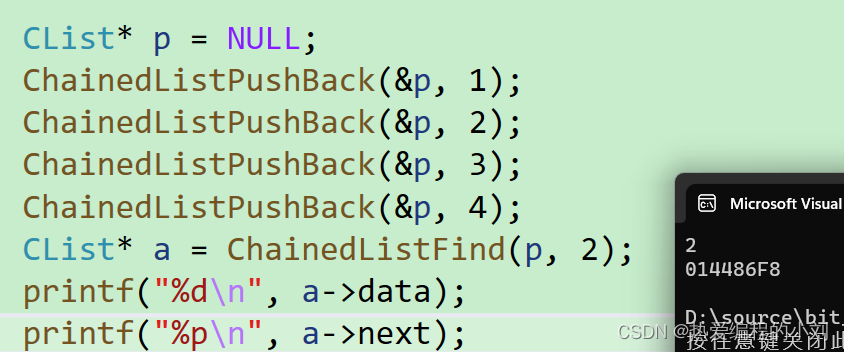
4.实现链表查找
.h文件
//单链表查找
CList* ChainedListFind(CList* phead, Typen x);
.c文件
//单链表查找
CList* ChainedListFind(CList* phead, Typen x)
{
CList* ps = phead;
while (ps)
{
if (ps->data == x)
{
return ps;
}
ps = ps->next;
}
return NULL;
}
5.实现链表在pos之前/之后插入
.h文件
// 在pos之前插入
void ChainedListInsert(CList** pphead, CList* pos, Typen x);
// 在pos之后插入
void ChainedListInsertAfter(CList* pos, Typen x);
.c文件
// 在pos之前插入
void ChainedListInsert(CList** pphead, CList* pos, Typen x)
{
assert(pphead);
assert(pos);
//一个节点时的情况
CList* ps = *pphead;
if (*pphead == pos)
{
ChainedListPushFront(pphead, x);
}
else
{
//多节点时的情况
while (ps->next != pos)
{
ps = ps->next;
}
CList* p = CListBuy(x);
p->next = ps->next;
ps->next = p;
}
}
// 在pos之后插入
void ChainedListInsertAfter(CList* pos, Typen x)
{
assert(pos);
CList* ps = CListBuy(x);
ps->next = pos->next;
pos->next = ps;
}6.实现链表删除pos位置的值
.h文件
// 删除pos位置的值
void ChainedListErase(CList** pphead, CList* pos);
.c文件
// 删除pos位置的值
void ChainedListErase(CList** pphead, CList* pos)
{
assert(pphead);
assert(pos);
//一个结点时
if (*pphead == pos)
{
ChainedListPopFront(pphead);
}
//多节点时
else
{
CList* ps = *pphead;
while (ps->next != pos)
{
ps = ps->next;
}
ps->next = pos->next;
free(pos);
}
}7.实现链表删除pos之后位置的值
.h文件
// 删除pos位置后面的值
void ChainedListEraseAfter(CList* pos);
.c文件
// 删除pos位置后面的值
void ChainedListEraseAfter(CList* pos)
{
assert(pos);
assert(pos->next);
pos->next = pos->next->next;
free(pos->next);
}总结
以上就是今天要讲的内容,希望能帮助到大家,多多支持,非常感谢!


 1532
1532


 被折叠的 条评论
为什么被折叠?
被折叠的 条评论
为什么被折叠?
 到【灌水乐园】发言


