


实现自定义系统调用
如何使用 QEMU 模拟32位 ARM 环境参考:使用Qemu模拟32位ARM系统
修改linux内核源码
使用 linux-4.4.240 源码,下载链接:下载链接
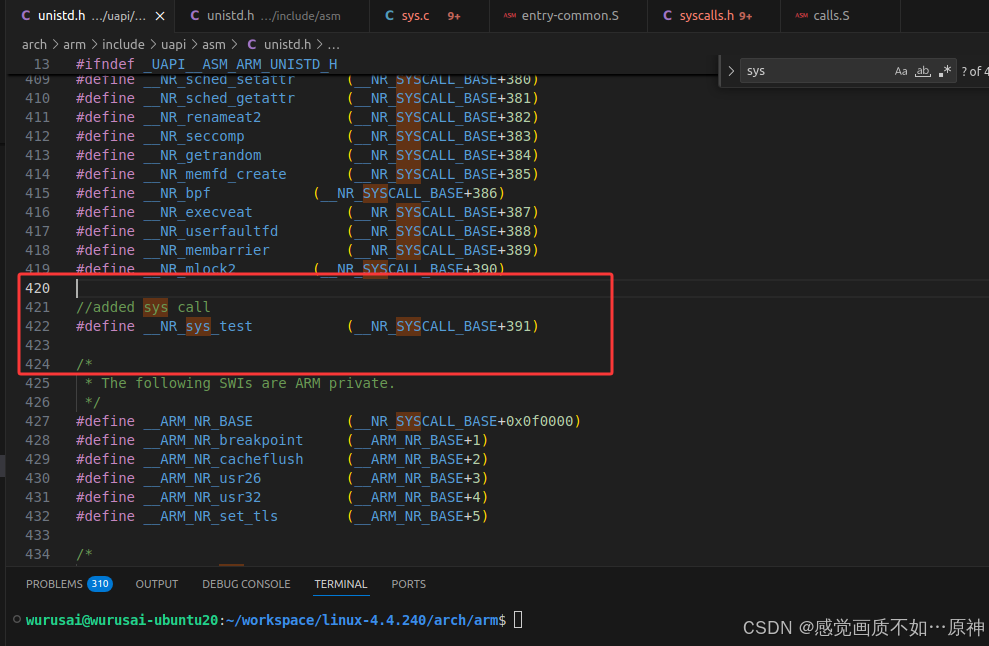
在 arch\arm\include\uapi\asm\unistd.h 文件下新增系统调用 sys_test:
//added sys call
#define __NR_sys_test         	(__NR_SYSCALL_BASE+391)
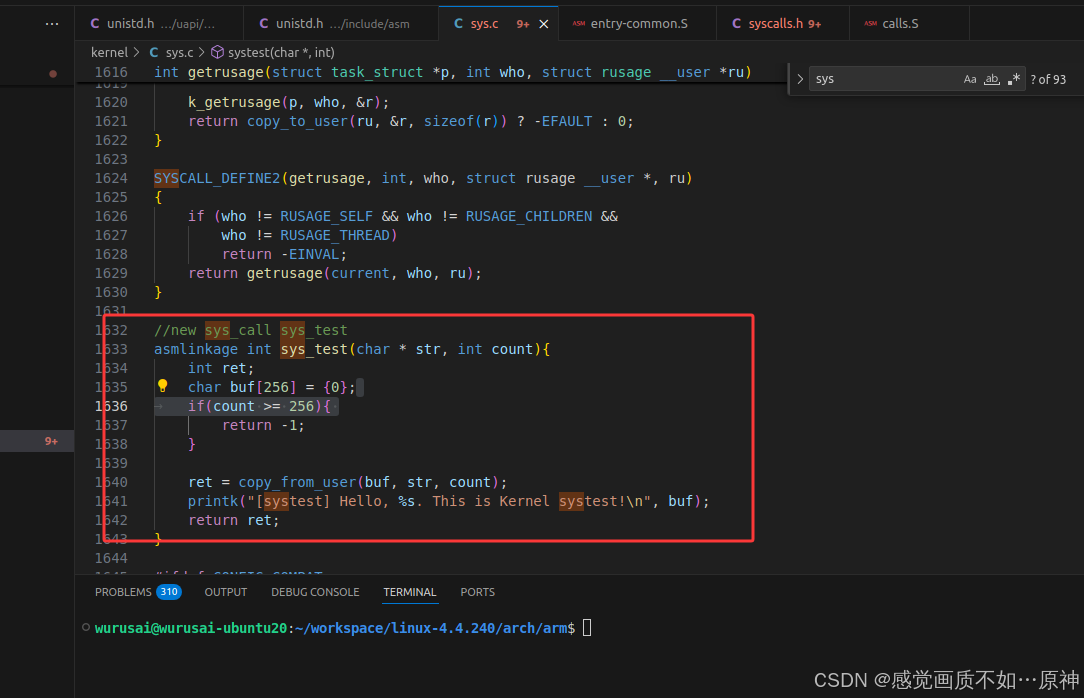
在 kernel/sys.c 添加系统调用函数 sys_test :
//new sys_call sys_test
asmlinkage int sys_test(char * str, int count){
	int ret;
	char buf[256] = {0};
	if(count >= 256){
		return -1;
	}

	ret = copy_from_user(buf, str, count);
	printk("[systest] Hello, %s. This is Kernel systest!\n", buf);
	return ret;
}
在 include/linux/syscalls.h 中添加 sys_test 的函数声明:
//new sys_call sys_test
asmlinkage int sys_test(char * str, int count);

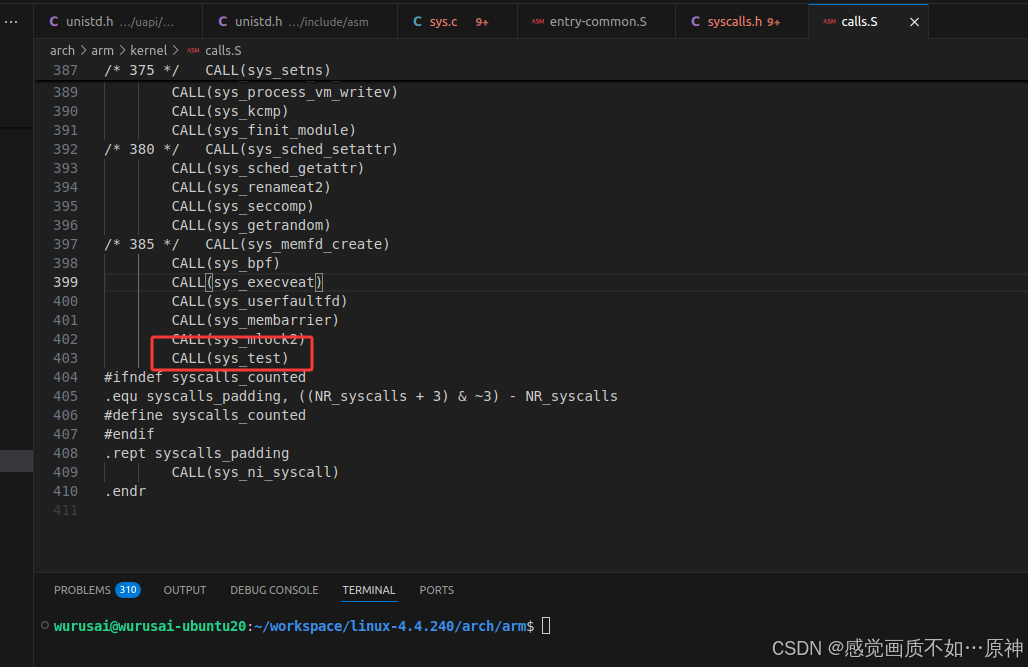
在 arch/arm/kernel/calls.S 中添加 CALL(sys_test):
CALL(sys_test)
重新编译内核
依次执行
make ARCH=arm CROSS_COMPILE=arm-linux-gnueabi- distclean
make ARCH=arm CROSS_COMPILE=arm-linux-gnueabi- vexpress_defconfig
make ARCH=arm CROSS_COMPILE=arm-linux-gnueabi- -j$(nproc)
测试系统调用
在共享目录 share 下,创建测试代码 sys_test.c:
#include <stdio.h>
#include <stdlib.h>
#include <unistd.h>
#include <linux/kernel.h>
#include <sys/syscall.h>
#include <string.h>

int main ()
{
        char * buffer = "i am dinggongwurusai";
        int ret;

        ret = syscall(391, buffer, strlen(buffer)+1);
        printf("syscall ret: %d\n", ret);
        return 0;
}
采用静态链接的方式编译程序:
arm-linux-gnueabi-gcc sys_test.c -o app -static
qemu模拟启动
qemu-system-arm \
  -M vexpress-a9 \
  -m 512M \
  -kernel /home/wurusai/workspace/linux-4.4.240/arch/arm/boot/zImage \
  -dtb /home/wurusai/workspace/linux-4.4.240/arch/arm/boot/dts/vexpress-v2p-ca9.dtb \
  -nographic \
  -append "root=/dev/mmcblk0 rw console=ttyAMA0" \
  -drive file=rootfs.ext3,format=raw,if=sd,readonly=off \
  -fsdev local,id=host0,path=./shared,security_model=passthrough \
  -device virtio-9p-device,fsdev=host0,mount_tag=host0
进入共享目录 /mnt/shared ,执行程序 app
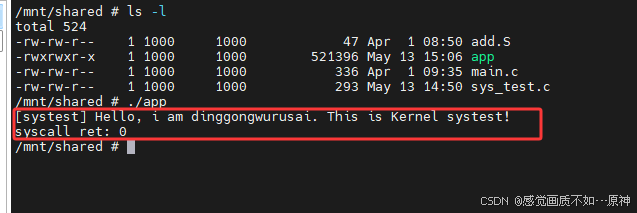
调用自定义系统调用 sys_test 成功。
注意:
对于大部分遇到的问题都参考 使用Qemu模拟32位ARM系统


 3403
3403

 被折叠的 条评论
为什么被折叠?
被折叠的 条评论
为什么被折叠?
 到【灌水乐园】发言


