


文章目录
- Vue生命周期介绍
- 说明
- Vue生命周期钩子(八大钩子)
- 钩子介绍
- 重点学习:
- 更新阶段与卸载阶段
- 小案例:
- 在created中发送数据
- 总结:
Vue生命周期介绍

说明
越早发送初始化渲染请求越好
至少dom得渲染出来什么才可以开始操作dom
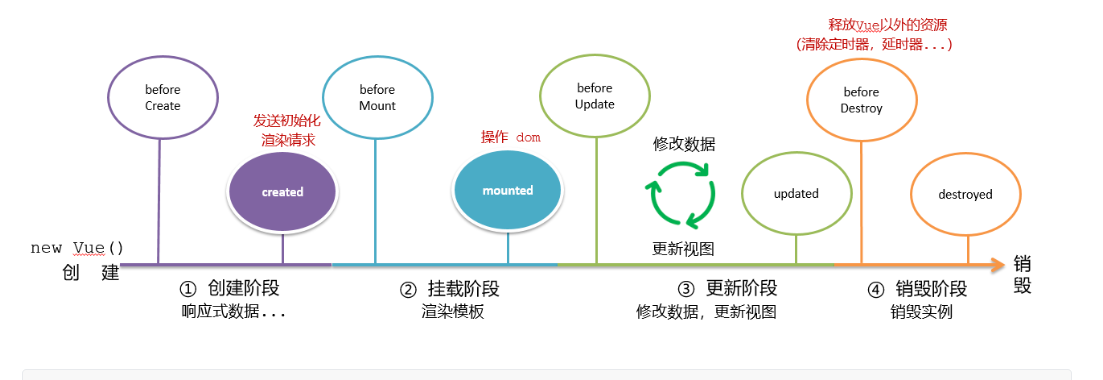
Vue生命周期:就是一个Vue实例从创建 到 销毁 的整个过程。
生命周期四个阶段:① 创建 ② 挂载 ③ 更新 ④ 销毁
1.创建阶段:创建响应式数据
2.挂载阶段:渲染模板
3.更新阶段:修改数据,更新视图
4.销毁阶段:销毁Vue实例
Vue生命周期钩子(八大钩子)
钩子介绍
Vue生命周期过程中,会自动运行一些函数,被称为【生命周期钩子】→ 可以在【特定阶段】运行自己的代码
重点学习:
创建阶段created和挂载阶段的mounted
示例:
<!DOCTYPE html>
<html lang="en">

<head>
  <meta charset="UTF-8">
  <meta http-equiv="X-UA-Compatible" content="IE=edge">
  <meta name="viewport" content="width=device-width, initial-scale=1.0">
  <title>Document</title>
</head>

<body>

  <div id="app">
    <h3>{{ title }}</h3>
    <div>
      <button @click="count--">-</button>
      <span>{{ count }}</span>
      <button @click="count++">+</button>
    </div>
  </div>
  <script src="./vue.js"></script>
  <script>
    const app = new Vue({
      el: '#app',
      data: {
        count: 100,
        title: '计数器'
      },
      beforeCreate() {
        console.log('beforeCreate 响应式数据准备好之前')

      },
      created() {
        console.log('created响应数据准备好之后')
      },
      beforeMount() {
        console.log('beforeMount模板渲染之前')
      },
      mounted() {
        console.log('mounted模板渲染之后')
      },
    })
  </script>
</body>

</html>
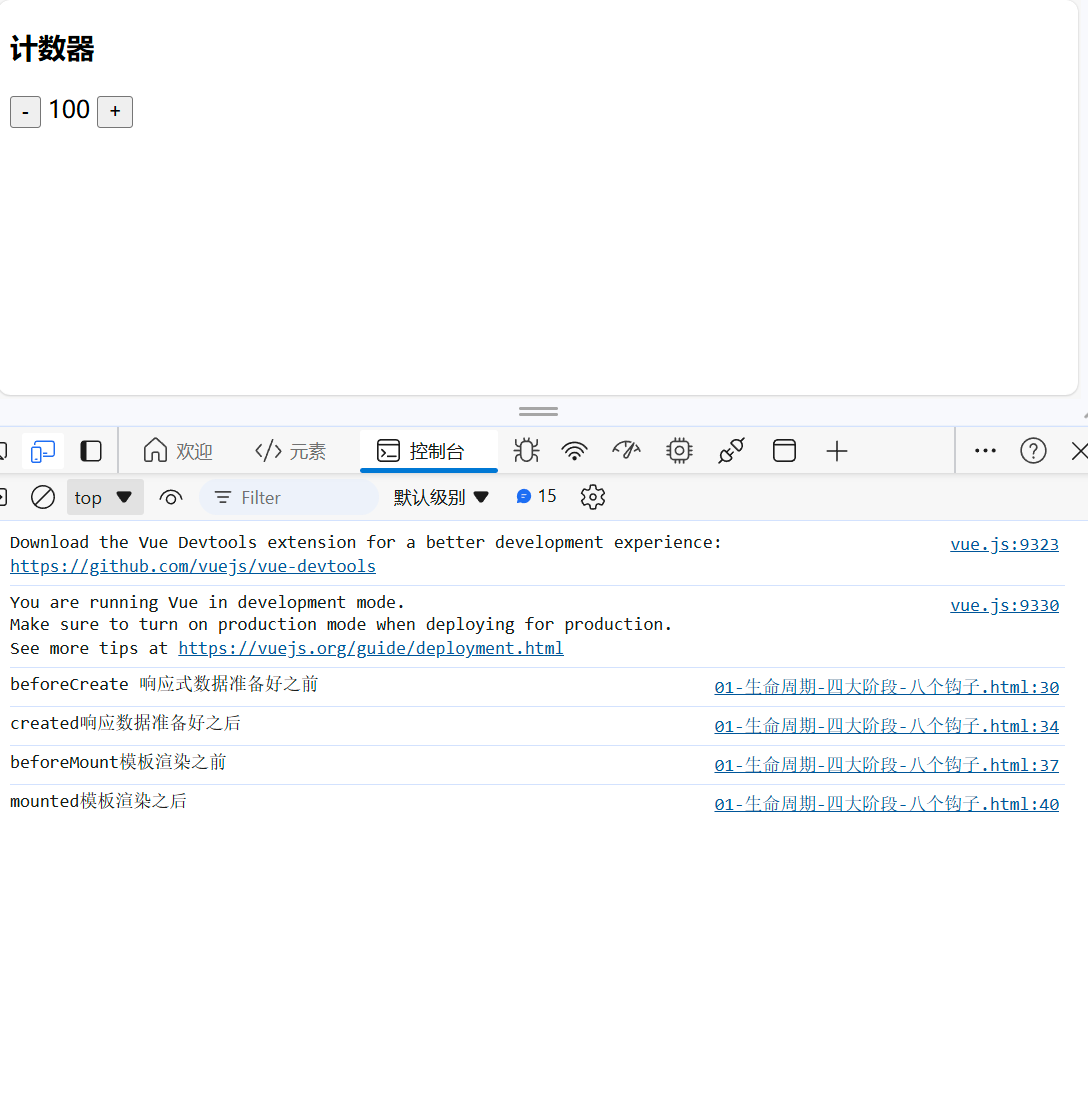
效果:可以看见在页面渲染之前就经历过前面两个阶段,并且在发送一些初始化渲染请求至少也要在created内及以后发送
更新阶段与卸载阶段
示例
<!DOCTYPE html>
<html lang="en">
<head>
<meta charset="UTF-8">
<meta http-equiv="X-UA-Compatible" content="IE=edge">
<meta name="viewport" content="width=device-width, initial-scale=1.0">
<title>Document</title>
</head>
<body>
<div id="app">
<h3>{{ title }}</h3>
<div>
<button @click="count--">-</button>
<span>{{ count }}</span>
<button @click="count++">+</button>
</div>
</div>
<script src="./vue.js"></script>
<script>
const app = new Vue({
el: '#app',
data: {
count: 100,
title: '计数器'
},
beforeCreate() {
console.log('beforeCreate 响应式数据准备好之前')
},
created() {
console.log('created响应数据准备好之后')
},
beforeMount() {
console.log('beforeMount模板渲染之前')
},
mounted() {
console.log('mounted模板渲染之后')
},
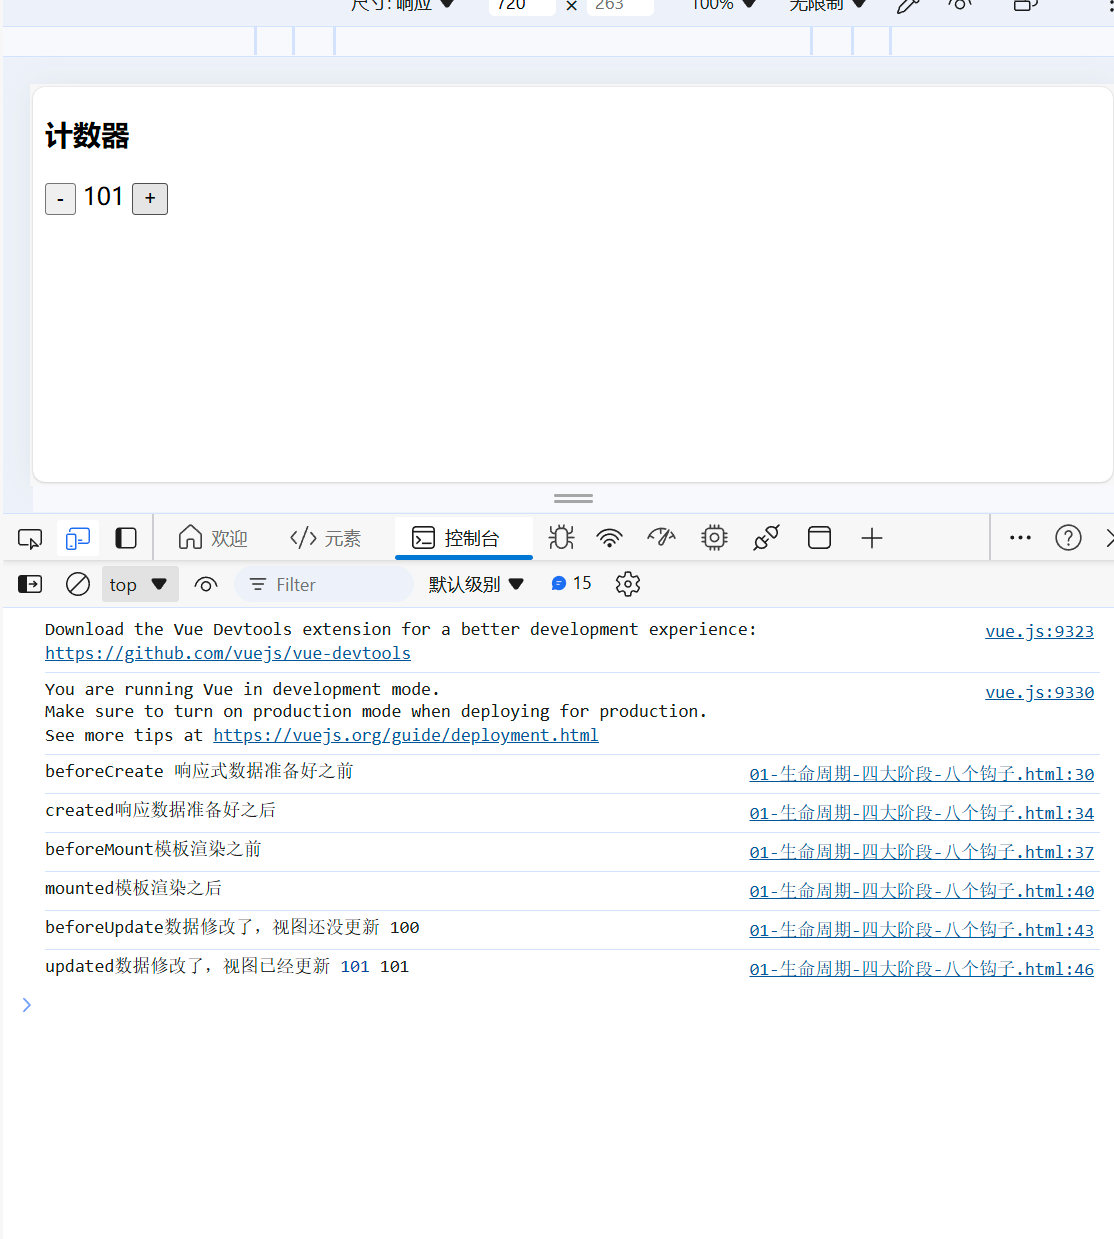
beforeUpdate() {
console.log('beforeUpdate数据修改了,视图还没更新' ,document.querySelector('span').innerHTML)
},
updated() {
console.log('updated数据修改了,视图已经更新',this.count,document.querySelector('span').innerHTML)
},
beforeDestroy() {
console.log('beforeDestroy卸载前,')
console.log('清除掉一些Vue以外的资源占用,定时器,延时器...')
},
destroyed() {
console.log('destroyed卸载后')
}
})
</script>
</body>
</html>
小案例:
在created中发送数据
<!DOCTYPE html>
<html lang="en">
<head>
  <meta charset="UTF-8">
  <meta http-equiv="X-UA-Compatible" content="IE=edge">
  <meta name="viewport" content="width=device-width, initial-scale=1.0">
  <title>Document</title>
  <style>
    * {
      margin: 0;
      padding: 0;
      list-style: none;
    }
    .news {
      display: flex;
      height: 120px;
      width: 600px;
      margin: 0 auto;
      padding: 20px 0;
      cursor: pointer;
    }
    .news .left {
      flex: 1;
      display: flex;
      flex-direction: column;
      justify-content: space-between;
      padding-right: 10px;
    }
    .news .left .title {
      font-size: 20px;
    }
    .news .left .info {
      color: #999999;
    }
    .news .left .info span {
      margin-right: 20px;
    }
    .news .right {
      width: 160px;
      height: 120px;
    }
    .news .right img {
      width: 100%;
      height: 100%;
      object-fit: cover;
    }
  </style>
</head>
<body>

  <div id="app">
    <ul>
      <li class="news" v-for="(item,index) in list" :key="item.id">
        <div class="left">
          <div class="title">{{item.title}}</div>
          <div class="info">
            <span>{{item.source}}</span>
            <span>{{item.time}}</span>
          </div>
        </div>
        <div class="right">
          <img :src="item.img" alt="">
        </div>
      </li>
    </ul>
  </div>
  <script src="./vue.js"></script>
  <script src="./axios.js"></script>
  <script>
    // 接口地址:http://hmajax.itheima.net/api/news
    // 请求方式:get
    const app = new Vue({
      el: '#app',
      data: {
        //发送请求,获取数据
        list:[]
      },
      async created() {
        const res=await axios.get('http://hmajax.itheima.net/api/news')
        //将数据更新给data中的list
        this.list=res.data.data
      },
    })
  </script>
</body>
</html>
有显示内容说明初始化渲染成功
 、
、
总结:
八个钩子,有三个常用create,mounted,beforeDestory


 2万+
2万+


 被折叠的 条评论
为什么被折叠?
被折叠的 条评论
为什么被折叠?
 到【灌水乐园】发言


