


1、节点规划
| IP | 主机名 | 节点 |
| 192.168.20.17 | localhost | 服务端 |
| 192.168.20.16 | localhost | 客户端 |
如表1-1-1 节点规划
2、基础准备
使用本地PC环境的VMWare Workstation软件进行实操练习,镜像使用提供的CentOS-7-x86_64-DVD-2009,网络适配器可以选择只配置NAT模式,硬件资源如图1-1-1所示。
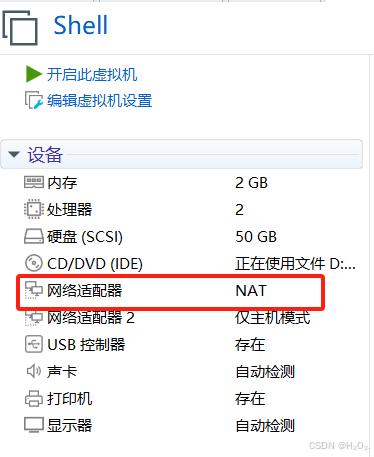
如图1-1-1 硬件资源
3、脚本配置
自行配置主机IP,在服务端编辑ftp-ano.sh文件(文件名自定义)并执行脚本:
[root@localhost ~]# vi ftp-ano.sh
#!/bin/bash
#********************************************************************
# 脚本功能:自动部署ftp服务
# 测试系统:CentOS7.9
#Author:	mawenshuo
#Date:	2024-10-16
#FileName:	ftp-ano.sh
#********************************************************************

# 删除原有的 yum 源配置
rm -rf /etc/yum.repos.d/*

# 设置新的 yum 源指向阿里云的 CentOS 7 镜像
if [ ! -f /etc/yum.repos.d/centos.repo ]; then
   echo -e "\033[32m创建 /etc/yum.repos.d/centos.repo 文件...\033[0m"
   curl http://mirrors.aliyun.com/repo/Centos-7.repo -o /etc/yum.repos.d/centos.repo
else
   echo -e "\033[32m已经存在yum源\033[0m"
fi
yum clean all
yum makecache

# 安装vsftpd
yum install -y vsftpd

# 启动vsftpd服务并设置为开机自启
systemctl start vsftpd
systemctl enable vsftpd

# 创建FTP共享目录并设置权限
mkdir -p /var/ftp/test
chmod -R 777 /var/ftp/test
chown -R ftp:ftp /var/ftp/test

# 配置vsftpd允许匿名用户访问和上传文件
sed -i 's/anonymous_enable=NO/anonymous_enable=YES/' /etc/vsftpd/vsftpd.conf
sed -i 's/#anon_upload_enable=YES/anon_upload_enable=YES/' /etc/vsftpd/vsftpd.conf
sed -i 's/#anon_mkdir_write_enable=YES/anon_mkdir_write_enable=YES/' /etc/vsftpd/vsftpd.conf
sed -i 's/#anon_other_write_enable=YES/anon_other_write_enable=YES/' /etc/vsftpd/vsftpd.conf

# 设置vsftpd服务为允许FTP被动模式并开放对应端口
echo "
pasv_enable=YES
pasv_min_port=40000
pasv_max_port=50001
" >> /etc/vsftpd/vsftpd.conf

# 重启vsftpd服务使配置生效
systemctl restart vsftpd

# 关闭防火墙并禁用SELinux
#Author: mawenshuo
systemctl stop firewalld
setenforce 0
sed -i '/^SELINUX=/c\SELINUX=disabled' /etc/selinux/config

# 输出提示
p1=$(ip -o -4 addr list |grep -v ' lo ' | awk '{print $4}' | cut -d/ -f1)
echo "vsftpd服务配置完成,FTP目录为 /var/ftp/test。"
echo "您可以使用 ftp://$p1 来匿名访问共享文件。"
[root@localhost ~]# bash ftp-all.sh
4、检测
在客户端检测:
[root@localhost ~]# ftp 192.168.20.17
Connected to 192.168.20.17 (192.168.20.17).
220 (vsFTPd 3.0.2)
Name (192.168.20.17:root): anonymous
331 Please specify the password.
Password:
230 Login successful.
Remote system type is UNIX.
Using binary mode to transfer files.
# 查看共享目录下的内容
ftp> ls
227 Entering Passive Mode (192,168,20,17,168,47).
150 Here comes the directory listing.
-rwxrwxrwx    1 14       50              0 Oct 16 01:54 1.txt
-rwxrwxrwx    1 14       50              0 Oct 16 07:10 111.txt
-rwxrwxrwx    1 14       50             14 Oct 16 01:54 a.txt
226 Directory send OK.
# 上传c.txt文件(如没有则自行创建)
ftp> put c.txt
local: c.txt remote: c.txt
227 Entering Passive Mode (192,168,20,17,177,159).
150 Ok to send data.
226 Transfer complete.
# 下载a.txt文件(确保共享目录中存在a.txt)
ftp> get a.txt
local: a.txt remote: a.txt
227 Entering Passive Mode (192,168,20,17,187,217).
150 Opening BINARY mode data connection for a.txt (14 bytes).
226 Transfer complete.
14 bytes received in 7.1e-05 secs (197.18 Kbytes/sec)
# 退出
ftp> exit
ftp> 221 Goodbye.
至此,Shell脚本一键部署FTP服务完成。


 被折叠的 条评论
为什么被折叠?
被折叠的 条评论
为什么被折叠?
 到【灌水乐园】发言


