


富文本编辑器的使用
本次用的富文本编辑器框架为:
原因:简介,轻量;
首先下载测试文档,查看代码:(vue实例)
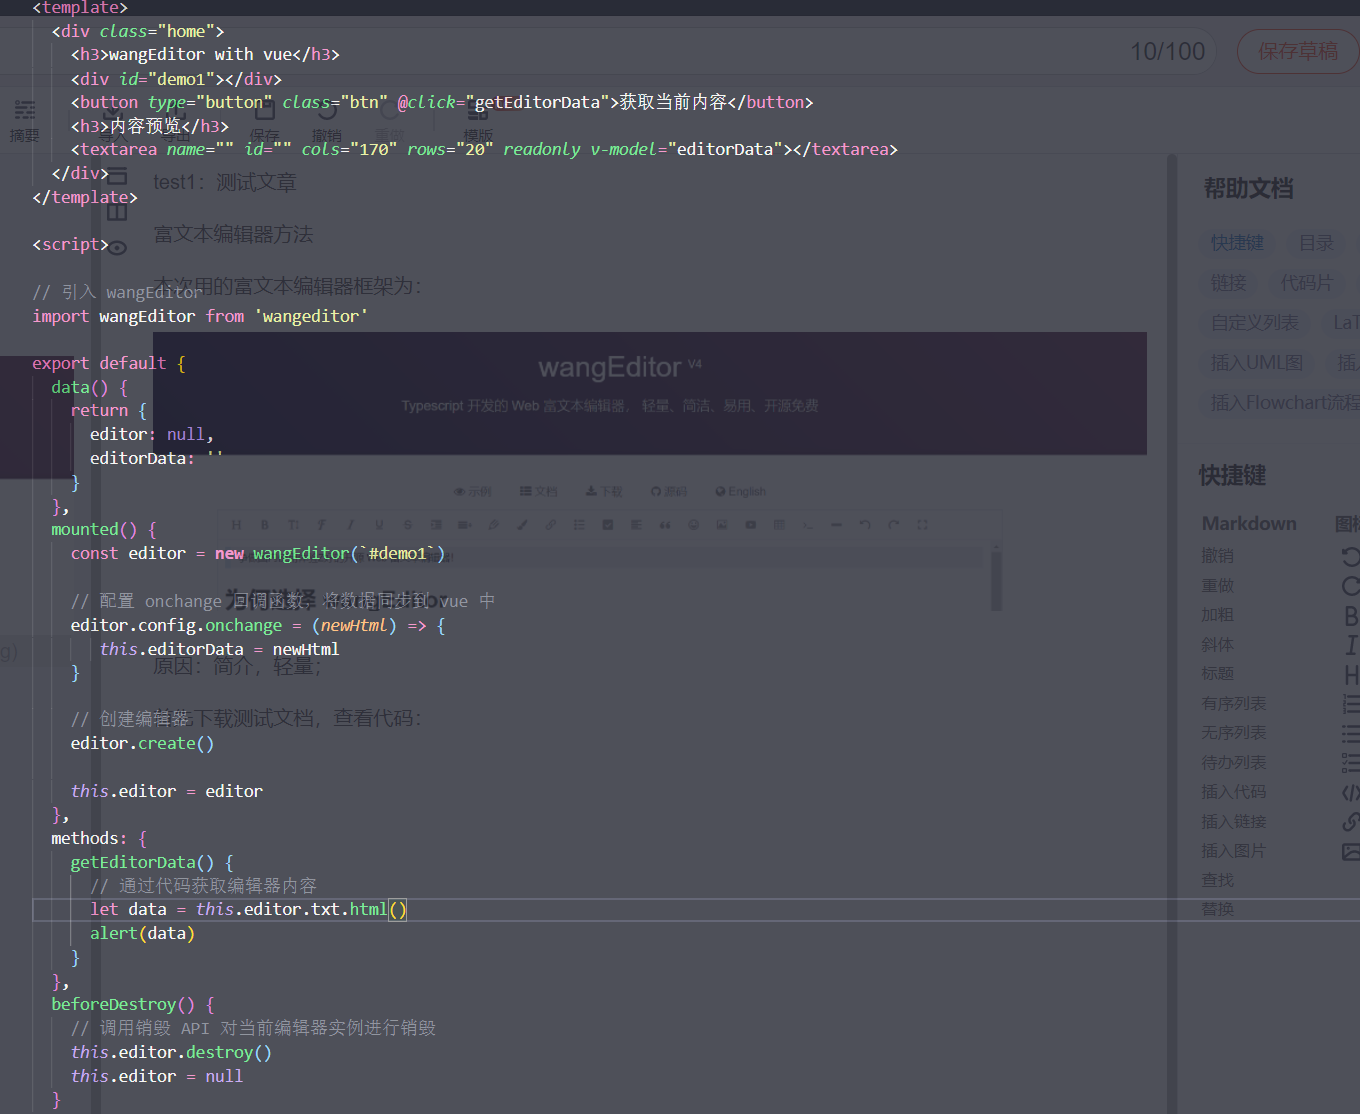
首先创建编辑器:
// 引入 wangEditor
import wangEditor from 'wangeditor'


 mounted() {
    const editor = new wangEditor(`#demo1`)

    // 配置 onchange 回调函数,将数据同步到 vue 中
    editor.config.onchange = (newHtml) => {
       this.editorData = newHtml
    }

    // 创建编辑器
    editor.create()

    this.editor = editor
  },
这里要注意的是:必须写在mounted中,因为jq为框架写的,偶尔绑定会失效(尤其引用了某些ui框架)
则需要用js原生获取dom元素绑定:
const editor = new E(document.getElementById('demo'))
项目中最好将富文本编辑框写成组件,否则有可能会报错
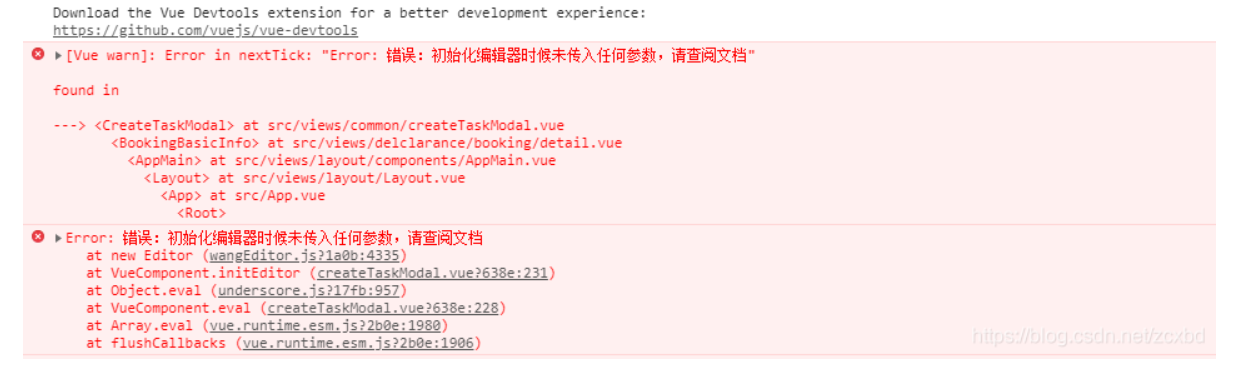
出此错误可参考此文章:(element UI和antUI基本确定会出此问题)
初始化编辑器错误解决方案
基本配置:
(所有的配置都要在创建之前,也就是create()之前)
设置编辑框高度:(默认高度为300px)
const editor = new E('#div1')

// 设置编辑区域高度为 500px
editor.config.height = 500

// 注意,先配置 height ,再执行 create()
editor.create()
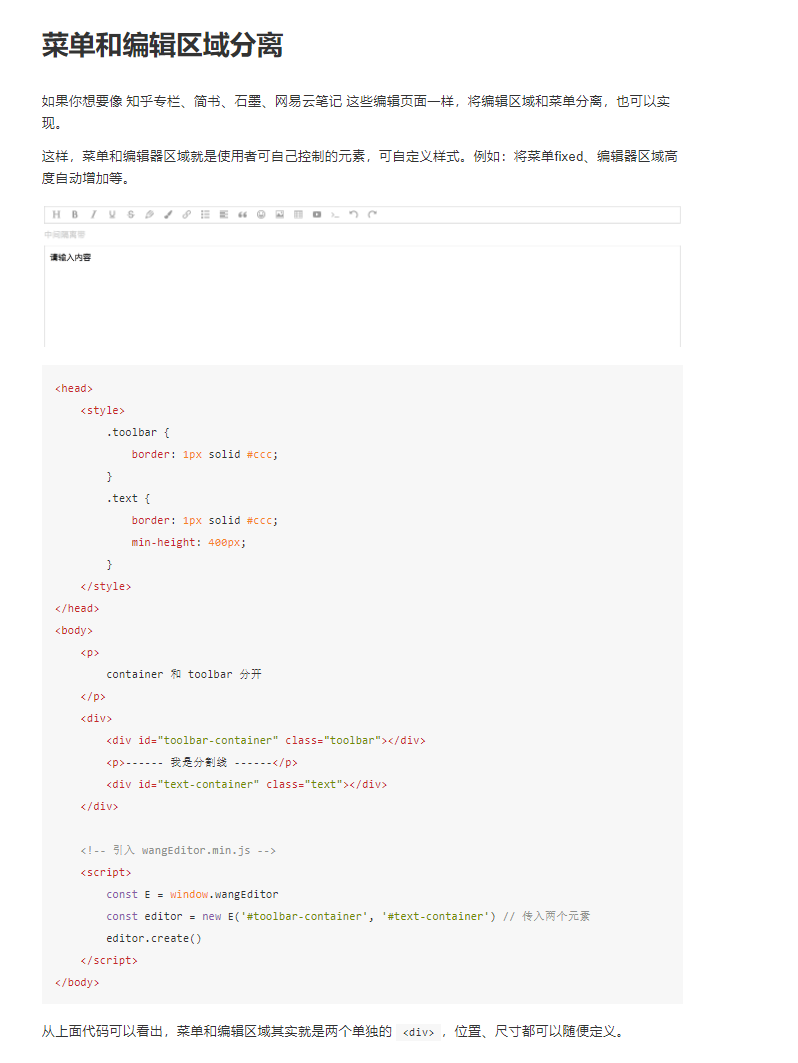
可以设置菜单与编辑器分离:(此处很少用,所以直接贴官方文档)
设置内容:
Html设置内容(推荐使用,效率最高,但实际基本用不到)
<div id="div1">
    <p>初始化的内容</p>
    <p>初始化的内容</p>
</div>

<!-- 引入 wangEditor.min.js -->
<script type="text/javascript">
    const E = window.wangEditor
    const editor = new E('#div1')
    editor.create()
</script>
js设置内容(基本都是用这个)
<div id="div1">
</div>

<!-- 引入 wangEditor.min.js -->
<script type="text/javascript">
    const E = window.wangEditor
    const editor = new E('#div1')
    editor.create()
    editor.txt.html('<p>用 JS 设置的内容</p>') // 重新设置编辑器内容
</script>
(补充例子)(vue)组件应用:
//首先从父组件接受内容
props: {
        editorData:{
          type:String,
          default: ''
        }
    },
//在创建组件时将内容放入;一定要另外创建变量,编辑框可能会改变此变量,而子组件是不允许改动父组件传入变量的
 mounted() {
     this.editor = editor
    const text = this.editorData
    this.editor.txt.html(text)
    }
此外append为追加新内容(与初始化内容差不多 不细说了)
editor.txt.append('<p>追加的内容</p>')
获取内容:
在初始化完毕后,要获取html内容,或者text内容
//获取html内容,纯html格式,没有样式
editor.txt.html()
//获取text内容
editor.txt.text()
也可以获取或设置json数据格式的内容:
//获取json内容
editor.txt.getJSON()
//格式如下
[
    {
        "tag": "p",
        "attrs": [],
        "children": [
            "欢迎使用 ",
            {
                "tag": "b",
                "attrs": [],
                "children": [ "wangEditor" ]
            },
            " 富文本编辑器"
        ]
    },
    {
        "tag": "p",
        "attrs": [],
        "children": [
            {
                "tag": "img",
                "attrs": [
                    { "name": "src", "value": "xxx.png" },
                    { "name": "style", "value": "max-width:100%;" }
                ]
            }
        ]
    }
]
//设置json内容(格式必须和上面格式相同,否则读取失败)
editor.txt.setJSON([...])
清空内容:
editor.txt.clear()
配置菜单
自定义菜单:
使用 editor.config.menus 定义显示哪些菜单和菜单的顺序。
 // 配置菜单栏,删减菜单,调整顺序
    editor.config.menus = [
        'bold',
        'head',
        'link',
        'italic',
        'underline'
    ]
    // 默认情况下,显示所有菜单
editor.config.menus = [
    'head',
    'bold',
    'fontSize',
    'fontName',
    'italic',
    'underline',
    'strikeThrough',
    'indent',
    'lineHeight',
    'foreColor',
    'backColor',
    'link',
    'list',
    'todo',
    'justify',
    'quote',
    'emoticon',
    'image',
    'video',
    'table',
    'code',
    'splitLine',
    'undo',
    'redo',
]
使用 editor.config.excludeMenus 当只需剔除少数菜单的时候,直接设置不需要的菜单
// 配置菜单栏,设置不需要的菜单
    editor.config.excludeMenus = [
        'emoticon',
        'video'
    ]
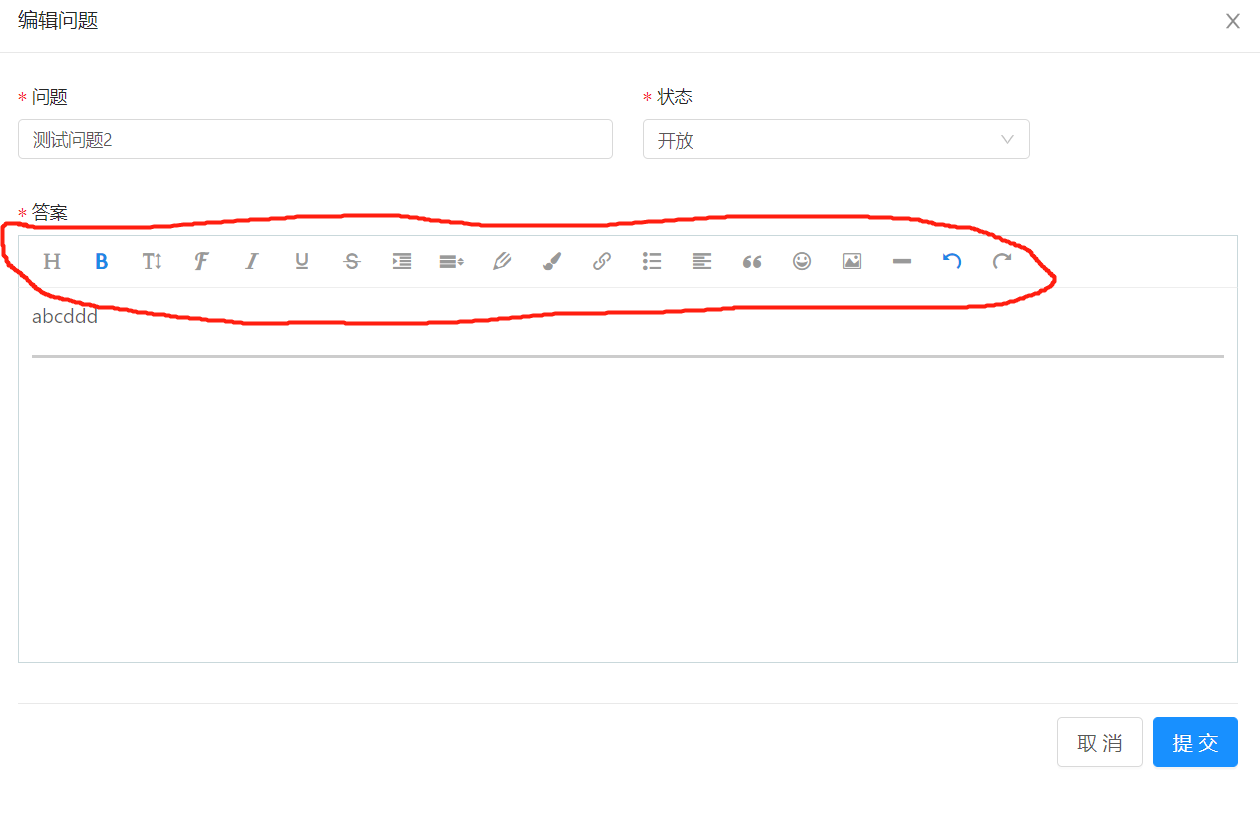
(实例效果)
 //配置自定义菜单
    editor.config.menus = [
    'head',
    'bold',
    'fontSize',
    'fontName',
    'italic',
    'underline',
    'strikeThrough',
    'indent',
    'lineHeight',
    'foreColor',
    'backColor',
    'link',
    'list',
    'justify',
    'quote',
    'emoticon',
    'image',
    'splitLine',
    'undo',
    'redo',
]
配置颜色:
编辑器的字体颜色和背景色,可以通过 editor.config.colors 自定义配置
// 配置颜色(文字颜色、背景色)
editor.config.colors = [
    '#000000',
    '#eeece0',
    '#1c487f',
    '#4d80bf'
]
配置字体:
编辑器的字体,可以通过 editor.config.fontNames 配置。(字体只能删减,无法增加)
editor.config.fontNames = [
    // 对象形式 v4.6.16
    {name:"黑体",value:"黑体"},
    {name:"绝绝字体",value:"Times New Roman"}
    // 字符串形式
    '黑体',
    '仿宋',
    '楷体',
    '标楷体',
    '华文仿宋',
    '华文楷体',
    '宋体',
    '微软雅黑',
    'Arial',
    'Tahoma',
    'Verdana',
    'Times New Roman',
    'Courier New',
]
配置字号:
编辑器的字号,可以通过 editor.config.fontSizes 配置。
editor.config.fontSizes = {
    'x-small': { name: '10px', value: '1' },
    'small': { name: '13px', value: '2' },
    'normal': { name: '16px', value: '3' },
    'large': { name: '18px', value: '4' },
    'x-large': { name: '24px', value: '5' },
    'xx-large': { name: '32px', value: '6' },
    'xxx-large': { name: '48px', value: '7' },
}
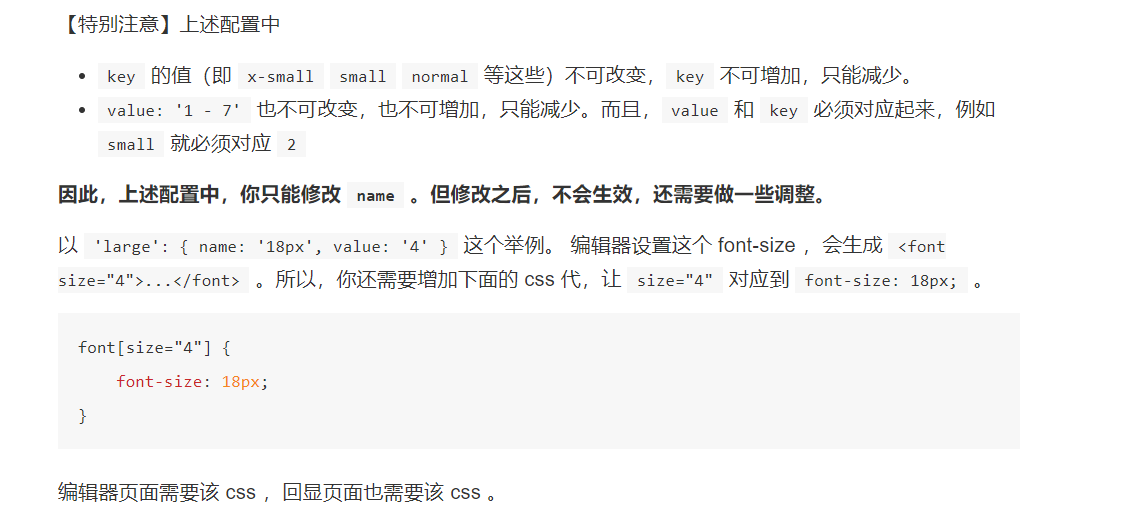
综上所述,字号的限制极大,所以最好不要更改;
行高配置:
编辑器的行高,可以通过 editor.config.lineHeights 配置。
editor.config.lineHeights = ['1', '1.15', '1.6', '2', '2.5', '3']
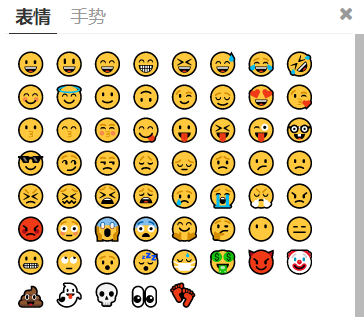
表情配置:
通过 editor.config.emotions 可配置表情图标。表情菜单的 panel 中,支持多 tab (如下图)。
const SINA_URL_PATH = 'http://img.t.sinajs.cn/t4/appstyle/expression/ext/normal'

editor.config.emotions = [
    {
        title: '新浪', // tab 的标题
        type: 'image', // 'emoji' 或 'image' ,即 emoji 形式或者图片形式
        content: [
            { alt: '[坏笑]', src: `${SINA_URL_PATH}/50/pcmoren_huaixiao_org.png` },
            { alt: '[舔屏]', src: `${SINA_URL_PATH}/40/pcmoren_tian_org.png` },
            { alt: '[污]', src: `${SINA_URL_PATH}/3c/pcmoren_wu_org.png` },
        ]
    },
    {
        title: 'emoji',  // tab 的标题
        type: 'emoji', // 'emoji' / 'image'
        // emoji 表情,content 是一个数组即可
        content: '😀 😃 😄 😁 😆 😅 😂 😊 😇 🙂 🙃 😉 😓 😪 😴 🙄 🤔 😬 🤐'.split(/\s/),
    }
]
代码高亮:
需引入highlight配合使用,建议直接查看官方文档(wangEditor代码高亮)
配置全屏功能:
编辑器创建之前, 可以使用 editor.config.showFullScreen = true 来展示全屏功能按钮, 默认是true, 就是不加这个属性默认展示全屏功能按钮
 // 配置全屏功能按钮是否展示
    editor.config.showFullScreen = true
    //同样也配置了api以便在事件中使用全屏:
    editor.fullScreen() // 全屏
    editor.unFullScreen() // 取消全屏
注意:此功能不支持工具栏和编辑区域分离的情况
设置菜单栏提示:
编辑器的菜单栏提示,可以通过 editor.config.showMenuTooltips 配置。(也可以设置菜单栏提示上标或下标)
// 隐藏菜单栏提示
editor.config.showMenuTooltips = false

// 以下配置二选一

// 菜单栏提示为上标(默认配置)
editor.config.menuTooltipPosition = 'up'

// 菜单栏提示为下标
// editor.config.menuTooltipPosition = 'down'
一份简单的菜单配置实例:(图片配置可忽略)
    mounted(){
      let that = this;
    const editor = new E(document.getElementById('demo'))
    //配置图片最大不超过2m
    editor.config.uploadImgMaxSize = 2 * 1024 * 1024
    //配置图片最多上传1张
    editor.config.uploadImgMaxLength = 1
    //配置图片自定义上传函数
    editor.config.customUploadImg = function (resultFiles, insertImgFn) {
    // resultFiles 是 input 中选中的文件列表
    // insertImgFn 是获取图片 url 后,插入到编辑器的方法
    let param = new FormData();
    param.append('file', resultFiles[0]);
      that.$http.post('file/upload',param
    ).then(res=>{
      insertImgFn(res.filePath)
    })
    // 上传图片,返回结果,将图片插入到编辑器中
    // insertImgFn(imgUrl)
}
//不显示全屏按钮
    editor.config.showFullScreen = false
    //配置颜色
    editor.config.colors = [
    '#D4237A',
    '#FCB91A',
    '#E41D32',
    '#8A8A8A',
    '#009688',
    '#3CCA19',
    '#ED4E1F',
    '#000000',
    '#eeece0',
    '#1c487f',
    '#4d80bf'
]
    //配置自定义菜单
    editor.config.menus = [
    'head',
    'bold',
    'fontSize',
    'fontName',
    'italic',
    'underline',
    'strikeThrough',
    'indent',
    'lineHeight',
    'foreColor',
    'backColor',
    'link',
    'list',
    'justify',
    'quote',
    'emoticon',
    'image',
    'splitLine',
    'undo',
    'redo',
]

    // 创建编辑器
    editor.create()
    this.editor = editor
    const text = this.editorData
    this.editor.txt.html(text)
  },


 4024
4024


 被折叠的 条评论
为什么被折叠?
被折叠的 条评论
为什么被折叠?
 到【灌水乐园】发言


