


Spring Boot(二):入门
1. 环境配置
- jdk 1.8
- maven 3.x
- idea 开发
- springboot 1.5.9开发
可以使用命令查看各自的版本环境,推荐使用环境相同的配置,减少环境不一致的bug。
推荐maven使用下面的镜像仓库:
<?xml version="1.0" encoding="UTF-8"?>

<settings xmlns="http://maven.apache.org/SETTINGS/1.0.0"
    xmlns:xsi="http://www.w3.org/2001/XMLSchema-instance"
    xsi:schemaLocation="http://maven.apache.org/SETTINGS/1.0.0 http://maven.apache.org/xsd/settings-1.0.0.xsd">

    <!--
    配置本地MAVEN仓库位置,默认在:C:\Users\机器名\.m2\repository
    <localRepository>D:\Program Files\mvn\</localRepository>
    ** Eclipse->Windows->Preferences->java->Build Path->Classpath Variables
    -->
     <localRepository>D:\maven\repository</localRepository>


    <pluginGroups>
    </pluginGroups>

    <proxies>
    </proxies>

    <servers>
    </servers>

    <mirrors>
        <mirror>
            <id>aliyun</id>
            <name>aliyun Maven</name>
            <mirrorOf>*</mirrorOf>
            <url>http://maven.aliyun.com/nexus/content/groups/public/</url>
        </mirror>
    </mirrors>

    <profiles>
</profiles>

    <activeProfiles>
    </activeProfiles>
</settings>
将环境配置到idea中:

maven:
选择自己的文件目录

2. 创建项目 springboot-quickstart
第一次我们先用maven搭建项目,之后再使用idea的功能创建项目,使用方式是创建一个jar的maven项目。
-
选中Maven–>Next

-
填写然后Next,点击完成。

3. 添加依赖
要是使用springboot我们需要导入springboot的依赖:
 <!-- Inherit defaults from Spring Boot -->
    <parent>
        <groupId>org.springframework.boot</groupId>
        <artifactId>spring-boot-starter-parent</artifactId>
        <version>1.5.9.RELEASE</version>
    </parent>

    <!-- Add typical dependencies for a web application -->
    <dependencies>
        <dependency>
            <groupId>org.springframework.boot</groupId>
            <artifactId>spring-boot-starter-web</artifactId>
        </dependency>
    </dependencies>
之后可以查看导入的依赖包。
4. 创建应用
我们实现一个功能:
浏览器发送请求,后台返回一个字符串。
后台代码
package cn.mh.controller;

import org.springframework.stereotype.Controller;
import org.springframework.web.bind.annotation.RequestMapping;
import org.springframework.web.bind.annotation.ResponseBody;

/**
 * @author: mahao
 * @date: 2019/11/5
 */
@Controller
public class HelloController {

    @RequestMapping("/hello")
    @ResponseBody
    public String hello() {

        return "hello";
    }

}
启动应用
springboot中内置了tomcat,不需要tomcat,我们在jar包中即可启动服务。
package cn.mh.sb;

import org.springframework.boot.SpringApplication;
import org.springframework.boot.autoconfigure.SpringBootApplication;

/**
 * 应用启动类
 *
 * @author: mahao
 * @date: 2019/11/5
 */
@SpringBootApplication//标注主程序类
public class AppStart {

    public static void main(String[] args) {
        //启动spring类
        SpringApplication.run(AppStart.class,args);
    }
}
访问请求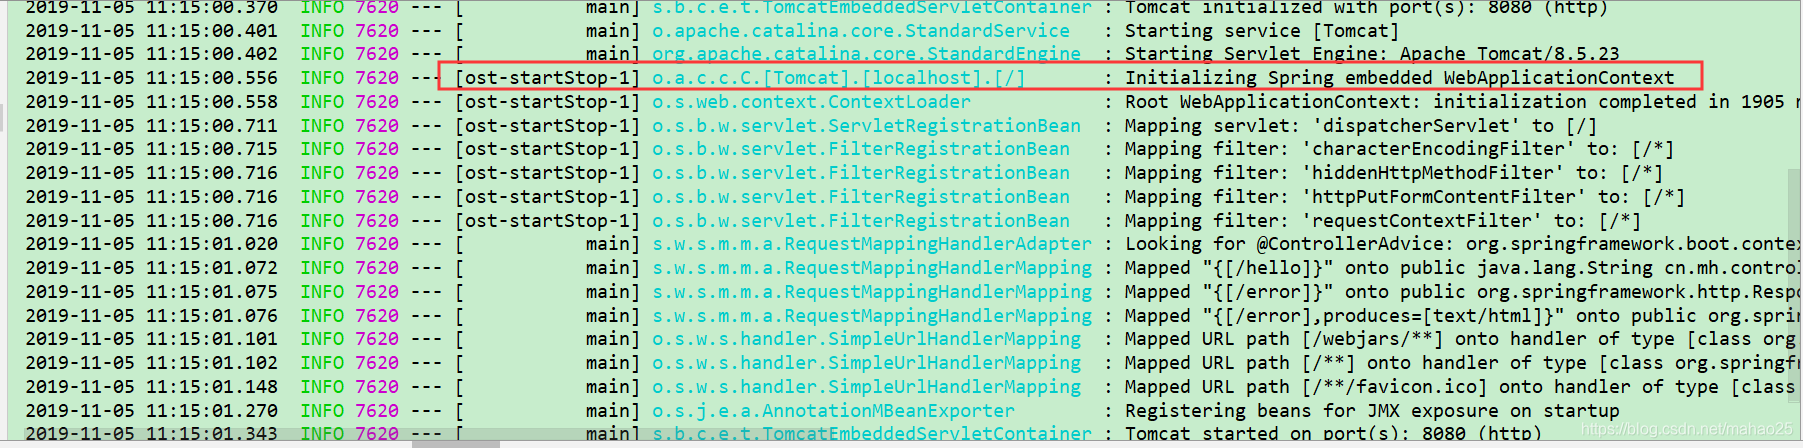
查看到访问地址:
我们输入链接访问: http://127.0.0.1:8080/hello
将会有字符串返回。
5. 运行sb项目
将springboot项目做成jar包,依赖 java -jar 命令运行项目;
插件:
	<build>
        <plugins>
            <plugin>
                <groupId>org.springframework.boot</groupId>
                <artifactId>spring-boot-maven-plugin</artifactId>
            </plugin>
        </plugins>
    </build>
利用Maven打包:


java -jar sb-quickstart-0.0.1-SNAPSHOT.jar运行
java -jar原理,是会去加载 META-INF/MANIFEST.MF下面的文件,找到Main -class类。
Manifest-Version: 1.0
Implementation-Title: sb-quickstart
Implementation-Version: 0.0.1-SNAPSHOT
Archiver-Version: Plexus Archiver
Built-By: mahao
Implementation-Vendor-Id: cn.mh
Spring-Boot-Version: 1.5.9.RELEASE
Implementation-Vendor: Pivotal Software, Inc.
Main-Class: org.springframework.boot.loader.JarLauncher
Start-Class: cn.mh.sbquickstart.SbQuickstartApplication
Spring-Boot-Classes: BOOT-INF/classes/
Spring-Boot-Lib: BOOT-INF/lib/
Created-By: Apache Maven 3.6.1
Build-Jdk: 1.8.0_161
Implementation-URL: http://projects.spring.io/spring-boot/sb-quickstart/
6. springboot的细节
1. 父项目
 	<parent>
        <groupId>org.springframework.boot</groupId>
        <artifactId>spring-boot-starter-parent</artifactId>
        <version>1.5.9.RELEASE</version>
        <relativePath/>
    </parent>

他的父项目:
	<parent>
		<groupId>org.springframework.boot</groupId>
		<artifactId>spring-boot-dependencies</artifactId>
		<version>1.5.9.RELEASE</version>
		<relativePath>../../spring-boot-dependencies</relativePath>
	</parent>

spring-boot-dependencies是管理所有的jar依赖,里面配置了jar包的版本号,根据你引入的sb版本不同,含有不同的依赖。所有这个是springboot的版本仲裁中心。我们使用jar包可以不用写版本号,如果是不存在仲裁中心中,还是要写版本号。
2. 依赖导入,启动器
通过启动器导入相应功能的jar包依赖。
	<dependency>
    	<groupId>org.springframework.boot</groupId>
    	<artifactId>spring-boot-starter-web</artifactId>
	</dependency>
springboot将功能场景抽取出来,构成一个个启动器starter,当我们的项目中需要某些场景的时候,只需要在项目中引入相关的启动器,然后启动器将会导入所有的依赖。
3. 主程序类
@SpringBootApplication
public class SbQuickstartApplication {

    public static void main(String[] args) {
        SpringApplication.run(SbQuickstartApplication.class, args);
    }

}
主需要运行main方法,即可 启动springboot项目;
@SpringBootApplication标记是springboot的主配置类,springboot就应该启动这个类的main方法来启动应用。
@Target(ElementType.TYPE)
@Retention(RetentionPolicy.RUNTIME)
@Documented
@Inherited
@SpringBootConfiguration
@EnableAutoConfiguration
@ComponentScan(excludeFilters = {
		@Filter(type = FilterType.CUSTOM, classes = TypeExcludeFilter.class),
		@Filter(type = FilterType.CUSTOM, classes = AutoConfigurationExcludeFilter.class) })
public @interface SpringBootApplication {


//查看@SpringBootConfiguration,发现是@Configuration,spring自带的配置类注解,
@Target(ElementType.TYPE)
@Retention(RetentionPolicy.RUNTIME)
@Documented
@Configuration
public @interface SpringBootConfiguration {

}
@EnableAutoConfiguration
 //我们未加任何配置,发现springboot就会自动注册组件,这个功能的实现,就是@EnableAutoConfiguration注解的功能。
//开启自动配置功能
@Target(ElementType.TYPE)
@Retention(RetentionPolicy.RUNTIME)
@Documented
@Inherited
@AutoConfigurationPackage
@Import(EnableAutoConfigurationImportSelector.class)
public @interface EnableAutoConfiguration {

}

// @AutoConfigurationPackage 自动配置包
@Target(ElementType.TYPE)
@Retention(RetentionPolicy.RUNTIME)
@Documented
@Inherited
@Import(AutoConfigurationPackages.Registrar.class)
public @interface AutoConfigurationPackage {

}
//起功能作用的地方,用@Import导入了一个注册类,往spring容器中注入组件。
@Import(AutoConfigurationPackages.Registrar.class)

//AutoConfigurationPackages.Registrar类,实现ImportBeanDefinitionRegistrar,会在定义好beanfactory后,执行,然后自定义扩展bean。
@Order(Ordered.HIGHEST_PRECEDENCE)
	static class Registrar implements ImportBeanDefinitionRegistrar, DeterminableImports {

        //作用就是导入基础包下面的组件,将需要导入的组件注册到注册中心中。
		@Override
		public void registerBeanDefinitions(AnnotationMetadata metadata,
				BeanDefinitionRegistry registry) {
			register(registry, new PackageImport(metadata).getPackageName());
		}

		@Override
		public Set<Object> determineImports(AnnotationMetadata metadata) {
			return Collections.<Object>singleton(new PackageImport(metadata));
		}

	}
除此之外,还有一个组件,@Import(AutoConfigurationPackages.Registrar.class),也是@EnableAutoConfiguration的注解的一部分。EnableAutoConfigurationImportSelector是开启自动导入选择器。这个是ImportSelector的子类,作用是返回string数组,里面是要导入的类的全类名。
@Deprecated
public class EnableAutoConfigurationImportSelector
		extends AutoConfigurationImportSelector {

	@Override
	protected boolean isEnabled(AnnotationMetadata metadata) {
		if (getClass().equals(EnableAutoConfigurationImportSelector.class)) {
			return getEnvironment().getProperty(
					EnableAutoConfiguration.ENABLED_OVERRIDE_PROPERTY, Boolean.class,
					true);
		}
		return true;
	}

}
	//父类中的方法。返回要导入的组件全类名。
	@Override
	public String[] selectImports(AnnotationMetadata annotationMetadata) {
		if (!isEnabled(annotationMetadata)) {
			return NO_IMPORTS;
		}
		try {
			AutoConfigurationMetadata autoConfigurationMetadata = AutoConfigurationMetadataLoader
					.loadMetadata(this.beanClassLoader);
			AnnotationAttributes attributes = getAttributes(annotationMetadata);
            //configurations就是返回的数组,这个是所有的配置类,根据不同场景的配置类。通过这些spring官方的提供的配置类,我们可以实现,默认配置。就相当于,我们自己写的配置类,添加上@Configuration作为spring容器的配置类,这里面是spring为我们提供好的配置类。
			List<String> configurations = getCandidateConfigurations(annotationMetadata,
					attributes);
			configurations = removeDuplicates(configurations);
			configurations = sort(configurations, autoConfigurationMetadata);
			Set<String> exclusions = getExclusions(annotationMetadata, attributes);
			checkExcludedClasses(configurations, exclusions);
			configurations.removeAll(exclusions);
			configurations = filter(configurations, autoConfigurationMetadata);
			fireAutoConfigurationImportEvents(configurations, exclusions);
			return configurations.toArray(new String[configurations.size()]);
		}
		catch (IOException ex) {
			throw new IllegalStateException(ex);
		}
	}

上面的就是springboot的自动配置功能,是人家提前配置好的。文件所在位置。

springboot在启动的时候,从类路径下的META/INF/spring.factories中获取EnableAutoConfiguration指定的值,将这些值作为自动配置类导入到容器中,自动配置类就生效,帮我们进行自动配置的工作。以前需要自己配置的,现在交由配置类来完成。
总结:
springboot也是用maven创建的项目,我们引入父工程,父工程中含有所有的我们需要的启动器,和依赖的版本依赖管理,我们做某个场景的状态时,只需要引入这个场景启动器,父项目就会为我们组织jar包,像配置依赖什么的,都是父工程给我们组织的,对于一些文件的配置信息,也是用Configuration组织的,下面将进行这些场景的学习。


 363
363

 被折叠的 条评论
为什么被折叠?
被折叠的 条评论
为什么被折叠?
 到【灌水乐园】发言


