Android使用TabHost程序异常终止could not create tab content because could not find view with id 错误

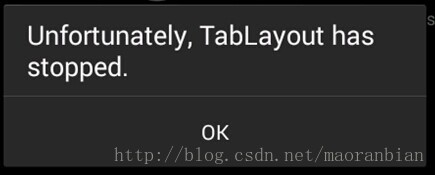
Android使用TabHost做了个练习的小例子,TabLayout程序,安装到模拟器时总是异常终止could not create tab contentbecause could not find view with id 。。。错误

我试验TabHost的时候用的是多个XML一个Activity的方式。建立了三个布局文件作为Tab的选项页。各种文件配置好以后运行总是出错。在日志里的错误信息如下:


找了半天结构上没有问题,参考网上的童鞋们,原来我太粗心了,代码里有个地方写错了:
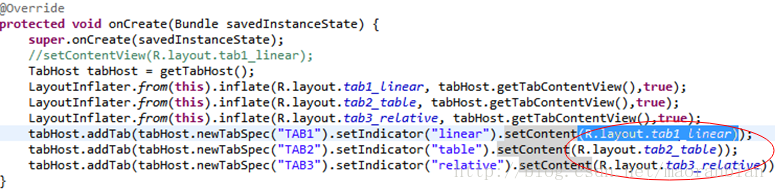
应该改为


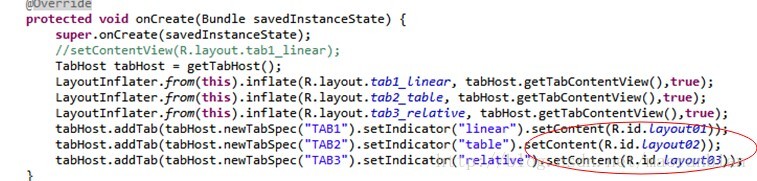
setContent(R.id.layout01)它的参数应该是id,而不是layout中的标示,不同于inflate方法!!

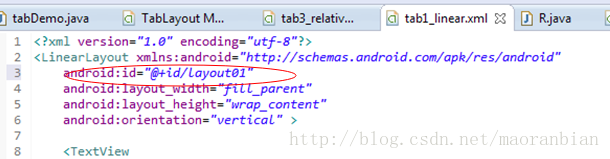
改过来就好了。对于各个tab的id,是在各自的XML中通过添加 android:id="@+id/layout01"后R文件自动生成的。例如第一个tab页对应的layout的xml如下:

并且保存后R文件自动更新。


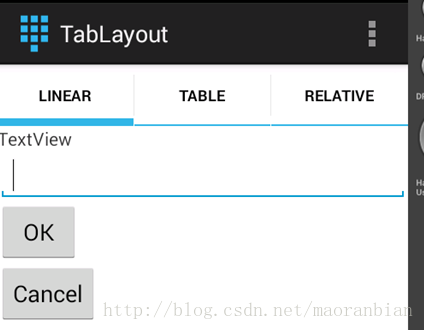
教训:折磨了我很久的问题原来就是小小的失误。以后程序检查时一定要注意:先看函数使用,避免小miss。如果还有错就想一遍结构上是否哪些配置文件没有改好,然后还是不可以的话很可能就是程序里哪里写错了!!切记!最后的运行结果如下:各个TAB良好!!


  • 0
    点赞
  • 0
    收藏
    觉得还不错? 一键收藏
  • 0
    评论
TabHostAndroid 应用程序中常用的选项卡控件,用于在多个选项卡之间切换。以下是 Android Studio 中使用 TabHost 控件的步骤: 1. 在布局文件中添加 TabHost 控件 ``` <TabHost android:id="@+id/tab_host" android:layout_width="match_parent" android:layout_height="match_parent"> <LinearLayout android:layout_width="match_parent" android:layout_height="match_parent" android:orientation="vertical"> <TabWidget android:id="@android:id/tabs" android:layout_width="match_parent" android:layout_height="wrap_content" /> <FrameLayout android:id="@android:id/tabcontent" android:layout_width="match_parent" android:layout_height="match_parent"> <!-- 添加选项卡内容布局 --> <LinearLayout android:id="@+id/tab1_layout" android:layout_width="match_parent" android:layout_height="match_parent" android:orientation="vertical"> <TextView android:layout_width="wrap_content" android:layout_height="wrap_content" android:text="Tab 1" /> </LinearLayout> <LinearLayout android:id="@+id/tab2_layout" android:layout_width="match_parent" android:layout_height="match_parent" android:orientation="vertical"> <TextView android:layout_width="wrap_content" android:layout_height="wrap_content" android:text="Tab 2" /> </LinearLayout> </FrameLayout> </LinearLayout> </TabHost> ``` 2. 在 Java 代码中获取 TabHost 控件并设置选项卡 ```java TabHost tabHost = findViewById(R.id.tab_host); tabHost.setup(); // 添加选项卡 TabHost.TabSpec tab1 = tabHost.newTabSpec("Tab1"); tab1.setIndicator("Tab 1"); tab1.setContent(R.id.tab1_layout); tabHost.addTab(tab1); TabHost.TabSpec tab2 = tabHost.newTabSpec("Tab2"); tab2.setIndicator("Tab 2"); tab2.setContent(R.id.tab2_layout); tabHost.addTab(tab2); ``` 在以上代码中,我们首先获取 TabHost 控件,并通过 `setup()` 方法初始化。然后,我们使用 `newTabSpec()` 方法创建选项卡,并设置选项卡的标签和内容布局。最后,我们使用 `addTab()` 方法将选项卡添加到 TabHost 控件中。 以上就是使用 TabHost 控件的基本步骤。你可以根据自己的需要自定义选项卡的样式和内容。

“相关推荐”对你有帮助么?

  • 非常没帮助
  • 没帮助
  • 一般
  • 有帮助
  • 非常有帮助
提交
评论
添加红包

请填写红包祝福语或标题

红包个数最小为10个

红包金额最低5元

当前余额3.43前往充值 >
需支付:10.00
成就一亿技术人!
领取后你会自动成为博主和红包主的粉丝 规则
hope_wisdom
发出的红包
实付
使用余额支付
点击重新获取
扫码支付
钱包余额 0

抵扣说明:

1.余额是钱包充值的虚拟货币,按照1:1的比例进行支付金额的抵扣。
2.余额无法直接购买下载,可以购买VIP、付费专栏及课程。

余额充值