


每次做小demo的时候,在网上找例子,总感觉不是自己需要的例子,闲来无事,自己折腾一个,以后要需要添加新的功能直接在上面集成就ok了。话不多说,进入正题。
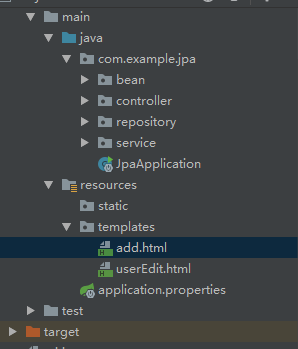
先整体看一下我的结构图
<modelVersion>4.0.0</modelVersion>
<parent>
    <groupId>org.springframework.boot</groupId>
    <artifactId>spring-boot-starter-parent</artifactId>
    <version>2.1.4.RELEASE</version>
    <relativePath/> <!-- lookup parent from repository -->
</parent>


<properties>
    <java.version>1.8</java.version>
</properties>

<dependencies>
    <dependency>
        <groupId>org.springframework.boot</groupId>
        <artifactId>spring-boot-starter-data-jpa</artifactId>
    </dependency>
    <dependency>
        <groupId>org.springframework.boot</groupId>
        <artifactId>spring-boot-starter-thymeleaf</artifactId>
    </dependency>
    <dependency>
        <groupId>org.springframework.boot</groupId>
        <artifactId>spring-boot-starter-web</artifactId>
    </dependency>

    <dependency>
        <groupId>mysql</groupId>
        <artifactId>mysql-connector-java</artifactId>
        <scope>runtime</scope>
    </dependency>
    <dependency>
        <groupId>org.projectlombok</groupId>
        <artifactId>lombok</artifactId>
        <optional>true</optional>
    </dependency>
    <dependency>
        <groupId>org.springframework.boot</groupId>
        <artifactId>spring-boot-starter-test</artifactId>
        <scope>test</scope>
    </dependency>
</dependencies>

<build>
    <plugins>
        <plugin>
            <groupId>org.springframework.boot</groupId>
            <artifactId>spring-boot-maven-plugin</artifactId>
        </plugin>
    </plugins>
</build>
springboot的配置文件
spring.datasource.url=jdbc:mysql://localhost/test?useUnicode=true&characterEncoding=utf-8&serverTimezone=UTC&useSSL=true
spring.datasource.driver-class-name=com.mysql.cj.jdbc.Driver
spring.datasource.username=你的用户名
spring.datasource.password=你的密码
spring.jpa.properties.hibernate.hbm2ddl.auto=create
pring.jpa.properties.hibernate.dialect=org.hibernate.dialect.MySQL5InnoDBDialect
spring.jpa.show-sql= true
spring.thymeleaf.cache=false
编写repository接口
public interface UserRespository extends JpaRepository<User,Integer> {
 User findUserById(int id);

 List<User> findAll();
}
service
public interface UserService {
User findUserById(int id);

List<User> findAll();
}
实现类
@Service
public class UserServiceImpl implements UserService {
@Autowired
private UserRespository userRespository;

 public User findUserById(int id){
    return userRespository.findUserById(id);
}

public List<User> findAll(){
     return userRespository.findAll();
}
}
controller
@Controller
public class UserController {
@Autowired
private UserService userService;

@RequestMapping("/find")
public String findUserById(Integer id, Model model){
   User user= userService.findUserById(id);
   model.addAttribute("user",user);
   return "userEdit";
}

@RequestMapping("/findAll")
public String findAll(Model model){
    List<User> list=userService.findAll();
    model.addAttribute("list",list);
    return "add";
}
}
实体类User
@Data
@Entity
public class User implements Serializable {
@Id @GeneratedValue
private Integer id;
@Column(nullable = false)
private String name;
@Column(nullable = false)
private Integer age;
}
其中@Data注解是lombok,有兴趣的同学可以自己看一下
@Entity,@Id等注解的作用我就不叙述了 有兴趣的同学自己可以看一下


 2万+
2万+


 被折叠的 条评论
为什么被折叠?
被折叠的 条评论
为什么被折叠?
 到【灌水乐园】发言


