


Hello Node Kubernetes
1 hourFree
GSP005

Overview
The goal of this hands-on lab is for you to turn code that you have developed into a replicated application running on Kubernetes, which is running on Kubernetes Engine. For this lab the code will be a simple Hello World node.js app.
Here's a diagram of the various parts in play in this lab, to help you understand how the pieces fit together with one another. Use this as a reference as you progress through the lab; it should all make sense by the time you get to the end (but feel free to ignore this for now).
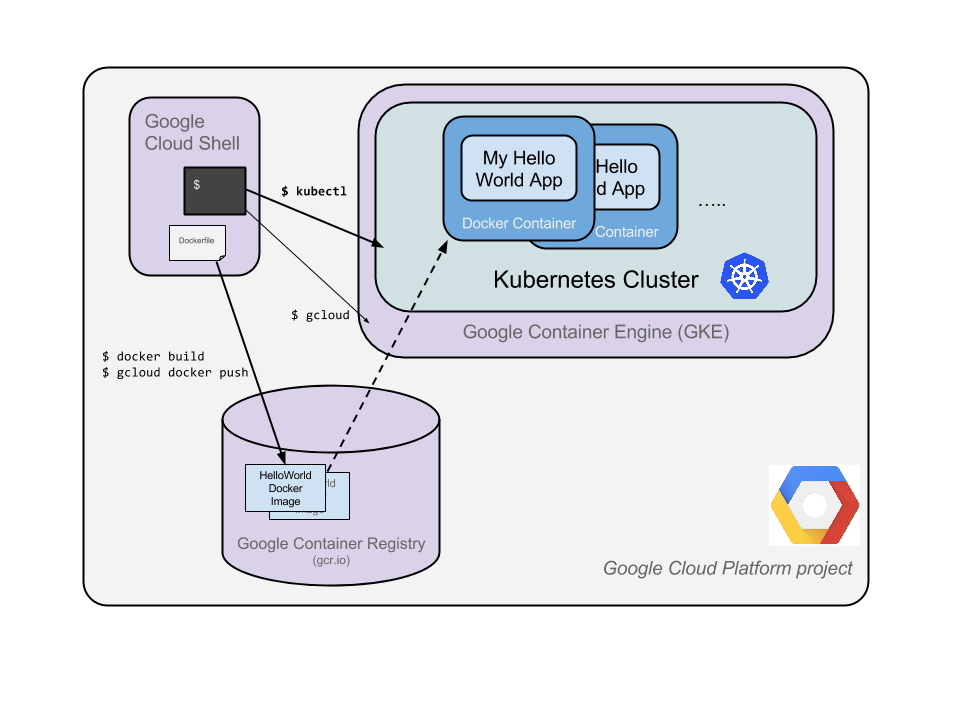
Kubernetes is an open source project (available on kubernetes.io) which can run on many different environments, from laptops to high-availability multi-node clusters; from public clouds to on-premise deployments; from virtual machines to bare metal.
For the purpose of this lab, using a managed environment such as Kubernetes Engine (a Google-hosted version of Kubernetes running on Compute Engine) will allow you to focus more on experiencing Kubernetes rather than setting up the underlying infrastructure.
What you'll do
- Create a Node.js server.
- Create a Docker container image.
- Create a container cluster.
- Create a Kubernetes pod.
- Scale up your services.
Prerequisites
- Familiarity with standard Linux text editors such as
vim,emacs, ornanowill be helpful.
We encourage students to type the commands themselves, to help encourage learning of the core concepts. Many labs will include a code block that contains the required commands. You can easily copy and paste the commands from the code block into the appropriate places during the lab.
Setup
Before you click the Start Lab button
Read these instructions. Labs are timed and you cannot pause them. The timer, which starts when you click Start Lab, shows how long Google Cloud resources will be made available to you.
This Qwiklabs hands-on lab lets you do the lab activities yourself in a real cloud environment, not in a simulation or demo environment. It does so by giving you new, temporary credentials that you use to sign in and access Google Cloud for the duration of the lab.
What you need
To complete this lab, you need:
- Access to a standard internet browser (Chrome browser recommended).
- Time to complete the lab.
Note: If you already have your own personal Google Cloud account or project, do not use it for this lab.
Note: If you are using a Pixelbook, open an Incognito window to run this lab.
How to start your lab and sign in to the Google Cloud Console
-
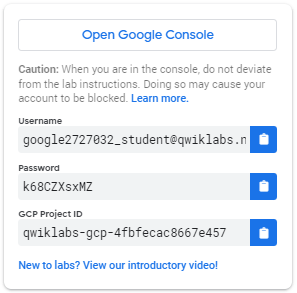
Click the Start Lab button. If you need to pay for the lab, a pop-up opens for you to select your payment method. On the left is a panel populated with the temporary credentials that you must use for this lab.
-
Copy the username, and then click Open Google Console. The lab spins up resources, and then opens another tab that shows the Sign in page.
Tip: Open the tabs in separate windows, side-by-side.
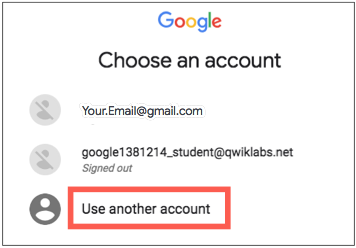
If you see the Choose an account page, click Use Another Account.
-
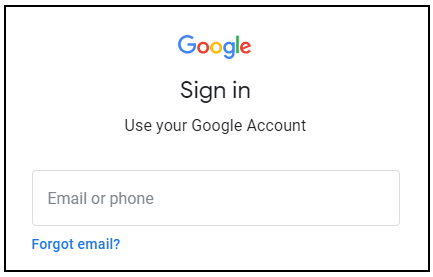
In the Sign in page, paste the username that you copied from the Connection Details panel. Then copy and paste the password.
Important: You must use the credentials from the Connection Details panel. Do not use your Qwiklabs credentials. If you have your own Google Cloud account, do not use it for this lab (avoids incurring charges).
-
Click through the subsequent pages:
- Accept the terms and conditions.
- Do not add recovery options or two-factor authentication (because this is a temporary account).
- Do not sign up for free trials.
After a few moments, the Cloud Console opens in this tab.
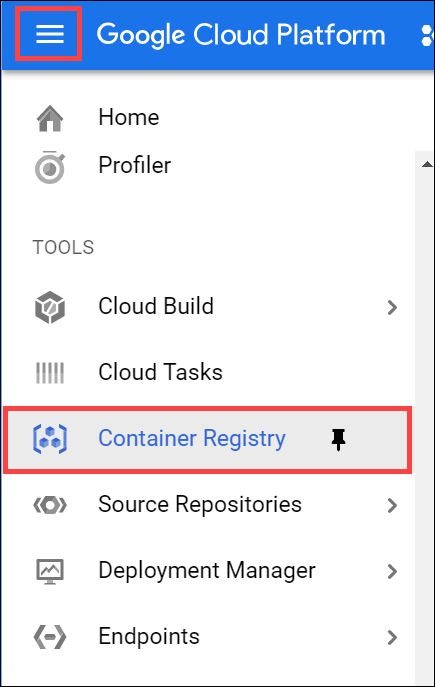
Note: You can view the menu with a list of Google Cloud Products and Services by clicking the Navigation menu at the top-left. 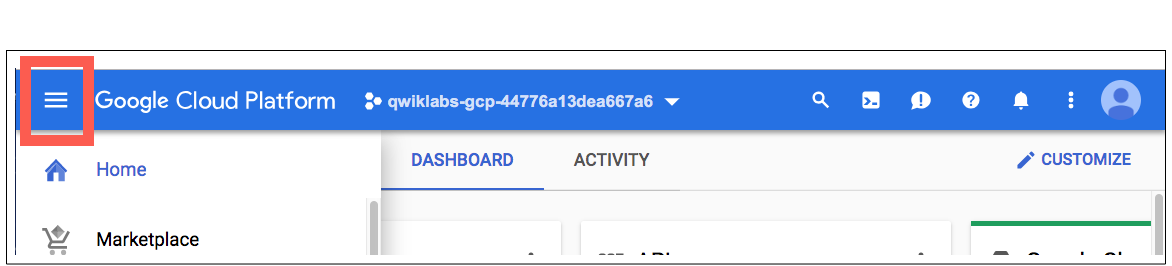
Activate Cloud Shell
Cloud Shell is a virtual machine that is loaded with development tools. It offers a persistent 5GB home directory and runs on the Google Cloud. Cloud Shell provides command-line access to your Google Cloud resources.
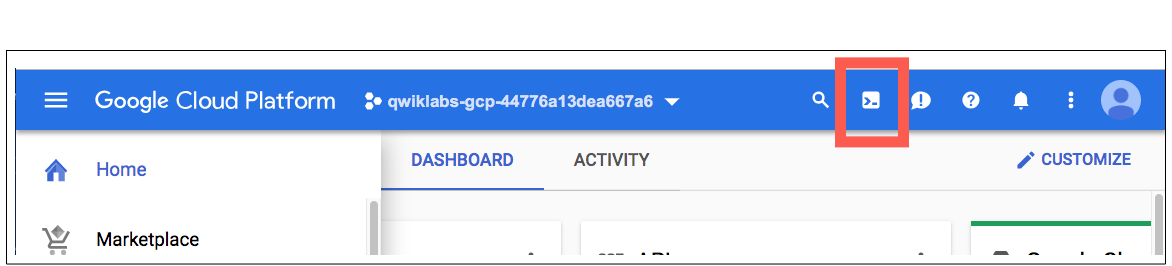
In the Cloud Console, in the top right toolbar, click the Activate Cloud Shell button.
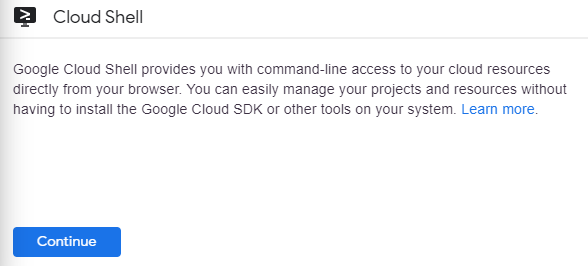
Click Continue.
It takes a few moments to provision and connect to the environment. When you are connected, you are already authenticated, and the project is set to your PROJECT_ID. For example:

gcloud is the command-line tool for Google Cloud. It comes pre-installed on Cloud Shell and supports tab-completion.
You can list the active account name with this command:
gcloud auth list
content_copy
(Output)
Credentialed accounts:
 - <myaccount>@<mydomain>.com (active)content_copy
(Example output)
Credentialed accounts:
 - google1623327_student@qwiklabs.netcontent_copy
You can list the project ID with this command:
gcloud config list project
content_copy
(Output)
[core]
project = <project_ID>content_copy
(Example output)
[core]
project = qwiklabs-gcp-44776a13dea667a6content_copy
For full documentation of gcloud see the gcloud command-line tool overview.
Create your Node.js application
Using Cloud Shell, write a simple Node.js server that you'll deploy to Kubernetes Engine:
vi server.js
content_copy
Start the editor:
i
content_copy
Add this content to the file:
var http = require('http');
var handleRequest = function(request, response) {
  response.writeHead(200);
  response.end("Hello World!");
}
var www = http.createServer(handleRequest);
www.listen(8080);
content_copy
Note: vi is used here, but nano and emacs are also available in Cloud Shell. You can also use the Web-editor feature of CloudShell as described here.
Save the server.js file: Esc then:
:wq
content_copy
Since Cloud Shell has the node executable installed, run this command to start the node server (the command produces no output):
node server.js
content_copy
Use the built-in Web preview feature of Cloud Shell to open a new browser tab and proxy a request to the instance you just started on port 8080.
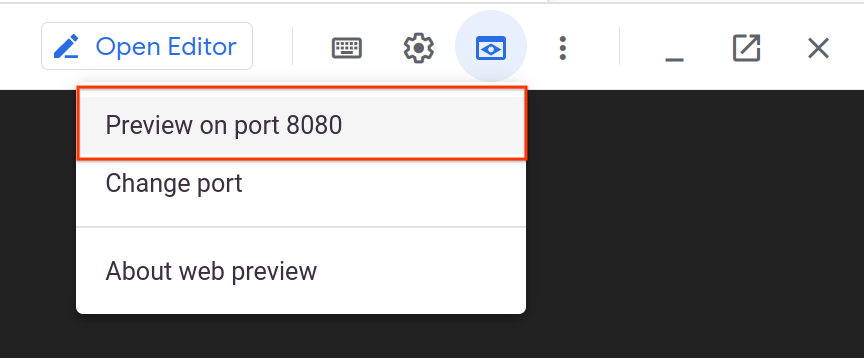
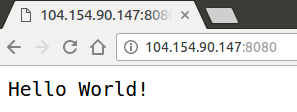
A new browser tab will open to display your results:

Before continuing, return to Cloud Shell and type Ctrl+c to stop the running node server.
Next you will package this application in a Docker container.
Create a Docker container image
Next, create a Dockerfile that describes the image you want to build. Docker container images can extend from other existing images, so for this image, we'll extend from an existing Node image.
vi Dockerfile
content_copy
Start the editor:
i
content_copy
Add this content:
FROM node:6.9.2
EXPOSE 8080
COPY server.js .
CMD node server.js
content_copy
This "recipe" for the Docker image will:
- Start from the
nodeimage found on the Docker hub. - Expose port
8080. - Copy your
server.jsfile to the image. - Start the node server as we previously did manually.
Save this Dockerfile by pressing Esc, then type:
:wq
content_copy
Build the image with the following, replacing PROJECT_ID with your Project ID, found in the Console and the Connection Details section of the lab:
docker build -t gcr.io/PROJECT_ID/hello-node:v1 .
content_copy
It'll take some time to download and extract everything, but you can see the progress bars as the image builds.
Once complete, test the image locally by running a Docker container as a daemon on port 8080 from your newly-created container image.
Run the following command replacing PROJECT_ID with your Project ID, found in the Console and the Connection Details section of the lab:
docker run -d -p 8080:8080 gcr.io/PROJECT_ID/hello-node:v1
content_copy
Your output should look something like this:
325301e6b2bffd1d0049c621866831316d653c0b25a496d04ce0ec6854cb7998content_copyTo see your results you can use the web preview feature of Cloud Shell:
Or use curl from your Cloud Shell prompt:
curl http://localhost:8080
content_copy
This is the output you should see:
Hello World!content_copyNote: Full documentation for the docker run command is found here.
Next, stop the running container.
Find your Docker container ID by running:
docker ps
content_copy
Your output you should look like this:
CONTAINER ID        IMAGE                              COMMAND
2c66d0efcbd4        gcr.io/PROJECT_ID/hello-node:v1    "/bin/sh -c 'nodecontent_copy
Stop the container by running the following, replacing the [CONTAINER ID] with the value provided from the previous step:
docker stop [CONTAINER ID]
content_copy
Your console output should resemble the following (your container ID):
2c66d0efcbd4content_copyNow that the image is working as intended, push it to the Google Container Registry, a private repository for your Docker images, accessible from your Google Cloud projects.
Run this command, replacing PROJECT_ID with your Project ID, found in the Console or the Connection Details section of the lab.
gcloud auth configure-docker
content_copy
docker push gcr.io/PROJECT_ID/hello-node:v1
content_copyThe initial push may take a few minutes to complete. You'll see the progress bars as it builds.
The push refers to a repository [gcr.io/qwiklabs-gcp-6h281a111f098/hello-node]
ba6ca48af64e: Pushed
381c97ba7dc3: Pushed
604c78617f34: Pushed
fa18e5ffd316: Pushed
0a5e2b2ddeaa: Pushed
53c779688d06: Pushed
60a0858edcd5: Pushed
b6ca02dfe5e6: Pushed
v1: digest: sha256:8a9349a355c8e06a48a1e8906652b9259bba6d594097f115060acca8e3e941a2 size: 2002content_copy
The container image will be listed in your Console. Select Navigation menu > Container Registry.
Now you have a project-wide Docker image available which Kubernetes can access and orchestrate.

Note: A generic domain is used for the registry (gcr.io). In your own environment you can be more specific about which zone and bucket to use. Details are documented here.
Create your cluster
Now you're ready to create your Kubernetes Engine cluster. A cluster consists of a Kubernetes master API server hosted by Google and a set of worker nodes. The worker nodes are Compute Engine virtual machines.
Make sure you have set your project using gcloud (replace PROJECT_ID with your Project ID, found in the console and in the Connection Details section of the lab):
gcloud config set project PROJECT_ID
content_copy
Create a cluster with two n1-standard-1 nodes (this will take a few minutes to complete):
gcloud container clusters create hello-world \
                --num-nodes 2 \
                --machine-type n1-standard-1 \
                --zone us-central1-a
content_copy
You can safely ignore warnings that come up when the cluster builds.
The console output should look like this:
Creating cluster hello-world...done.
Created [https://container.googleapis.com/v1/projects/PROJECT_ID/zones/us-central1-a/clusters/hello-world].
kubeconfig entry generated for hello-world.
NAME         ZONE           MASTER_VERSION  MASTER_IP       MACHINE_TYPE   STATUS
hello-world  us-central1-a  1.5.7           146.148.46.124  n1-standard-1  RUNNINGcontent_copy
Note: You can also create this cluster through the Console by opening the Navigation menu and selecting Kubernetes Engine > Kubernetes clusters > Create cluster.
Note: It is recommended to create the cluster in the same zone as the storage bucket used by the container registry (see previous step).
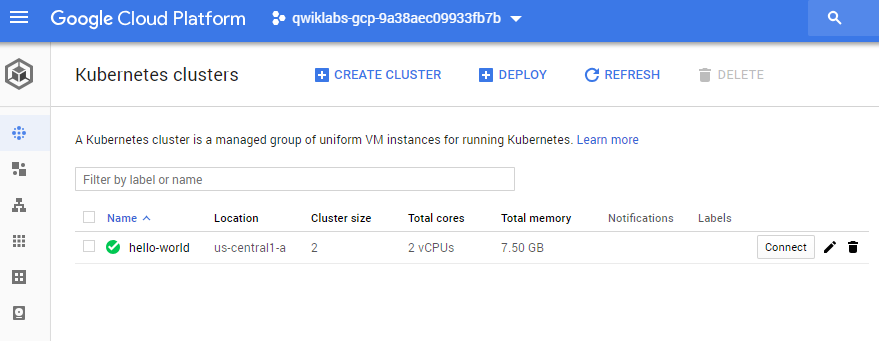
If you select Navigation menu > Kubernetes Engine, you'll see that you now you have a fully-functioning Kubernetes cluster powered by Kubernetes Engine:
It's time to deploy your own containerized application to the Kubernetes cluster! From now on you'll use the kubectl command line (already set up in your Cloud Shell environment).
Click Check my progress below to check your lab progress.
Create your cluster.
Check my progress
Create your pod
A Kubernetes pod is a group of containers tied together for administration and networking purposes. It can contain single or multiple containers. Here you'll use one container built with your Node.js image stored in your private container registry. It will serve content on port 8080.
Create a pod with the kubectl run command (replace PROJECT_ID with your Project ID, found in the console and in the Connection Details section of the lab):
kubectl create deployment hello-node \
    --image=gcr.io/PROJECT_ID/hello-node:v1
content_copy
(Output)
deployment.apps/hello-node createdcontent_copyAs you can see, you've created a deployment object. Deployments are the recommended way to create and scale pods. Here, a new deployment manages a single pod replica running the hello-node:v1 image.
To view the deployment, run:
kubectl get deployments
content_copy
(Output)
NAME         READY   UP-TO-DATE   AVAILABLE   AGE
hello-node   1/1     1            1           1m36scontent_copy
To view the pod created by the deployment, run:
kubectl get pods
content_copy
(Output)
NAME                         READY     STATUS    RESTARTS   AGE
hello-node-714049816-ztzrb   1/1       Running   0          6mcontent_copy
Now is a good time to go through some interesting kubectl commands. None of these will change the state of the cluster, full documentation is available here:
kubectl cluster-info
content_copy
kubectl config view
content_copyAnd for troubleshooting :
kubectl get events
content_copy
kubectl logs <pod-name>
content_copyYou now need to make your pod accessible to the outside world.
Click Check my progress below to check your lab progress.
Create your pod
Check my progress
Allow external traffic
By default, the pod is only accessible by its internal IP within the cluster. In order to make the hello-node container accessible from outside the Kubernetes virtual network, you have to expose the pod as a Kubernetes service.
From Cloud Shell you can expose the pod to the public internet with the kubectl expose command combined with the --type="LoadBalancer" flag. This flag is required for the creation of an externally accessible IP:
kubectl expose deployment hello-node --type="LoadBalancer" --port=8080
content_copy
(Output)
service/hello-node exposedcontent_copyThe flag used in this command specifies that are using the load-balancer provided by the underlying infrastructure (in this case the Compute Engine load balancer). Note that you expose the deployment, and not the pod, directly. This will cause the resulting service to load balance traffic across all pods managed by the deployment (in this case only 1 pod, but you will add more replicas later).
The Kubernetes master creates the load balancer and related Compute Engine forwarding rules, target pools, and firewall rules to make the service fully accessible from outside of Google Cloud.
To find the publicly-accessible IP address of the service, request kubectl to list all the cluster services:
kubectl get services
content_copy
This is the output you should see:
NAME         CLUSTER-IP     EXTERNAL-IP      PORT(S)    AGE
hello-node   10.3.250.149   104.154.90.147   8080/TCP   1m
kubernetes   10.3.240.1     <none>           443/TCP    5mcontent_copy
There are 2 IP addresses listed for your hello-node service, both serving port 8080. The CLUSTER-IP is the internal IP that is only visible inside your cloud virtual network; the EXTERNAL-IP is the external load-balanced IP.
Note: The EXTERNAL-IP may take several minutes to become available and visible. If the EXTERNAL-IP is missing, wait a few minutes and run the command again.
You should now be able to reach the service by pointing your browser to this address: http://<EXTERNAL_IP>:8080
At this point you've gained several features from moving to containers and Kubernetes - you do not need to specify on which host to run your workload and you also benefit from service monitoring and restart. Now see what else can be gained from your new Kubernetes infrastructure.
Click Check my progress below to check your lab progress.
Create a Kubernetes Service
Check my progress
Scale up your service
One of the powerful features offered by Kubernetes is how easy it is to scale your application. Suppose you suddenly need more capacity. You can tell the replication controller to manage a new number of replicas for your pod:
kubectl scale deployment hello-node --replicas=4
content_copy
(Output)
deployment.extensions/hello-node scaledcontent_copyYou can request a description of the updated deployment:
kubectl get deployment
content_copy
(Output)
NAME         READY   UP-TO-DATE   AVAILABLE   AGE
hello-node   4/4     4            4           16mcontent_copy
You may need to run the above command until you see all 4 replicas created. You can also list the all pods:
kubectl get pods
content_copy
This is the output you should see:
NAME                         READY     STATUS    RESTARTS   AGE
hello-node-714049816-g4azy   1/1       Running   0          1m
hello-node-714049816-rk0u6   1/1       Running   0          1m
hello-node-714049816-sh812   1/1       Running   0          1m
hello-node-714049816-ztzrb   1/1       Running   0          16mcontent_copy
A declarative approach is being used here. Rather than starting or stopping new instances, you declare how many instances should be running at all times. Kubernetes reconciliation loops makes sure that reality matches what you requested and takes action if needed.
Here's a diagram summarizing the state of your Kubernetes cluster:

Click Check my progress below to check your lab progress.
Scale up your service
Check my progress
Roll out an upgrade to your service
At some point the application that you've deployed to production will require bug fixes or additional features. Kubernetes helps you deploy a new version to production without impacting your users.
First, modify the application by opening server.js:
vi server.js
content_copy
i
content_copyThen update the response message:
response.end("Hello Kubernetes World!");content_copySave the server.js file by pressing Esc then:
:wq
content_copy
Now you can build and publish a new container image to the registry with an incremented tag (v2 in this case).
Run the following commands, replacing PROJECT_ID with your lab project ID:
docker build -t gcr.io/PROJECT_ID/hello-node:v2 .
content_copy
docker push gcr.io/PROJECT_ID/hello-node:v2
content_copyNote: Building and pushing this updated image should be quicker since caching is being taken advantage of.
Kubernetes will smoothly update your replication controller to the new version of the application. In order to change the image label for your running container, you will edit the existing hello-node deployment and change the image from gcr.io/PROJECT_ID/hello-node:v1 to gcr.io/PROJECT_ID/hello-node:v2.
To do this, use the kubectl edit command. It opens a text editor displaying the full deployment yaml configuration. It isn't necessary to understand the full yaml config right now, just understand that by updating the spec.template.spec.containers.image field in the config you are telling the deployment to update the pods with the new image.
kubectl edit deployment hello-node
content_copy
Look for Spec > containers > image and change the version number to v2:
# Please edit the object below. Lines beginning with a '#' will be ignored,
# and an empty file will abort the edit. If an error occurs while saving this file will be
# reopened with the relevant failures.
#
apiVersion: extensions/v1beta1
kind: Deployment
metadata:
  annotations:
    deployment.kubernetes.io/revision: "1"
  creationTimestamp: 2016-03-24T17:55:28Z
  generation: 3
  labels:
    run: hello-node
  name: hello-node
  namespace: default
  resourceVersion: "151017"
  selfLink: /apis/extensions/v1beta1/namespaces/default/deployments/hello-node
  uid: 981fe302-f1e9-11e5-9a78-42010af00005
spec:
  replicas: 4
  selector:
    matchLabels:
      run: hello-node
  strategy:
    rollingUpdate:
      maxSurge: 1
      maxUnavailable: 1
    type: RollingUpdate
  template:
    metadata:
      creationTimestamp: null
      labels:
        run: hello-node
    spec:
      containers:
      - image: gcr.io/PROJECT_ID/hello-node:v1 ## Update this line ##
        imagePullPolicy: IfNotPresent
        name: hello-node
        ports:
        - containerPort: 8080
          protocol: TCP
        resources: {}
        terminationMessagePath: /dev/termination-log
      dnsPolicy: ClusterFirst
      restartPolicy: Always
      securityContext: {}
      terminationGracePeriodSeconds: 30
content_copy
After making the change, save and close this file: Press Esc, then:
:wq
content_copy
This is the output you should see:
deployment.extensions/hello-node edited
content_copy
Run the following to update the deployment with the new image:
kubectl get deployments
content_copy
New pods will be created with the new image and the old pods will be deleted.
This is the output you should see (you may need to rerun the above command to see the following):
NAME         READY   UP-TO-DATE   AVAILABLE   AGE
hello-node   4/4     4            4           1h
content_copy
While this is happening, the users of your services shouldn't see any interruption. After a little while they'll start accessing the new version of your application. You can find more details on rolling updates in this documentation.
Hopefully with these deployment, scaling, and updated features, once you've set up your Kubernetes Engine cluster, you'll agree that Kubernetes will help you focus on the application rather than the infrastructure.
Test your knowledge
Test your knowledge about Google cloud Platform by taking our quiz. (Please select multiple correct options.)
Which of the following are features of the Kubernetes Engine?
Integrated Logging and Monitoring
Stateful Application Support
None of these
Identity and Access ManagementSubmit
Congratulations!
This concludes this hands-on lab with Kubernetes. You've only scratched the surface of this technology. Explore with your own pods, replication controllers, and services - and also check out liveness probes (health checks) and consider using the Kubernetes API directly.
Take Your Next Lab
Try Managing Deployments using Kubernetes Engine, or check out these suggestions:
Next Steps/Learn More
- Check out Minikube, which offers a simple setup of a single node kubernetes cluster for development and testing purposes after you take this lab: http://kubernetes.io/docs/getting-started-guides/minikube/.
- Kubernetes is an open source project ( http://kubernetes.io/) hosted on GitHub. Your feedback and contributions are always welcome.
- You can follow the Kubernetes news on Twitter and on the community blog.
Google Cloud Training & Certification
...helps you make the most of Google Cloud technologies. Our classes include technical skills and best practices to help you get up to speed quickly and continue your learning journey. We offer fundamental to advanced level training, with on-demand, live, and virtual options to suit your busy schedule. Certifications help you validate and prove your skill and expertise in Google Cloud technologies.
Manual last updated July 05, 2021
Lab last tested July 05, 2021
Copyright 2021 Google LLC All rights reserved. Google and the Google logo are trademarks of Google LLC. All other company and product names may be trademarks of the respective companies with which they are associated.


 781
781


 被折叠的 条评论
为什么被折叠?
被折叠的 条评论
为什么被折叠?
 到【灌水乐园】发言


