


nexus3.15安装与使用
一、nexus3.15安装
1.1 下载
下载地址
https://www.sonatype.com/products/repository-oss-download?hsLang=en-us
我试了下载不下来,网上找了一个,在百度网盘
1.2 安装
1.2.1 jdk和maven安装
JDK安装链接:https://blog.csdn.net/martinlinux/article/details/115161249
maven安装链接:https://blog.csdn.net/martinlinux/article/details/120539512
1.2.2 nexus安装
tar xvfz nexus-3.15.2-01-unix.tar.gz
mkdir /data/nexus-3.15
mv nexus-3.15.2-01 sonatype-work /data/nexus-3.15
1.2.3 创建用户
useradd nexus -s /sbin/nologin
chown -R nexus /data/nexus-3.15
1.2.4 修改配置
1.2.4.1 修改端口
cd /data/nexus-3.15/nexus-3.15.2-01/etc
cp nexus-default.properties nexus-default.properties-bak
vim nexus-default.properties

## DO NOT EDIT - CUSTOMIZATIONS BELONG IN $data-dir/etc/nexus.properties
##
# Jetty section
application-port=9090		##Nexus服务监听的端口  默认是8081
application-host=0.0.0.0	##Nexus服务监听的主机
nexus-args=${jetty.etc}/jetty.xml,${jetty.etc}/jetty-http.xml,${jetty.etc}/jetty-requestlog.xml
nexus-context-path=/		##Nexus服务的上下文路径,这个路径跟访问的时候有关系,如果修改错之后会访问不到

# Nexus section
nexus-edition=nexus-pro-edition
nexus-features=\
 nexus-pro-feature
1.2.4.2 设置系统内核,这个是根据日志报警自己设置的
加入以下配置,注意这是设置的nexus用户的
vim /etc/security/limits.conf
nexus    soft   nproc 2047
nexus    hard   nproc 1638423
nexus    soft   nofile 1024
nexus    hard   nofile 65536
1.2.4.3 设置运行用户
cd /data/nexus-3.15/nexus-3.15.2-01/bin
vim nexus.rc
#默认是root用户启动
run_as_user="nexus"
1.2.4.4 数据存储路径
这个配置文件可修改占用内存,存储,日志的位置
cd /data/nexus-3.15/nexus-3.15.2-01/bin
vim nexus.vmoptions

-Xms1200M			##可根据自己服务器设置
-Xmx1200M
-XX:MaxDirectMemorySize=2G
-XX:+UnlockDiagnosticVMOptions
-XX:+UnsyncloadClass
-XX:+LogVMOutput
-XX:LogFile=../sonatype-work/nexus3/log/jvm.log
-XX:-OmitStackTraceInFastThrow
-Djava.net.preferIPv4Stack=true
-Dkaraf.home=.
-Dkaraf.base=.
-Dkaraf.etc=etc/karaf
-Djava.util.logging.config.file=etc/karaf/java.util.logging.properties
-Dkaraf.data=../sonatype-work/nexus3			##存储位置(根据自己的需求改,我测试的时候,这个相对路径是bin的上一层目录,不知道是否跟上下文路径有关系)
-Djava.io.tmpdir=../sonatype-work/nexus3/tmp
-Dkaraf.startLocalConsole=false
1.2.5 设置开启启动
cat << eof > /lib/systemd/system/nexus.service
[Unit]
Description=nexus
After=network.target remote-fs.target nss-lookup.target
[Service]
Type=forking
LimitNOFILE=65536
ExecStart=/data/nexus-3.15/nexus-3.15.2-01/bin/nexus start
ExecReload=/data/nexus-3.15/nexus-3.15.2-01/bin/nexus restart
ExecStop=/data/nexus-3.15/nexus-3.15.2-01/bin/nexus stop
Restart=on-failure
User=nexus
[Install]
WantedBy=multi-user.target
eof

systemctl daemon-reload
systemctl enable nexus.service
systemctl status nexus.sevice
1.2.6 访问
nexus3.X的默认端口是:8081
nexus3.X的默认账号是:admin
nexus3.X的默认密码是:admin123
从3.17版本开始默认密码不再是admin123,密码是随机生成。首次登录页面会显示admin用户的密码在/nexus-data/admin.password
二、说明
2.1 仓库说明
默认仓库/data/nexus/sonatype-work/nexus
apache-snapshots central central-m1 public releases snapshots thirdparty
1) public Repositories:类型为group,这个可以理解为仓库的集合,可以把其他仓库加入到这个组里对外展示。
大部分的终端用户,只需要配置上面这一个单独的组合后的URL,而不是单独配置多个仓库。用户也不需要知道某个jar包具体来源于maven中央仓库,或者是Apache Snapshots,或者是我们自己添加的其他仓库。
这样的好处在于:如果我们要新增某个仓库(如开源中国、阿里云),客户端不需要做任何更改,只需要在nexus上将要新增的仓库加入到对外提供服务的仓库group中就可以了。
2) 3rd party与 Releases和Snapshots一样,类型为hosted,意思是由nexus本机管理的仓库。该仓库用于商业化的,第三方提供的非开源的依赖仓库,如oracle jdbc driver。
3) Release 用于存放开发团队内部用的正式版的依赖。
4) Snapshots= 用于存放开发团队内部日常构建的频率更新较快的依赖包。
5) Apache Snapshots 和 Central 类型都是proxy,意思是远端仓库的代理。前者包含了Apache Software Foundation发布的快照版本,后者为Maven中央仓库,我们平时maven默认就是连接的该仓库。
6) Central M1 Shadow类型为virtual,意思是只是已有仓库的一个不同呈现方式的映射。
三、Nexus 使用
3.1 创建docker Repositories
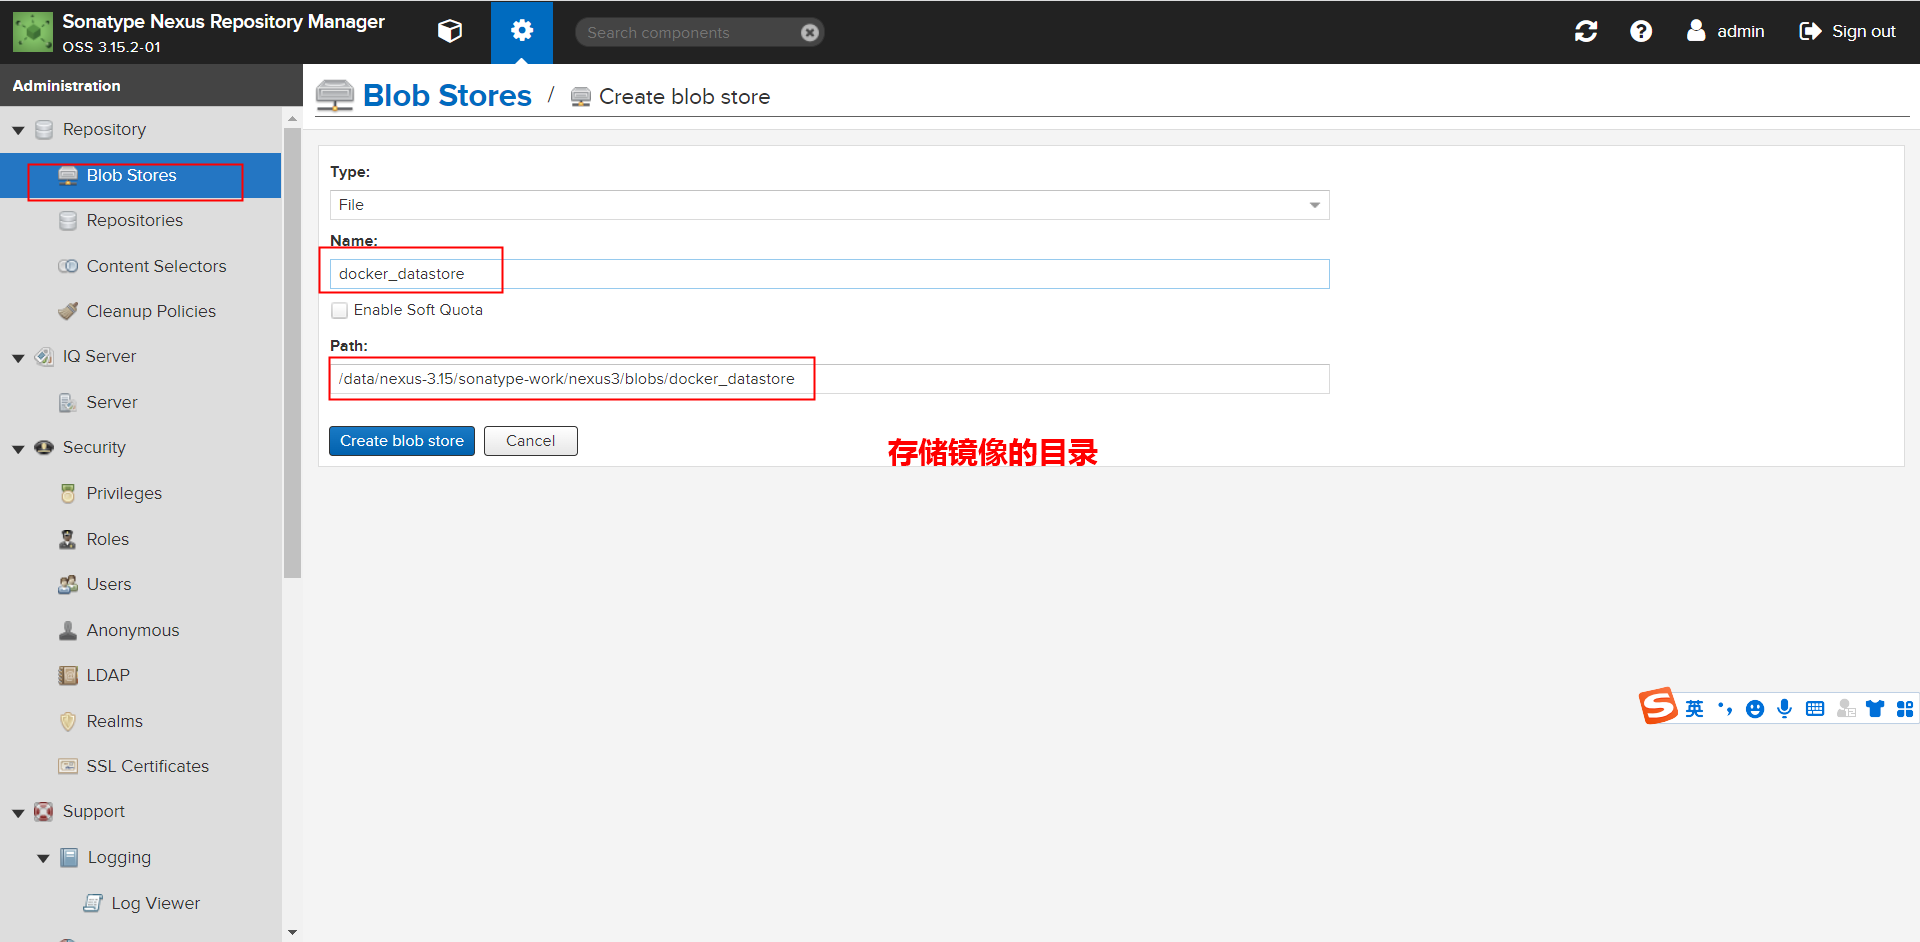
3.1.1 创建镜像存储目录
点击齿轮 - Repositorie - Blob Stores - Create blob store
指定用于存储镜像的目录
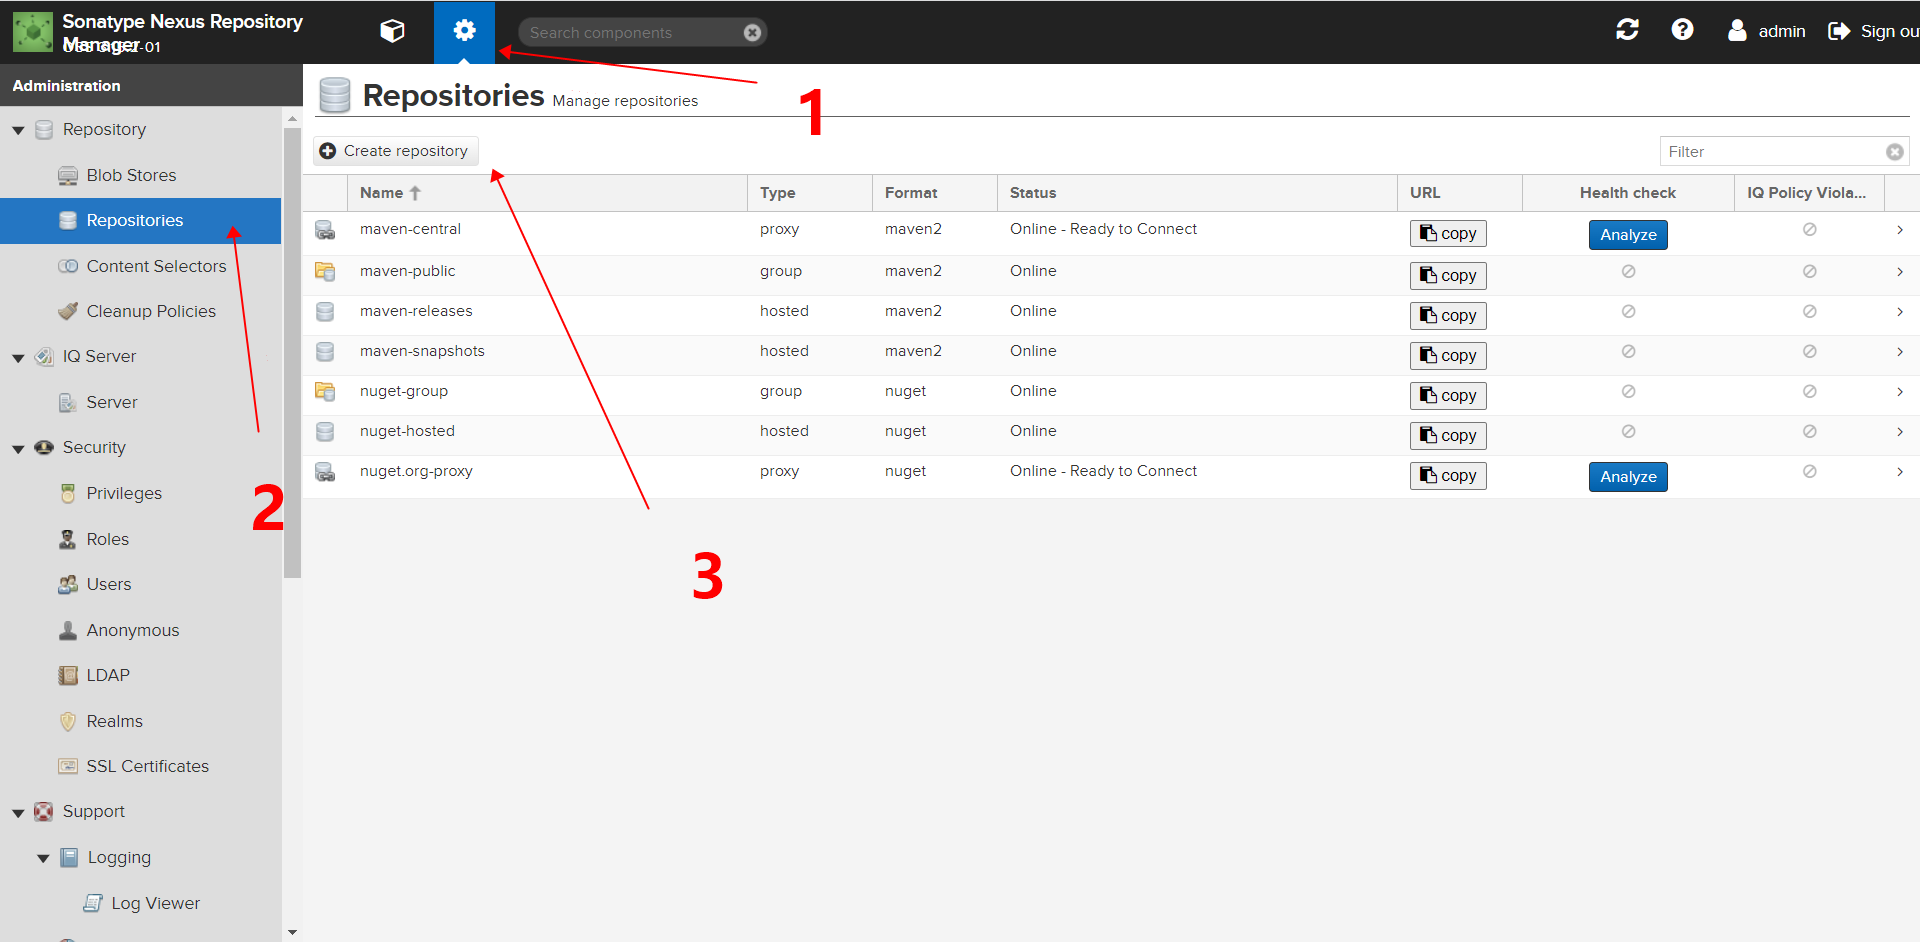
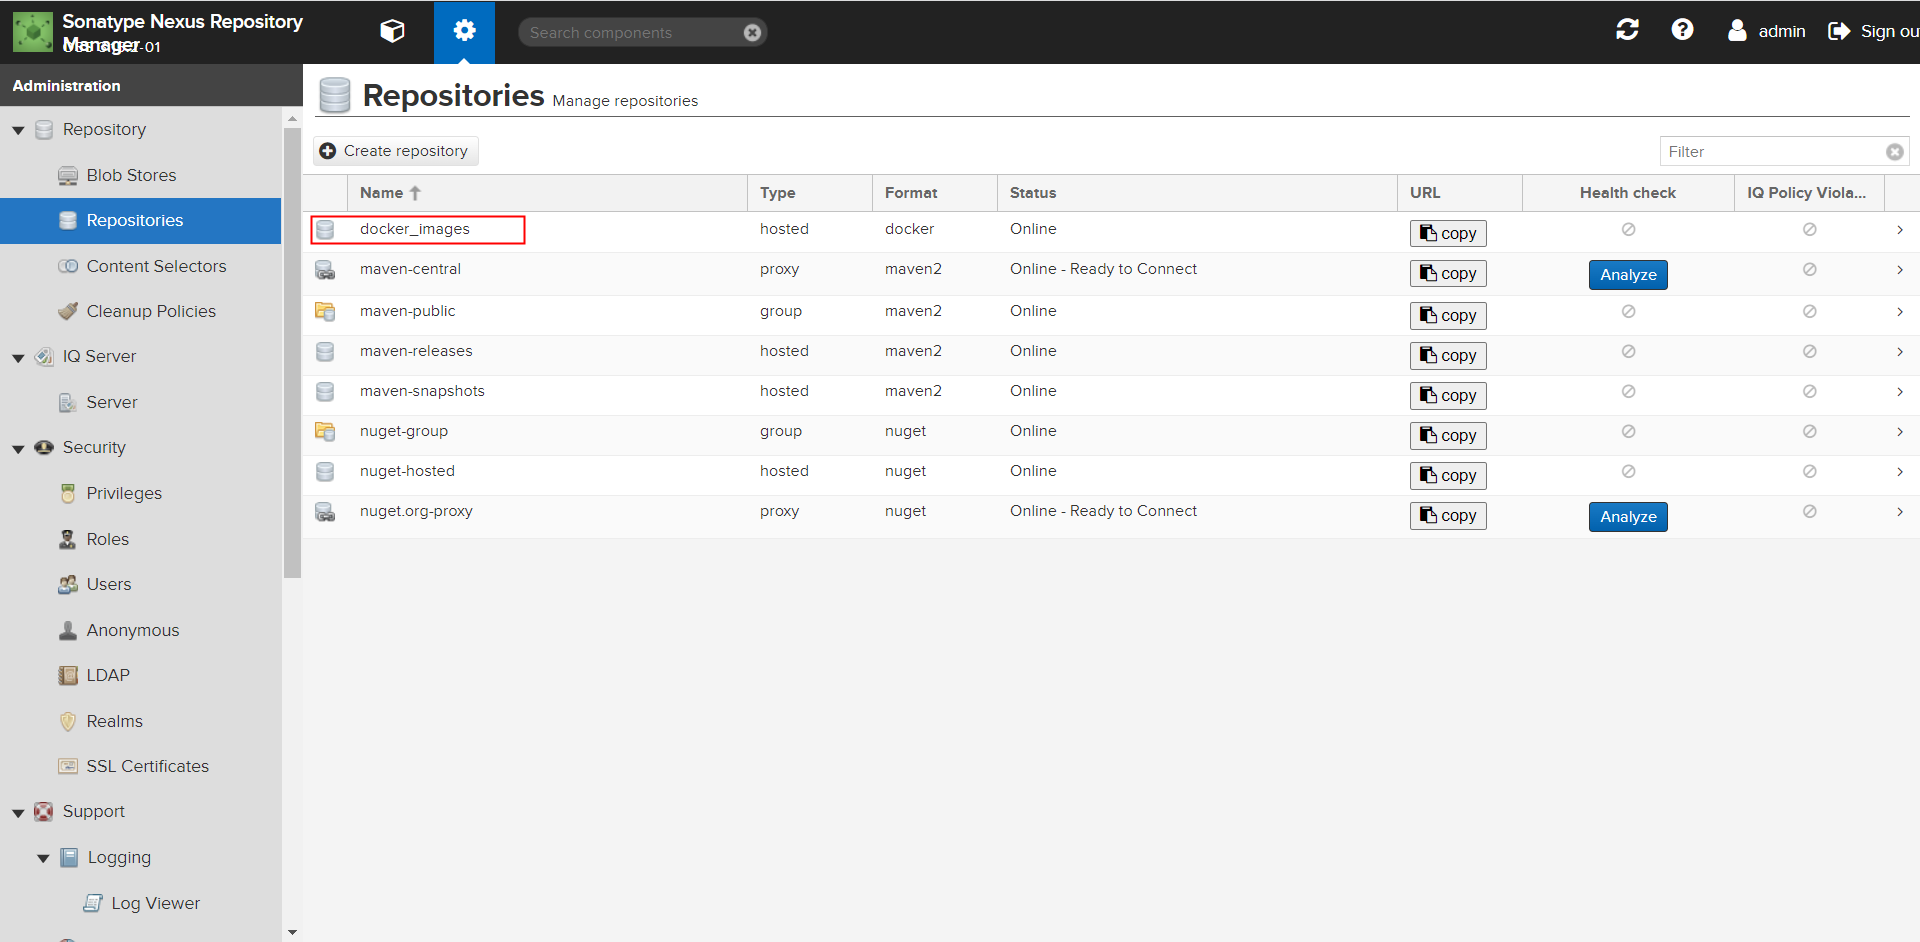
3.1.2 创建docker repo
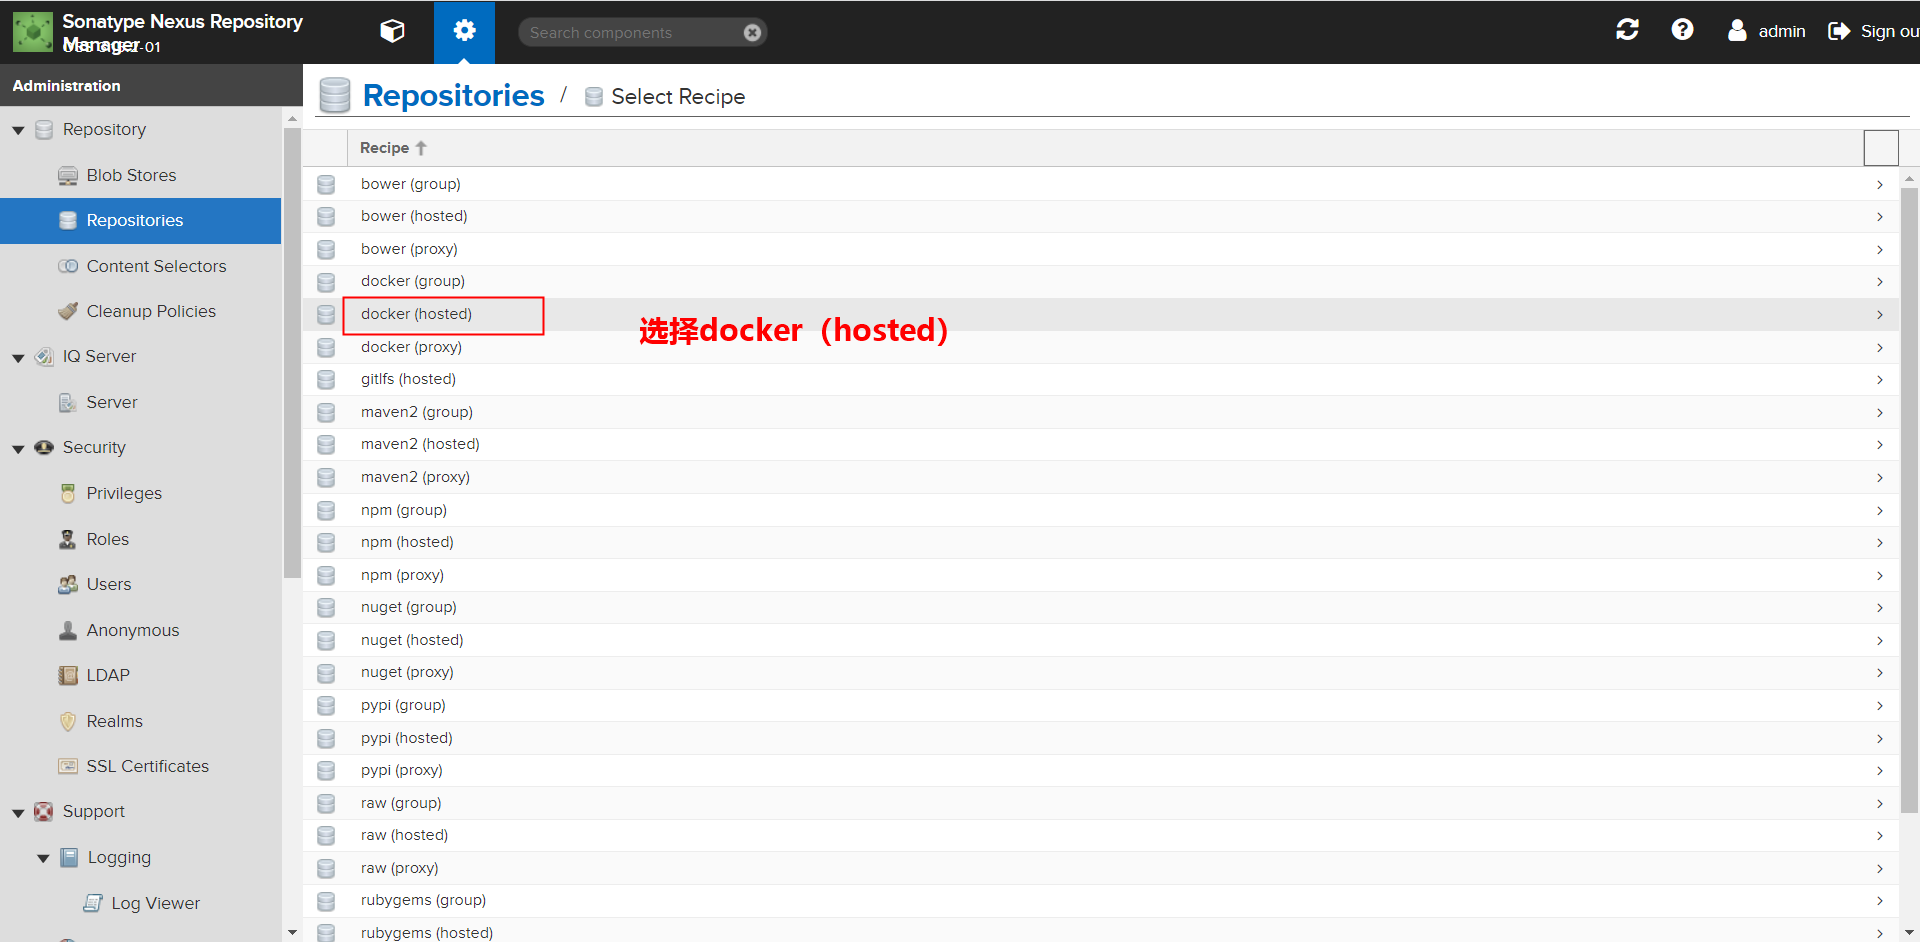
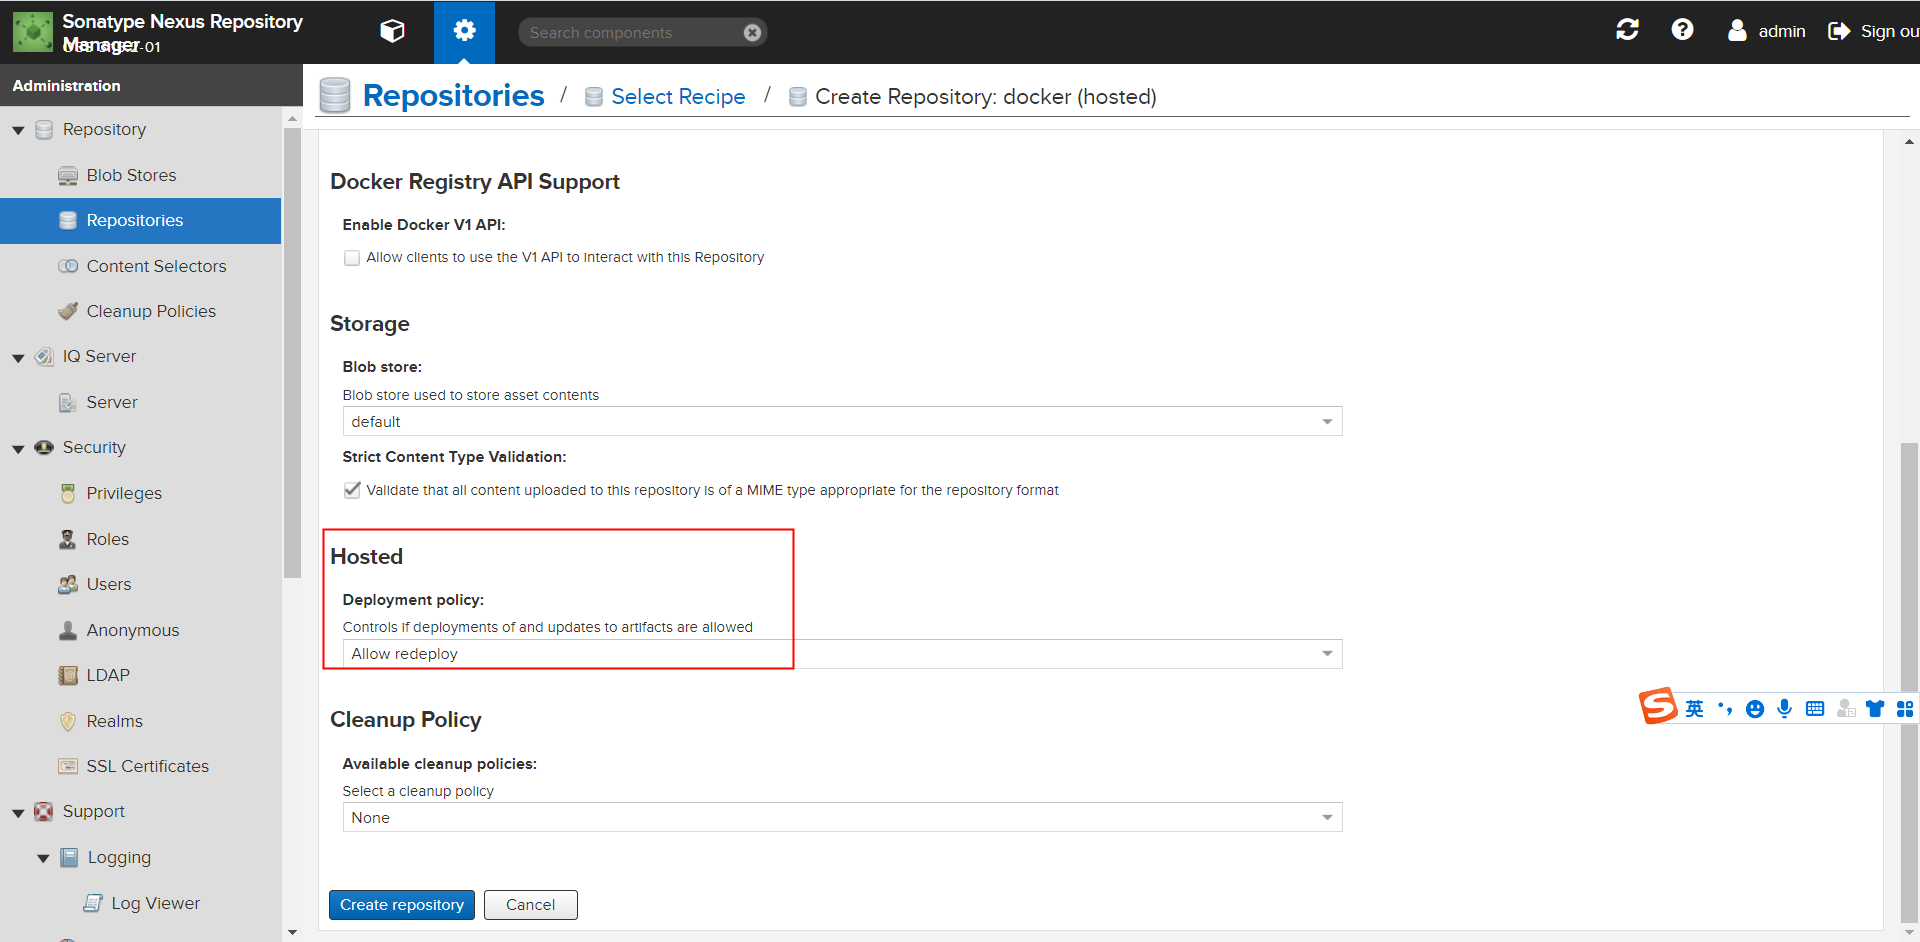
- 点击齿轮 - Repositories - Create repository - 选择 docker (hosted)
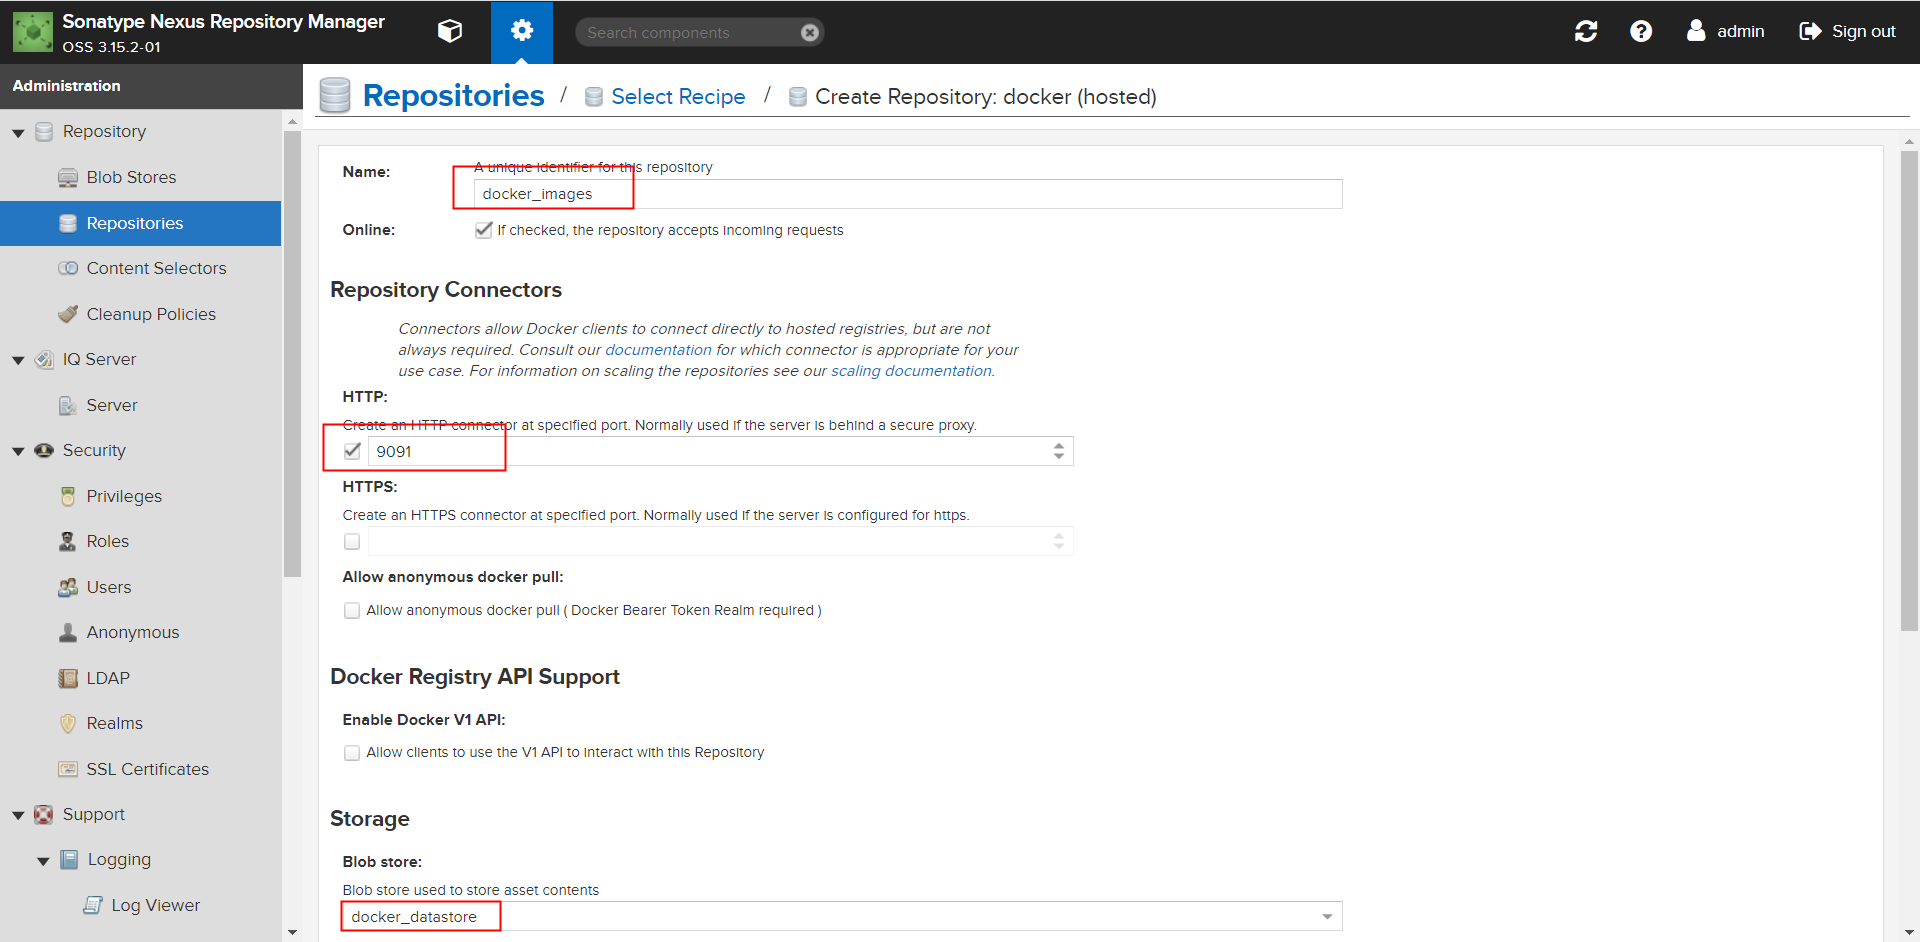
Name: 仓库的名称
HTTP: 仓库单独的访问端口
Enable Docker V1 API: 如果需要同时支持 V1 版本请勾选此项(不建议勾选)。
Hosted -> Deployment pollcy: 请选择 Allow redeploy 否则无法上传 Docker 镜像。
其它的仓库创建方法请各位自己摸索,还可以创建一个 docker (proxy) 类型的仓库链接到 DockerHub 上。再创建一个 docker (group) 类型的仓库把刚才的 hosted 与 proxy 添加在一起。主机在访问的时候默认下载私有仓库中的镜像,如果没有将链接到 DockerHub 中下载并缓存到 Nexus 中。
编写信息完成后选择“Create repository”按钮。
3.1.3 创建用于上传的账号
-
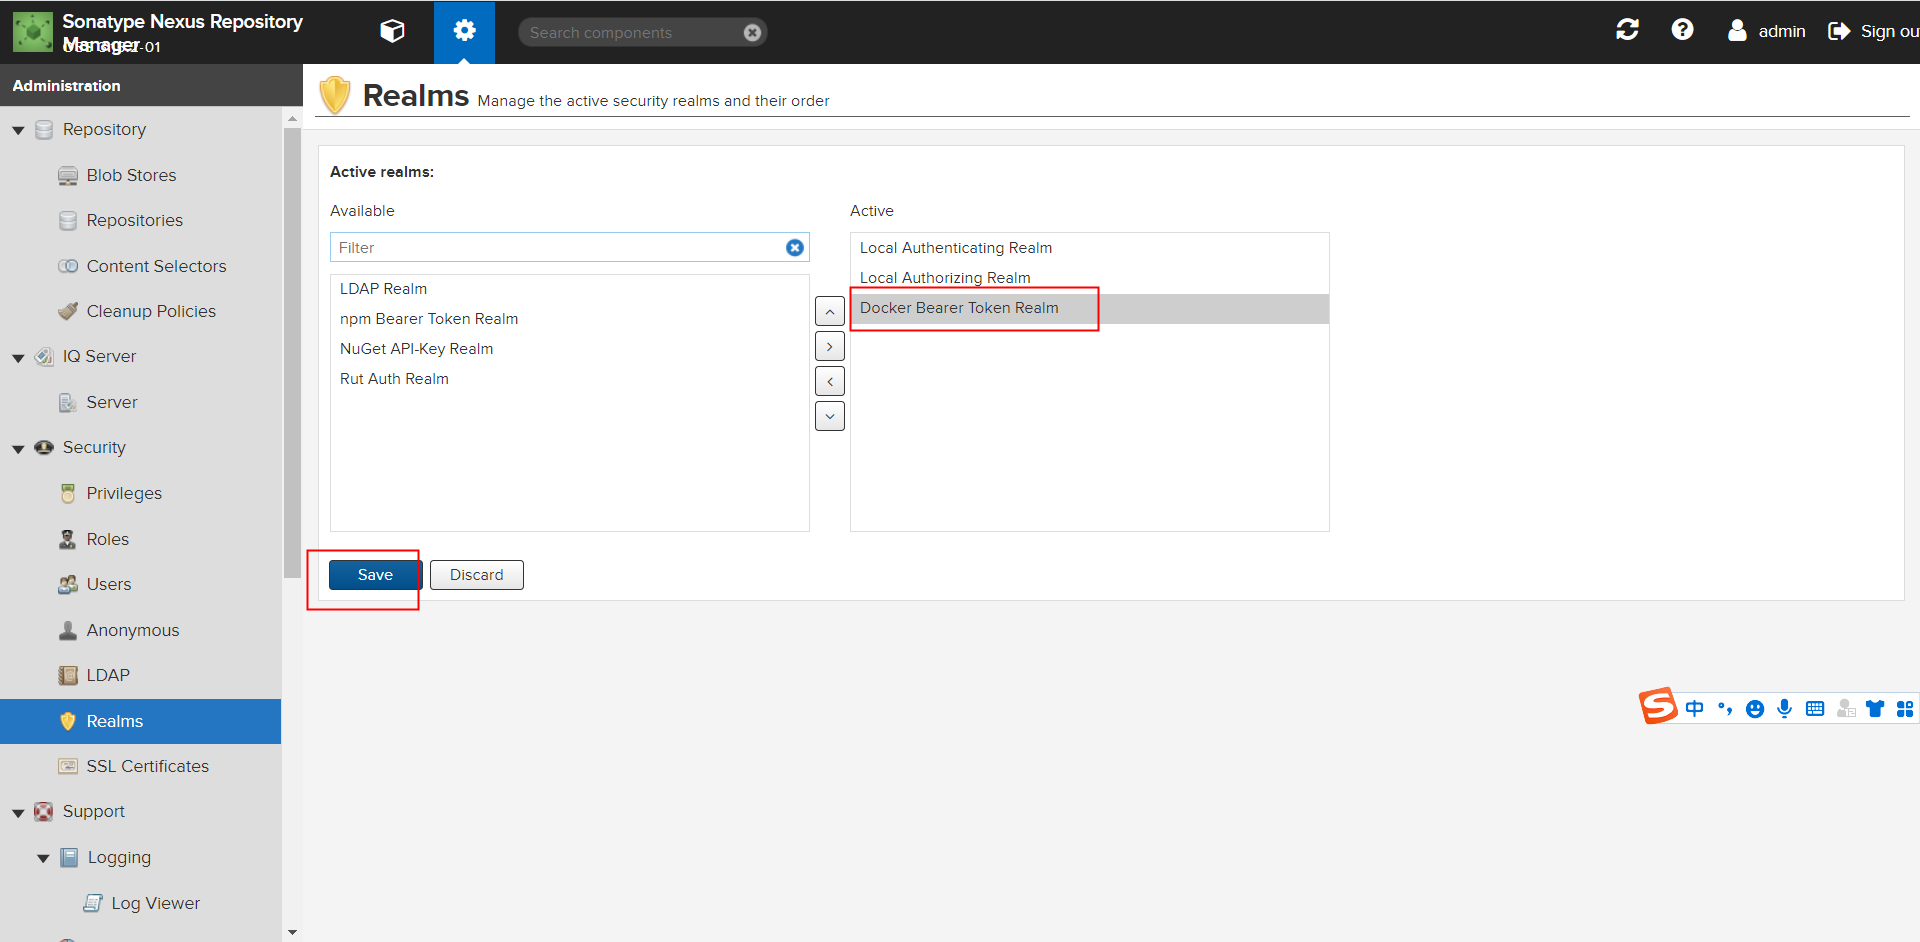
创建角色和账号
点击security - 点击Realms菜单 - 把 Docker Bearer Token Realm 移到右边的框中点击Save保存。
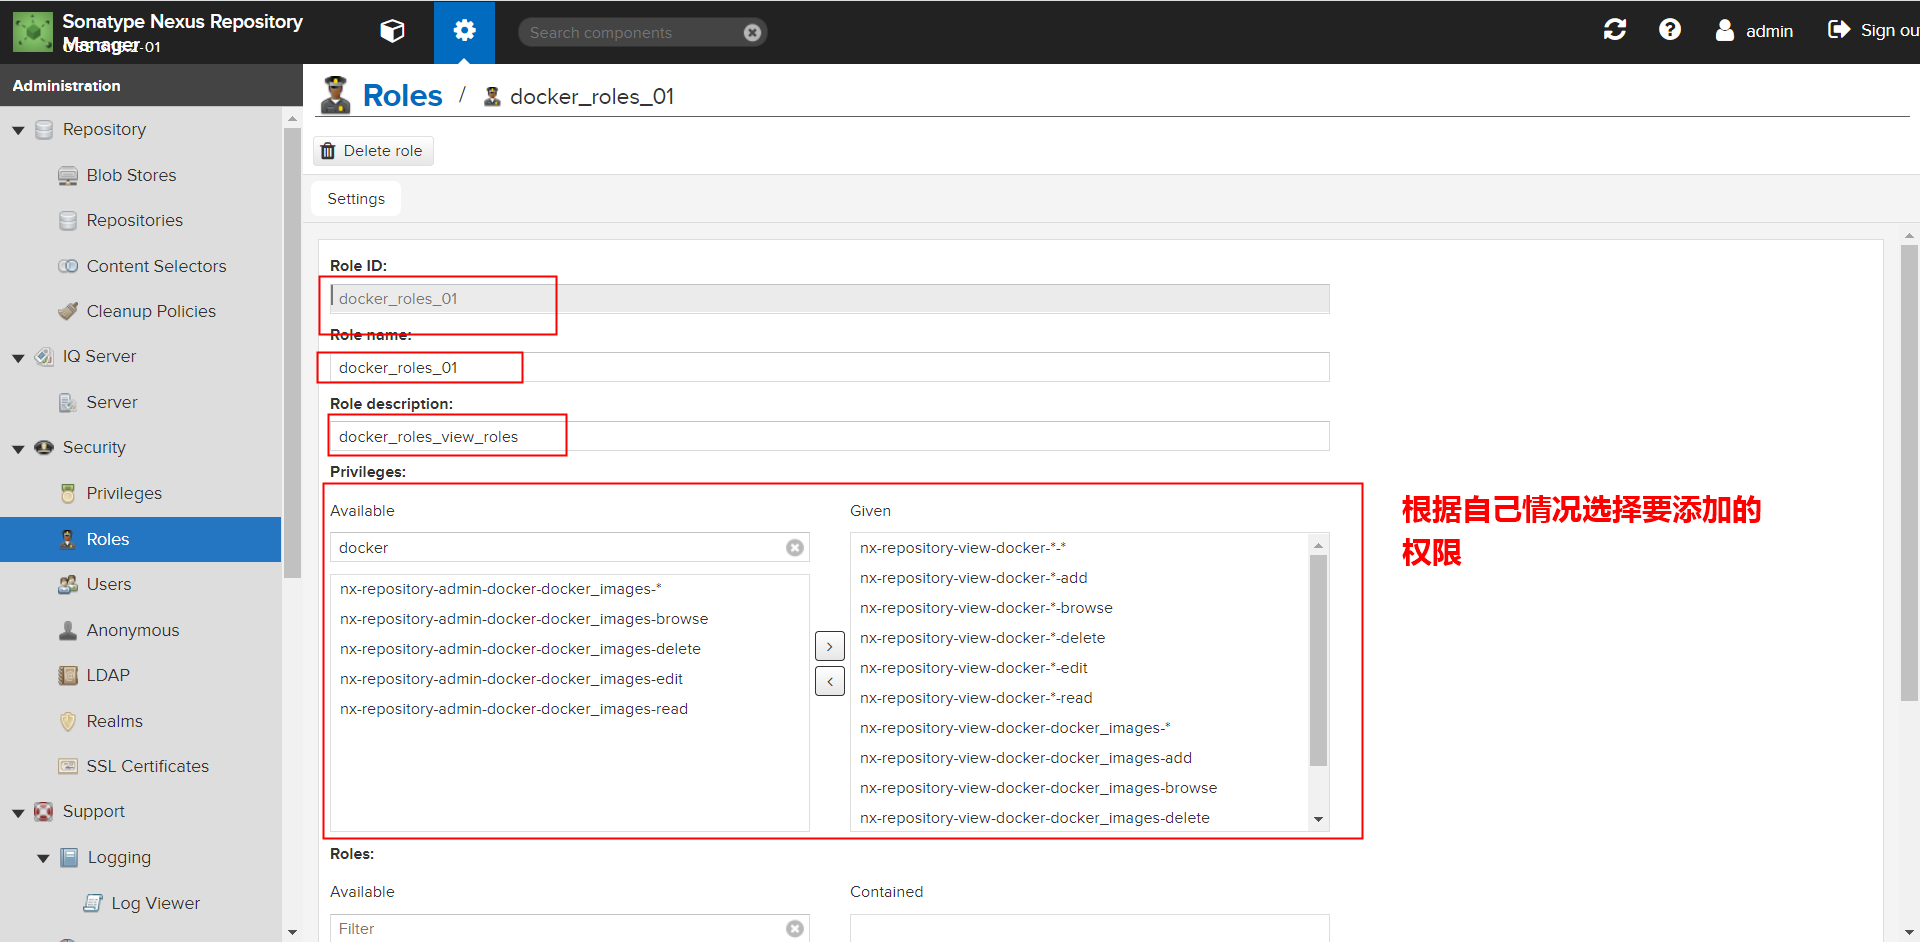
-
添加用户规则:菜单 Security->Roles->Create role 在 Privlleges 选项搜索 docker 把相应的规则移动到右边的框中然后保存

-
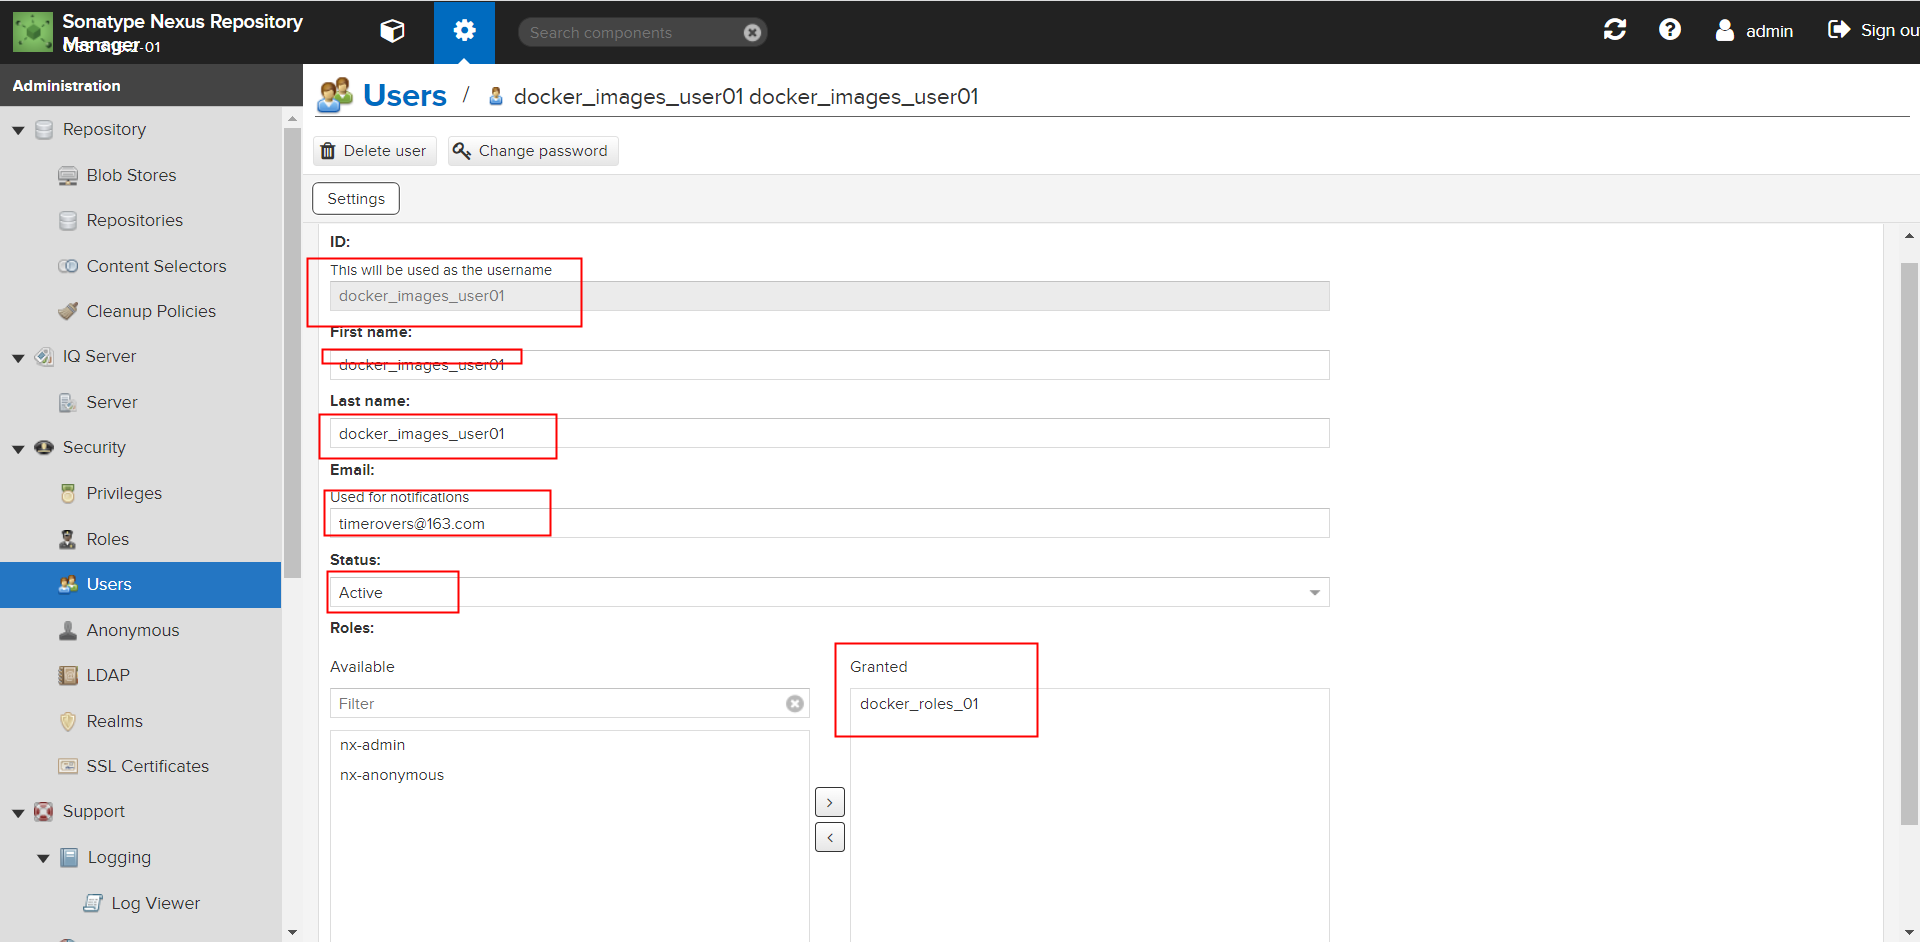
添加用户:菜单 Security->Users->Create local user 在 Roles 选项中选中刚才创建的规则移动到右边的窗口保存

3.1.4 docker配置私服
- 更改docker配置添加docker私服
vim /etc/docker/daemon.json
加入以下配置
"insecure-registries":["192.168.8.20:9091"]

systemctl restart docker
以下命令可以查看是否添加成功
docker info
- 登录
docker 默认的仓库不是咱们添加的这个所以登录需要注明仓库地址
docker login -u docker_images_user01 -p 123456 192.168.8.20:9091
或docker login 192.168.8.20:9091

退出:docker logout 192.168.8.20:9091
- 上传
4. 查看本地镜像
[root@node02 ~]# docker images
REPOSITORY TAG IMAGE ID CREATED SIZE
nginx 1.16 dfcfd8e9a5d3 23 months ago 127MB
5. 将本地镜像修改
docker tag nginx:1.16 192.168.8.20:9091/nginx/nginx:1.16
6. 查看是否成功
[root@node02 ~]# docker images
REPOSITORY TAG IMAGE ID CREATED SIZE
192.168.8.20:9091/nginx/nginx 1.16 dfcfd8e9a5d3 23 months ago 127MB
nginx 1.16 dfcfd8e9a5d3 23 months ago 127MB
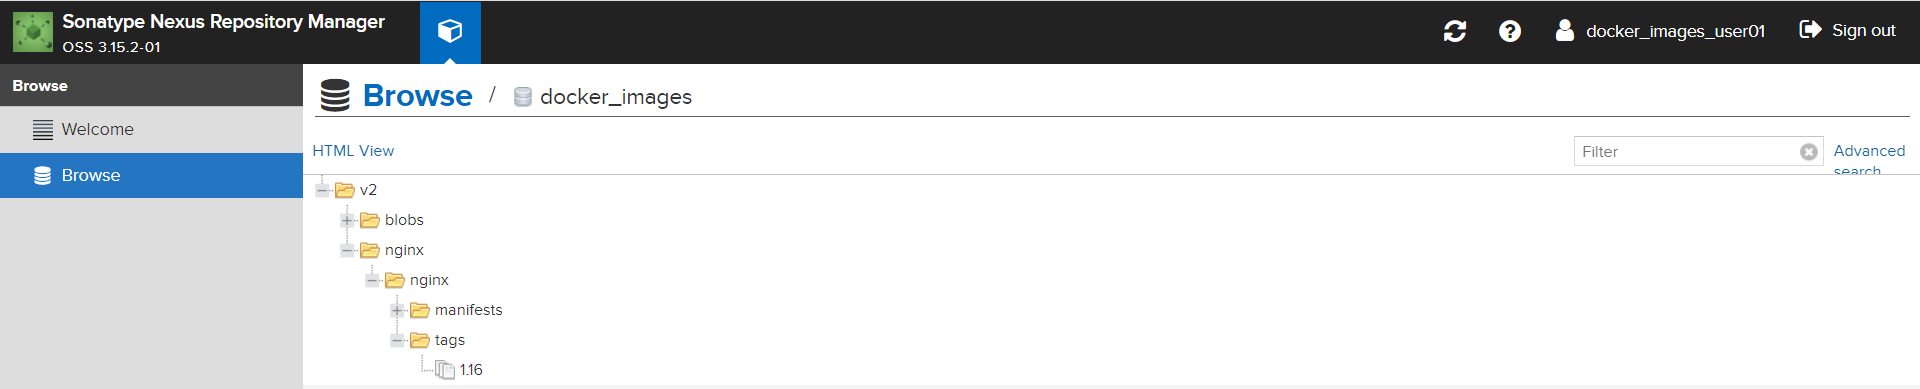
7. 上传
规划好自己上传的镜像目录
docker push 192.168.8.20:9091/nginx/nginx:1.16


 954
954


 被折叠的 条评论
为什么被折叠?
被折叠的 条评论
为什么被折叠?
 到【灌水乐园】发言


