


现在用maven构建的项目越来越多,部署一个私有的仓库拥有较大的价值:
1、方便项目组的人员之间共享类库
2、maven的jar包版本管理能更好地管理jar包
3、减少对中央仓库的依赖。
当下载一个snapshot或release时,maven查找的顺序为 本地仓库-->私服仓库-->中央仓库。部署私有仓库后,每当访问私有仓库查找时,若不存在,私有仓库即会从中央仓库下载,以后其他开发人员再次下载时因为私有仓库已有该artifact所以都会从私有仓库下载。由于私服多数部署在内网,所以网络之间的传输由外网变成内网。
=============================================================
1、下载并解压
cd /usr/local/src
wget https://sonatype-download.global.ssl.fastly.net/nexus/oss/nexus-2.12.0-01-bundle.tar.gz
tar -zxvf nexus-2.12.0-01-bundle.tar.gz -directory=/usr/local
cd /usr/local
ln -s nexus-2.12.0-01 nexus
2、把nexus设成系统服务
cp /usr/local/nexus/bin/nexus /etc/init.d/
chown +x /etc/init.d/nexus
chmod 755 /etc/init.d/nexus
vi /etc/init.d/nexus
设置以下内容
RUN_AS_USER=root
NEXUS_HOME="/usr/local/nexus"
PIDDIR="${NEXUS_HOME}/bin/jsw/linux-x86-64"
使用chkconfig命令增加开机自动启动
chkconfig --add nexus
chkconfig nexus on
启动nexus: service nexus start
默认的访问地址是 http://{ip}:8081/nexus
3、修改默认密码
nexus默认的三个账户
| 帐号 | 默认密码 | 权限 |
|---|---|---|
| admin | admin123 | 管理员 |
| deployment | deployment123 | 读、发布 |
| anomynous | 无 | 读 |
有两种修改密码的方式
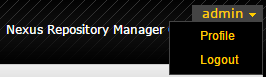
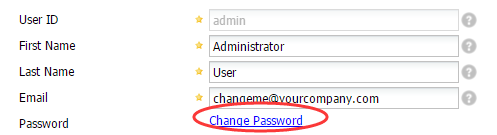
(1)、在用户界面登陆后修改
(2)、直接修改security.xml配置文,修改后重启nexus后生效
vi /usr/local/sonatype-work/nexus/conf/security.xml
    <user>
      <id>deployment</id>
      <firstName>Deployment</firstName>
      <lastName>User</lastName>
      <password>b2a0e378437817cebdf753d7dff3dd75483af9e0</password>
      <status>active</status>
      <email>changeme1@yourcompany.com</email>
    </user>
nexus使用SHA1的加密码方式,把加密后的密码替换<password>标签的内容即可
4、去除anonymous用户的浏览respository的权限(可选)
由于匿名用户也拥有读权限,在安全性要求高的代码仓库可以删除匿名用户的读权限。
vi /usr/local/sonatype-work/nexus/conf/security.xml
    <userRoleMapping>
      <userId>anonymous</userId>
      <source>default</source>
      <roles>
        <role>anonymous</role>
        <!-- <role>repository-any-read</role> -->  <!-- 删除读权限 -->
      </roles>
    </userRoleMapping>
5、在maven项目的pom.xml文件加入
 <!-- 仓库地址 -->
    <repositories>
        <repository>
            <id>nexus</id>
            <name>Team Nexus Repository</name>
            <url>http://192.168.30.61:8081/nexus/content/groups/public</url>
        </repository>
    </repositories>
    <pluginRepositories>
        <pluginRepository>
            <id>nexus</id>
            <name>Team Nexus Repository</name>
            <url>http://192.168.30.61:8081/nexus/content/groups/public</url>
        </pluginRepository>
    </pluginRepositories>
<!-- 发布地址 -->
<distributionManagement>
<repository>
<id>releases</id> <!-- 若要使用mvn:deploy命令须与settings.xml文件的server标签的id对应 -->
<name>Nexus Release Repository</name>
<url>http://192.168.30.61:8081/nexus/content/repositories/releases/</url>
</repository>
<snapshotRepository>
<id>snapshots</id>
<name>Nexus Snapshot Repository</name>
<url>http://192.168.30.61:8081/nexus/content/repositories/snapshots/</url>
</snapshotRepository>
</distributionManagement>若想使用mvn:deploy命令直接部署至nexus则需在pom.xml增加部署插件、打包源码插件(推荐)
          <!-- 部署插件 -->
            <plugin>
                <groupId>org.apache.maven.plugins</groupId>
                <artifactId>maven-deploy-plugin</artifactId>
                <version>2.4</version>
            </plugin>
<!-- 打包源码插件 -->
<plugin>
<groupId>org.apache.maven.plugins</groupId>
<artifactId>maven-source-plugin</artifactId>
<version>2.4</version>
<executions>
<execution>
<id>attach-sources</id>
<goals>
<goal>jar-no-fork</goal>
</goals>
</execution>
</executions>
</plugin>编辑$MAVEN_HOME/conf/settings.xml文件增加部署的帐户
  <server>
    <server>
      <id>releases</id>     <!-- 要与pom.xml的发布仓库中的id对应 -->
      <username>admin</username>
      <password>123456</password>
    </server>
  </servers>
配置完毕后就可以愉快的使用mvn:deploy命令把jar和源码一起发布至nexus私服了


 1072
1072


 被折叠的 条评论
为什么被折叠?
被折叠的 条评论
为什么被折叠?
 到【灌水乐园】发言


