


说明:本文章转载自:http://blog.csdn.net/rsyaoxin/article/details/9220735
接触GDAL有四五年多时间了,平时都是在C++下使用,最近需要在C#下调用GDAL,所以就开始学习了下,相比C++调用,C#下使用GDAL做图像处理的效率有点低,但是其简单易学,适合菜鸟上手,现把自己刚学到的心得跟大伙分享下,以遥感影像的显示为例。
1、 程序环境搭建
首先,需要编译GDAL库的源代码。 GDAL是一个非常强悍的遥感数据格式解析库,支持多种遥感数据格式的读写,而且还有一些算法实现。然而,它只是一个开源库,并不是一个单独的软件,而是C++写的源代码,需要编译成动态链接库后才能为我们程序调用,如果需要在C#/.Net环境下调用,还需特别编译C#版的DLL。关于编译的方法网上很多教程,我就不介绍了,具体编译步骤可以参照民录大哥的博客:http://blog.csdn.net/liminlu0314/article/details/6937194
如果很难编译成功,需要编译后的版本,可以留下邮箱,或者给我发邮件RSyaoxin@163.com。
编译完成后,我们会得到9个DLL文件(以GDAL1.10版为例):gdal110.dll、gdal_csharp.dll、gdal_wrap.dll、gdalconst_csharp.dll、gdalconst_wrap.dll、ogr_csharp.dll、ogr_wrap.dll、osr_csharp.dll、osr_wrap.dll。
注意:需要强调的一点是,如果编译GDAL时添加了额外的依赖库,需要将其动态链接库一并拷贝过来。比如,我编译GDAL库时就添加了HDF4、HDF5、JPEG2000、NetCDF、Proj4等文件格式支持,那么调用的时候就需要将hd425m.dll等拷贝到同上面几个DLL一起。
其次,C#下的环境配置。
我们首先建立一个Windows窗体应用程序,将上面得到的9个DLL文件拷贝到项目所在的文件夹,然后在解决方案面板下找到引用项,右键添加引用,选择gdal_csharp.dll将它添加进来,这样就可以在C#调用GDAL函数了。
再次,初始化GDAL环境。具体做法是:
using OSGeo.GDAL;
将上面这一句添加到namespace这一行前面。
然后在构造函数或者Form_Load函数中添加下面两行:
OSGeo.GDAL.Gdal.AllRegister();
OSGeo.GDAL.Gdal.SetConfigOption("GDAL_FILENAME_IS_UTF8","YES");
说明:第一行是注册所有的格式驱动,第二行是支持中文路径和名称,由于GDAL默认不支持中文路径,所以在编译的时候会修改源码让它支持中文路径,C++代码就可以直接支持了,但是会发现C#版还是会不支持,所以需要加上第二句。
这样开发环境就搭建好了,可以直接调用GDAL函数进行图像处理了。
2、 关键代码
C#下图像的显示方法有多种,最简单的方法就是构建位图。我们可以把GDAL下的Dataset转换为Bitmap供C#调用。在C#里面调用GDAL读取栅格数据的主要函数是ReadRaster,它相当于C++下的RasterIO函数,其有多重形式:
public CPLErr ReadRaster(int xOff, int yOff, int xSize, int ySize, byte[] buffer,
    int buf_xSize, int buf_ySize, int pixelSpace, int lineSpace)
public CPLErr WriteRaster(int xOff, int yOff, int xSize, int ySize, byte[] buffer,
    int buf_xSize, int buf_ySize, int pixelSpace, int lineSpace)
public CPLErr ReadRaster(int xOff, int yOff, int xSize, int ySize, short[] buffer,
    int buf_xSize, int buf_ySize, int pixelSpace, int lineSpace)
public CPLErr WriteRaster(int xOff, int yOff, int xSize, int ySize, short[] buffer,
    int buf_xSize, int buf_ySize, int pixelSpace, int lineSpace)
public CPLErr ReadRaster(int xOff, int yOff, int xSize, int ySize, int[] buffer,
    int buf_xSize, int buf_ySize, int pixelSpace, int lineSpace)
public CPLErr WriteRaster(int xOff, int yOff, int xSize, int ySize, int[] buffer,
    int buf_xSize, int buf_ySize, int pixelSpace, int lineSpace)
public CPLErr ReadRaster(int xOff, int yOff, int xSize, int ySize, float[] buffer,
    int buf_xSize, int buf_ySize, int pixelSpace, int lineSpace)
public CPLErr WriteRaster(int xOff, int yOff, int xSize, int ySize, float[] buffer,
    int buf_xSize, int buf_ySize, int pixelSpace, int lineSpace)
public CPLErr ReadRaster(int xOff, int yOff, int xSize, int ySize, double[] buffer,
    int buf_xSize, int buf_ySize, int pixelSpace, int lineSpace)
public CPLErr WriteRaster(int xOff, int yOff, int xSize, int ySize, double[] buffer,
    int buf_xSize, int buf_ySize, int pixelSpace, int lineSpace)
public CPLErr ReadRaster(int xOff, int yOff, int xSize, int ySize, IntPtr buffer, i
    nt buf_xSize, int buf_ySize, DataType buf_type, int pixelSpace, int lineSpace)
public CPLErr WriteRaster(int xOff, int yOff, int xSize, int ySize, IntPtr buffer,
    int buf_xSize, int buf_ySize, DataType buf_type, int pixelSpace, int lineSpace)
这里面,xOff和yOff是指偏移量,即从影像的左上角起始坐标(xOff,yOff)开始读取数据。xSize和ySize是指读取图像数据的行列数,即宽度和高度,单位都是像素。Buffer是图像数据缓存。buf_xSize和buf_ySize是缓存区的大小,它们须与buffer申请的大小保持一致,通过这两个参数可以控制缩放,如果它们小于xSize和ySize就是将原图缩小,反之如果它们大于xSize和ySize就是将原图放大。pixelSpace和lineSpace一般默认取0即可。
关键代码如下:
- /// <summary>
- /// GDAL栅格转换为位图
- /// </summary>
- /// <param name="ds">GDAL Dataset</param>
- /// <param name="showRect">显示区域</param>
- /// <param name="bandlist">需要显示的波段列表</param>
- /// <returns>返回Bitmap对象</returns>
- public Bitmap GetImage(OSGeo.GDAL.Dataset ds, Rectangle showRect, int[] bandlist)
- {
- int imgWidth = ds.RasterXSize; //影像宽
- int imgHeight = ds.RasterYSize; //影像高
- float ImgRatio = imgWidth / (float)imgHeight; //影像宽高比
- //获取显示控件大小
- int BoxWidth = showRect.Width;
- int BoxHeight = showRect.Height;
- float BoxRatio = imgWidth / (float)imgHeight; //显示控件宽高比
- //计算实际显示区域大小,防止影像畸变显示
- int BufferWidth, BufferHeight;
- if (BoxRatio >= ImgRatio)
- {
- BufferHeight = BoxHeight;
- BufferWidth = (int)(BoxHeight * ImgRatio);
- }
- else
- {
- BufferWidth = BoxWidth;
- BufferHeight = (int)(BoxWidth/ImgRatio);
- }
- //构建位图
- Bitmap bitmap = new Bitmap(BufferWidth, BufferHeight,
- System.Drawing.Imaging.PixelFormat.Format24bppRgb);
- if (bandlist.Length==3) //RGB显示
- {
- int[] r = new int[BufferWidth * BufferHeight];
- Band band1 = ds.GetRasterBand(bandlist[0]);
- band1.ReadRaster(0, 0, imgWidth, imgHeight, r, BufferWidth ,BufferHeight, 0, 0); //读取图像到内存
- //为了显示好看,进行最大最小值拉伸显示
- double[] maxandmin1 = { 0, 0 };
- band1.ComputeRasterMinMax(maxandmin1,0);
- int[] g = new int[BufferWidth * BufferHeight];
- Band band2 = ds.GetRasterBand(bandlist[1]);
- band2.ReadRaster(0, 0, imgWidth, imgHeight, g, BufferWidth, BufferHeight, 0, 0);
- double[] maxandmin2 = { 0, 0 };
- band2.ComputeRasterMinMax(maxandmin2, 0);
- int[] b = new int[BufferWidth * BufferHeight];
- Band band3 = ds.GetRasterBand(bandlist[2]);
- band3.ReadRaster(0, 0, imgWidth, imgHeight, b, BufferWidth, BufferHeight, 0, 0);
- double[] maxandmin3 = { 0, 0 };
- band3.ComputeRasterMinMax(maxandmin3, 0);
- int i, j;
- for (i = 0; i < BufferWidth; i++)
- {
- for (j = 0; j < BufferHeight; j++)
- {
- int rVal=Convert.ToInt32(r[i + j * BufferWidth]);
- rVal = (int)((rVal - maxandmin1[0]) / (maxandmin1[1] - maxandmin1[0]) * 255);
- int gVal=Convert.ToInt32(g[i + j * BufferWidth]);
- gVal = (int)((gVal - maxandmin2[0]) / (maxandmin2[1] - maxandmin2[0]) * 255);
- int bVal=Convert.ToInt32(b[i + j * BufferWidth]);
- bVal = (int)((bVal - maxandmin3[0]) / (maxandmin3[1] - maxandmin3[0]) * 255);
- Color newColor = Color.FromArgb(rVal, gVal, bVal);
- bitmap.SetPixel(i, j, newColor);
- }
- }
- }
- else //灰度显示
- {
- int[] r = new int[BufferWidth * BufferHeight];
- Band band1 = ds.GetRasterBand(bandlist[0]);
- band1.ReadRaster(0, 0, imgWidth, imgHeight, r, BufferWidth, BufferHeight, 0, 0);
- double[] maxandmin1 = { 0, 0 };
- band1.ComputeRasterMinMax(maxandmin1, 0);
- int i, j;
- for (i = 0; i < BufferWidth; i++)
- {
- for (j = 0; j < BufferHeight; j++)
- {
- int rVal = Convert.ToInt32(r[i + j * BufferWidth]);
- rVal = (int)((rVal - maxandmin1[0]) / (maxandmin1[1] - maxandmin1[0]) * 255);
- Color newColor = Color.FromArgb(rVal, rVal, rVal);
- bitmap.SetPixel(i, j, newColor);
- }
- }
- }
- return bitmap;
- }
3、 主函数调用
得到Bitmap,我们就可以在程序中调用它了。我们可以在窗体上加一个PictureBox控件来显示图像,其name设为pictureBox1。主要调用代码如下:
- private void ImageShow()
- {
- string filename="";
- OpenFileDialog dlg = new OpenFileDialog();
- dlg.Filter = "Tiff文件|*.tif|Erdas img文件|*.img|Bmp文件|*.bmp|jpeg文件|*.jpg|所有文件|*.*";
- if (dlg.ShowDialog() == DialogResult.OK)
- {
- filename = dlg.FileName;
- }
- if (filename == "")
- {
- MessageBox.Show("影像路径不能为空");
- return;
- }
- OSGeo.GDAL.Dataset ds= Gdal.Open(filename, Access.GA_ReadOnly);
- if(ds==null)
- {
- MessageBox.Show("影像打开失败");
- return;
- }
- Rectangle pictureRect = new Rectangle();
- pictureRect.X = 0;
- pictureRect.Y = 0;
- pictureRect.Width = this.pictureBox1.Width;
- pictureRect.Height = this.pictureBox1.Height;
- int[] disband = {3,2,1};
- Bitmap bitmap = GetImage(ds, pictureRect, disband); //遥感影像构建位图
- pictureBox1.Image = bitmap; //将位图传递给PictureBox控件进行显示
- }
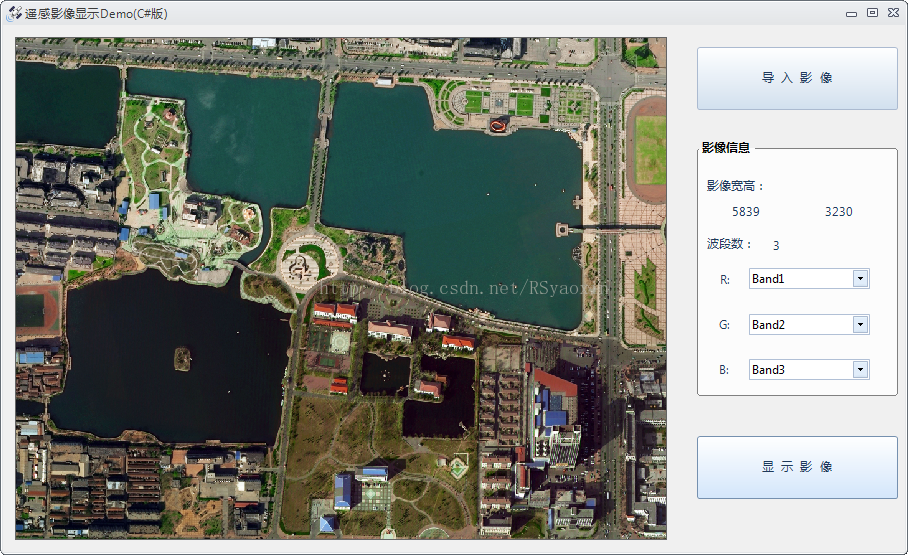
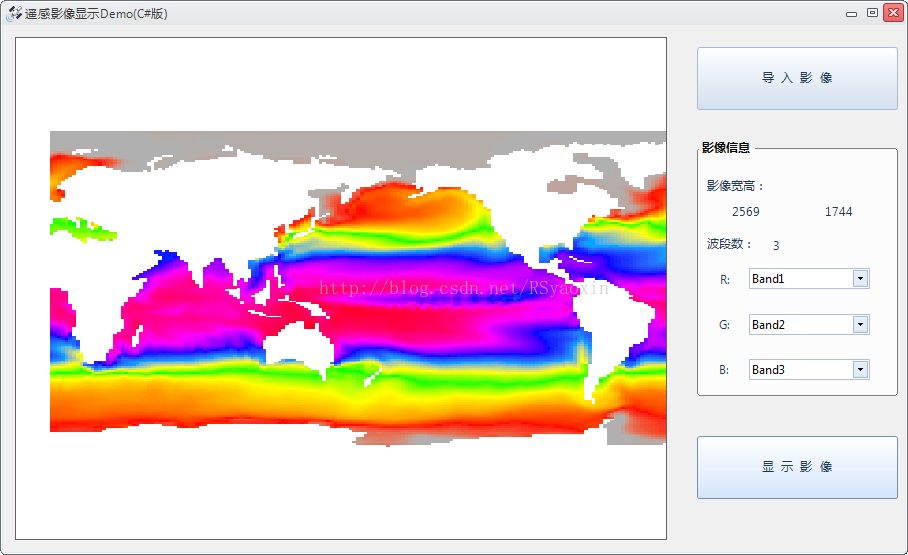
4、 结果展示
这样我们就可以很容易地显示遥感影像了。


 3万+
3万+

 被折叠的 条评论
为什么被折叠?
被折叠的 条评论
为什么被折叠?
 到【灌水乐园】发言


