


- 扩展点 RequestInterceptor#apply
- 扩展点 feign.Client#execute
- spring cloud dubbo 调用
RPC
RPC 全称是 Remote Procedure Call ,即远程过程调用,其对应的是我们的本地调用
RPC 的目的是:让我们调用远程方法像调用本地方法一样

Feign
Feign是Netflix开发的声明式、模板化的HTTP客户端,Feign可帮助我们更加便捷、优雅地调用HTTP API。
Feign可以做到使用 HTTP 请求远程服务时就像调用本地方法一样的体验,开发者完全感知不到这是远程方法,更感知不到这是个 HTTP 请求。它像 Dubbo 一样,consumer 直接调用接口方法调用 provider,而不需要通过常规的 Http Client 构造请求再解析返回数据。它解决了让开发者调用远程接口就跟调用本地方法一样,无需关注与远程的交互细节,更无需关注分布式环境开发。
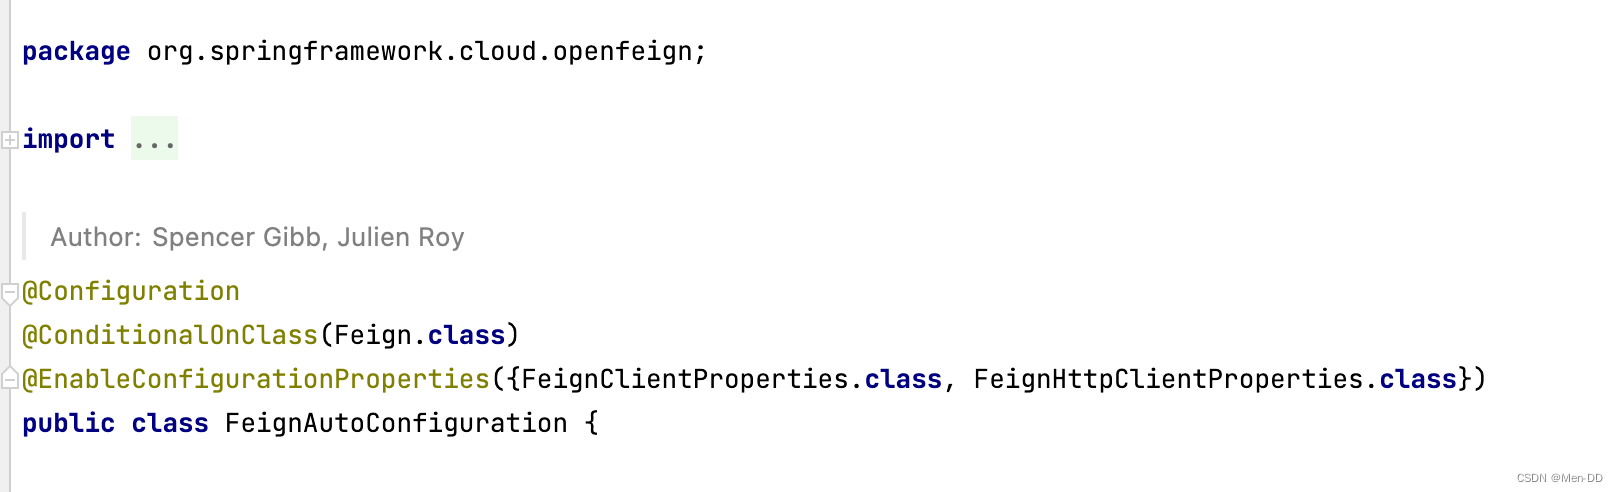
Spring Cloud openfeign 对Feign进行了增强,使其支持Spring MVC注解,另外还整合了Ribbon和Eureka,从而使得Feign的使用更加方便。
Ribbon 与 Feign 对比
Ribbon
@Bean
@LoadBalanced //open-api-service-product => ip:port
public RestTemplate hasLoadBalancedrestTemplate() {
    return new RestTemplate();
}

@Autowired
private RestTemplate hasLoadBalancedrestTemplate;

String url = "http://open-api-service-product/check";
String result = hasLoadBalancedrestTemplate.getForObject(url, String.class);
Feign
@FeignClient(value = "open-api-service-product", fallbackFactory = ProductFeignFallback.class)
public interface IProductFeign {
    @PostMapping("/products/sync")
    ResultDTO productsSync(@RequestBody ProductDTO productDTO) throws Exception;
}

@Autowired
private IProductFeign productFeign;

ResultDTO resultDTO = productFeign.productsSync(productDTO);
Feign 设计

Feign 扩展


@ConfigurationProperties(“feign.client”)
FeignClientProperties
public class FeignClientProperties {
	...
	private boolean defaultToProperties = true;

	private String defaultConfig = "default";

	private Map<String, FeignClientConfiguration> config = new HashMap<>();
	...
	public static class FeignClientConfiguration {

		private Logger.Level loggerLevel;

		private Integer connectTimeout;

		private Integer readTimeout;

		private Class<Retryer> retryer;

		private Class<ErrorDecoder> errorDecoder;

		private List<Class<RequestInterceptor>> requestInterceptors;

		private Boolean decode404;

		private Class<Decoder> decoder;

		private Class<Encoder> encoder;

		private Class<Contract> contract;
		...
	}
	...
}
日志
配置前提
在yml配置文件中配置 Client 的日志级别才能正常输出日志,格式是"logging.level.feign接口包路径=debug"
logging:
  level:
    com.baku.openapi.feign: debug
- 全局配置
import feign.Logger;
import org.springframework.context.annotation.Bean;
import org.springframework.context.annotation.Configuration;

//注意: 此处配置@Configuration注解就会全局生效,如果想指定对应微服务生效,就不能配置@Configuration
@Configuration
public class FeignConfig {

    @Bean
    public Logger.Level feignLoggerLevel() {
        return Logger.Level.FULL;
    }
}
通过源码可以看到日志等级有 4 种,分别是:
- NONE【性能最佳,适用于生产】:不记录任何日志(默认值)。
- BASIC【适用于生产环境追踪问题】:仅记录请求方法、URL、响应状态代码以及执行时间。
- HEADERS:记录BASIC级别的基础上,记录请求和响应的header。
- FULL【比较适用于开发及测试环境定位问题】:记录请求和响应的header、body和元数据。
- 局部配置
- 方法一: 在yml中配置(推荐)
对应属性配置类: org.springframework.cloud.openfeign.FeignClientProperties.FeignClientConfiguration
feign:
  client:
    config:
      open-api-service-product:
        loggerLevel: FULL
- 方法二: 在@FeignClient 注解中指定使用的配置类(不推荐)
ProductIndexFeignConfig 不能是@Configuration注解
@FeignClient(value = "open-api-service-product", fallbackFactory = IndexFeignFallback.class, configuration = ProductIndexFeignConfig.class)
public interface IIndexFeign {

    @GetMapping("/check")
    String check() throws Exception;
}
锲约
Spring Cloud 在 Feign 的基础上做了扩展,可以让 Feign 支持 Spring MVC 的注解来调用。原生的 Feign 是不支持 Spring MVC 注解的,如果你想在 Spring Cloud 中使用原生的注解方式来定义客户端也是可以的,通过配置契约来改变这个配置,Spring Cloud 中默认的是 SpringMvcContract。
- 修改锲约配置,支持Feign原生注解
@Bean
public Contract feignContract() {
    return new Contract.Default();
}
或者Yml
feign:
  client:
    config:
      open-api-service-product:
        loggerLevel: FULL
        contract: feign.Contract.Default   #指定Feign原生注解契约配置
- 修改契约配置后,IIndexFeign 不再支持springmvc的注解,需要使用Feign原生的注解
@FeignClient(value = "open-api-service-product")
public interface OrderFeignService {
    @RequestLine("GET /check")
    String check() throws Exception;
}
拦截器实现参数传递
扩展点 RequestInterceptor#apply
通常我们调用的接口都是有权限控制的,很多时候可能认证的值是通过参数去传递的,还有就是通过请求头去传递认证信息,比如 Basic 认证方式。
Feign 中我们可以直接配置 Basic 认证
- 全局配置
@Configuration
public class FeignConfig {
    @Bean
    public BasicAuthRequestInterceptor basicAuthRequestInterceptor() {
        return new BasicAuthRequestInterceptor("mx", "******");
    }
}
BasicAuthRequestInterceptor
扩展点: feign.RequestInterceptor
每次 feign 发起http调用之前,会去执行拦截器中的逻辑。
public class BasicAuthRequestInterceptor implements RequestInterceptor {

  private final String headerValue;

  public BasicAuthRequestInterceptor(String username, String password) {
    this(username, password, ISO_8859_1);
  }

  public BasicAuthRequestInterceptor(String username, String password, Charset charset) {
    checkNotNull(username, "username");
    checkNotNull(password, "password");
    this.headerValue = "Basic " + base64Encode((username + ":" + password).getBytes(charset));
  }

  private static String base64Encode(byte[] bytes) {
    return Base64.encode(bytes);
  }

  @Override
  public void apply(RequestTemplate template) {
    template.header("Authorization", headerValue);
  }
}

- 局部配置
open-api-service-product端可以通过 @RequestHeader获取请求参数,建议在filter,interceptor中处理
feign:
  client:
    config:
      open-api-service-product:
        loggerLevel: FULL
        requestInterceptors[0]: #配置拦截器
          com.baku.openapi.rule.nterceptor.FeignAuthRequestInterceptor
FeignAuthRequestInterceptor
public class FeignAuthRequestInterceptor implements RequestInterceptor {

    @Override
    public void apply(RequestTemplate template) {
        // 业务逻辑  模拟认证逻辑
        String access_token = UUID.randomUUID().toString();
        //设置token
        template.header("Authorization",access_token);
    }
}

超时时间
补充说明: Feign的底层用的是Ribbon,但超时时间以Feign配置为准
通过 Options 可以配置连接超时时间和读取超时时间
第一个参数是连接的超时时间(ms),默认值是 2s;
第二个是请求处理的超时时间(ms),默认值是 5s
- 全局配置
@Configuration
public class FeignConfig {
    @Bean
    public Request.Options options() {
        return new Request.Options(5000, 10000);
    }
}
- 局部配置
feign:
  client:
    config:
      open-api-service-product:
        loggerLevel: FULL
        requestInterceptors[0]: #配置拦截器
          com.baku.openapi.rule.nterceptor.FeignAuthRequestInterceptor
        connectTimeout: 5000 #连接超时时间,默认2s
        readTimeout: 10000 #请求处理超时时间,默认5s
客户端组件配置
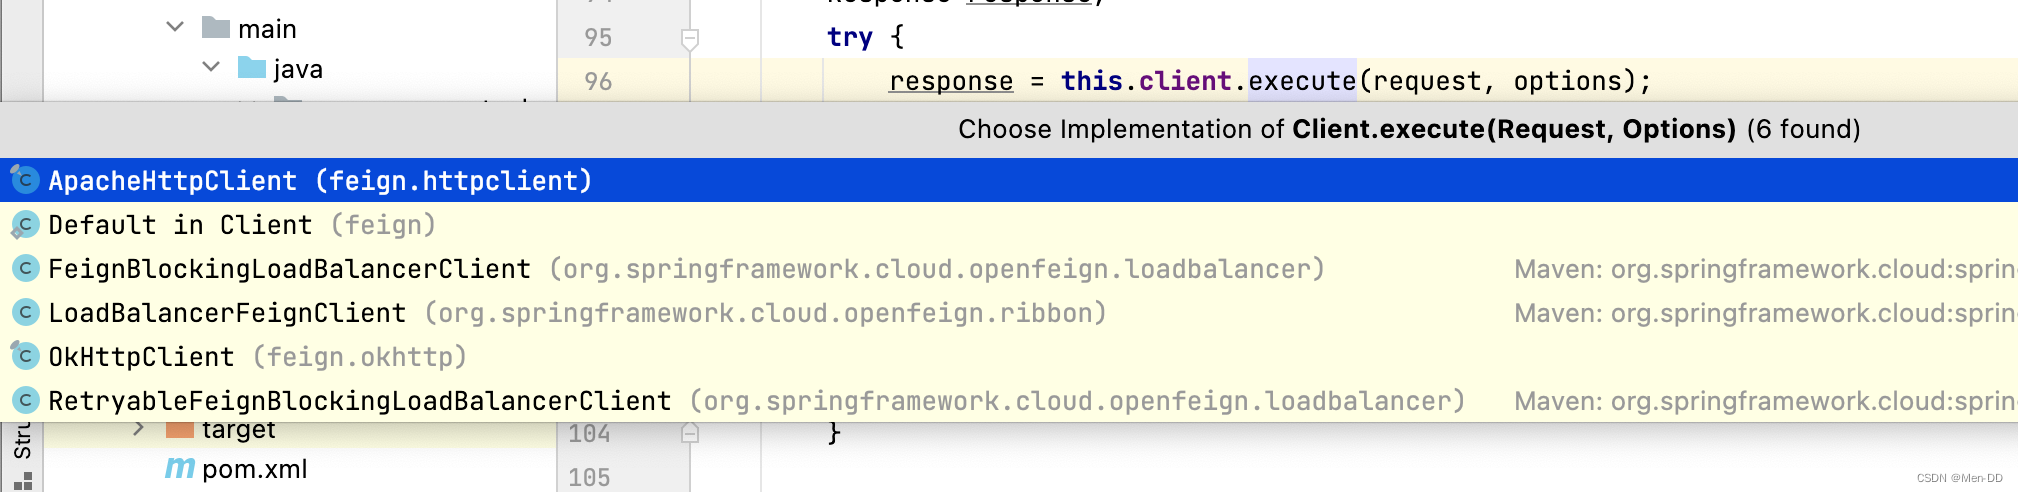
扩展点 feign.Client#execute
Feign 中默认使用 JDK 原生的 URLConnection 发送 HTTP 请求,我们可以集成别的组件来替换掉 URLConnection,比如 Apache HttpClient,OkHttp。

Feign发起调用真正执行逻辑:feign.Client#execute (扩展点)
配置 HttpClient
<!-- Apache HttpClient -->
<dependency>
    <groupId>org.apache.httpcomponents</groupId>
    <artifactId>httpclient</artifactId>
    <version>4.5.7</version>
</dependency>
<dependency>
    <groupId>io.github.openfeign</groupId>
    <artifactId>feign-httpclient</artifactId>
    <version>10.1.0</version>
</dependency>
yml配置,将 Feign 的 Apache HttpClient启用 :
feign:
  #feign 使用 Apache HttpClient  可以忽略,默认开启
  httpclient:
    enabled: true

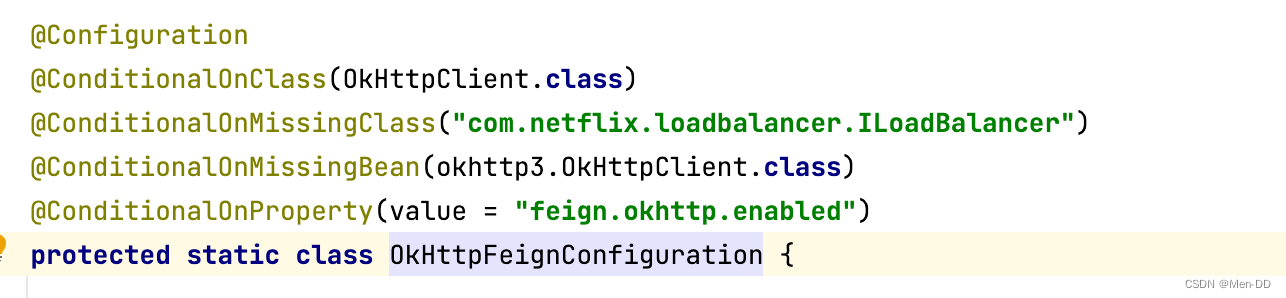
配置 OkHttp
<dependency>
    <groupId>io.github.openfeign</groupId>
    <artifactId>feign-okhttp</artifactId>
</dependency>
feign:
  #feign 使用 okhttp
  httpclient:
    enabled: false
  okhttp:
    enabled: true
GZIP压缩
开启压缩可以有效节约网络资源,提升接口性能
feign:
  # 配置 GZIP 来压缩数据
  compression:
    request:
      enabled: true
      # 配置压缩的类型
      mime-types: text/xml,application/xml,application/json
      # 最小压缩值
      min-request-size: 2048
    response:
      enabled: true
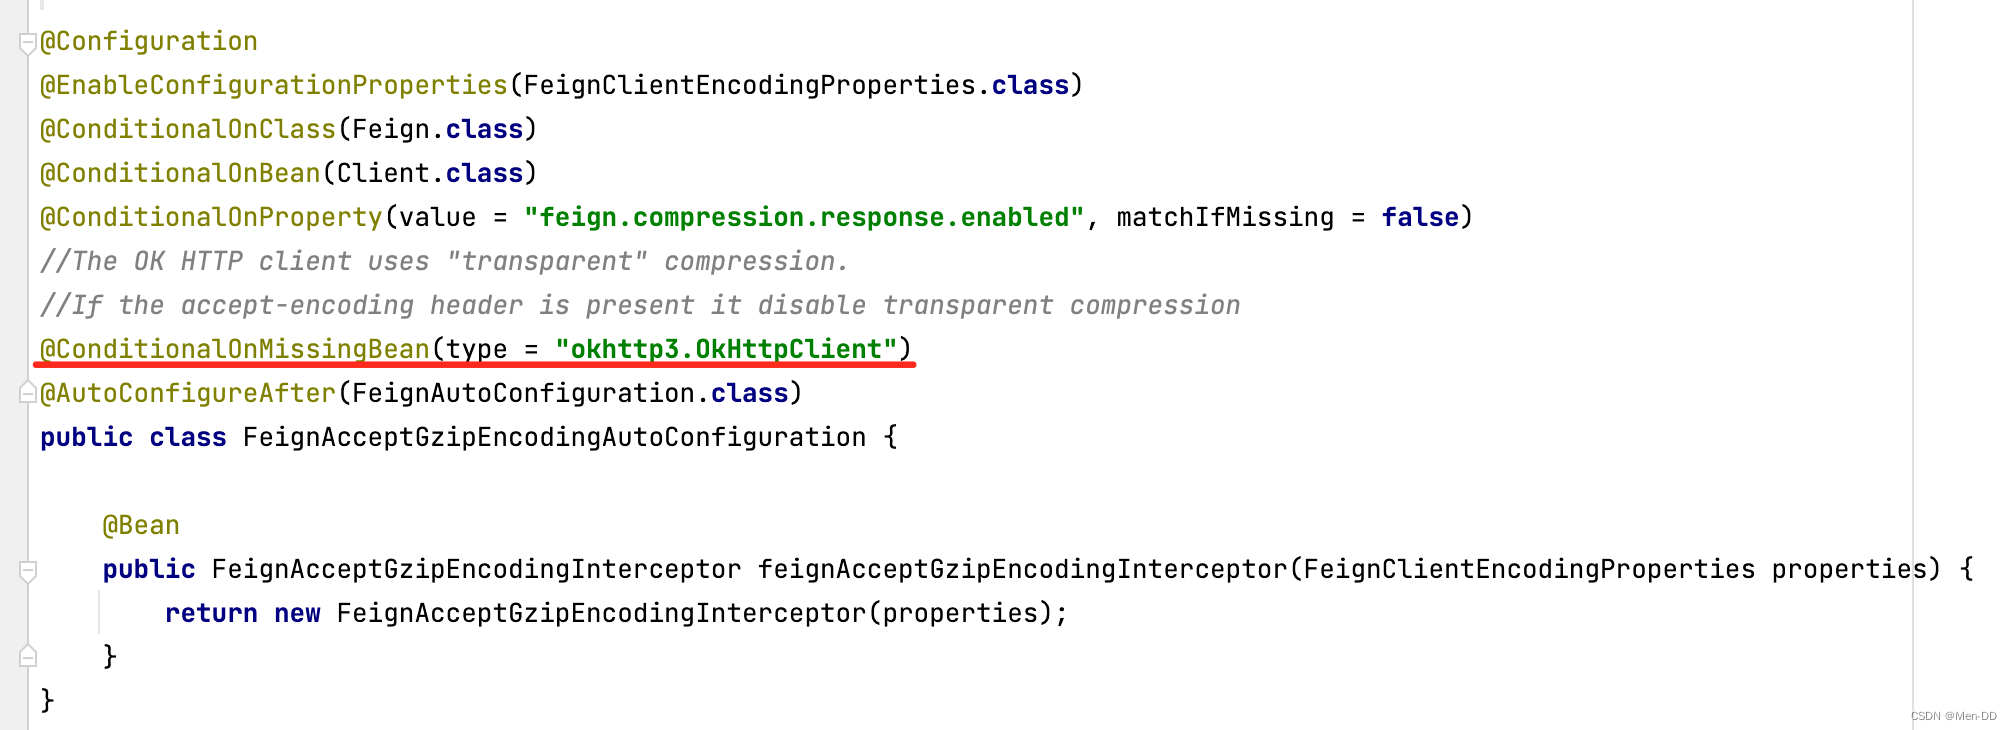
注意:只有当 Feign 的 Http Client 不是 okhttp3 的时候,压缩才会生效,配置源码在FeignAcceptGzipEncodingAutoConfiguration
编解码配置
Feign 中提供了自定义的编码解码器设置,同时也提供了多种编码器的实现,比如 Gson、Jaxb、Jackson。我们可以用不同的编码解码器来处理数据的传输。如果你想传输 XML 格式的数据,可以自定义 XML 编码解码器来实现获取使用官方提供的 Jaxb。
扩展点:Encoder & Decoder
public interface Encoder {
    void encode(Object object, Type bodyType, RequestTemplate template) throws EncodeException;
}
public interface Decoder {
    Object decode(Response response, Type type) throws IOException, DecodeException, FeignException;
}
Java配置方式
配置编码解码器只需要在 Feign 的配置类中注册 Decoder 和 Encoder 这两个类即可:
- 全局配置
@Bean
public Decoder decoder() {
    return new JacksonDecoder();
}
@Bean
public Encoder encoder() {
    return new JacksonEncoder();
}
- 局部配置
feign:
  client:
    config:
      open-api-service-product: # 配置编解码器
        encoder: feign.jackson.JacksonEncoder
        decoder: feign.jackson.JacksonDecoder
Spring Cloud 整合 Feign
- 依赖
<dependency>
	<groupId>org.springframework.cloud</groupId>
	<artifactId>spring-cloud-starter-openfeign</artifactId>
</dependency>
- 调用接口和@FeignClient注解
@FeignClient(value = "open-api-service-product", fallbackFactory = ProductFeignFallback.class)
public interface IProductFeign {
    @PostMapping("/products/sync")
    ResultDTO productsSync(@RequestBody ProductDTO productDTO) throws Exception;
}
- 客户端添加@EnableFeignClients注解扫描@FeignClient注解类注册到Spring容器中
@EnableScheduling
@EnableDiscoveryClient
@EnableFeignClients(basePackages = { "com.mx.openapi.feign" })
@SpringBootApplication(scanBasePackages = "com.mx.openapi")
public class QuartzApplication {
    public static void main(String[] args) {
        SpringApplication application = new SpringApplication(QuartzApplication.class);
        application.run(args);
    }
}
- 发起调用
@Slf4j
@Component
@DisallowConcurrentExecution
public class DemoProductTask implements Job {

    @Autowired
    private IProductFeign productFeign;

    @Override
    public void execute(JobExecutionContext context) throws JobExecutionException {
    	DataSourceWholeInfo dataSourceWholeInfo = (DataSourceWholeInfo) context.getJobDetail().getJobDataMap().get("dataSourceWholeInfo");
		...
		ProductDTO productDTO = new DemoProductDTO(dataSourceWholeInfo).builder();
		ResultDTO resultDTO = productFeign.productsSync(productDTO);
		...
    }
}
Spring Cloud 整合 Dubbo
https://github.com/alibaba/spring-cloud-alibaba/wiki/%E7%89%88%E6%9C%AC%E8%AF%B4%E6%98%8E
注意:因为spring cloud alibaba 2.2.8这个版本没有整合dubbo,所以需要指定dubbo的版本
<dependency>
    <groupId>com.alibaba.cloud</groupId>
    <artifactId>spring-cloud-starter-dubbo</artifactId>
    <version>2.2.7.RELEASE</version>
</dependency>

<dependency>
    <groupId>com.alibaba.cloud</groupId>
    <artifactId>spring-cloud-starter-alibaba-nacos-discovery</artifactId>
</dependency>
Provider
- 配置
dubbo:
  scan:
    # 指定 Dubbo 服务实现类的扫描基准包
    base-packages: com.tuling.mall.user.service
  #  application:
  #    name: ${spring.application.name}
  protocol:
    # dubbo 协议
    name: dubbo
    # dubbo 协议端口( -1 表示自增端口,从 20880 开始)
    port: -1
#  registry:
#    #挂载到 Spring Cloud 注册中心  高版本可选
#    address: spring-cloud://127.0.0.1:8848

spring:
  application:
    name: spring-cloud-dubbo-provider-user-feign
  main:
    # Spring Boot2.1及更高的版本需要设定
    allow-bean-definition-overriding: true
  cloud:
    nacos:
      # Nacos 服务发现与注册配置
      discovery:
        server-addr: 127.0.0.1:8848
- 暴露服务@DubboService
@DubboService
@Slf4j
@RestController
@RequestMapping("/user")
public class UserServiceImpl implements UserService {

	@Autowired
	private UserMapper userMapper;

	@Override
	@RequestMapping("/list")
	public List<User> list() {
		log.info("查询user列表");
		return userMapper.list();
	}

	@Override
	@RequestMapping("/getById/{id}")
	public User getById(@PathVariable("id") Integer id) {
		return userMapper.getById(id);
	}
}
Consumer
- 配置
dubbo:
  cloud:
    # 指定需要订阅的服务提供方,默认值*,会订阅所有服务,不建议使用
    subscribed-services: spring-cloud-dubbo-provider-user-feign
#  application:
#    name: ${spring.application.name}
  protocol:
    # dubbo 协议
    name: dubbo
    # dubbo 协议端口( -1 表示自增端口,从 20880 开始)
    port: -1
#  registry:
#    #挂载到 Spring Cloud 注册中心  高版本可选
#    address: spring-cloud://127.0.0.1:8848

spring:
  application:
    name: spring-cloud-dubbo-consumer-user-feign
  main:
    # Spring Boot2.1及更高的版本需要设定
    allow-bean-definition-overriding: true
  cloud:
    nacos:
      # Nacos 服务发现与注册配置
      discovery:
        server-addr: 127.0.0.1:8848
- 服务引入 @DubboReference
@RestController
@RequestMapping("/user")
public class UserConstroller {

    @DubboReference
    private UserService userService;

    @RequestMapping("/info/{id}")
    public User info(@PathVariable("id") Integer id){
        return userService.getById(id);
    }
}
从Open Feign迁移到Dubbo
- 修改服务提供者
@DubboService
@Slf4j
@RestController
@RequestMapping("/user")
public class UserServiceImpl implements UserService {

   @Autowired
   private UserMapper userMapper;

   @Override
   @RequestMapping("/list")
   public List<User> list() {
      log.info("查询user列表");
      return userMapper.list();
   }

   @Override
   @RequestMapping("/getById/{id}")
   public User getById(@PathVariable("id") Integer id) {
      return userMapper.getById(id);
   }
}
- 服务消费端引入依赖
<dependency>
    <groupId>org.springframework.boot</groupId>
    <artifactId>spring-boot-starter-web</artifactId>
</dependency>

<dependency>
    <groupId>com.alibaba.cloud</groupId>
    <artifactId>spring-cloud-starter-dubbo</artifactId>
    <version>2.2.7.RELEASE</version>
</dependency>

<dependency>
    <groupId>com.alibaba.cloud</groupId>
    <artifactId>spring-cloud-starter-alibaba-nacos-discovery</artifactId>
</dependency>

<dependency>
    <groupId>org.springframework.cloud</groupId>
    <artifactId>spring-cloud-starter-openfeign</artifactId>
</dependency>
- 添加Feign的实现,启动类上添加@EnableFeignClients
@SpringBootApplication
@EnableFeignClients
public class SpringCloudDubboConsumerUserFeignApplication {
    public static void main(String[] args) {
        SpringApplication.run(SpringCloudDubboConsumerUserFeignApplication.class, args);
    }
}
- Feign接口添加 @DubboTransported 注解
@FeignClient(value = "spring-cloud-dubbo-provider-user-feign",path = "/user")
@DubboTransported(protocol = "dubbo")
public interface UserDubboFeignService {

    @RequestMapping("/list")
    public List<User> list();

    @RequestMapping("/getById/{id}")
    public User getById(@PathVariable("id") Integer id);
}
- 调用对象添加 @DubboTransported 注解,发起调用
@RestController
@RequestMapping("/user")
public class UserConstroller {

    @Autowired
    private UserDubboFeignService userDubboFeignService;

    @RequestMapping("/list")
    public List<User> list2(){

        return userDubboFeignService.list();
    }
}
Feign 源码简介
- 首先通过@EnableFeignCleints注解开启FeignCleint
- 根据Feign的规则实现接口,并加@FeignCleint注解
- 程序启动后,会进行包扫描,扫描所有的@ FeignCleint的注解的类,并将这些信息注入到ioc容器中。
- 当接口的方法被调用,通过jdk的代理,来生成具体的RequesTemplate
- RequesTemplate在生成Request
- Request交给Client去处理,其中Client可以是HttpUrlConnection、HttpClient也可以是Okhttp
- 最后Client被封装到LoadBalanceClient类,这个类结合类Ribbon做到了负载均衡。
主线
- 注解@EnableFeignClients(basePackages = “com.mx.use.feign”)
- EnableFeignClients Import FeignClientsRegistrar
- FeignClientsRegistrar implements ImportBeanDefinitionRegistrar
- registerBeanDefinitions
- registerFeignClients
- 通过包扫描注入FeignClient的bean
- FeignClientFactoryBean 包装 @FeignClient 类注入IOC容器
- 通过 FeignClientFactoryBean.getObject() 获取Bean
- FeignClientFactoryBean # getObject # getTarget
- Builder builder = this.feign(context) // feign的各项配置 HystrixFeign or 原生Feign
- this.loadBalance(builder, context, new HardCodedTarget(this.type, this.name, this.url));
- Targeter targeter = (Targeter)this.get(context, Targeter.class); //HystrixTargeter 或者 原生DefaultTargeter
- targeter.target(this, builder, context, target);
- 走原生
- builder.target(target);
- this.build().newInstance(target); --> this.build() = ReflectiveFeign
- ReflectiveFeign.newInstance(target);
//Hystrix HystrixFeign.create 或者 原生 InvocationHandlerFactory.Default.create InvocationHandler handler = this.factory.create(target, methodToHandler); T proxy = Proxy.newProxyInstance(target.type().getClassLoader(), new Class[]{target.type()}, handler); - 走原生 InvocationHandlerFactory.Default
public InvocationHandler create(Target target, Map<Method, InvocationHandlerFactory.MethodHandler> dispatch) { return new FeignInvocationHandler(target, dispatch); } - FeignInvocationHandler implements InvocationHandler
public Object invoke(Object proxy, Method method, Object[] args) throws Throwable {
...
//SynchronousMethodHandler.invoke(args)
 ((MethodHandler)this.dispatch.get(method)).invoke(args);
...
}
final class SynchronousMethodHandler implements MethodHandler {
    ...
    public Object invoke(Object[] argv) throws Throwable {
    	//根据参数生成RequestTemplate对象,该对象就是http请求的模板
      RequestTemplate template = this.buildTemplateFromArgs.create(argv);
      Options options = this.findOptions(argv);
      Retryer retryer = this.retryer.clone();

      while(true) {
          try {
              return this.executeAndDecode(template, options);
          } catch (RetryableException var9) {
              RetryableException e = var9;

              try {
                  retryer.continueOrPropagate(e);
              } catch (RetryableException var8) {
              ....
           }
           ....
    }
    ...

  //RequestTemplate生成Request请求对象,然后根据用client获取response
  Object executeAndDecode(RequestTemplate template, Options options) throws Throwable {
      Request request = this.targetRequest(template);
      if (this.logLevel != Level.NONE) {
          this.logger.logRequest(this.metadata.configKey(), this.logLevel, request);
      }

      long start = System.nanoTime();

      Response response;
      try {
          response = this.client.execute(request, options);
          response = response.toBuilder().request(request).requestTemplate(template).build();
      } catch (IOException var13) {
      ....
}
源码
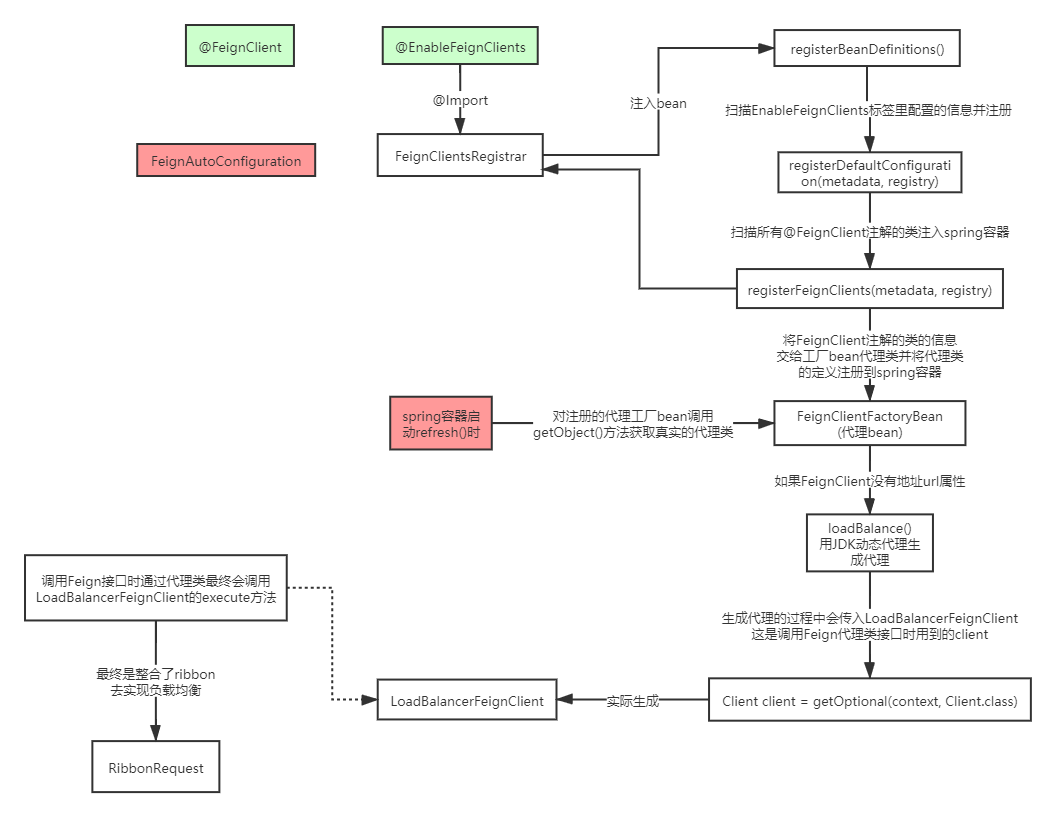
- RibbonRequest 发起请求经过Ribbon的Http拦截器 LoadBalancerInterceptor 之后调用Ribbon


 1622
1622


 被折叠的 条评论
为什么被折叠?
被折叠的 条评论
为什么被折叠?
 到【灌水乐园】发言


