


提示:文章写完后,目录可以自动生成,如何生成可参考右边的帮助文档
文章目录
前言
打算再centos下安装influxdb并结合granfna做系统资源监控
一、centso下安装influxdb
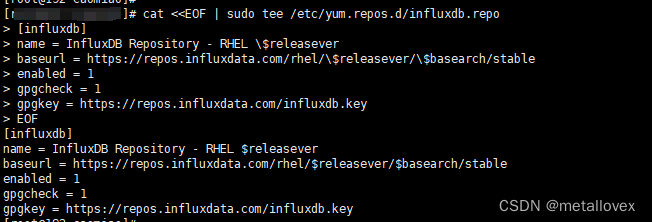
cat <<EOF | sudo tee /etc/yum.repos.d/influxdb.repo
[influxdb]
name = InfluxDB Repository - RHEL $releasever
baseurl = https://repos.influxdata.com/rhel/$releasever/$basearch/stable
enabled = 1
gpgcheck = 1
gpgkey = https://repos.influxdata.com/influxdb.key
EOF
操作结果
二、安装服务
sudo yum install influxdb
安装成功示图
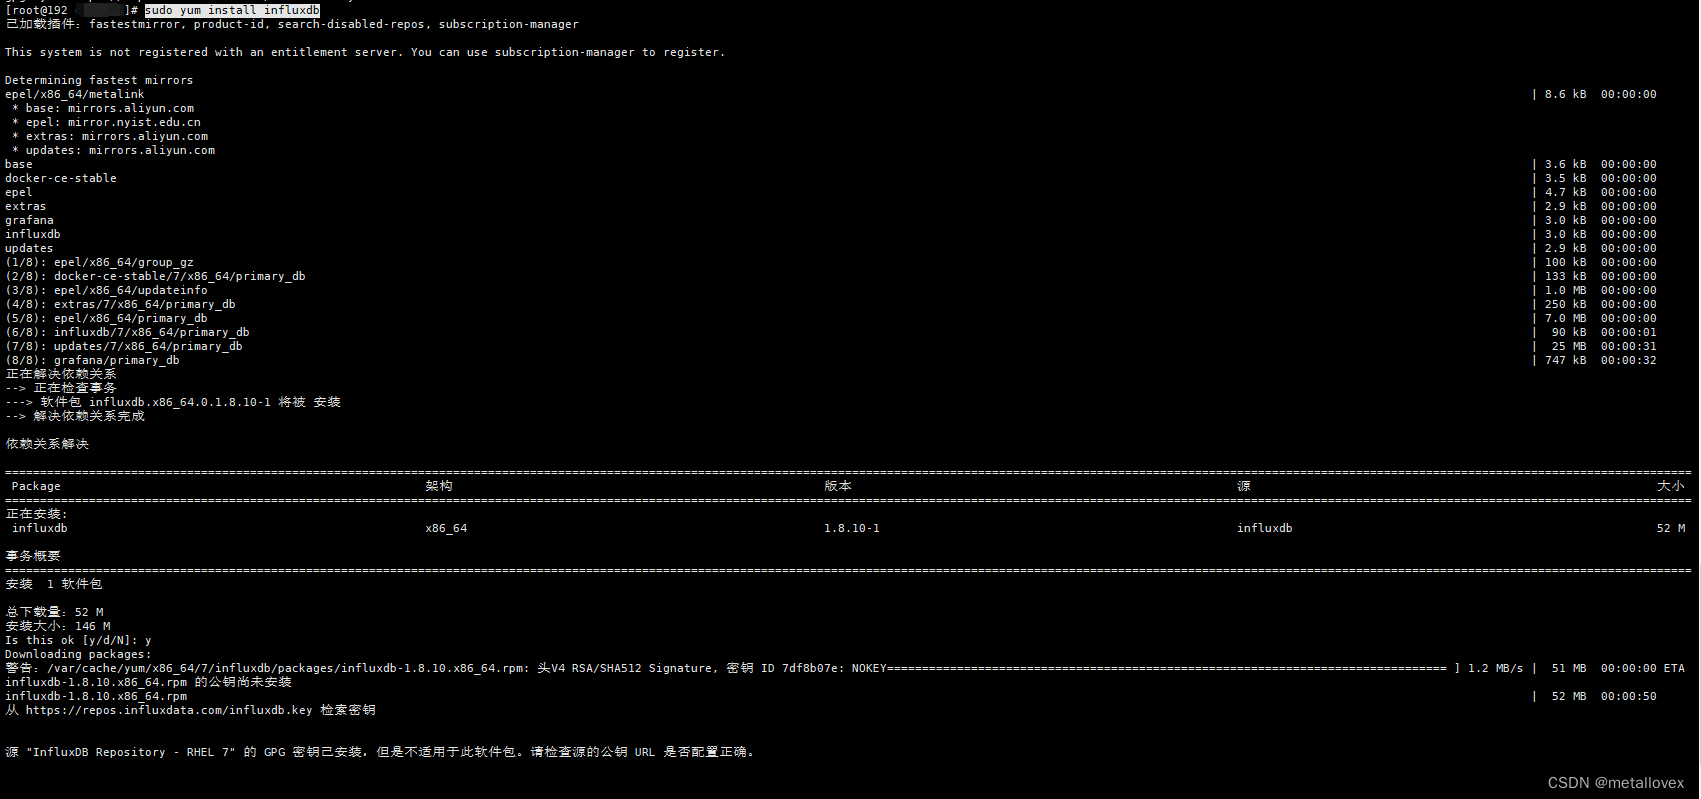
图上安装失败了:
检查仓库配置文件:
通常,InfluxDB 的仓库配置文件位于 /etc/yum.repos.d/ 目录下。您可以查看该目录下的 influxdb.repo 文件(或者类似的文件名),确保其中的 gpgcheck 设置为 enabled,并且 gpgkey URL 指向正确的 GPG 公钥位置。
ini
[influxdb]
name = InfluxDB Repository - RHEL 7
baseurl = https://repos.influxdata.com/rhel/7/x86_64/stable/
enabled = 1
gpgcheck = 1
gpgkey = https://repos.influxdata.com/influxdb.key
如果仓库配置文件中的 gpgkey URL 正确,但 GPG 公钥尚未导入到您的系统中,您可以通过以下命令导入它:
bash
rpm --import https://repos.influxdata.com/influxdb.key
这将导入 GPG 公钥,使您的系统能够验证来自 InfluxDB 仓库的软件包签名。
清除缓存并重新尝试安装:
清除 YUM 缓存,然后再次尝试安装 InfluxDB。
bash
yum clean all
yum makecache
yum install influxdb
sudo yum install influxdb-1.8.10-1.x86_64 --nogpgcheck
已加载插件:fastestmirror, product-id, search-disabled-repos, subscription-manager
This system is not registered with an entitlement server. You can use subscription-manager to register.
Loading mirror speeds from cached hostfile
- base: mirrors.ustc.edu.cn
- epel: mirrors.bfsu.edu.cn
- extras: mirrors.ustc.edu.cn
- updates: mirrors.ustc.edu.cn
正在解决依赖关系
–> 正在检查事务
—> 软件包 influxdb.x86_64.0.1.8.10-1 将被 安装
–> 解决依赖关系完成
依赖关系解决
=================================================================================================================================================================================================================================================
Package 架构 版本 源 大小
正在安装:
influxdb x86_64 1.8.10-1 influxdb 52 M
事务概要
安装 1 软件包
总计:52 M
安装大小:146 M
Is this ok [y/d/N]: y
Downloading packages:
Running transaction check
Running transaction test
Transaction test succeeded
Running transaction
正在安装 : influxdb-1.8.10-1.x86_64 1/1
Created symlink from /etc/systemd/system/influxd.service to /usr/lib/systemd/system/influxdb.service.
Created symlink from /etc/systemd/system/multi-user.target.wants/influxdb.service to /usr/lib/systemd/system/influxdb.service.
验证中 : influxdb-1.8.10-1.x86_64 1/1
已安装:
influxdb.x86_64 0:1.8.10-1
完毕!
总结
更新中


 4195
4195

 被折叠的 条评论
为什么被折叠?
被折叠的 条评论
为什么被折叠?
 到【灌水乐园】发言


