


vue2做了个表格的demo,有增删改查的功能,记录一下,喜欢就点个赞收藏一下吧~
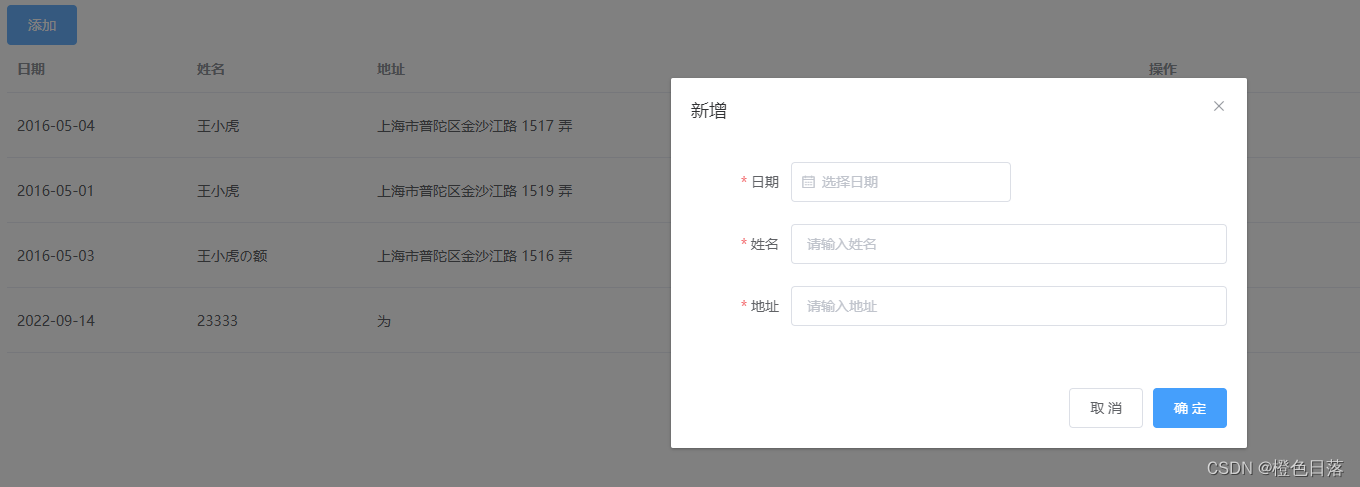
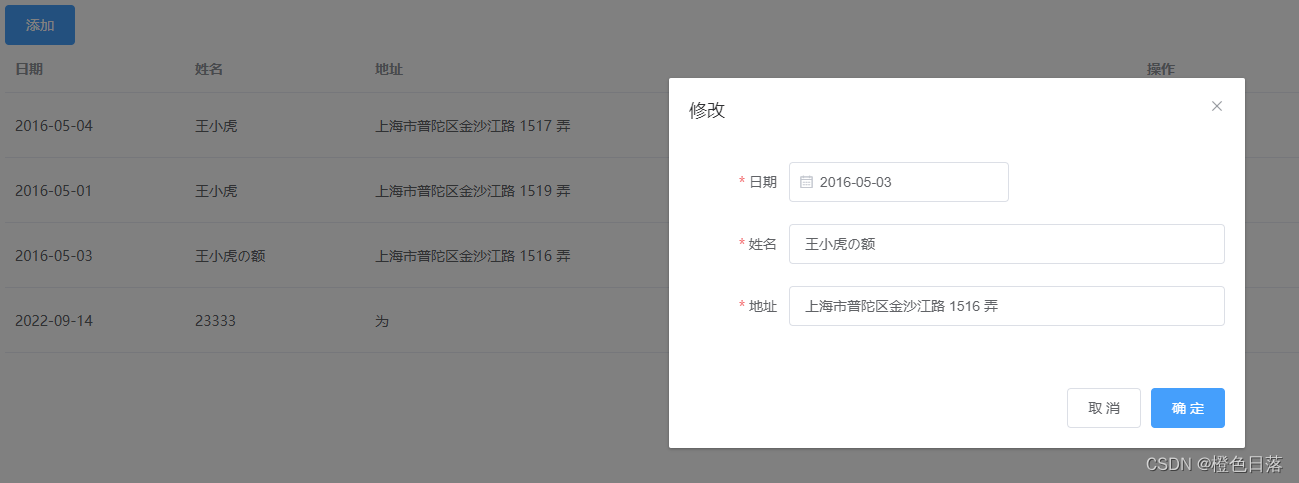
效果:

代码:
1.主文件list-page.vue 列表页
<template>
  <div>
    <div class="btn-box">
      <el-button type="primary" @click="add">添加</el-button>
    </div>
    <el-table :data="tableData" style="width: 100%">
      <el-table-column prop="date" label="日期" width="180"> </el-table-column>
      <el-table-column prop="name" label="姓名" width="180"> </el-table-column>
      <el-table-column prop="address" label="地址"> </el-table-column>
      <el-table-column label="操作">
        <template slot-scope="scope">
          <el-button type="text" @click="edit(scope.row, scope.$index)"
            >修改</el-button
          >
          <el-button type="text" @click="del(scope.row, scope.$index)"
            >删除</el-button
          >
        </template>
      </el-table-column>
    </el-table>
    <operation-dialog ref="operaDialog" />
  </div>
</template>

<script>
import OperationDialog from "./operation-dialog.vue";
export default {
  name: "ListPage",
  components: { OperationDialog },
  data() {
    return {
      tableData: [],
    };
  },
  created() {
    this.getTableData();
  },
  methods: {
    getTableData() {
      // 模拟请求回来的数据 实际操作中这里应该调接口发请求获取数据
      this.tableData = [
        {
          id: 1,
          date: "2016-05-02",
          name: "王小虎",
          address: "上海市普陀区金沙江路 1518 弄",
        },
        {
          id: 2,
          date: "2016-05-04",
          name: "王小虎",
          address: "上海市普陀区金沙江路 1517 弄",
        },
        {
          id: 3,
          date: "2016-05-01",
          name: "王小虎",
          address: "上海市普陀区金沙江路 1519 弄",
        },
        {
          id: 4,
          date: "2016-05-03",
          name: "王小虎",
          address: "上海市普陀区金沙江路 1516 弄",
        },
      ];
    },
    // 添加弹窗打开
    add() {
      this.$refs.operaDialog.open();
    },
    // 添加弹窗打开
    edit(row, index) {
      this.$refs.operaDialog.open(row, index);
    },
    // 删除
    del(row, index) {
      this.$confirm("此操作将永久删除该文件, 是否继续?", "提示", {
        confirmButtonText: "确定",
        cancelButtonText: "取消",
        type: "warning",
      })
        .then(() => {
          // 这两句模拟接口删除返回的结果
          this.tableData.splice(index, 1);
          this.$message({
            type: "success",
            message: "删除成功!",
          });
          //   // 实际操作调接口请求删除当前选中数据
          //   delRow(row.id).then((res) => {
          //     if (res.code === 200) {
          //       this.$message({
          //         type: "success",
          //         message: res.msg,
          //       });
          //     }
          //   });
        })
        .catch(() => {
          this.$message({
            type: "info",
            message: "已取消删除",
          });
        });
    },
  },
};
</script>
2.弹窗页面(新增/编辑公用一个弹窗页面)
<template>
  <el-dialog
    v-if="visible"
    :title="form.id?'修改':'新增'"
    :visible.sync="visible"
    modal
    :close-on-click-modal="false"
    width="30%"
    :before-close="close"
  >
    <el-form
      :model="form"
      :rules="rules"
      ref="form"
      label-width="100px"
      class="form"
    >
      <el-form-item label="日期" prop="date">
        <el-date-picker value-format="yyyy-MM-dd" format="yyyy-MM-dd" v-model="form.date" type="date" placeholder="选择日期">
        </el-date-picker>
      </el-form-item>
      <el-form-item label="姓名" prop="name">
        <el-input v-model="form.name" placeholder="请输入姓名"></el-input>
      </el-form-item>
      <el-form-item label="地址" prop="address">
        <el-input v-model="form.address" placeholder="请输入地址"></el-input>
      </el-form-item>
    </el-form>
    <span slot="footer" class="dialog-footer">
      <el-button @click="close">取 消</el-button>
      <el-button type="primary" @click="confirm">确 定</el-button>
    </span>
  </el-dialog>
</template>

<script>
export default {
  data() {
    return {
      visible: false,
      form: {
        date:'',
        name:'',
        address:''
      },
      rules: {
        date: [
          { required: true, message: "请选择日期", trigger: "change" },
        ],
        name: [
          { required: true, message: "请输入姓名", trigger: "blur" },
          { min: 3, max: 5, message: "长度在 3 到 5 个字符", trigger: "blur" },
        ],
        address: [{ required: true, message: "请输入地址", trigger: "blur" }],
      },
    };
  },
  methods: {
    open(row, index) {
      this.visible = true;
      //   有id则是编辑 否则则是新增
      if (row && row.id) {
        this.form = JSON.parse(JSON.stringify(row));
        // 因为要模拟修改 此处需要索引 实际项目操作不需要index
        this.form.index = index;
      }
    },
    close() {
      this.visible = false;
      this.form = {};
      // 移除校验结果并重置数据
      this.$refs.form.resetFields()
    },
    confirm() {
      this.$refs["form"].validate((valid) => {
        if (valid) {
          if (this.form.id) {
            // 编辑的提交
            // 调用修改接口 并在接口返回成功后调用父组件的getList()方法
            // editApi(this.form).then(res=>{if(res.code===200) {this.$message.sucess(res.msg);this.$parent.getList();this.close()}})

            // 模拟修改-(以下四句实际操作不需要 逻辑处理在接口返回 参考上面的代码)
            let cloneForm=JSON.parse(JSON.stringify(this.form))
            this.$parent.tableData.splice(this.form.index, 1, cloneForm);
            this.close();
          } else {
            // 新增的提交
            // 调用新增接口 并在接口返回成功后调用父组件的getList()方法
            // addApi(this.form).then(res=>{if(res.code===200) {this.$message.sucess(res.msg);this.$parent.getList();this.close()}})

            // 模拟添加-(以下四句实际操作不需要 逻辑处理在接口返回 参考上面的代码)
            this.form.id=this.$parent.tableData.length+1
            let cloneForm=JSON.parse(JSON.stringify(this.form))
            this.$parent.tableData.push(cloneForm);
            this.close();
          }
        } else {
          return false;
        }
      });
    },
  },
};
</script>


 3361
3361


 被折叠的 条评论
为什么被折叠?
被折叠的 条评论
为什么被折叠?
 到【灌水乐园】发言


