


Deploy J2EE Project
-= Eclipse MyEclipse MySQL JBoss Struts Hibernate =-
1. Run Database Server
(1) If your database server is running already (may be registered as system services), then go to step (5). (If you don’t want it runs automatically, see Appendix 1 to solve this problem)
(2) Open “Command Prompt”. You can use the following two way.
1st: Start -> All Programs -> Accessories -> Command Prompt
2nd: Start -> Run… -> Input “cmd” and Enter
(3) Input “net start mysql5” to let database server running.
(4) When you see the Picture 1, your MySQL server is running.
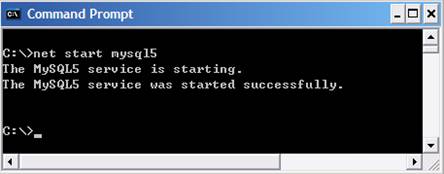
Picture 1. Start MySQL server
(5) Start SQLyog program. As the Picture 2 depicts, single click [Connect] button to connect MySQL Database. If you have database you want in MySQL host already, go to step (7), otherwise go to step (5).
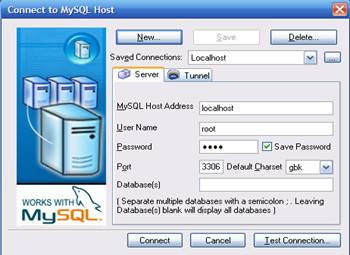
Picture 2. Connect to MySQL Host
(6) As the Picture 3 depicts, right click “root@localhost” and select “Import from SQL Statements…” You will see the dialog showing in Picture 4. Find your file of query statements, select it and single click [Execute] button. When you see “Import Successful” message, single click [Close] button.
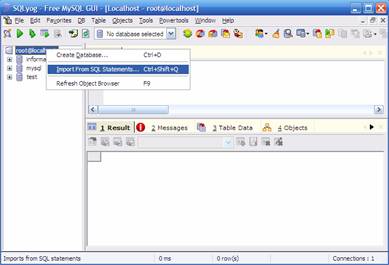
Picture 3. Import a new Database
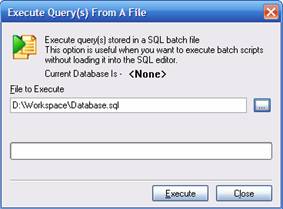
Picture 4. Execute Query from a File Dialog
(7) Press F9 key in the Database List Area showing in the Picture 5, in order to refresh object browser to see the new database you have just created.
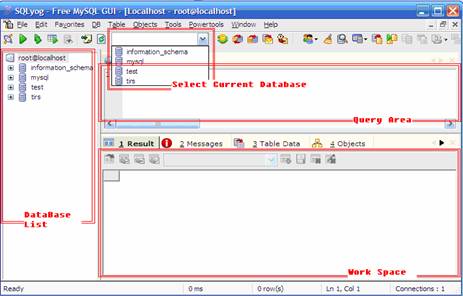
Picture 5. SQLyog Main Window
(8) Done for Database running.
2. Deploy J2EE Project
(1) Start Eclipse and decompress J2EE rar-file to your workspace if there is no J2EE project in Eclipse’s workspace. E.g., there is a J2EE rar-file named “TIRS.rar”, which include three folders named “TIRS”, “TIRSEJB” and “TIRSWeb” respectively. Decompress it to your own workspace “D:/Workspace/Java”. Of course, if there exist the same folders, delete them at first.
(2) As the Picture 6 depicts, right click in “Eclipse Workspace” and select [Import…]. Then select [Existing Projects into Workspace] and click [Next] button. Finally, choose the project you want to import and single click [Finish] button. E.g., import “TIRSEJB”, “TIRSWeb” and “TIRS” successively.
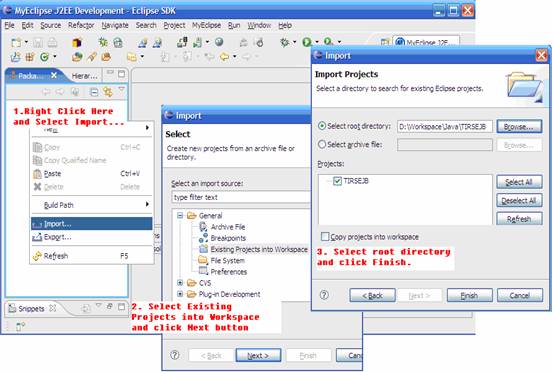
Picture 6. Import J2EE Projects
(3) As the Picture 7 depicts, single click button in toolbar, and then select the top project (E.g., “TIRS” project) before you click [Add] button. Finally, select the right application server (E.g., “JBoss
4”
) and single click [Finish] button.

Picture 7. Deploy the J2EE Projects
(4) Done for J2EE Projects Deploy.
3. Run Application Server
(1) Click button in toolbar to run your application server. You’ll see the information as follows in the Eclipse’s Console area after few seconds.
.. .. .. ..
11:13:46,921 INFO [ChannelSocket] JK: ajp13 listening on / 0.0.0 .0:8009
11:13:46,937 INFO [JkMain] Jk running ID=0 time=0/109 config=null
11:13:47,000 INFO [Server] JBoss (MX MicroKernel) [ 4.0.4 .GA (build: CVSTag=JBoss_4_0_4_GA date=200605151000)] Started in 37s:0ms
(2) Done for Application Server Running.
4. Test J2EE Project
(1) Open the IE Browser and input the Web root into the address area. E.g. http://localhost:8080/TIRSWeb as Picture 8 showing.
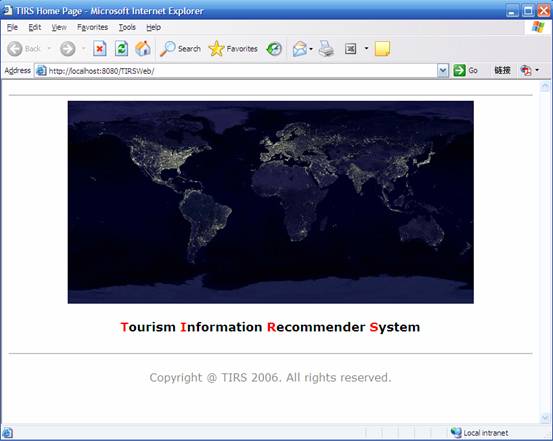
Picture 8. Testing in IE Browser
(2) If you want to close all the tasks now, go to step (), otherwise go to step (3).
(3) If you need update some source code or want to deploy a new J2EE project, you should stop the application server at first. E.g. as the Picture 9 depicts, click the button beside
icon and select [JBoss 4] | [Stop], when you see the information as follows in the Eclipse’s Console area after few seconds, that means the JBoss server is shut down.
.. .. .. ..
14:27:36,312 INFO [Http11BaseProtocol] Stopping Coyote HTTP/1.1 on http-0.0.0.0-8080
14:27:36,359 INFO [TomcatDeployer] undeploy, ctxPath=/invoker, warUrl=.../deploy/http-invoker.sar/invoker.war/
14:27:36,843 INFO [Server] Shutdown complete
Shutdown complete
Halting VM
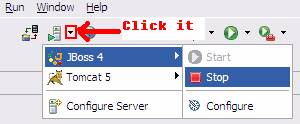
Picture 9. Stop JBoss 4 server
(4) Then deploy the updated J2EE project step by step as section 2 and 3 says. When everything is already, you can test it again.
(5) When everything is done, close Eclipse at first (It’ll close application server automatically), then close SQLyog program.
(6) Open “Command Prompt” as section 1.2 says, and input “net stop mysql 5” showing in Picture 10.
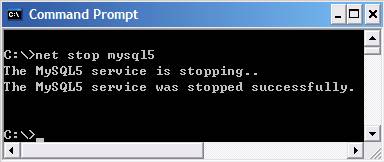
Picture 10. Stop MySQL Server
(7) Done for Testing J2EE Projects.
Appendix 1
-= Let MySQL Service Start Manually =-
(1) Right click [My Computer] | [Manager], popup the “Computer Management” dialog showing as the Picture A-1.
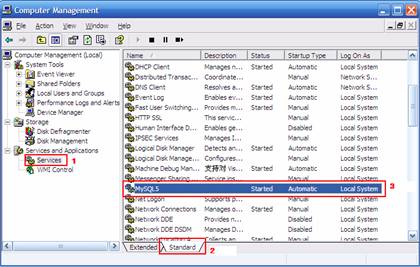
Picture A-1. Computer Management Dialog
(2) Choose “MySQL 5” service according to the orders showing in the Picture A-1.
(3) Right click [MySQL5] | [Properties], popup the “MySQL5 Properties” dialog showing as the Picture A-2.
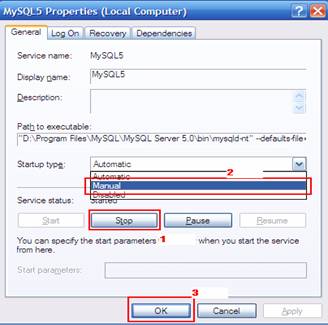
Picture A-2. MySQL5 Properties Dialog
(4) Choose “Manual” in [Startup type] selection box after you stop this service, then press [OK] button to close the dialog showing in the Picture A-2.
(5) Done.


 9184
9184

 被折叠的 条评论
为什么被折叠?
被折叠的 条评论
为什么被折叠?
 到【灌水乐园】发言


