在angular组件中数据交互主要有下面几种
- 1、父组件通过属性绑定到子组件,子组件通过事件传递参数到父组件
- 2、父组件通过局部变量获取子组件的引用
- 3、父组件使用@ViewChild获取子组件的引用
- 4、两个不相关联的组件使用中间人模式交互
- 5、终极大招:创建一个服务注入到组件中
- 6、直接把父组件当做服务注入到子组件中
一、通过输入与输出属性进行传递进行组件之间数据交互
<li *ngFor="let item of dataSet;let i = index">
<span>{{item.name}}</span>----{{i+1}}--{{item.id}}
<app-child [names]="item" (foo)="bar($event)"></app-child>
</li>
dataSet = [
{"id":0,"name":"张三"},
{"id":1,"name":"李四"},
{"id":2,"name":"王五"},
]
bar(event:any){
console.log(event);
}
<input type="button" value="{{names.name}}" (click)="todo($event)"/>
export class ChildComponent implements OnInit {
@Input() names:any = {}
@Output() foo = new EventEmitter<string>()
todo(event:any){
this.foo.emit('你好');
}
constructor() { }
ngOnInit() {
}
}
- 1
- 2
- 3
- 4
- 5
- 6
- 7
- 8
- 9
- 10
- 11
- 12
- 13
- 14
- 15
- 16
- 17
- 18
- 19
- 20
- 21
- 22
- 23
- 24
- 25
- 26
- 27
- 28
- 29
- 30
- 31
- 32
子组件中通过emit将要传递出去的参数传递给父组件,父组件中就可以获取到
二、使用局部变量获取子组件的引用
在angular中使用局部模板变量可以获取到子组件的实例引用
模板局部变量的定义是使用#name
<li *ngFor="let item of dataSet">
<app-child [names] = "item" (click)="father.childFn()" #father></app-child>
</li>
dataSet = [
{"id":0,"name":"张三"},
{"id":1,"name":"李四"}
]
@Input() names: any = {}
childFn(){
console.log("我是子类的方法");
}
<span>{{names.name}}</span>
- 1
- 2
- 3
- 4
- 5
- 6
- 7
- 8
- 9
- 10
- 11
- 12
- 13
- 14
- 15
- 16
- 17
三、使用@ViewChild获取子组件的引用
这种方法跟使用模板局部变量一样的,都是在父组件中调用子组件的方法
子组件跟上面方法一样的
dataSet = [
{"id":0,"name":"张三"},
{"id":1,"name":"李四"}
]
@ViewChild(ChildComponent) child:ChildComponent;
father(){
this.child.childFn();
}
<li *ngFor="let item of dataSet">
<app-child [names] = "item" (click)="father()"></app-child>
</li>
四、使用中间人模式
中间人模式就是第一种方式的改版,如果两个组件没有父子关系,那么久查找他们共同的父组件,我们知道angular是有一个根组件组成的组件树,那么至少有根组件可以使用的。
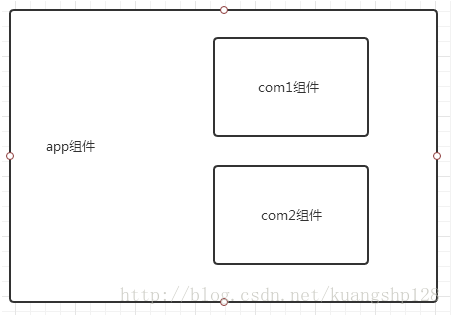
现在要实现从组件com1点击按钮传递参数到组件com2中
具体代码如下:
<div class="com1">
<p>我是com1组件</p>
<input type="button" value="com1按钮" (click)="com1Fn($event)" />
</div>
@Output()
outcom1Fn = new EventEmitter<string>();
com1Fn(){
this.outcom1Fn.emit("我是com1组件的");
}
private com1Tocom2;
appFn(event:any){
console.log(event);
this.com1Tocom2 = event;
}
<app-com1 (outcom1Fn)="appFn($event)"></app-com1>
<app-com2 [com2]="com1Tocom2"></app-com2>
@Input() com2:string = "";
<div class="com2">
<p>我是com2组件</p>
<p>我是com1组件传递过来的:{{com2}}</p>
</div>
- 1
- 2
- 3
- 4
- 5
- 6
- 7
- 8
- 9
- 10
- 11
- 12
- 13
- 14
- 15
- 16
- 17
- 18
- 19
- 20
- 21
- 22
- 23
- 24
- 25
- 26
- 27
- 28
- 29
- 30
- 31
- 32
- 33
总结说明:angular项目有时候运行没效果,自己觉得代码没错,那么请重启下服务
六、补充说明
在父组件传递数据到子组件中,子组件接受数据,可以对其接收的数据进行处理后再显示在页面中,这里就要用到set与get方法
data:string = "parent";
<app-comdemo01 [input]="data"></app-comdemo01>
export class Comdemo01Component implements OnInit {
_input: string;
@Input()
public set input(v: string) {
this._input = v.toUpperCase();
console.log(v);
}
public get input(): string {
return this._input;
}
constructor() {
}
ngOnInit() {
}
}
I am fron {{input}}
- 1
- 2
- 3
- 4
- 5
- 6
- 7
- 8
- 9
- 10
- 11
- 12
- 13
- 14
- 15
- 16
- 17
- 18
- 19
- 20
七、直接将父组件当做服务注入到子组件中
import { Component, OnInit } from '@angular/core';
@Component({
selector: 'app-father1',
templateUrl: './father1.component.html',
styleUrls: ['./father1.component.css']
})
export class Father1Component implements OnInit {
constructor() { }
public name:string = "我是父组件的名字";
public dataSet:Array<any> = [
{"id":"0","name":"张三"},
{"id":"1","name":"李四"},
{"id":"2","name":"王五"}
]
ngOnInit() {
}
}
- 1
- 2
- 3
- 4
- 5
- 6
- 7
- 8
- 9
- 10
- 11
- 12
- 13
- 14
- 15
- 16
- 17
- 18
- 19
- 20
- 21
import { Component, OnInit } from '@angular/core';
import {Father1Component} from "app/father1/father1.component";
@Component({
selector: 'app-child1',
templateUrl: './child1.component.html',
styleUrls: ['./child1.component.css']
})
export class Child1Component implements OnInit {
constructor(private father1:Father1Component) { }
ngOnInit() {
}
}
- 1
- 2
- 3
- 4
- 5
- 6
- 7
- 8
- 9
- 10
- 11
- 12
- 13
- 14
- 15
- 16
- 17
//子组件html代码
<p>{{father1.name}}</p>
<ul>
    <li *ngFor="let item of father1.dataSet">{{item.name}}</li>
</ul>


 1万+
1万+

 被折叠的 条评论
为什么被折叠?
被折叠的 条评论
为什么被折叠?
 到【灌水乐园】发言


