


首先写一个服务端:
package com.pp.ws.server;

import javax.jws.WebMethod;
import javax.jws.WebParam;
import javax.jws.WebService;

@WebService(targetNamespace="http://wsapi.pp1618.com", serviceName="PPLoginService")
public class LoginService {

	@WebMethod
	public String login(@WebParam(name="username") String username, @WebParam(name="password") String password){
		if(username != null && username.equals(password)){
			return "OK";
		}
		return "Faliure";
	}
}
package com.pp.ws.server;
import javax.xml.ws.Endpoint;
public class AppServer {
public static void main( String[] args ) {
Endpoint.publish("http://127.0.0.1:6644/user/login", new LoginService());
}
}启动。
然后,用wsimport(JDK自带命令,本文章中使用的是JDK1.8)生成源代码,命令如下:
wsimport -s ./src -p com.pp.client.ws -encoding utf-8 http://127.0.0.1:6644/user/login?wsdl
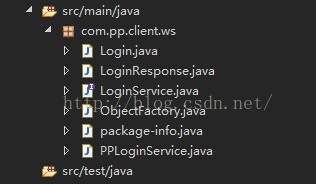
另外新建一个maven项目,把上面生成的代码(src目录)拷贝到项目的src目录中去
代码结构如下:
并且加入spring依赖
<dependency>
	<groupId>org.springframework</groupId>
	<artifactId>spring-web</artifactId>
	<version>4.3.2.RELEASE</version>
</dependency>package com.pp.client;
import java.net.MalformedURLException;
import java.net.URL;
import javax.xml.namespace.QName;
import javax.xml.ws.Service;
import org.springframework.context.annotation.AnnotationConfigApplicationContext;
import org.springframework.context.annotation.Bean;
import org.springframework.context.annotation.Configuration;
import org.springframework.remoting.jaxws.JaxWsPortProxyFactoryBean;
import com.pp.client.ws.LoginService;
import com.pp.client.ws.PPLoginService;
public class AppClient {
//方式一
public static void fun1() throws Exception {
URL url = new URL("http://127.0.0.1:6644/user/login?wsdl");
//QName的两个参数,参照LoginService上面的注解
QName qname = new QName("http://wsapi.pp1618.com", "PPLoginService");
Service service = Service.create(url, qname);
LoginService ls = service.getPort(LoginService.class);
System.out.println(ls.login("admin", "123"));
System.out.println(ls.login("admin", "admin"));
}
//方式二(PPLoginService内部其实使用的是方式一)
public static void fun2() throws Exception {
URL url = new URL("http://127.0.0.1:6644/user/login?wsdl");
PPLoginService ppls = new PPLoginService(url);
LoginService ls = ppls.getLoginServicePort();
System.out.println(ls.login("admin", "123"));
System.out.println(ls.login("admin", "admin"));
}
//方式三,使用spring封装的方式
public static void fun3() throws Exception {
AnnotationConfigApplicationContext context = new AnnotationConfigApplicationContext(WSConfig.class);
LoginService ls = context.getBean(LoginService.class);
System.out.println(ls.login("admin", "123"));
System.out.println(ls.login("admin", "admin"));
context.close();
}
public static void main(String[] args) throws Exception {
fun1();
fun2();
fun3();
}
}
@Configuration
class WSConfig {
@Bean
public JaxWsPortProxyFactoryBean createMainCouponService() throws MalformedURLException {
//JaxWsPortProxyFactoryBean 类在spring-web.jar里面
JaxWsPortProxyFactoryBean bean = new JaxWsPortProxyFactoryBean();
bean.setServiceInterface(LoginService.class);
bean.setServiceName("PPLoginService");
bean.setWsdlDocumentUrl(new URL("http://127.0.0.1:6644/user/login?wsdl"));
//设置超时
bean.addCustomProperty("com.sun.xml.internal.ws.request.timeout", 20000);
bean.addCustomProperty("com.sun.xml.internal.ws.connect.timeout", 20000);
return bean;
}
}需要注意的是:前两种方式是使用JDK自带的方式,第三种是spring封装的调用方式


 85
85

 被折叠的 条评论
为什么被折叠?
被折叠的 条评论
为什么被折叠?
 到【灌水乐园】发言


